概要
kubernetesを運用する際に、アドオン的な感じで動的にPod(Kubernetes Resource)を生成するというユースケースを知った。そのため例えばPod内から新たにPodを生成するなどといった場合が考えられ、その際にkubectlをPod内から使用するケースやcurlなどの汎用的なツールを簡易的に使えるかを確認したくなった。
下記では、kubectl proxyを用いて、kubernetesクラスタ外からKubernetes APIをcurlを通して実行することで同様のことを確認した。Pod内から同様のことを行う際は、Kubernetes APIを実行するためのトークン 取得方法が異なっているので注意が必要。
Kubernetes APIとは
Kubernetes内のコンポーネント間の通信や捜査はすべてAPIを通して行われており、REST形式のAPIとなっています。
kubectlを用いることで大半の操作は行うことができますし、直接REST APIをcurlで叩くことでも同様の操作を行うことができます。
直接Kubernetes API叩いてみる
kubectl proxyなしの場合
なければクラスタ起動
kind create cluster
クラスタ一覧確認
kubectl config view -o jsonpath='{"Cluster name\tServer\n"}{range .clusters[*]}{.name}{"\t"}{.cluster.server}{"\n"}{end}'
アクセスするクラスタ名を選択(自分の場合は、kindを使用しているのでこのクラスタ名を選択)
export CLUSTER_NAME="kind-kind"
クラスタ名からアクセス先取得
APISERVER=$(kubectl config view -o jsonpath="{.clusters[?(@.name==\"$CLUSTER_NAME\")].cluster.server}")
アクセストークン 取得
TOKEN=$(kubectl get secrets -o jsonpath="{.items[?(@.metadata.annotations['kubernetes\.io/service-account\.name']=='default')].data.token}"|base64 --decode)
kubernetes APIを実行
curl -X GET $APISERVER/api --header "Authorization: Bearer $TOKEN" --insecure
{
  "kind": "APIVersions",
  "versions": [
    "v1"
  ],
  "serverAddressByClientCIDRs": [
    {
      "clientCIDR": "0.0.0.0/0",
      "serverAddress": "172.17.0.2:6443"
    }
  ]
}
kubectl proxyありの場合
kubectl proxyを起動
8001番ポートで動作していることを確認
kubectl proxy
Starting to serve on 127.0.0.1:8001
Kubernetes APIを叩いてみると、先ほどと同様の結果を取得できる
curl -X GET 127.0.0.1:8001/api
{
  "kind": "APIVersions",
  "versions": [
    "v1"
  ],
  "serverAddressByClientCIDRs": [
    {
      "clientCIDR": "0.0.0.0/0",
      "serverAddress": "172.17.0.2:6443"
    }
  ]
}
試しにnginxのPodを動作させてみてから、Kubernetes APIでPodを確認してみる
k run nginx --image=nginx --restart=Never --dry-run -oyaml > nginx.yaml
k apply -f nginx.yaml
k get po
NAME    READY   STATUS              RESTARTS   AGE
nginx   0/1     ContainerCreating   0          1s
curlでPod一覧取得してみるとjson形式で同様の情報が取得できる
curl -X GET http://127.0.0.1:8001/api/v1/namespaces/default/pods
{
  "kind": "PodList",
  "apiVersion": "v1",
  "metadata": {
    "selfLink": "/api/v1/namespaces/default/pods",
    "resourceVersion": "5973"
  },
  "items": [
    {
      "metadata": {
        "name": "nginx",
        "namespace": "default",
        "selfLink": "/api/v1/namespaces/default/pods/nginx",
        "uid": "119f6219-5ff3-4542-b785-e7532301a972",
        "resourceVersion": "5891",
        "creationTimestamp": "2020-03-21T06:08:56Z",
        "labels": {
          "run": "nginx"
        },
        "annotations": {
          "kubectl.kubernetes.io/last-applied-configuration": "{\"apiVersion\":\"v1\",\"kind\":\"Pod\",\"metadata\":{\"annotations\":{},\"creationTimestamp\":null,\"labels\":{\"run\":\"nginx\"},\"name\":\"nginx\",\"namespace\":\"default\"},\"spec\":{\"containers\":[{\"image\":\"nginx\",\"name\":\"nginx\",\"resources\":{}}],\"dnsPolicy\":\"ClusterFirst\",\"restartPolicy\":\"Never\"},\"status\":{}}\n"
        }
      },
      "spec": {
        "volumes": [
          {
            "name": "default-token-lh646",
            "secret": {
              "secretName": "default-token-lh646",
              "defaultMode": 420
            }
          }
        ],
        "containers": [
          {
            "name": "nginx",
            "image": "nginx",
            "resources": {

            },
~中略~
      }
    }
  ]
}
jsonだとkubectlの結果より見づらいのは仕方ないが、下記のようなツールでjson結果もある程度扱いやすくできる。
Macの場合下記のコマンドで導入できる。
brew install jid
curl -X GET http://127.0.0.1:8001/api/v1/namespaces/default/pods | jid
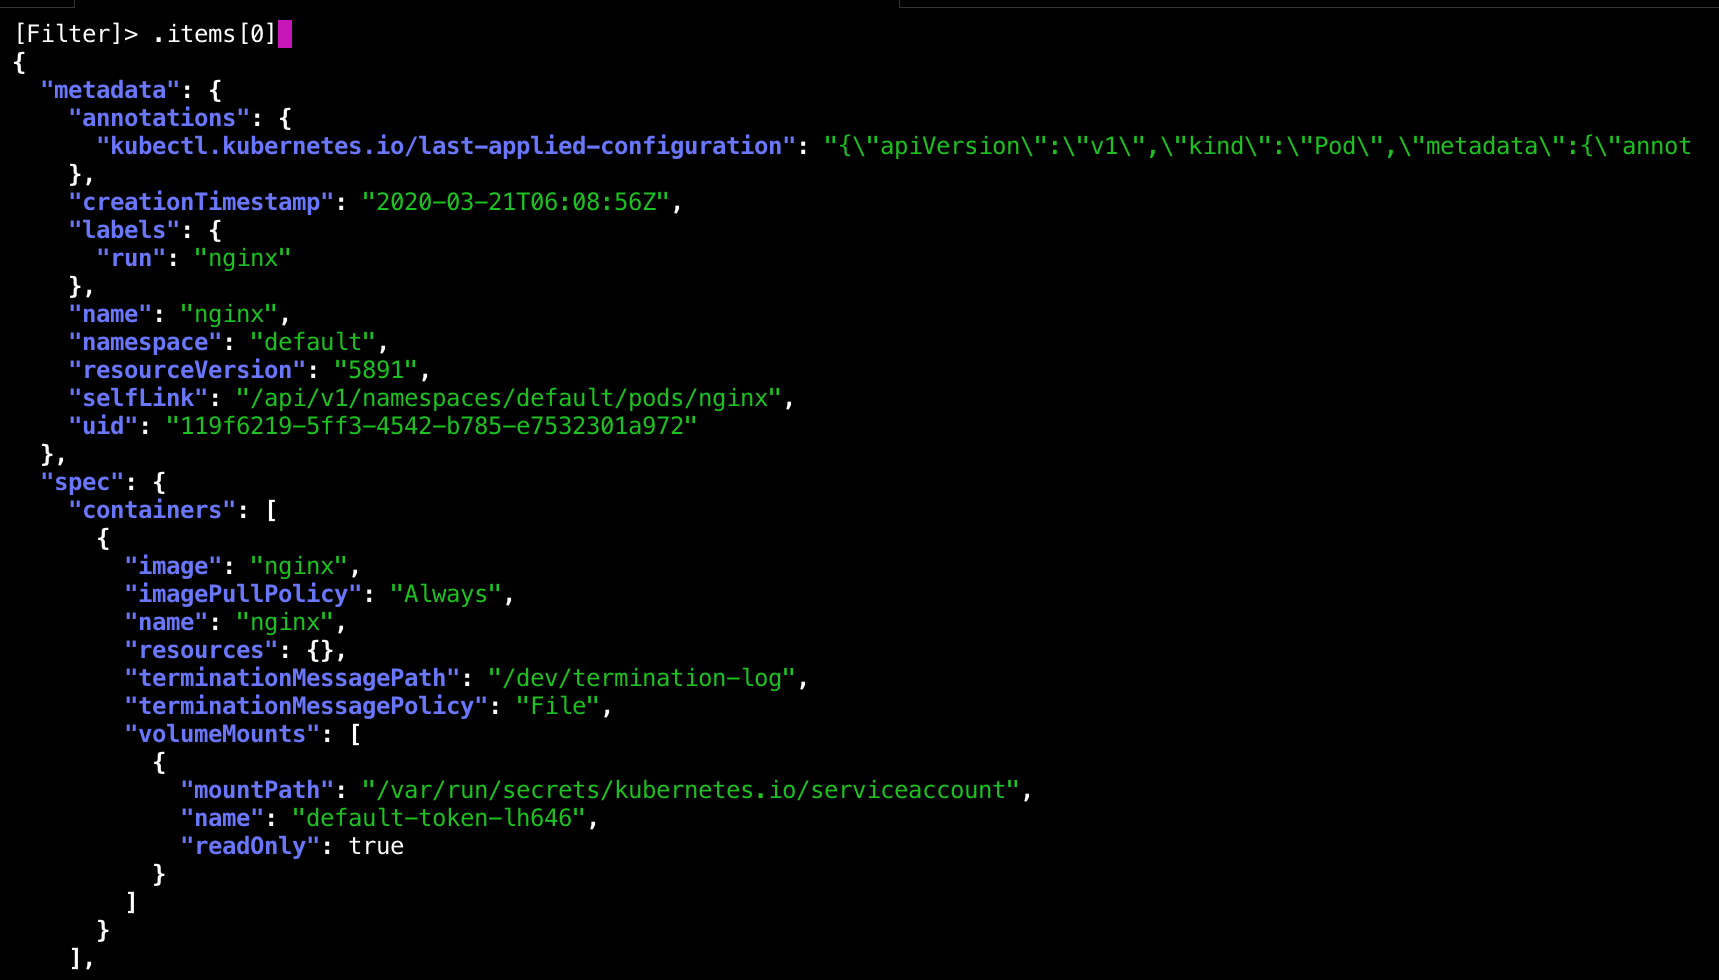
下記のように対話的にjsonファイルを深掘りできる。
curlでPodの作成を試してみる
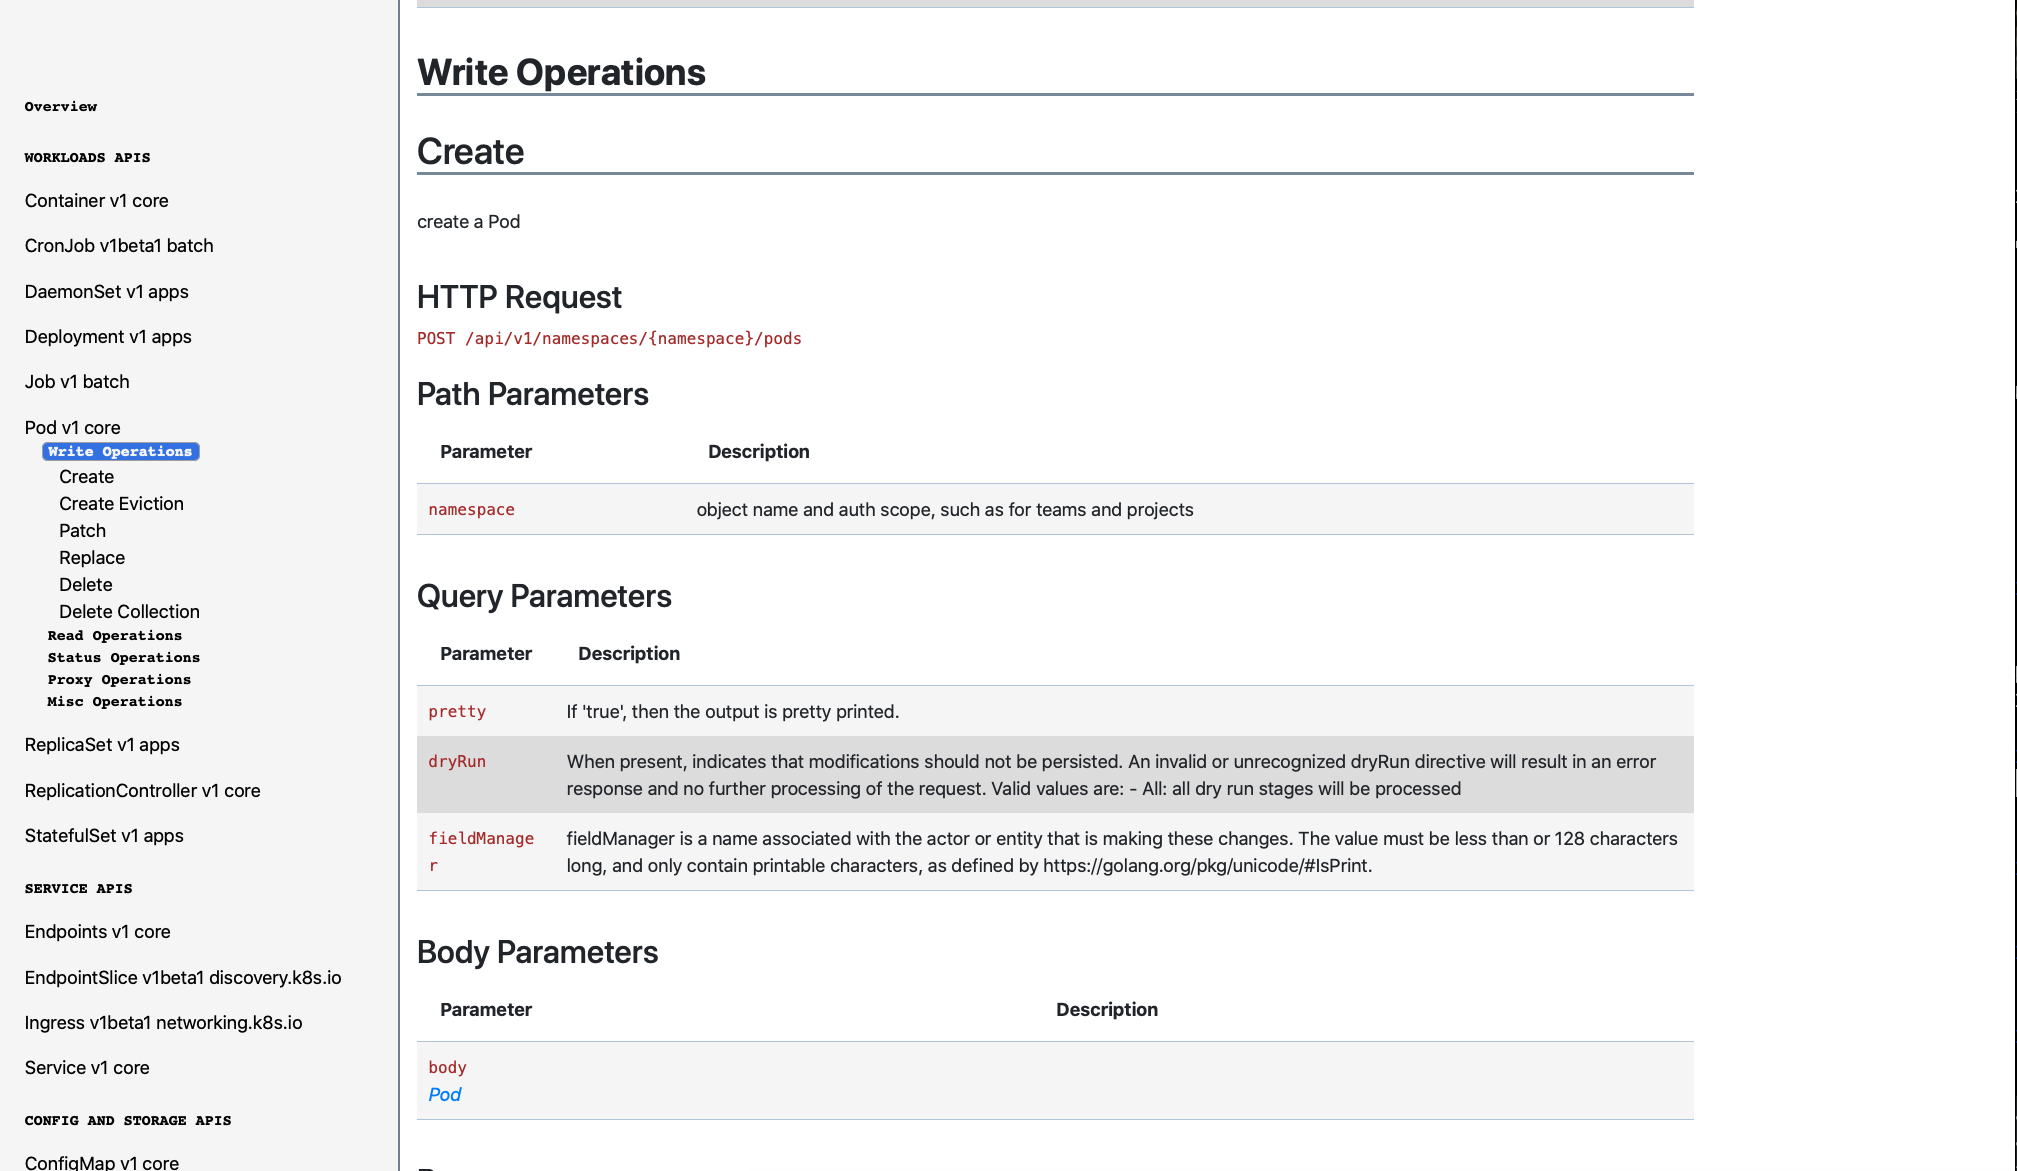
エンドポイントについてはKubernetes APIから確認することができる
Hwllo Worldとだけ出力するPodを作成する
curl -X POST -H 'Content-Type: application/yaml'  -d '
apiVersion: v1
kind: Pod
metadata:
  name: pod-example
spec:
  containers:
  - name: ubuntu
    image: ubuntu:trusty
    command: ["echo"]
    args: ["Hello World"]
  restartPolicy: Never
'  http://127.0.0.1:8001/api/v1/namespaces/default/pods
実行結果
{
  "kind": "Pod",
  "apiVersion": "v1",
  "metadata": {
    "name": "pod-example",
    "namespace": "default",
    "selfLink": "/api/v1/namespaces/default/pods/pod-example",
    "uid": "4ac7cf5c-69b7-40f9-806d-582cafebd590",
    "resourceVersion": "8977",
    "creationTimestamp": "2020-03-21T06:50:46Z"
  },
  "spec": {
    "volumes": [
      {
        "name": "default-token-lh646",
        "secret": {
          "secretName": "default-token-lh646",
          "defaultMode": 420
        }
      }
    ],
    "containers": [
      {
        "name": "ubuntu",
        "image": "ubuntu:trusty",
        "command": [
          "echo"
        ],
        "args": [
          "Hello World"
        ],
        "resources": {

        },
~中略~
}
先ほど作成したnginxのpodに加えて、
ログにHello Worldが出力されていることも確認できる
k logs pod-example
Hello World
Pod内からKubernetes APIを叩く方法
必要な権限を持ったSeriveAccountを作成(ついでにnamespaceなども作成)
k apply -f api.yaml
Namespace切り替え
kubensは別途install必要(https://github.com/ahmetb/kubectx)
kubens mynamespace
Curlを叩くためのPodのyamlを生成
k run fedora --image=fedora --restart=Never --dry-run -oyaml -- /sbin/init > fedora.yaml
出力したyamlに一部追記(tty, stdin, serviceAccountName)
apiVersion: v1
kind: Pod
metadata:
  creationTimestamp: null
  labels:
    run: fedora
  name: fedora
spec:
  containers:
  - args:
    - /sbin/init
    image: fedora
    name: fedora
    resources: {}
  dnsPolicy: ClusterFirst
  restartPolicy: Never
  tty: true
  stdin: true
  serviceAccountName: mysa
status: {}
Podをデプロイ
k apply -f fedora.yaml
Pod内にアクセス
k exec -it fedora bash
トークン を取得して、Kubernetes APIを実行
下記は、このコマンドを実行しているPod情報を取得する
KUBE_TOKEN=$(cat /var/run/secrets/kubernetes.io/serviceaccount/token)
NAMESPACE=mynamespace
curl -sSk -H "Authorization: Bearer $KUBE_TOKEN" \
https://$KUBERNETES_SERVICE_HOST:$KUBERNETES_PORT_443_TCP_PORT/api/v1/namespaces/$NAMESPACE/pods/$HOSTNAME
jsonで取得するためぱっと見わかるづらいが、k get po と同様の内容を取得できている。
{
  "kind": "Pod",
  "apiVersion": "v1",
  "metadata": {
    "name": "fedora",
    "namespace": "mynamespace",
    "selfLink": "/api/v1/namespaces/mynamespace/pods/fedora",
    "uid": "7c918fc0-f194-4729-896a-f52167c4a803",
    "resourceVersion": "17841",
    "creationTimestamp": "2020-03-21T08:51:57Z",
    "labels": {
      "run": "fedora"
    },
    "annotations": {
      "kubectl.kubernetes.io/last-applied-configuration": "{\"apiVersion\":\"v1\",\"kind\":\"Pod\",\"metadata\":{\"annotations\":{},\"creationTimestamp\":null,\"labels\":{\"run\":\"fedora\"},\"name\":\"fedora\",\"namespace\":\"mynamespace\"},\"spec\":{\"containers\":[{\"args\":[\"/sbin/init\"],\"image\":\"fedora\",\"name\":\"fedora\",\"resources\":{},\"stdin\":true,\"tty\":true}],\"dnsPolicy\":\"ClusterFirst\",\"restartPolicy\":\"Never\",\"serviceAccountName\":\"mysa\"},\"status\":{}}\n"
    }
  },
  "spec": {
    "volumes": [
      {
        "name": "mysa-token-lt4gh",
        "secret": {
          "secretName": "mysa-token-lt4gh",
          "defaultMode": 420
        }
      }
    ],
    "containers": [
      {
        "name": "fedora",
        "image": "fedora",
        "args": [
          "/sbin/init"
        ],
        "resources": {

        },
~中略~
}
まとめ
Kubernetes APIを知ることでkubectlでやっていることをcurlでも同様に行えることを確認した。
新たにPodなどを作る処理はPod内でもかけるため、動的に増加するリソースを制御・監視する方法を検討したい。


