この記事は、IntelliJでGo言語のデバックを『delve』のツールで行う時にデバックできるまでを記載していきます。
■ Overview
- Go言語で書かれたソースをIntelliJで開いて、delveツールを使ってデバックします。
- ソースコードは以下です。シンプルに
main.go
package main

import "fmt"

type rect struct {
	width, height int
}

// This `area` method has a _receiver type_ of `*rect`.
func (r *rect) area() int {
	return r.width * r.height
}

// Methods can be defined for either pointer or value
// receiver types. Here's an example of a value receiver.
func (r rect) perim() int {
	return 2*r.width + 2*r.height
}

func main() {
	r := rect{width: 10, height: 5}

	// Here we call the 2 methods defined for our struct.
	fmt.Println("area: ", r.area())
	fmt.Println("perim:", r.perim())

	// Go automatically handles conversion between values
	// and pointers for method calls. You may want to use
	// a pointer receiver type to avoid copying on method
	// calls or to allow the method to mutate the
	// receiving struct.
	rp := &r
	fmt.Println("area: ", rp.area())
	fmt.Println("perim:", rp.perim())
}
- 網羅する範囲としては、高度なデバックではなくデバックの第一歩目です。
- IntelliJ及びGoのセットアップは終わっている前提です。
- またIntelliJのGoのPlugin(go-lang-idea-plugin)が入れるようにしてください。
■ "delve" setUp
デバッグツールである、delveをインストールしていきます。
詳しくは、installationにありますがMacの場合はおおよそ以下の2つの方法のどっちかになります。
$ go get -u github.com/derekparker/delve/cmd/dlv
$ brew install go-delve/delve/delve
無事インストールが完了したら、バージョンを確認しましょう。
$ dlv version
Delve Debugger
Version: 1.1.0
setUpはこちらで完了です。
IntelliJでのデバック方法
では、IntelliJを開いてデバックしてみましょう。
まずは大前提としては、先程のソースコードをmain.goに記載します。
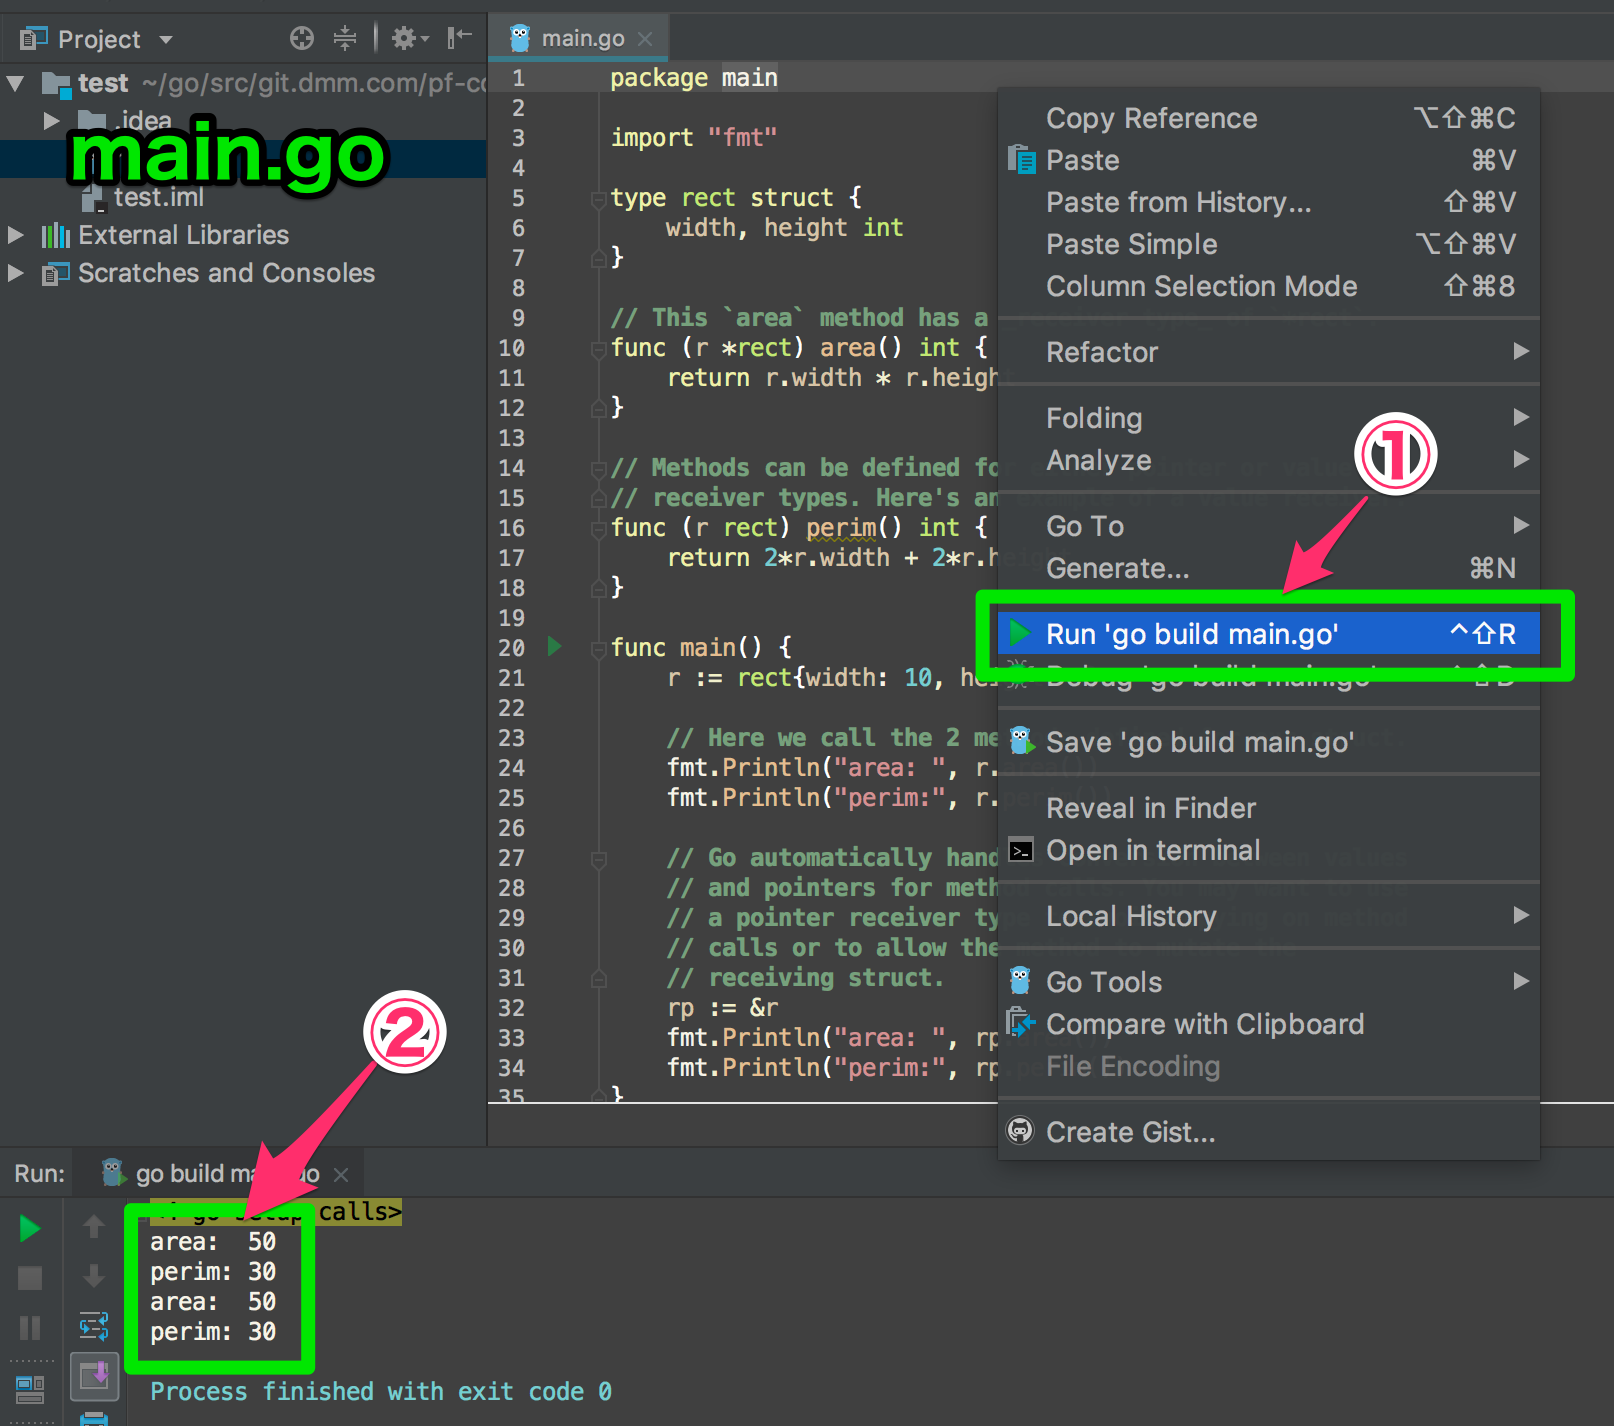
①にある、Run 'go build main.go'を押下するとしたのコンソール(②)に結果がでます。
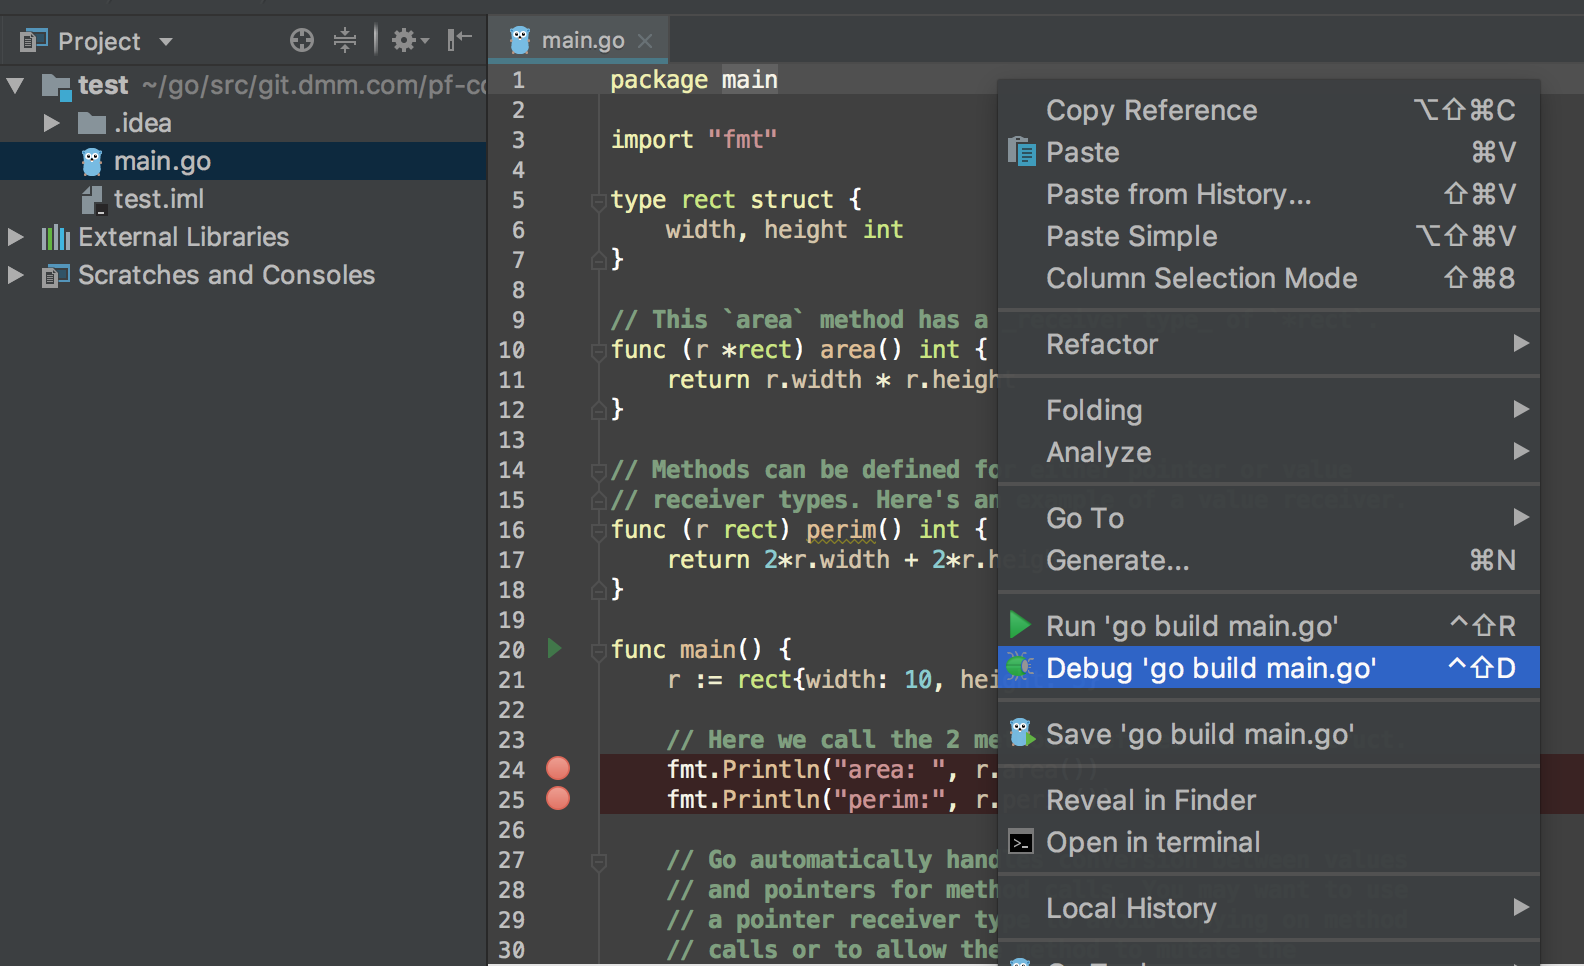
デバックをするには、処理がみたいところで『ブレークポイント』といった印を付ける必要があります。
今回は、以下の2つにつけてみたいと思います。

この中で、main.goを実行後rといった型にはなにが入っているのだろうというのがデバックをすることでわかります。
では、ブレイクポイントを張った状態で、Debug 'go build main.go'を押下します。
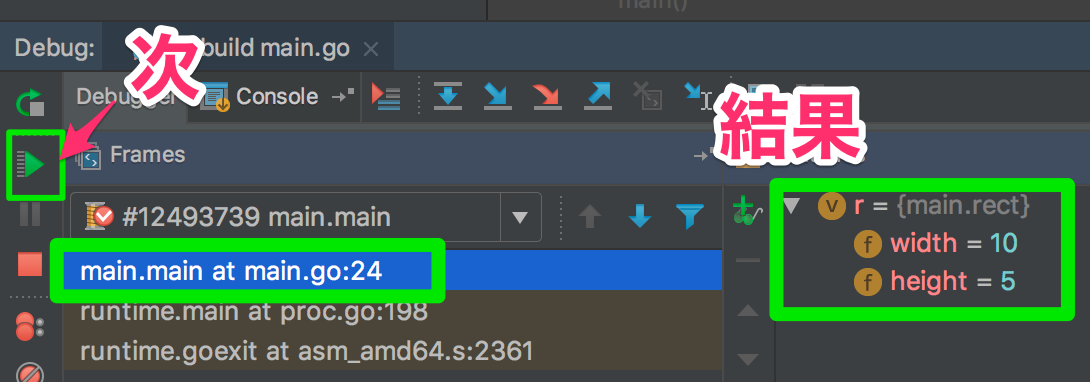
そうするとはじめのブレイクポイントである『go:24』つまり24行目で止まり、その結果であるrの中にどんな値が入っているかがわかるようになります。
以上です。
dlvコマンドはさまざまな設定ができるため奥が深いです。
以下は、CLIでの操作ですが網羅されているのでご参照ください。
https://qiita.com/minamijoyo/items/4da68467c1c5d94c8cd7