0. はじめに
Flutter + Firestoreを連携してアプリを作成する手順についてまとめました。
FloatingActionButton押下時のカウンターをFirestoreへ登録するだけの簡単なアプリになります。
ついでに自動デプロイする方法についても記載しています。
以下を前提とさせてください。
- FlutterWebプロジェクトを登録するためのリポジトリが作成されていること。
- Firebaseアカウントが登録済みであること。
- Node.jsがインストールされていること。
1. Firebase編
1-1. プロジェクトを作成する
①まずはFirebaseにプロジェクトを作成していきましょう。
以下にアクセスします。
②「プロジェクトの追加」ボタンを押下します。
③プロジェクト名を入力し、「続行」ボタンを押下します。
プロジェクト名は、この後作成するFlutterアプリと同名にすると分かりやすいかと思います。

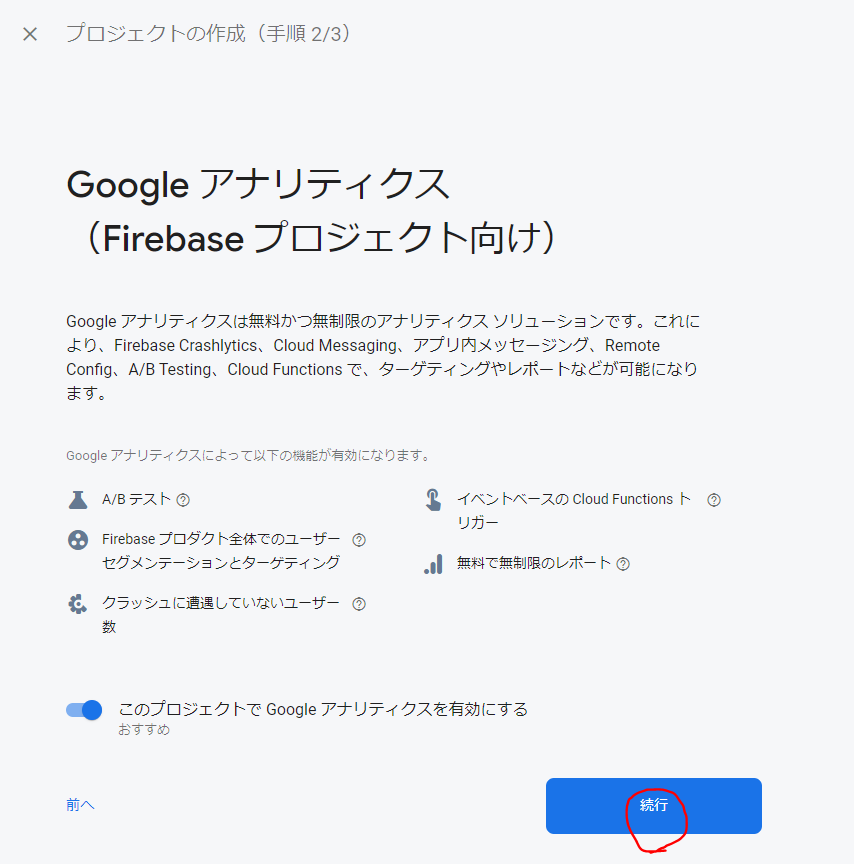
④アナリティクスの有効 or 無効を選択し、「続行」ボタンを押下します。
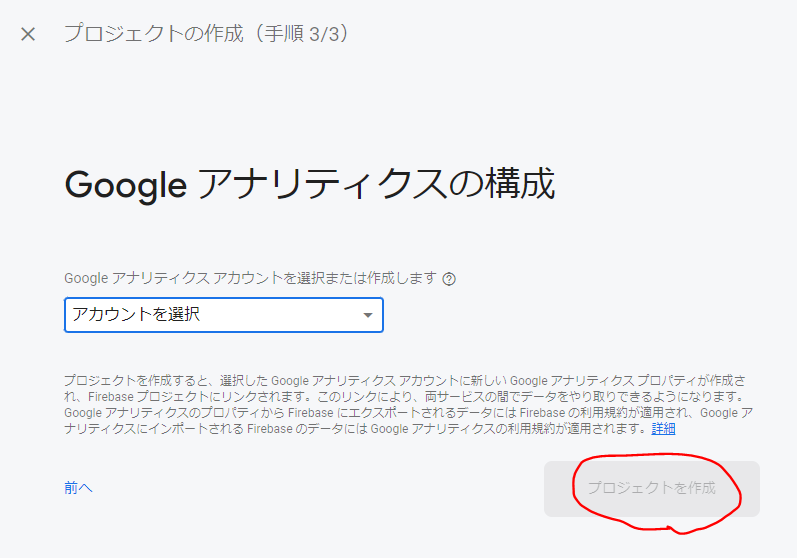
⑤アカウントを選択し、「プロジェクトを作成」ボタンを押下します。
⑥プロジェクトが作成されます![]()
1-2. Webアプリを登録する
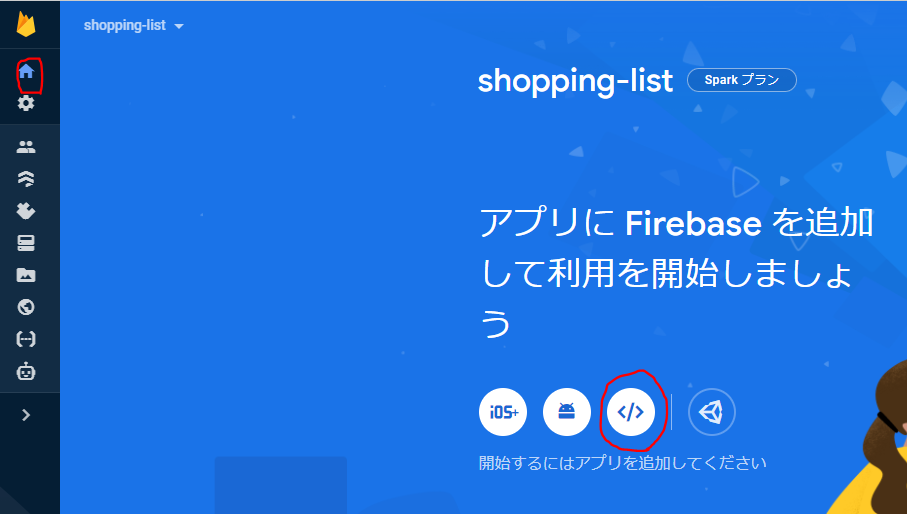
①続いてアプリケーションの登録を行います。今回はWebアプリですね。(他にはiOS、Android、Unityがあります。)
「プロジェクトの概要![]() 」→「ウェブ</>」ボタンを押下します。
」→「ウェブ</>」ボタンを押下します。
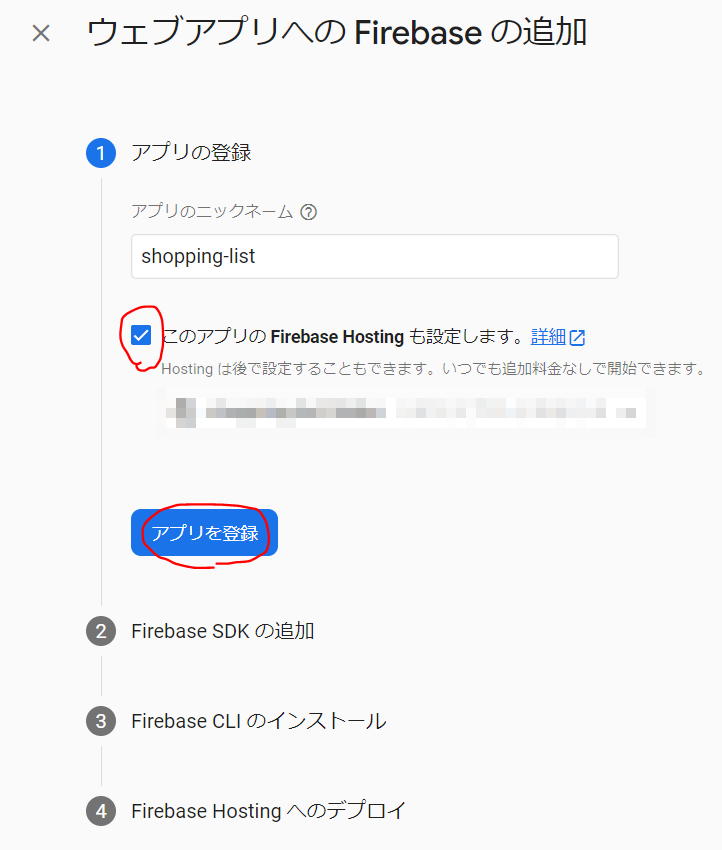
②ホスティングも行うため、Firebase Hostingにチェックを入れ(デフォで入ってるかも)、「アプリを登録」ボタンを押下します。
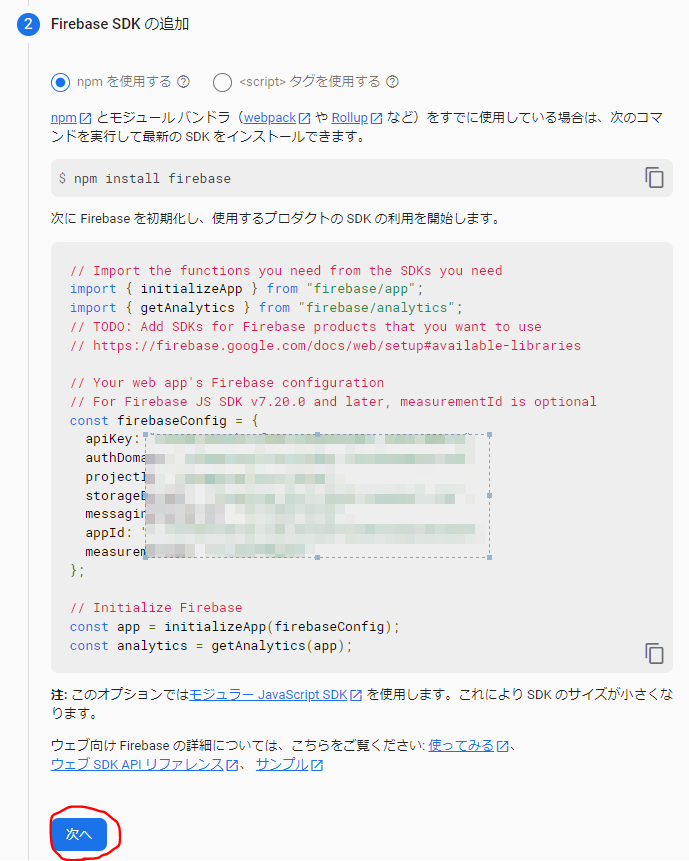
③firebaseをインストールしていない場合は、以下のコマンドを実行してインストールを行ってください。
> npm install firebase
④「次へ」ボタンを押下します。
以下で表示されているapiKeyなどは、後ほど利用します。
⑤firebase-toolsをインストールしていない場合は、以下のコマンドを実行してインストールを行ってください。
> npm install -g firebase-tools
⑥「次へ」ボタンを押下します。

⑦「コンソールに進む」ボタンを押下すれば、Webアプリが登録されます![]()
1-3. Firestore Databaseを作成する
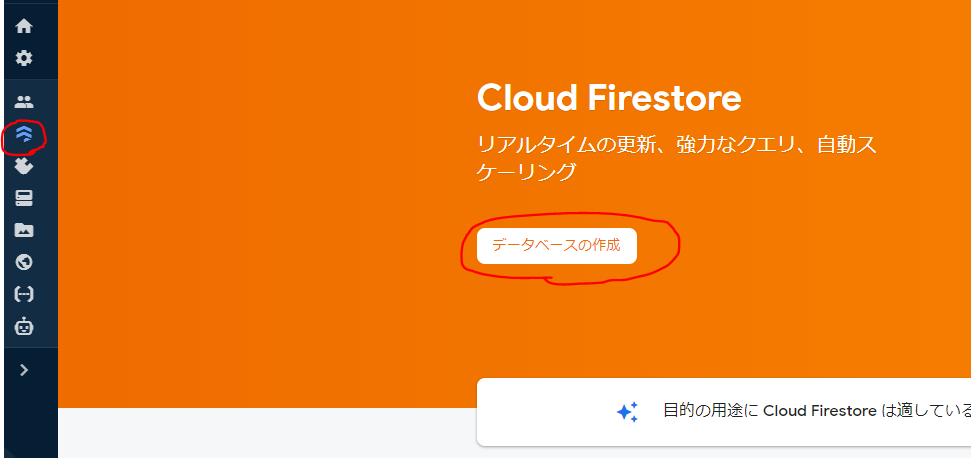
①続いてFirestore Databaseを作成していきます。
「Firestore Database」→「データベースの作成」ボタンを押下します。
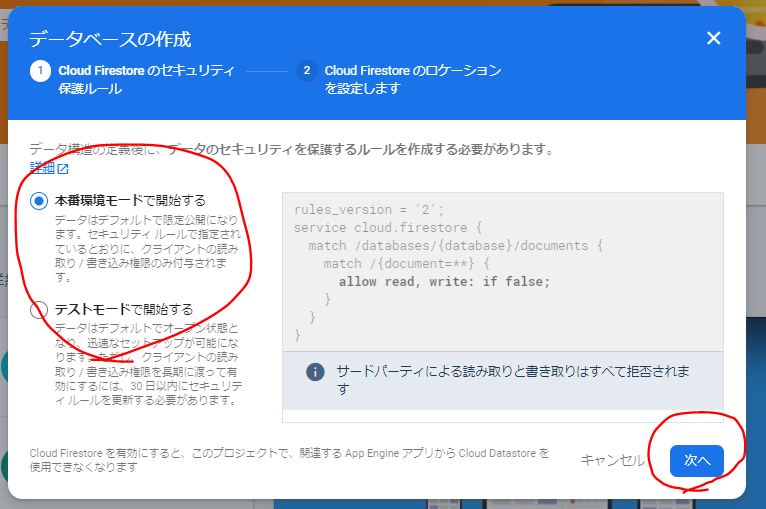
②「本番環境モード」or「テストモード」を選択し、「次へ」ボタンを押下します。
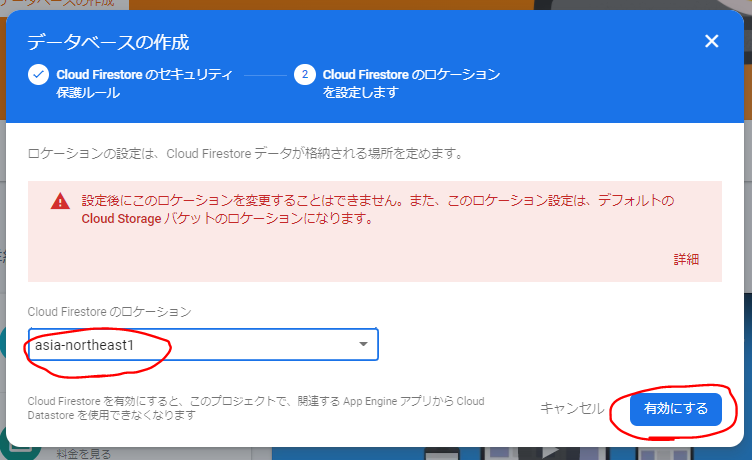
③以下を参考に、リージョンを選択し、「有効にする」ボタンを押下します。
後で変更できないので注意してください![]()
私は事前調査せずに直観で「asia-northeast3」を選んだら、ソウルになってしまいました![]()
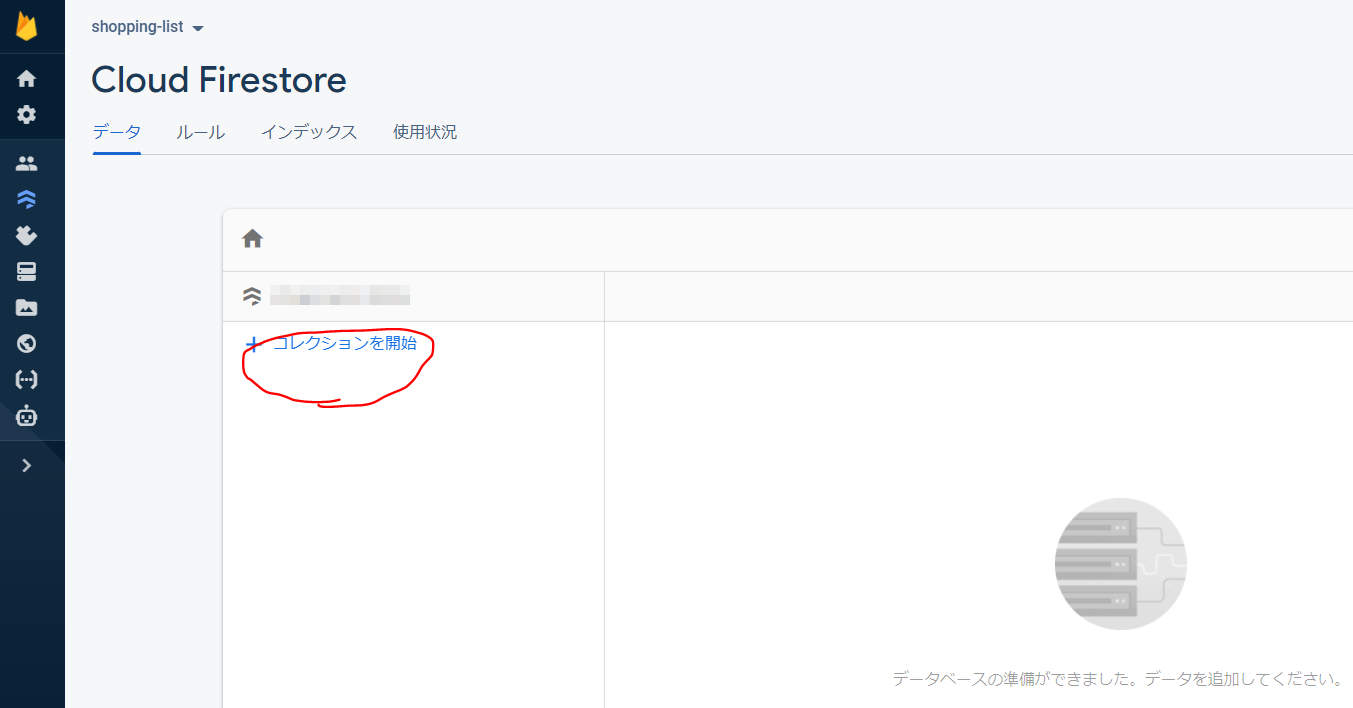
④データベースが作成されたため![]() 、データを投入していきます。
、データを投入していきます。
「コレクションを開始」を選択します。
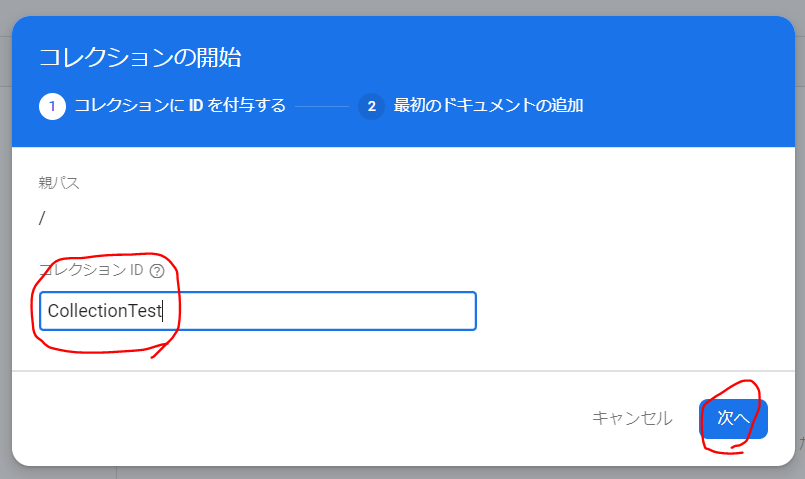
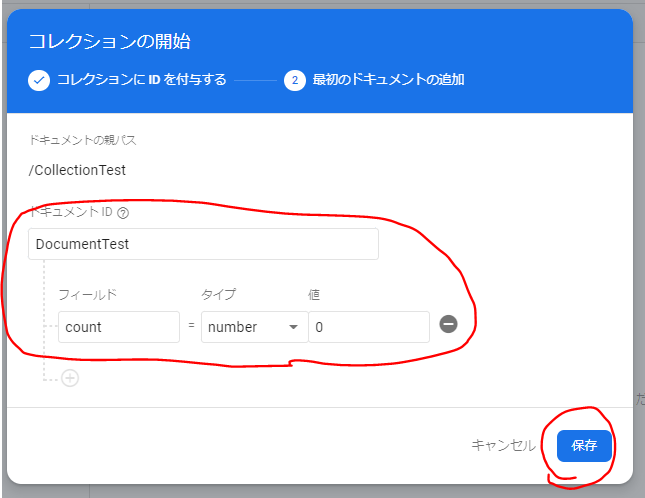
⑤コレクションIDを入力し、「次へ」ボタンを押下します。
⑥ドキュメントID、フィールド、タイプ、値を入力し、「保存」ボタンを押下します。
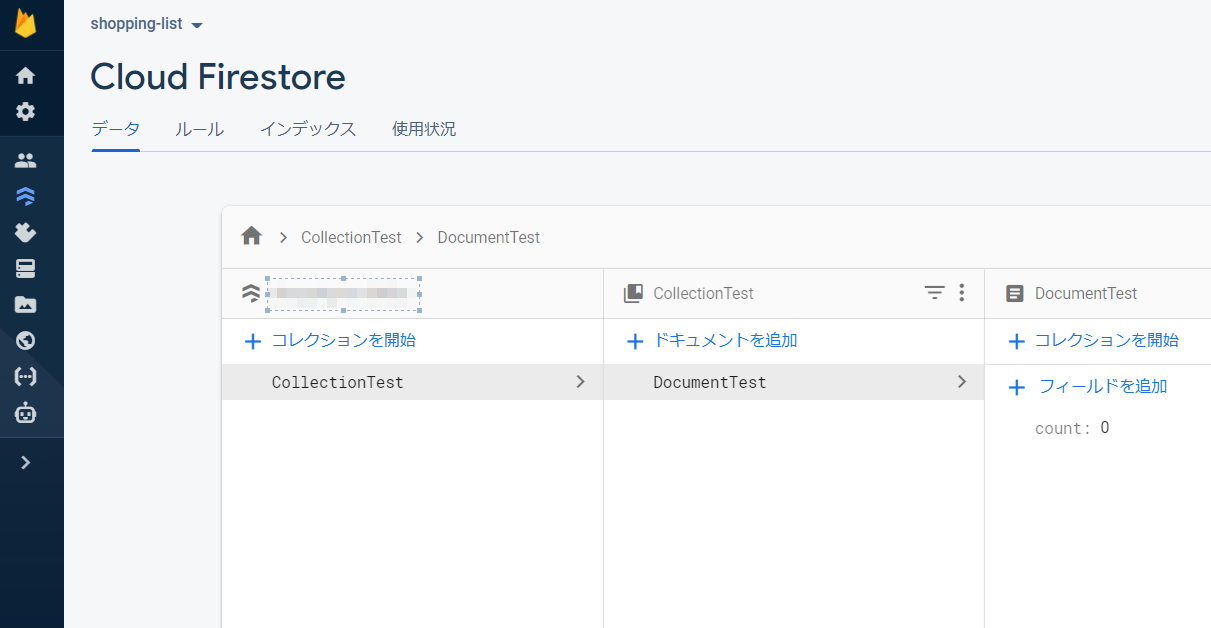
⑦データが投入されます![]()
2. Flutter編
2-1. プロジェクトを新規作成する
①まずはFirebaseにプロジェクトやDatabaseを作成できたので、次はFlutterプロジェクトを作成していきます。
以下のコマンドを実行します。(プロジェクト名はFirebaseで登録した名前と同じだと分かりやすいですね。)
> flutter create shopping_list
2-2. Firebaseのログインを行う
①Firebaseにログインします。
> firebase login
②最初に登録したプロジェクトがちゃんと存在するかを確認します。
> firebase projects:list

✔ Preparing the list of your Firebase projects
┌─────────────────────────┬─────────────────────────┬────────────────┬──────────────────────┐
│ Project Display Name    │ Project ID              │ Project Number │ Resource Location ID │
├─────────────────────────┼─────────────────────────┼────────────────┼──────────────────────┤
│ shopping-list           │ shopping-list-xxxxx     │ xxxxxxxxxxxx   │ asia-northeast1      │
└─────────────────────────┴─────────────────────────┴────────────────┴──────────────────────┘
2-3. Firebase hostingの設定を行う
①今回はホスティングも合わせて行っていきます。
以下のコマンドを実行し、質問に答えていきます。
> firebase init hosting

     ######## #### ########  ######## ########     ###     ######  ########
     ##        ##  ##     ## ##       ##     ##  ##   ##  ##       ##
     ######    ##  ########  ######   ########  #########  ######  ######
     ##        ##  ##    ##  ##       ##     ## ##     ##       ## ##
     ##       #### ##     ## ######## ########  ##     ##  ######  ########

You're about to initialize a Firebase project in this directory:

  C:\xxxxx\shopping_list

【準備はOKですかー!?】
? Are you ready to proceed? Yes

=== Project Setup

First, let's associate this project directory with a Firebase project.
You can create multiple project aliases by running firebase use --add,
but for now we'll just set up a default project.

【既に作成されているFirebaseプロジェクトを利用しますか?】
? Please select an option: Use an existing project
? Select a default Firebase project for this directory: shopping-list-366bc (shopping-list)
i  Using project shopping-list-366bc (shopping-list)

=== Hosting Setup

Your public directory is the folder (relative to your project directory) that
will contain Hosting assets to be uploaded with firebase deploy. If you
have a build process for your assets, use your build's output directory.

【publicディレクトリはどのような構成にしますか?】
? What do you want to use as your public directory? build/web

【SPAにしますか?】
? Configure as a single-page app (rewrite all urls to /index.html)? No

【GitHubを使用して自動ビルドとデプロイを設定しますか?】
? Set up automatic builds and deploys with GitHub? Yes
+  Wrote build/web/404.html
+  Wrote build/web/index.html

i  Didn't detect a .git folder. Assuming C:\xxxxx\shopping_list is the project root.
i  Authorizing with GitHub to upload your service account to a GitHub repository's secrets store.

Visit this URL on this device to log in:
https://github.com/login/oauth/authorize?client_id=89cf50f02ac6aaed3484&state=53148410&redirect_uri=http%3A%2F%2Flocalhost%3A9005&scope=read%3Auser%20repo%20public_repo

Waiting for authentication...

+  Success! Logged into GitHub as i-tanaka730

【どのGitHubリポジトリにGitHubワークフローを設定しますか?】
? For which GitHub repository would you like to set up a GitHub workflow? (format: user/repository) i-tanaka730/shopping_list

+  Created service account github-action-477706712 with Firebase Hosting admin permissions.
+  Uploaded service account JSON to GitHub as secret FIREBASE_SERVICE_ACCOUNT_SHOPPING_LIST_366BC.
i  You can manage your secrets at https://github.com/i-tanaka730/shopping_list/settings/secrets.

【デプロイの前にビルドスクリプトを実行するようにワークフローを設定しますか?】
? Set up the workflow to run a build script before every deploy? Yes

【すべてのデプロイの前にどのスクリプトを実行する必要がありますか?(何故か2回指定せんとあかんかった)】
? What script should be run before every deploy? (npm ci && npm run build) flutter build web
? What script should be run before every deploy? flutter build web

+  Created workflow file C:\xxxxx\shopping_list\.github/workflows/firebase-hosting-pull-request.yml

【PRがマージされたときに、自動でプロインしますか?】
PRがマージされたときに、サイトのライブチャネルへの自動展開を設定しますか?
? Set up automatic deployment to your site's live channel when a PR is merged? Yes

【GitHubブランチの名前は何ですか?】
? What is the name of the GitHub branch associated with your site's live channel? main

+  Created workflow file C:\xxxxx\shopping_list\.github/workflows/firebase-hosting-merge.yml

i  Action required: Visit this URL to revoke authorization for the Firebase CLI GitHub OAuth App:
https://github.com/settings/connections/applications/89cf50f02ac6aaed3484
i  Action required: Push any new workflow file(s) to your repo

i  Writing configuration info to firebase.json...
i  Writing project information to .firebaserc...

+  Firebase initialization complete!
2-4. 必要なパッケージをインストールする
①今回使用するFirebaseパッケージの「firebase_core」「cloud_firestore」をインストールします。
dependencies:
  flutter:
    sdk: flutter
  firebase_core: ^1.13.1  # 追加
  cloud_firestore: ^3.1.10 # 追加
2-5. 実装をする
①以下はindex.htmlの実装になります。
Firebaseの設定情報をここに組み込みます。
firebaseConfigの部分に、1-2. Webアプリを登録するで表示されたapiKeyなどを設定します。
私は最初firebasejs 9系を入れていたのですが、何故かアプリ起動時にFirebaseの初期化で失敗しました。
以下のようにfirebasejs 8系を入れてみたらうまくいきましたが、原因不明・・・![]()
<!DOCTYPE html>
<html>
<head>
    ...
</head>
<body>
  <script>
    ...
    if ('serviceWorker' in navigator) {
    ...
    } else {
      // Service workers not supported. Just drop the <script> tag.
      loadMainDartJs();
    }
  </script>
  <script src="https://www.gstatic.com/firebasejs/8.10.1/firebase-app.js"></script>
  <script src="https://www.gstatic.com/firebasejs/8.10.1/firebase-analytics.js"></script>
  <script src="https://www.gstatic.com/firebasejs/8.10.1/firebase-firestore.js"></script>
  <script>
    const firebaseConfig = {
          apiKey: "xxxxx",
          authDomain: "xxxxx",
          projectId: "xxxxx",
          storageBucket: "xxxxx",
          messagingSenderId: "xxxxx",
          appId: "xxxxx",
          measurementId: "xxxxx"
      };
      firebase.initializeApp(firebaseConfig);
      firebase.analytics();
   </script>
②以下はdart側の実装になります。
アプリ起動時にFirestoreから値を取得し、テキストに設定します。
フローティングアクションボタン押下時は、Firestoreの値を更新します。
import 'package:flutter/material.dart';
import 'package:cloud_firestore/cloud_firestore.dart';
import 'package:firebase_core/firebase_core.dart';

void main() async {
  WidgetsFlutterBinding.ensureInitialized();
  await Firebase.initializeApp();
  runApp(const MyApp());
}

class MyApp extends StatelessWidget {
  const MyApp({Key? key}) : super(key: key);
  @override
  Widget build(BuildContext context) {
    return MaterialApp(
      title: 'Flutter Demo',
      theme: ThemeData(
        primarySwatch: Colors.blue,
      ),
      home: const MyHomePage(title: 'Flutter Demo Home Page'),
    );
  }
}

class MyHomePage extends StatefulWidget {
  const MyHomePage({Key? key, required this.title}) : super(key: key);
  final String title;

  @override
  State<MyHomePage> createState() => _MyHomePageState();
}

class _MyHomePageState extends State<MyHomePage> {
  int _counter = 0;

  @override
  void initState() {
    super.initState();
    load();
  }

  void load() async {
    await FirebaseFirestore.instance
        .collection('CollectionTest')
        .doc('DocumentTest')
        .get()
        .then((DocumentSnapshot snapshot) {
      var count = snapshot.get('count');
      debugPrint(count.toString());
      setState(() {
        _counter = count as int;
      });
    });
  }

  void _incrementCounter() async {
    setState(() {
      _counter++;
    });
    await FirebaseFirestore.instance.collection('CollectionTest').doc('DocumentTest').set({'count': _counter});
  }

  @override
  Widget build(BuildContext context) {
    return Scaffold(
      appBar: AppBar(
        title: Text(widget.title),
      ),
      body: Center(
        child: Column(
          mainAxisAlignment: MainAxisAlignment.center,
          children: <Widget>[
            const Text(
              'You have pushed the button this many times:',
            ),
            Text(
              '$_counter',
              style: Theme.of(context).textTheme.headline4,
            ),
          ],
        ),
      ),
      floatingActionButton: FloatingActionButton(
        onPressed: _incrementCounter,
        tooltip: 'Increment',
        child: const Icon(Icons.add),
      ),
    );
  }
}
2-6. GitHub Actionsで自動デプロイされるように設定する
①2つのyamlファイルを以下のように変更し、GitへのPushやMergeが行われた場合に自動でデプロイされるようにします。
# This file was auto-generated by the Firebase CLI
# https://github.com/firebase/firebase-tools

name: Deploy to Firebase Hosting on merge
'on':
  push:
    branches:
      - main
jobs:
  build_and_deploy:
    runs-on: ubuntu-latest
    steps:
      - uses: actions/checkout@v2

      # -- 追加 ここから --
      - name: Install Flutter
        run: git clone https://github.com/flutter/flutter.git
      - name: Add path
        run: echo "$(pwd)/flutter/bin" >> $GITHUB_PATH
      - name: Download Flutter packages
        run: flutter pub get
      # -- 追加 ここまで --

      - run: flutter build web
      - uses: FirebaseExtended/action-hosting-deploy@v0
        with:
          repoToken: '${{ secrets.GITHUB_TOKEN }}'
          firebaseServiceAccount: '${{ secrets.FIREBASE_SERVICE_ACCOUNT_SHOPPING_LIST_366BC }}'
          channelId: live
          projectId: shopping-list-366bc
# This file was auto-generated by the Firebase CLI
# https://github.com/firebase/firebase-tools

name: Deploy to Firebase Hosting on PR
'on': pull_request
jobs:
  build_and_preview:
    if: '${{ github.event.pull_request.head.repo.full_name == github.repository }}'
    runs-on: ubuntu-latest
    steps:
      - uses: actions/checkout@v2

      # -- 追加 ここから --
      - name: Install Flutter
        run: git clone https://github.com/flutter/flutter.git
      - name: Add path
        run: echo "$(pwd)/flutter/bin" >> $GITHUB_PATH
      - name: Download Flutter packages
        run: flutter pub get
      # -- 追加 ここまで --

      - run: flutter build web
      - uses: FirebaseExtended/action-hosting-deploy@v0
        with:
          repoToken: '${{ secrets.GITHUB_TOKEN }}'
          firebaseServiceAccount: '${{ secrets.FIREBASE_SERVICE_ACCOUNT_SHOPPING_LIST_366BC }}'
          projectId: shopping-list-366bc
2-7. GitHubにプッシュしてGutHub Actionsを実行
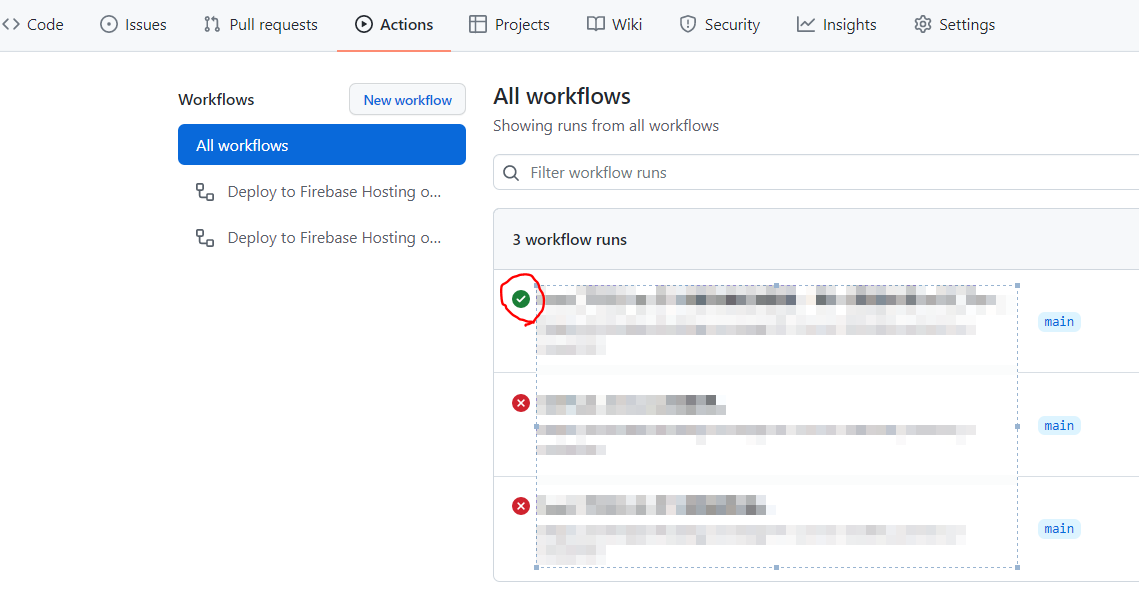
①ソース一式をCommit + Pushしましょう!
GutHub Actionsが実行され、うまくいけば![]() になるかと思います。
になるかと思います。
2-X. 手動でビルド+デプロイする場合
> flutter build web
> firebase deploy
3. 動作確認
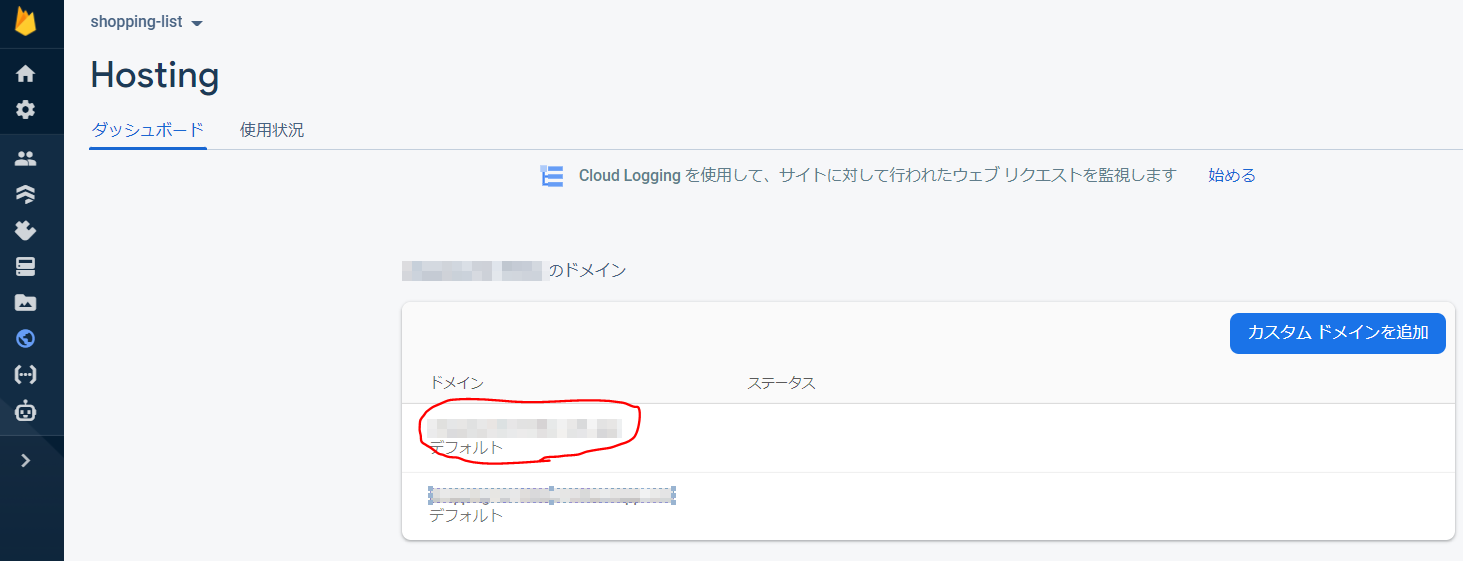
①最後に動作確認を行います。
Firebaseの「Hosting」を選択し、Hostingページに表示されているURLにアクセスします。
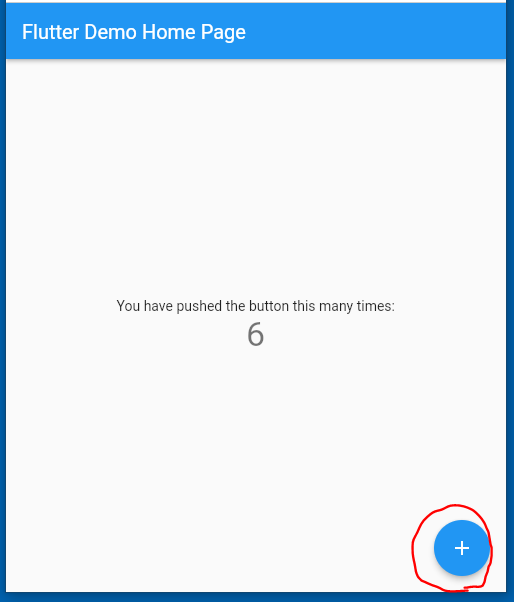
②以下のような画面が表示されていると思いますので、フローティングアクションボタンを押下し、画面のカウントや、Firestoreのカウントが更新されるか確認しましょう。
4. おわりに
- 超簡単なサンプルになりましたが、ここまでの連携が行えれば色々作っていけそうな気がしますね

- 私はNoSQL未経験なので、この流れで知見をつけていきたいと思います
- リリースしなくても、家族でパッと使えるものをサクッと作っていきたいと思います