環境
Xcode Version 13.4.1
での動作環境になります。
概要
SwiftUIにはtoolbarというmodifierがあります。
このtoolBarにはToolbarItemをはじめとしたContentが設定でき、これを設定することにより、画面にボタンなどを配置することができます。
ToolbarItemの特徴はToolbarItemPlacementが指定できる点です。
toolbarには直接ボタンの位置を指定することもできますが、キャンセルボタンとして配置(.cancellationAction)、重要なアクションとして配置(.primaryAction)、など 役割に基づいた配置指定ができます。
これを使いこなせば、SwiftUIでプラットフォームごとに適切なボタン配置ができることになります。
toolbarでの困りごと
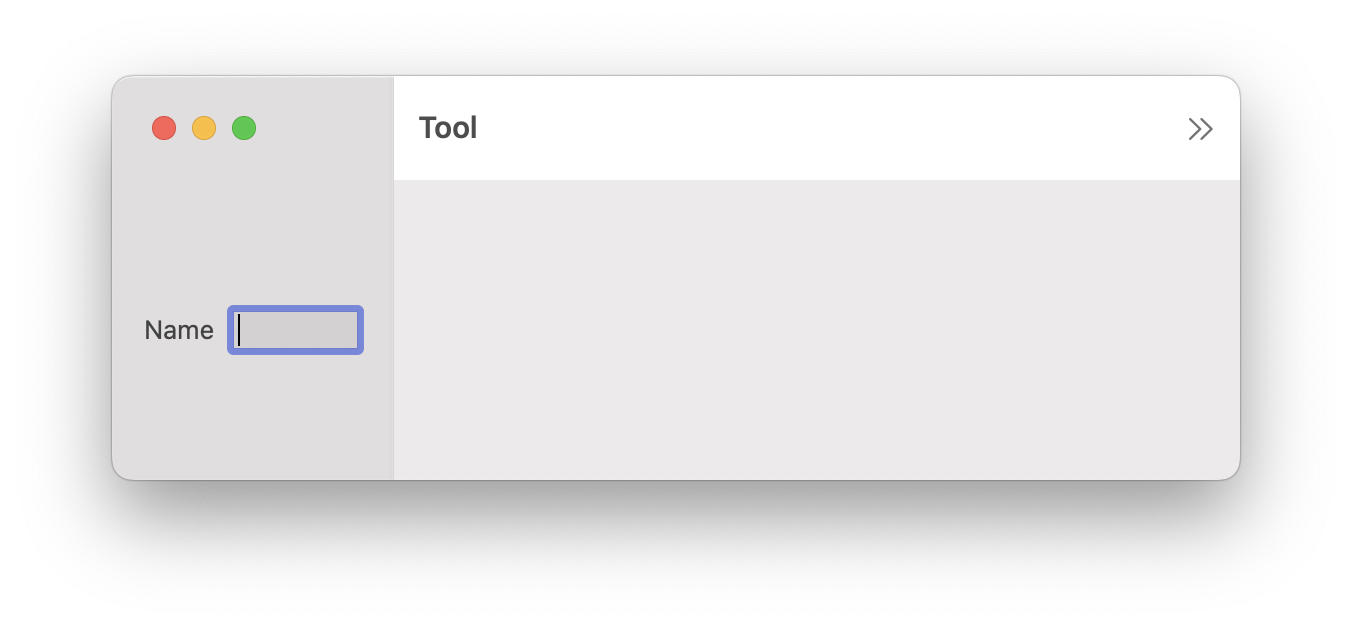
例えば、名前を入力するための画面が存在するとします。
そこにはキャンセルボタンと追加ボタンが存在し、名前を入力するテキストボックスが存在します。
そのため、toolbarにはcancellationActionとしてCancelボタン、primaryActionとしてAddボタンが配置されるようにコードを作成しました。
import SwiftUI

struct ContentView: View {
    @State private var name = ""
    var body: some View {
        Form {
            TextField("Name", text: $name)
                .padding()
        }
        .toolbar {
            ToolbarItem(placement: .cancellationAction) {
                Button("Cancel", action: {})
            }
            ToolbarItem(placement: .primaryAction) {
                Button("Add", action: {})
            }
        }
    }
}
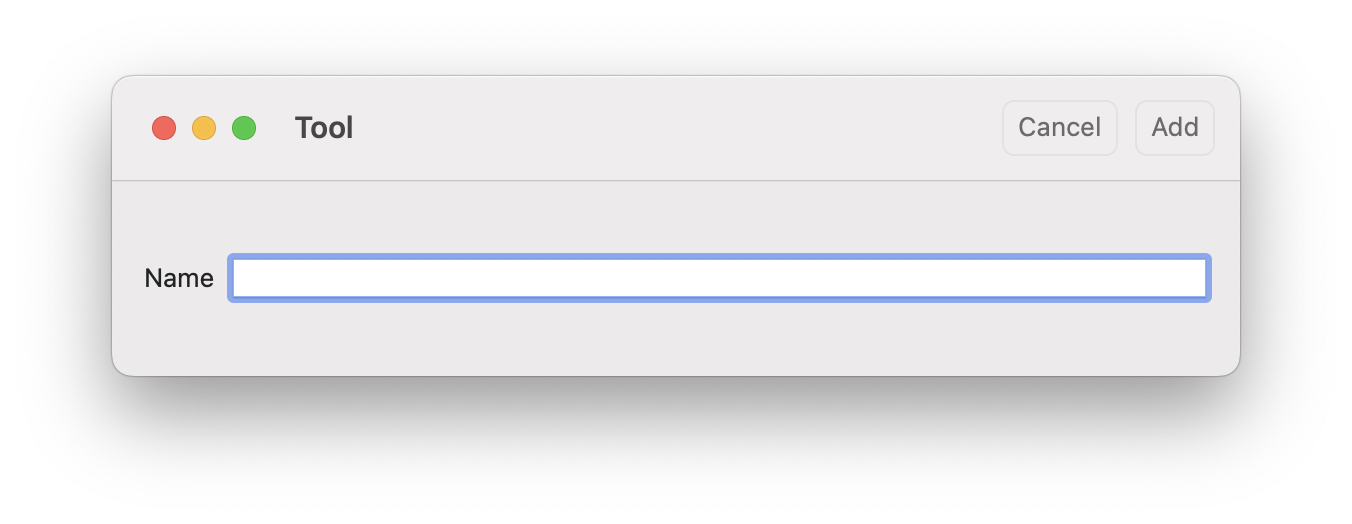
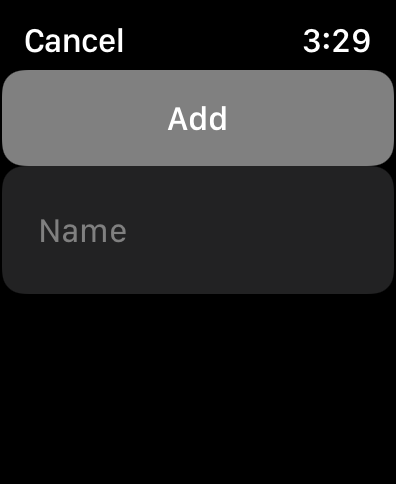
このコードを動かすと、macOS用アプリ、watchOS用アプリではtoolbarに指定したボタンが表示されます。
watchOSではprimaryActionのアイテムは画面を引っ張ることで表示されます。
が、iOS、iPad、tvOSにはボタンが表示されません。

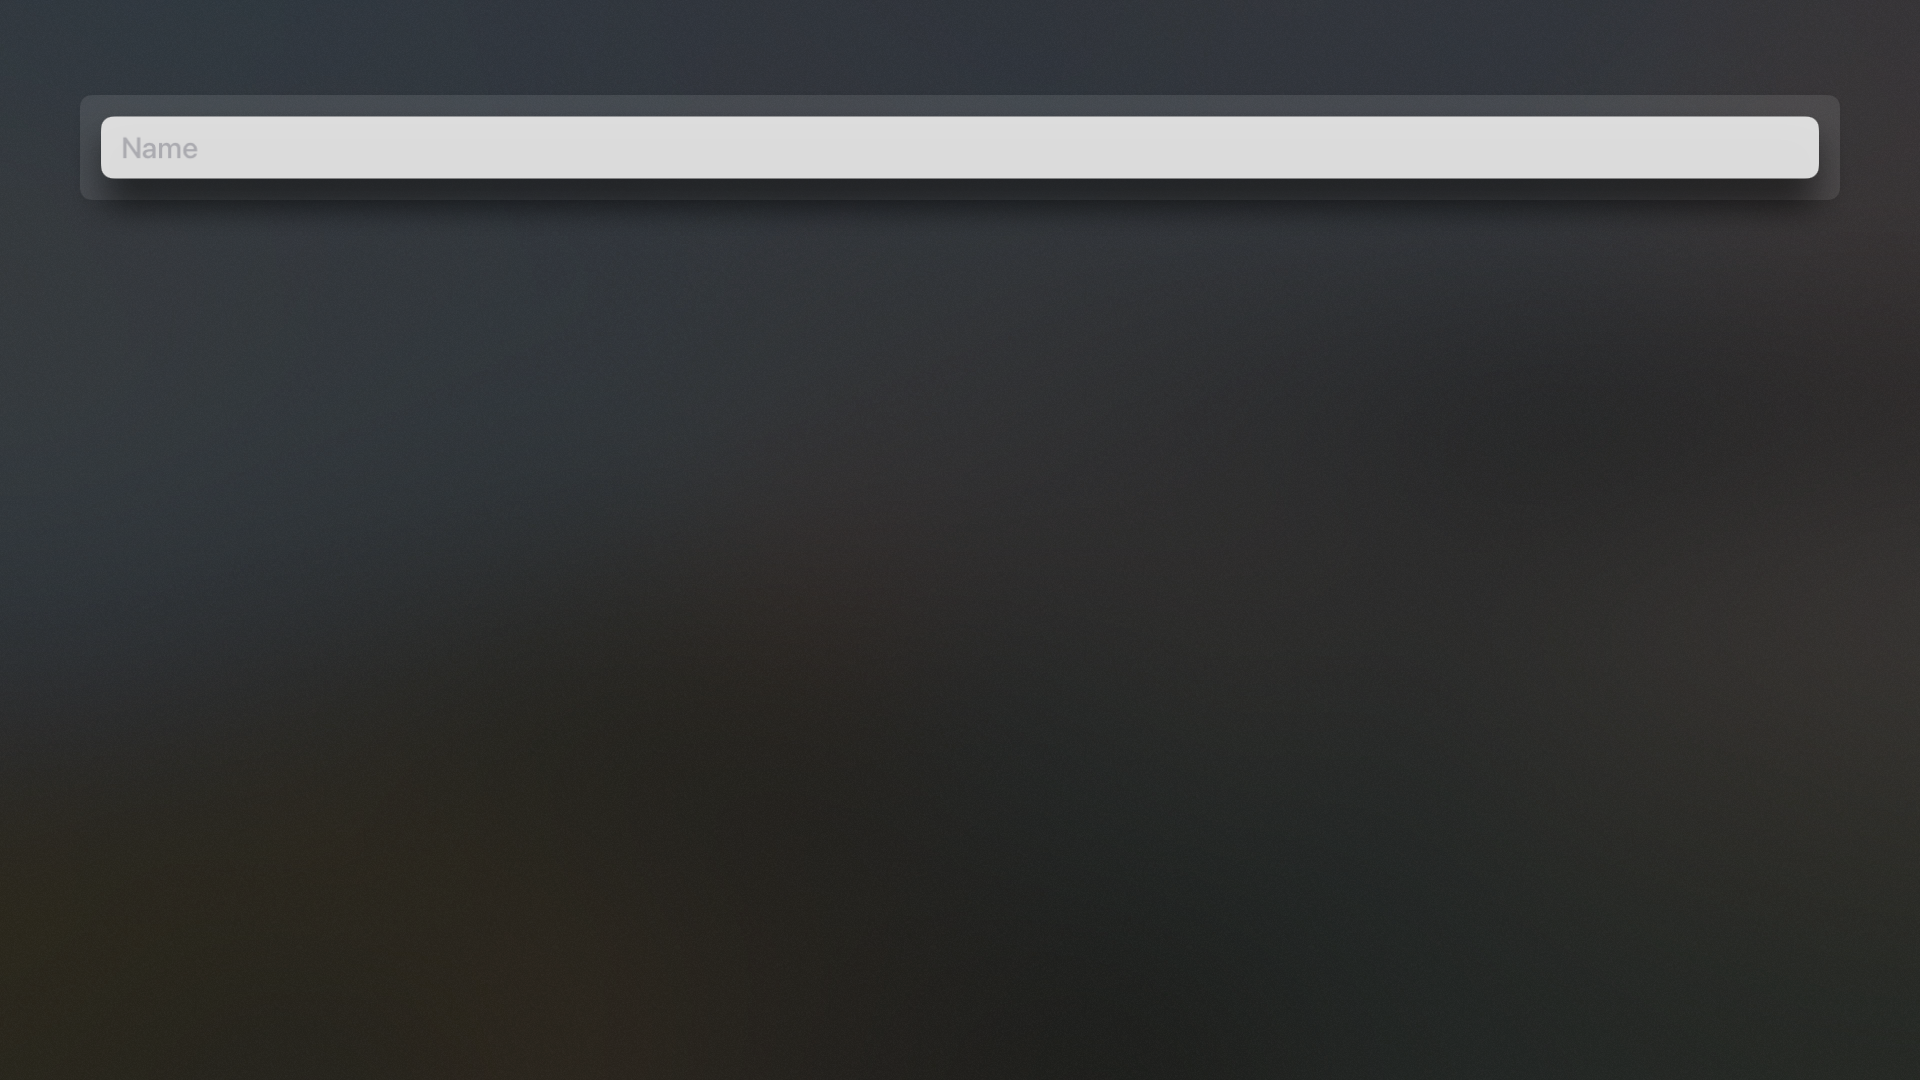
これは、iOS及びtvOSはprimaryActionに設定したものがナビゲーションバーの後端側(右)、cancellationActionがナビゲーションバーの先頭側(左)に表示されるようになっているため、ナビゲーションバーの実装のない上記ビューは表示されないことになっています。
つまりiOSおよびtvOSではprimaryAction及びcancellationActionの意図としてボタンを表示したい場合はNavigationViewの実装が必須となります。
なので、NavigationViewの実装をしてみます。
struct ContentView: View {
    @State private var name = ""
    var body: some View {
        NavigationView {
            Form {
                TextField("Name", text: $name)
                    .padding()
            }
            .toolbar {
                ToolbarItem(placement: .cancellationAction) {
                    Button("Cancel", action: {})
                }
                ToolbarItem(placement: .primaryAction) {
                    Button("Add", action: {})
                }
            }
        }
    }
}
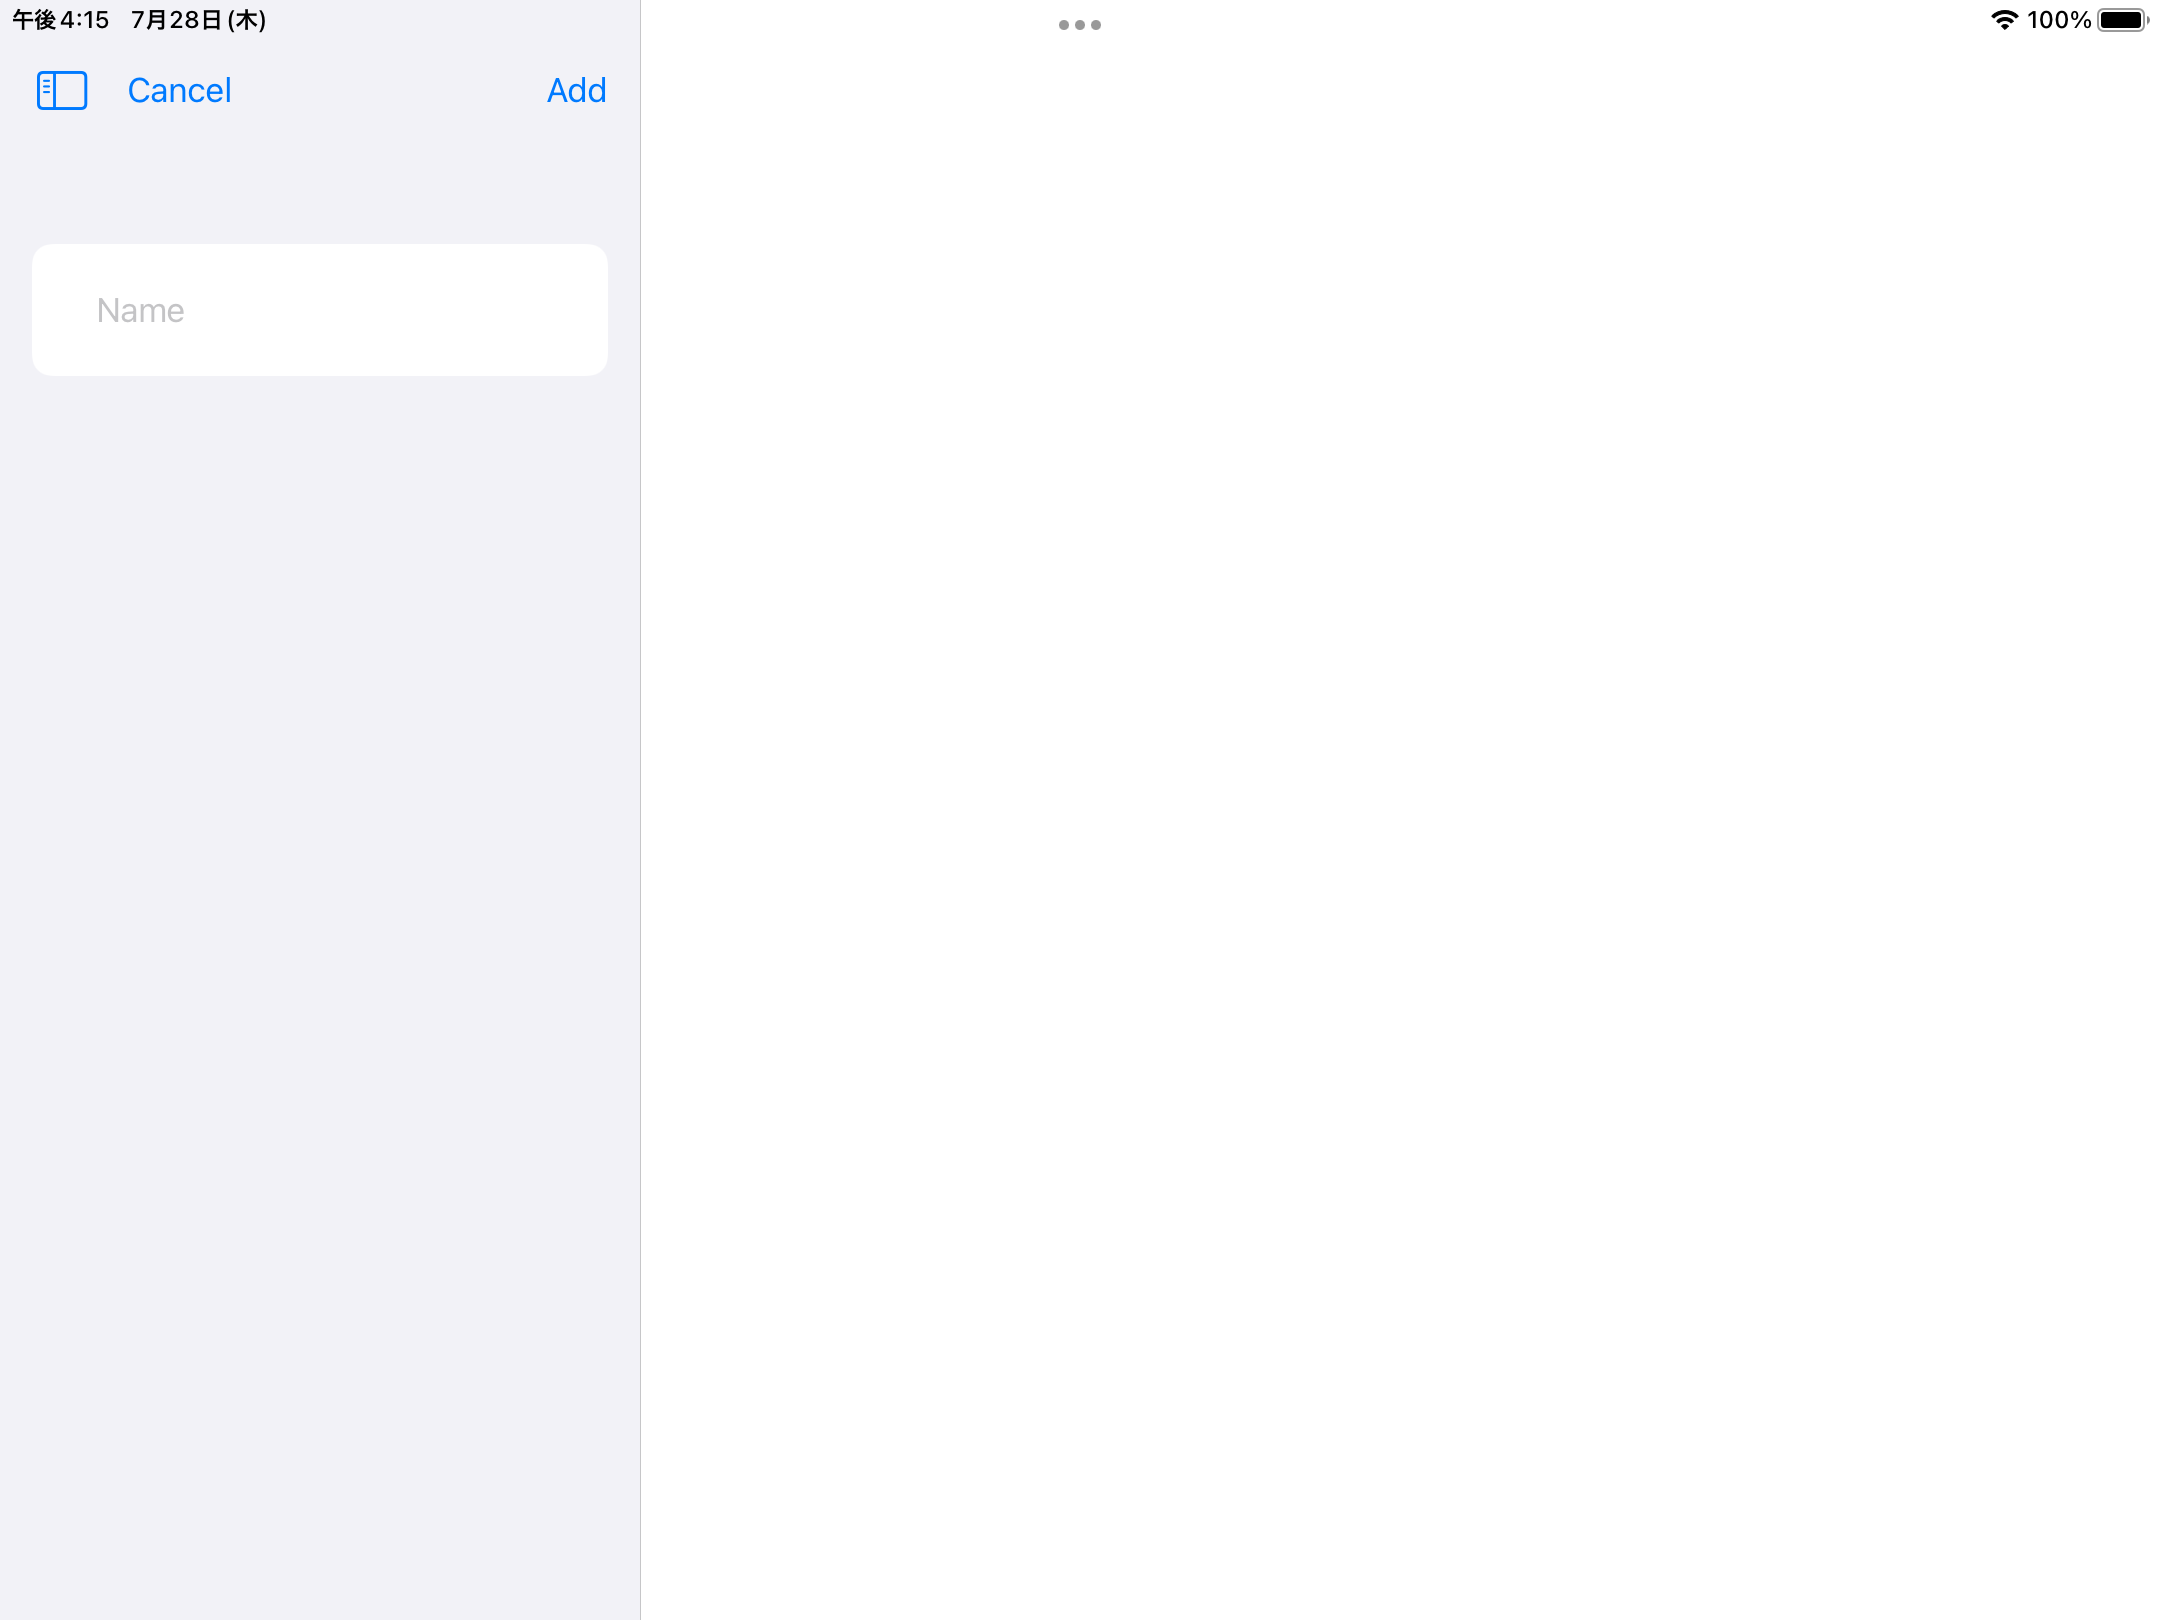
こうすると確かにiPhoneではCancelボタンとAddボタンが表示されるようになりました。
しかし、iPadではこの入力欄が左側、右側に何もないビューが表示される、という分割表示になりました。
macOSも同様です。
iPadでこの現象を防ぐためには .navigationViewStyle(.stack) を配置することで防ぐことが可能ですが、macOSはstackに対応しておらず、そもそも今回の主題としてはNavigationLinkを配置したいわけではなく、キャンセルと追加ボタンを持った画面を作成したいだけなので、その観点でシンプルなツールバー実装ができないかと考えてみました。
結論
以下のようなカスタムmodifier multiPlatformToolbar を使うことで解決?しました。
struct MultiPlatformToolbar<T: ToolbarContent>: ViewModifier {
    let title: String
    let toolbarContent: () -> T
    func body(content: Content) -> some View {
#if os(OSX) || os(watchOS)
        content
            .toolbar(content: toolbarContent)
#else
        NavigationView {
            content
                .navigationTitle(title)
                .toolbar(content: toolbarContent)
        }
        .navigationViewStyle(.stack)
#endif
    }
}

extension View {
    func multiPlatformToolbar<Content>(title: String, @ToolbarContentBuilder content: @escaping () -> Content) -> some View where Content : ToolbarContent {
        modifier(MultiPlatformToolbar(title: title, toolbarContent: content))
    }
}
import SwiftUI

struct ContentView: View {
    @State private var name = ""
    var body: some View {
        Form {
            TextField("Name", text: $name)
                .padding()
        }
        .multiPlatformToolbar(title: "title") {
            ToolbarItem(placement: .cancellationAction) {
                Button("Cancel", action: {})
            }
            ToolbarItem(placement: .primaryAction) {
                Button("Add", action: {})
            }
        }
    }
}
multiPlatformToolbarの内部でOSごとにNavigationが必要か見て、toolbarを構築しています。
toolbarのmodifierをmultiPlatformToolbarに置き換えることにより、それぞれのプラットフォームでtoolbarにボタンが配置されるようになりました。
navigationTitleを内部で実装しているのは、これがないとtvOSでボタンが表示されないためです。
まとめ
SwiftUI On All Devicesとある通り、SwiftUIはマルチプラットフォームに対応してますが、細かいところは結構大変です。