kintoneを初めて触ってみたのでメモです。
kintoneのアプリを作成する
1. kintoneアプリが必要なので作成
サイボウズの開発者アカウントを取得し、右下のアプリの"+"から作成できます。

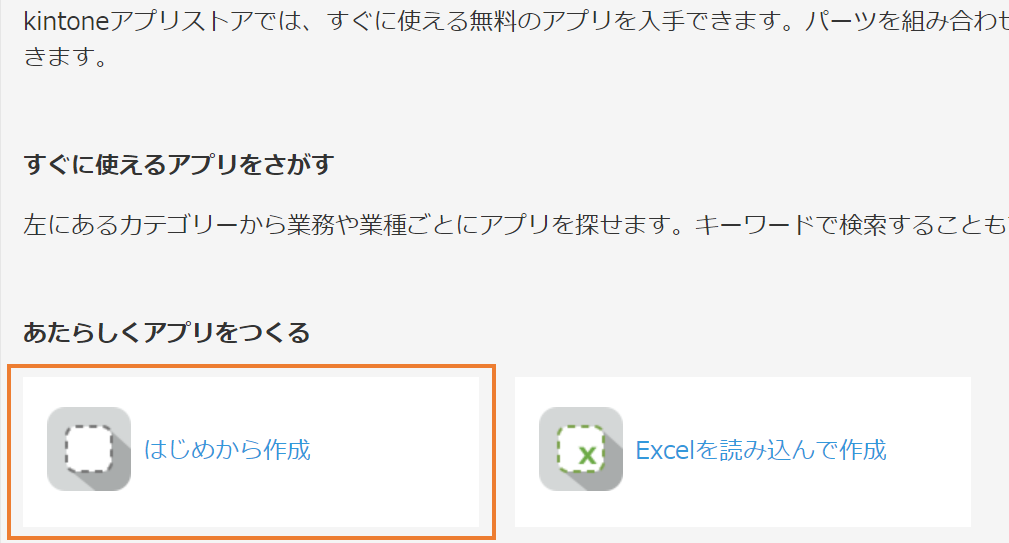
2. 「はじめから作成」を選択
今回は簡単なアプリなので「はじめから作成」を選択します。

3. 「数値」と「日付」を選択
左のカテゴリから選択します。

4. フィールドコートを「数値」と「日付」にする
それぞれの設定からフィールドコートも「数値」と「日付」にしておきます。

これでアプリ側は完成です。
APIでの操作
APIで操作するために「kintone REST API Client」を使用します。kintone SDKより新しいバージョンとしてリリースされた?っぽいのでこちらを使用します。
詳しくはこちらから
目指せ!JavaScriptカスタマイズ中級者(4) 〜kintone REST API Client編〜
1. kintone/rest-api-clientのインストール
npm install @kintone/rest-api-client
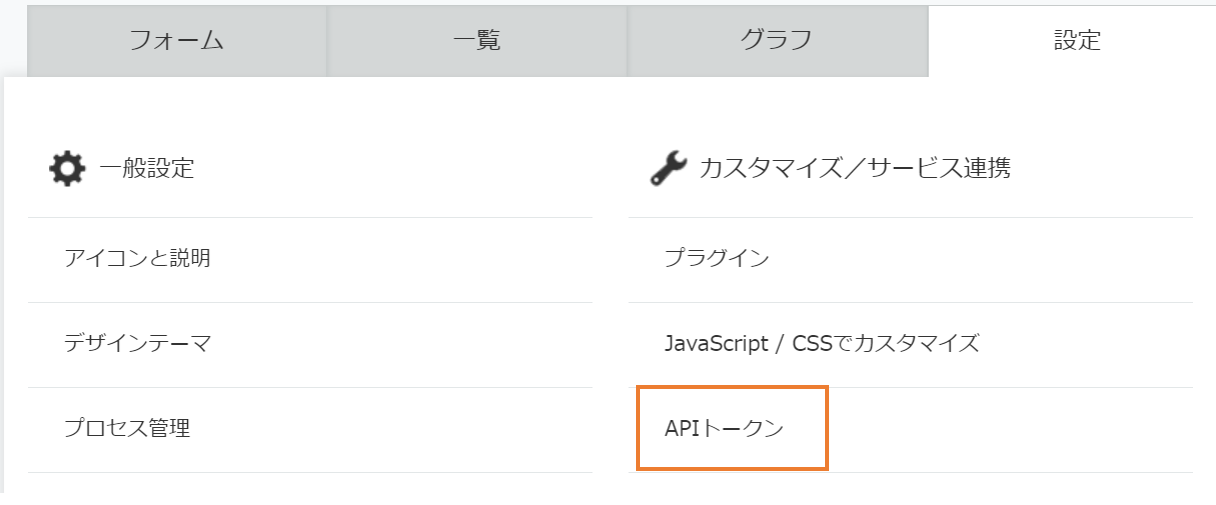
2. API tokenの取得
API tokenを取得します。kintoneのtokenはアプリ毎に設定されています。
生成するを選択
アクセス権を指定することで操作の可否を指定することをできます。

3. コードの記述
node index.js POST
で実行できます。
GETしたいときは下の様にすれば大丈夫です。
node index.js GET
サブドメインはアプリを開いて、青四角で塗りつぶされているところです。

アプリIDは/k/3/の'3'の部分です。アプリを新しく作成すると、この部分が変わります。
const { KintoneRestAPIClient } = require("@kintone/rest-api-client");

const client = new KintoneRestAPIClient({
  baseUrl: "https://t2l5kxnlowux.cybozu.com",
  auth: { apiToken: "CkmlakwKXGGVFhS1SSfVqzdB5NtFIOlrtuaL1QSs" },
});

const appId = "3";

const getRecord = async () => {
  try {
    const getData = {
      app: appId,
    };
    const resp = await client.record.getRecords(getData);
    console.log(resp.records);
  } catch (err) {
    console.log(err);
  }
};

const postRecord = async () => {
  try {
    const postData = {
      app: appId,
      record: {
        日付: { value: "2023-12-30" },
        数値: { value: "11" },
      },
    };
    const resp = await client.record.addRecord(postData);
    console.log(resp);
  } catch (err) {
    console.log(err);
  }
};

const putRecord = async () => {
  try {
    const putData = {
      app: appId,
      id: 77,
      record: {
        日付: { value: "1111-11-11" },
        数値: { value: "999999" },
      },
    };

    const resp = await client.record.updateRecord(putData);
    console.log(resp);
  } catch (err) {
    console.log(err);
  }
};

const deleteRecord = async () => {
  try {
    const deleteData = {
      app: appId,
      ids: 77,
    };

    const resp = await client.record.deleteRecords(deleteData);
    console.log(resp);
  } catch (err) {
    console.log(err);
  }
};

const main = (method) => {
  switch (method) {
    case "POST":
      postRecord();
      break;

    case "GET":
      getRecord();
      break;

    case "PUT":
      putRecord();
      break;

    case "DELETE":
      deleteRecord();
      break;

    default:
      console.log("default");
      break;
  }
};

main(process.argv[2]);
実行した結果
POSTをしてみます。
node index.js POSTを実行すると、登録されました。

node index.js GETを実行すると、レスポンスが返ってきます。
  {
    'レコード番号': { type: 'RECORD_NUMBER', value: '77' },
    '更新者': { type: 'MODIFIER', value: [Object] },
    '作成者': { type: 'CREATOR', value: [Object] },
    '数値': { type: 'NUMBER', value: '11' },
    '$revision': { type: '__REVISION__', value: '1' },
    '更新日時': { type: 'UPDATED_TIME', value: '2023-12-04T06:30:00Z' },
    '作成日時': { type: 'CREATED_TIME', value: '2023-12-04T06:30:00Z' },
    '日付': { type: 'DATE', value: '2023-12-30' },
    '$id': { type: '__ID__', value: '77' }
  }
node index.js PUTを実行すると、レコードが更新されます。
日付を'1111-11-11'、数値を'999999'としてみました。

node index.js DELETEを実行すると、レコードが削除されます。元の状態に戻ります。
ファイルの添付
最後にファイルの添付をしてみたいと思います。
日付、数値と同様にレコードに添付ファイルを追加します。

APIから実行
postRecordメソッドを以下の様に変更します。
同じフォルダ内に「audio.mp3」という音声ファイルを準備したのでレコードに登録したいと思います。
'fs.createReadStream'でファイルを読み込み、アップロードします。
kintoneにアップロードすると、fileKeyというキーが与えられるのでそちらを使用して登録をします。
詳しくはこちら
ファイルをアップロードする
const postRecord = async () => {
  try {
    const file = await fs.createReadStream("./audio.mp3");
    const { fileKey } = await client.file.uploadFile({ file });

    const postData = {
      app: appId,
      record: {
        日付: { value: "2023-12-30" },
        数値: { value: "11" },
        添付ファイル: {
          value: [{ fileKey: fileKey }],
        },
      },
    };
    // KintoneにPOSTリクエストを送信;
    const resp = await client.record.addRecord(postData);
    console.log(resp);
  } catch (err) {
    console.log(err);
    console.log(err.errors);
  }
};


