はじめに
Spring Security シリーズ第2回目です。
- 第1回:最初のSpring Security - フォーム認証&画面遷移
- 第2回:Spring Securityのログインページをカスタマイズする(本記事)
- 第3回:ログイン認証のDBアクセス処理を実装
前回作成したフォーム認証機能に対して、ログインページのカスタマイズを行います。
FW、ミドルウェア
本記事では下記バージョンを使用します。
- Spring Boot 2.1.5
- Spring Security 5.1.5(maven依存)
- Java 11(AdoptOpenJDK)
実装
第1回の実装に追加する形で行います。
依存jarの追加
ログインページをThymeleafで作成します。
Thymeleafを使うための依存関係を追加します。
<!-- 中略 -->
<!-- ログインページ作成用にThymeleafを使用 -->
<dependency>
	<groupId>org.springframework.boot</groupId>
	<artifactId>spring-boot-starter-thymeleaf</artifactId>
</dependency>
<!-- 中略 -->
セキュリティ設定
ログインページをカスタマイズするための設定を追加します。
@Configuration
class DemoWebSecurityConfig extends WebSecurityConfigurerAdapter {

    @Override
    protected void configure(HttpSecurity http) throws Exception {

        http
            // AUTHORIZE
            .authorizeRequests()
            /* */.mvcMatchers("/hello").permitAll()
            /* */.anyRequest()
            /*    */.authenticated()
            .and()
            // LOGIN
            .formLogin()
            // ▼今回追加
            /* */.loginPage("/login")
            /*    */.permitAll()
            // ▲今回追加
            /* */.defaultSuccessUrl("/success")
        // end
        ;
        // ▼今回追加
        // メッセージをカスタマイズするために、メッセージソースを設定する
        AuthenticationManager a = this.authenticationManager();
        if (a instanceof ProviderManager) {
            ProviderManager a2 = (ProviderManager)a;
            a2.getProviders().forEach(p -> {
                if (p instanceof MessageSourceAware) {
                    ((MessageSourceAware)p).setMessageSource(s);
                }
            });
        }
        // ▲今回追加
    }
}
-
formLogin().loginPage("/login").permitAll()にて、カスタムログインページの設定を行います。-
loginPage(...)でカスタムのログインパスを指定します。この例だとデフォルトログインページも同じパスですが、明示的に指定しないとカスタムページに届きません。 -
permitAll()にて未ログイン時のアクセスを許容します(これを指定しないと、ログインページ開くのにログインページを求められて無限リダイレクトします)。
-
-
MessageSourceAware#setMessageSourceを呼び出して、Spring Securityが提供するデフォルトメッセージをカスタマイズします。※補足参照
メッセージ追加
カスタマイズするメッセージを設定します。
AbstractUserDetailsAuthenticationProvider.badCredentials=IDまはたパスワードが誤っています。
demo.login.logouted=ログアウトに成功しました。
コントローラ追加
ログインページ表示のコントローラを追加します。
- リクエストパスが
login?errorの場合、エラーメッセージを表示するためのデータを用意します。 - リクエストパスが
login?logoutの場合、ログアウト完了メッセージを表示するためのデータを用意します。
@Controller
class DemoController {

    @GetMapping(path = "login")
    public String login(@RequestParam(value = "error", required = false) String error,
            @RequestParam(value = "logout", required = false) String logout,
            Model model, HttpSession session) {

        model.addAttribute("showErrorMsg", false);
        model.addAttribute("showLogoutedMsg", false);
        if (error != null) {
            if (session != null) {
                AuthenticationException ex = (AuthenticationException) session
                        .getAttribute(WebAttributes.AUTHENTICATION_EXCEPTION);
                if (ex != null) {
                    model.addAttribute("showErrorMsg", true);
                    model.addAttribute("errorMsg", ex.getMessage());
                }
            }
        } else if (logout != null) {
            model.addAttribute("showLogoutedMsg", true);
        }
        return "login";
    }

    @GetMapping("success")
    public String success() {
        return "success.html";
    }
}
ログインページ
カスタマイズしたログインページです。
(といいつつ、Spring標準のDefaultLoginPageGeneratingFilterからデフォルトログインページを拝借しましたが・・・)
<!DOCTYPE html>
<html xmlns:th="http://www.thymeleaf.org">
<head>
    <meta charset="utf-8">
    <meta name="viewport" content="width=device-width, initial-scale=1, shrink-to-fit=no">
    <title>ログイン</title>
    <link href="https://maxcdn.bootstrapcdn.com/bootstrap/4.0.0-beta/css/bootstrap.min.css" rel="stylesheet" integrity="sha384-/Y6pD6FV/Vv2HJnA6t+vslU6fwYXjCFtcEpHbNJ0lyAFsXTsjBbfaDjzALeQsN6M" crossorigin="anonymous">
    <link href="https://getbootstrap.com/docs/4.0/examples/signin/signin.css" rel="stylesheet" crossorigin="anonymous"/>
</head>
<body>
<div class="container">
   <p style="text-align: center;">オリジナルログインフォームです</p>
   <form class="form-signin" th:action="@{/login}" method="post">
        <div th:if="${showErrorMsg}" class="alert alert-danger" role="alert" th:text="${errorMsg}">
            ※エラーメッセージ※
        </div>
        <div th:if="${showLogoutedMsg}" class="alert alert-success" role="alert" th:text="#{demo.login.logouted}">
            ※ログアウトメッセージ※
        </div>

        <p>
          <input type="text" id="username" name="username" class="form-control" placeholder="ユーザID" required autofocus>
        </p>
        <p>
          <input type="password" id="password" name="password" class="form-control" placeholder="パスワード" required>
        </p>
        <button class="btn btn-lg btn-primary btn-block" type="submit">ログイン</button>
   </form>
</div>
</body>
</html>
-
th:action="@{/login}" method="post"でログインの送信先を指定します。- デフォルト送信先が
{contextPath}/loginになります。 - httpメソッドは
POSTである必要があります。
- デフォルト送信先が
-
<div th:if="${iserror}" >...</div>で、エラーが発生して画面に戻った際、この部分が表示されます
ログイン成功ページ
ログイン成功後のページです。
ログアウトボタンを配置して、クリックするとログアウト実行されるようにしています。
<!DOCTYPE html>
<html xmlns:th="http://www.thymeleaf.org">
<head>
    <meta charset="utf-8">
    <meta name="viewport" content="width=device-width, initial-scale=1, shrink-to-fit=no">
    <title>マイページ</title>
    <link href="https://maxcdn.bootstrapcdn.com/bootstrap/4.0.0-beta/css/bootstrap.min.css" rel="stylesheet" integrity="sha384-/Y6pD6FV/Vv2HJnA6t+vslU6fwYXjCFtcEpHbNJ0lyAFsXTsjBbfaDjzALeQsN6M" crossorigin="anonymous">
    <link href="https://getbootstrap.com/docs/4.0/examples/signin/signin.css" rel="stylesheet" crossorigin="anonymous"/>
</head>
<body>
<div class="container">
   <p style="text-align: center;">ログイン成功後のページです。</p>
   <form class="form-signin" th:action="@{/logout}" method="post">
        <button class="btn btn-lg btn-primary btn-block" type="submit">ログアウト</button>
   </form>
</div>
</body>
</html>
動作確認
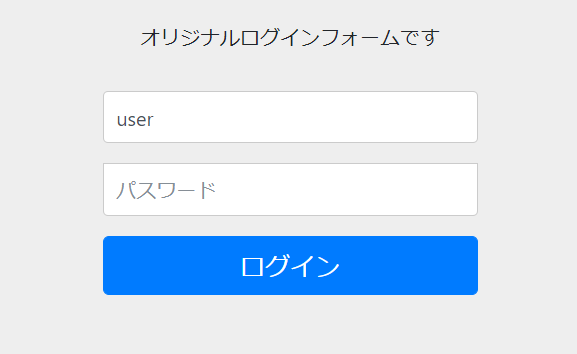
ログインページ
サーバを立ち上げて/loginを開きます。
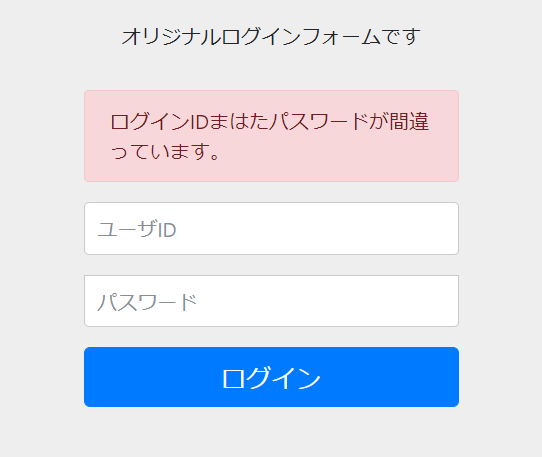
ID、パスワード入力誤り
ID、パスワードを誤るとログインページに戻ってきてエラー表示されます。
ログイン成功
正しいID/PASSを入力してログイン成功させます。
デフォルトのID/PASSについてはこちらを参照してください。

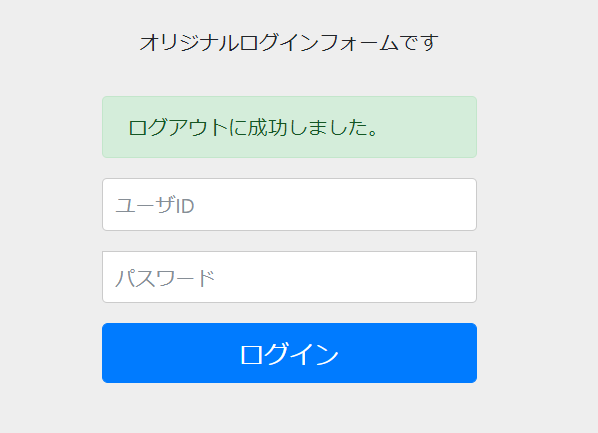
ログアウト成功
ログアウトボタンをクリックするとログインページに戻ります。
URLが/login?logoutとなるため、専用のメッセージが表示されます。
おわりに
今回はログインページにフォーカスした記事を扱ってみました。
次回は認証処理をカスタマイズしてDBアクセスによる認証を実装しようと思います。
補足:メッセージのカスタマイズについて
少し調べたところ、メッセージプロパティにAbstractUserDetailsAuthenticationProvider.badCredentialsを設定するとカスタマイズ可能、という情報が複数ヒットしましたが、実際にやってみてもメッセージが変わりませんでした。
そこで、Springのソースコードをデバッグ実行して調べてみた結果、該当箇所AbstractUserDetailsAuthenticationProviderに行き当たりました。
実装は次のようなものになっています。
public abstract class AbstractUserDetailsAuthenticationProvider implements
        AuthenticationProvider, InitializingBean, MessageSourceAware {
    // 中略
    protected MessageSourceAccessor messages = SpringSecurityMessageSource.getAccessor(); // ←使用するメッセージソースはここで初期化されている
    // 中略

    public Authentication authenticate(Authentication authentication)
            throws AuthenticationException {
        // 中略
            try {
                user = retrieveUser(username,
                        (UsernamePasswordAuthenticationToken) authentication);
            }
            catch (UsernameNotFoundException notFound) {
                logger.debug("User '" + username + "' not found");

                if (hideUserNotFoundExceptions) {
                    throw new BadCredentialsException(messages.getMessage(
                            "AbstractUserDetailsAuthenticationProvider.badCredentials", //←ここで該当メッセージを取得
                            "Bad credentials"));
                }
                else {
                    throw notFound;
                }
            }
        // 中略
    }
    // 中略
}
SpringSecurityMessageSource#getAccessorの実装は次のようになっています
public class SpringSecurityMessageSource extends ResourceBundleMessageSource {

	public SpringSecurityMessageSource() {
		setBasename("org.springframework.security.messages"); // ←ここでリソースのbasenameが決まっている
	}

	public static MessageSourceAccessor getAccessor() {
		return new MessageSourceAccessor(new SpringSecurityMessageSource());
	}
}
つまり、パッケージorg.springframework.securityに配置されたメッセージソースが使われることになります。
よって、メッセージをカスタマイズするには、AbstractUserDetailsAuthenticationProviderの保持しているmessagesをハンドル可能なものに変えなければなりません(?)。
AbstractUserDetailsAuthenticationProviderは、WebSecurityConfigurerAdapter#authenticationManagerで得られるProviderManager型のインスタンスが保持しているため、それに対して適切なメッセージソースを設定することでカスタマイズができるようになりました。
※とても適切な方法とは思えないので、他の方法をご存知でしたら是非教えてください。
参考:デフォルトログイン、ログアウトページ生成フィルタ
Spring Securityのデフォルトログインページ、ログアウトページの仕様が下記フィルタのソースコードから読み取れます。
- ログインページ:
DefaultLoginPageGeneratingFilter - ログアウトページ:
DefaultLogoutPageGeneratingFilter
参考記事
SpringSecurity:デフォルトのログイン画面をオリジナルログイン画面に変更する
ログインエラーのメッセージをカスタマイズする