この記事ではsalesforce開発において良く使われるLWCについて学んでいきたいと思います。この記事に通じて分かるようになる内容が以下となります。
・LWC開発の基本
・LWCのローカル開発環境
・コンポーネントのライフサイクルと構成
・イベントを使うコンポーネントの通信
・salesforce dataへのアクセス
・標準搭載機能とその他
・3rdパーティーライブラリの実装
・lwcテスト
この記事は学んだ内容をアウトプットする目的のものなので知識不足で間違った内容と逃した内容はあると思います。将来リトライする予定です。
1.LWC開発の基本
ここでは開発が必要な事前知識や作業のステップなどを紹介します。
1-1.事前知識
LWC開発の事前知識としてCLIコマンドとローカルのsalsesforce開発環境の整え方、この記事を参考してください。
https://qiita.com/hubin616/items/5aaed1a928b40796d61a
これ以外にJavaScriptの知識を持った方が理解を深まることができます。
1-2.組織とローカルの準備
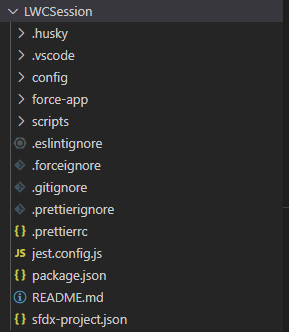
まずはローカルに新規sfdxプロジェクトを作成しましょう。
sfdx force:project:create -n LWCSession
次に、デフォルトユーザーの本番組織をログインしてスクラッチ組織を作成しましょう。
sfdx force:auth:web:login -d -a <組織名>
別名がlwc101so1、有効期限が30日 組織参照がconfig/project-scratch-def.json デフォルトユーザーに設定する
sfdx force:org:create -a lwc101so1 -d 30 -f config/project-scratch-def.json -s
もし、CLIコマンド練習の記事に従ってJWTまでやりましたら、証明書でAPI権限を認証することを忘れずに
sfdx force:auth:jwt:grant --clientid <コンシューマ鍵> --jwtkeyfile <サーバーキーの位置> --username <ユーザー名> --setdefaultdevhubusername
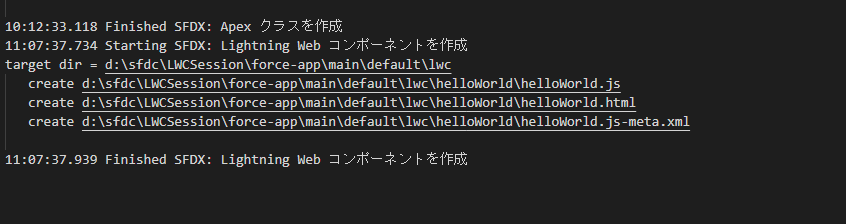
スクラッチ組織の作成が終わったらlwcを作成しましょう。
sfdx force:lightning:component:create --type lwc -n firstLWC -d .\force-app\main\default\lwc\
lwcを作成しましたらclassを作成しましょう。
sfdx force:apex:class:create -n abcd -t DefaultApexClass -d .\force-app\main\default\classes\
またCtrl+Shift+Pでコマンドパレットを呼び出して作成することもできる

1-3.実際に作成して動かしてみよう
初めてのlwcを作成し実装しましょう。
まず、プロジェクト内に名前がHelloWorldのLWCを作成しましょう。
HelloWorldのhtmlとxmlとjsを以下内容に変更しましょう。
<template>
   <lightning-card title="Hello world LWC">
        <div>Hello world</div>
        <lightning-input label="greeting">
        </lightning-input>
   </lightning-card>
</template>
<?xml version="1.0" encoding="UTF-8"?>
<LightningComponentBundle xmlns="http://soap.sforce.com/2006/04/metadata">
    <apiVersion>54.0</apiVersion>
    <isExposed>true</isExposed>
    <targets>
        <target>lightning__RecordPage</target>
        <target>lightning__AppPage</target>
        <target>lightning__HomePage</target>
    </targets>
</LightningComponentBundle>
import { LightningElement, track } from 'lwc';

export default class HelloWorld extends LightningElement {
    @track dynamicGreeting = 'World';

    greetingChangeHandler(event){
        this.dynamicGreeting = event.target.value;
    }
}
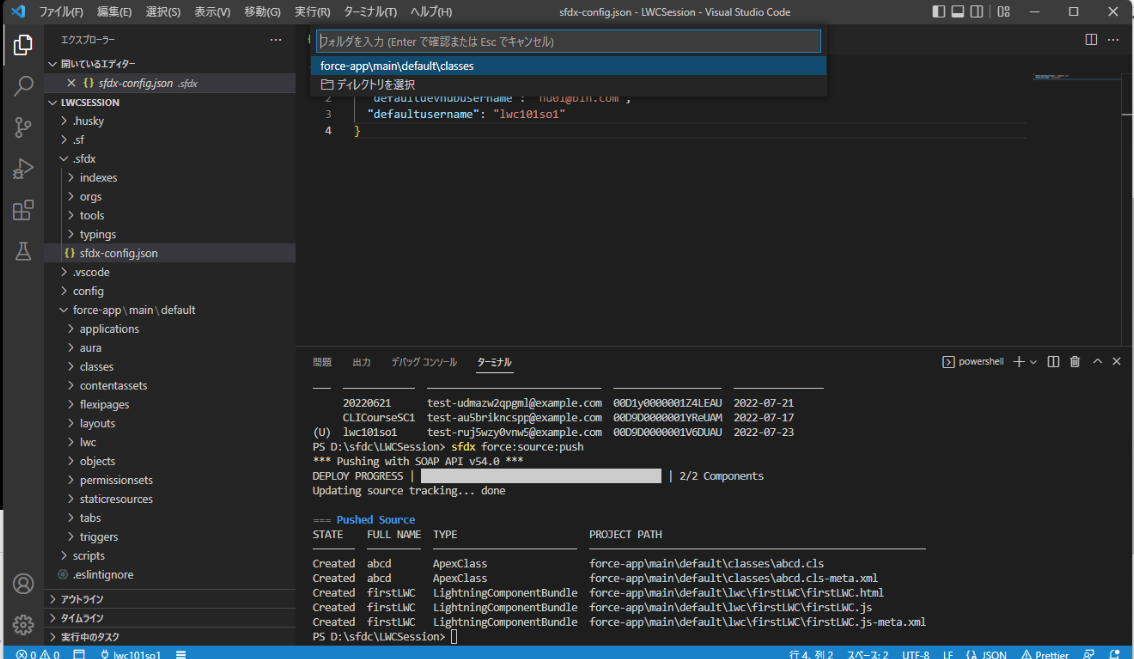
変更した後に組織にpushしましょう。
sfdx force:source:push
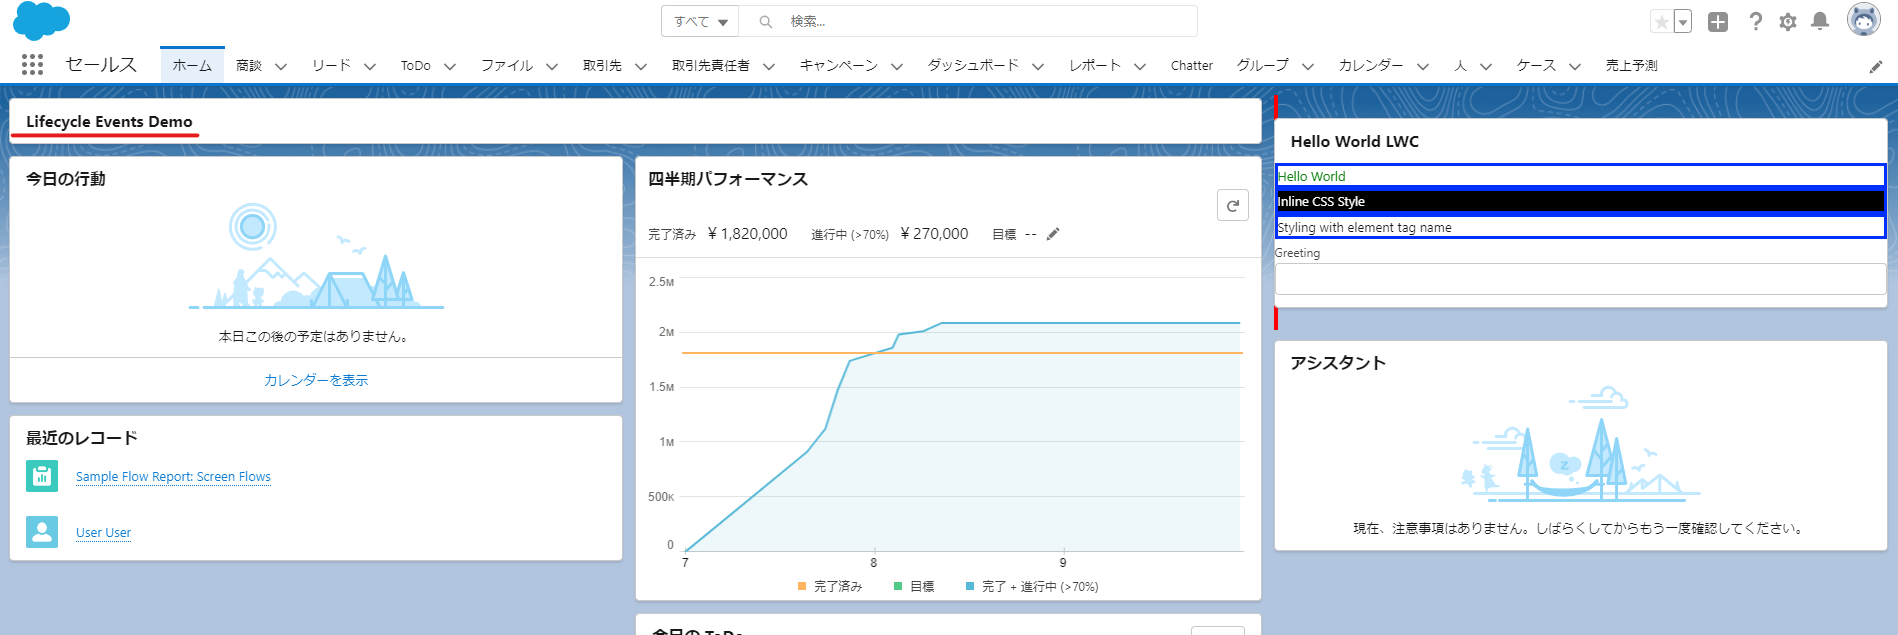
デプロイした後に組織に入ってアプリケーションランチャーを開きましょう。セールスをクリック。

セールスのホームページに入ったら編集ページを開く

Hellowworldをページにドラッグして保存しましょう。
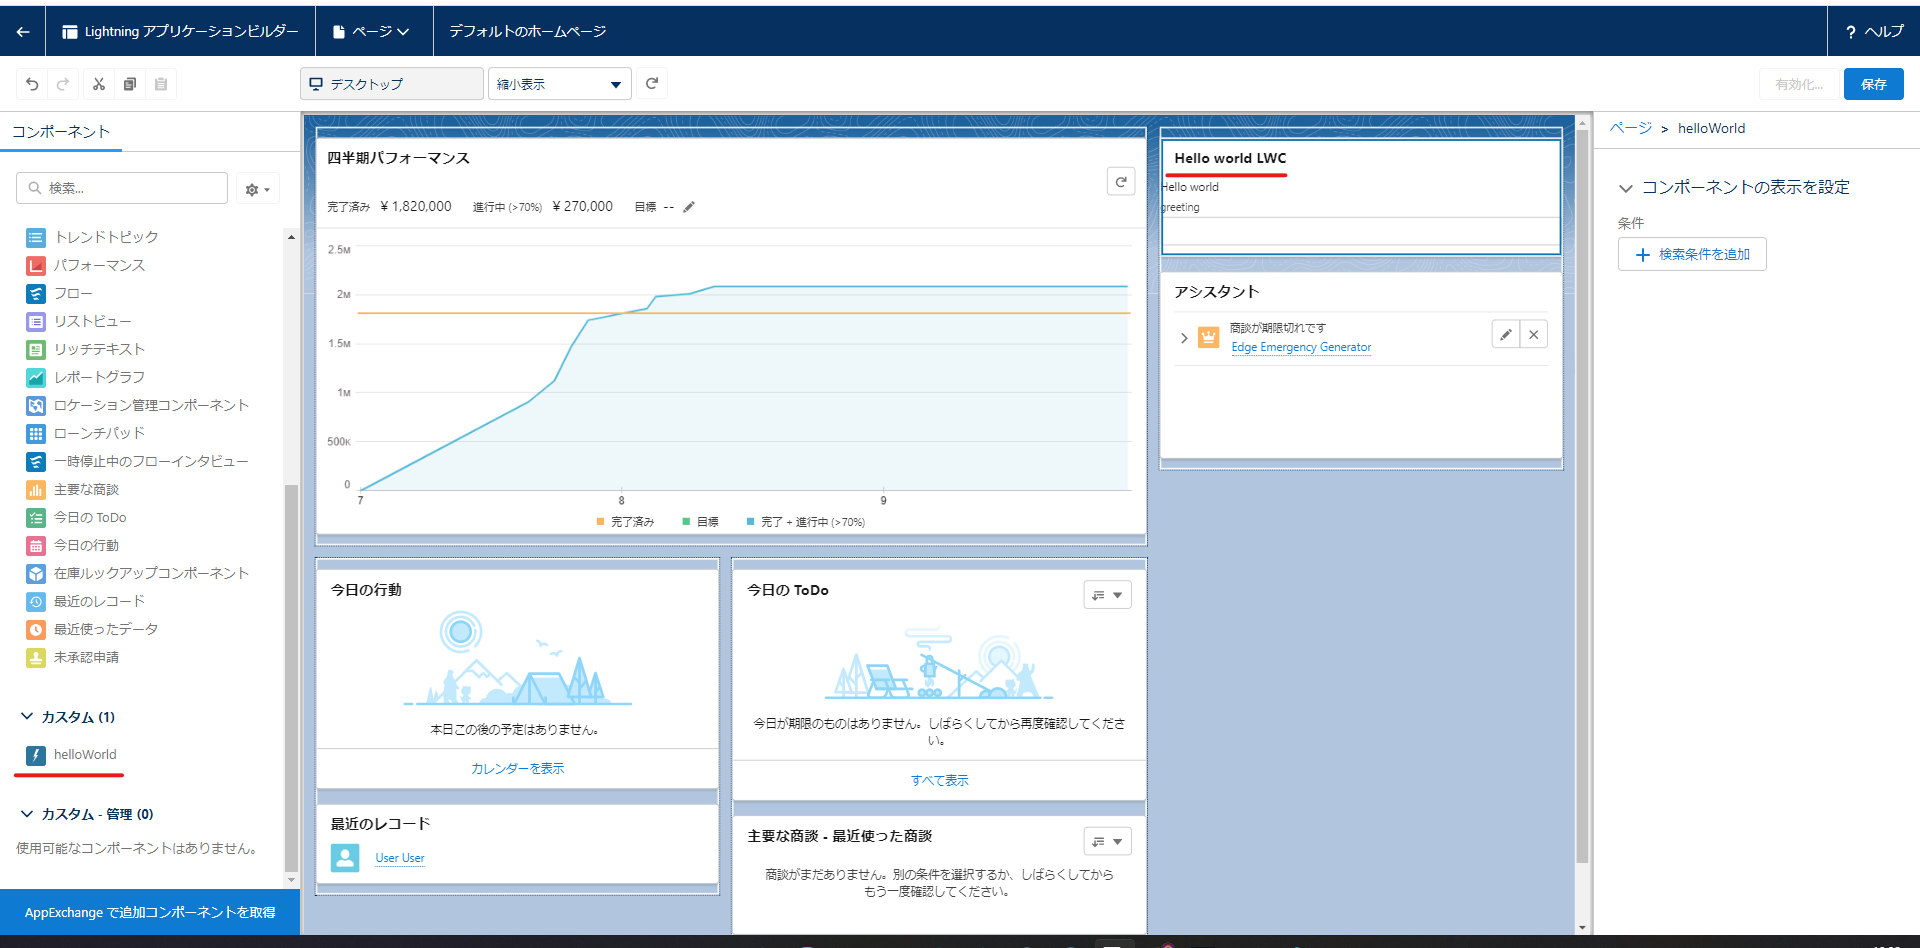
有効化をクリックしましょう
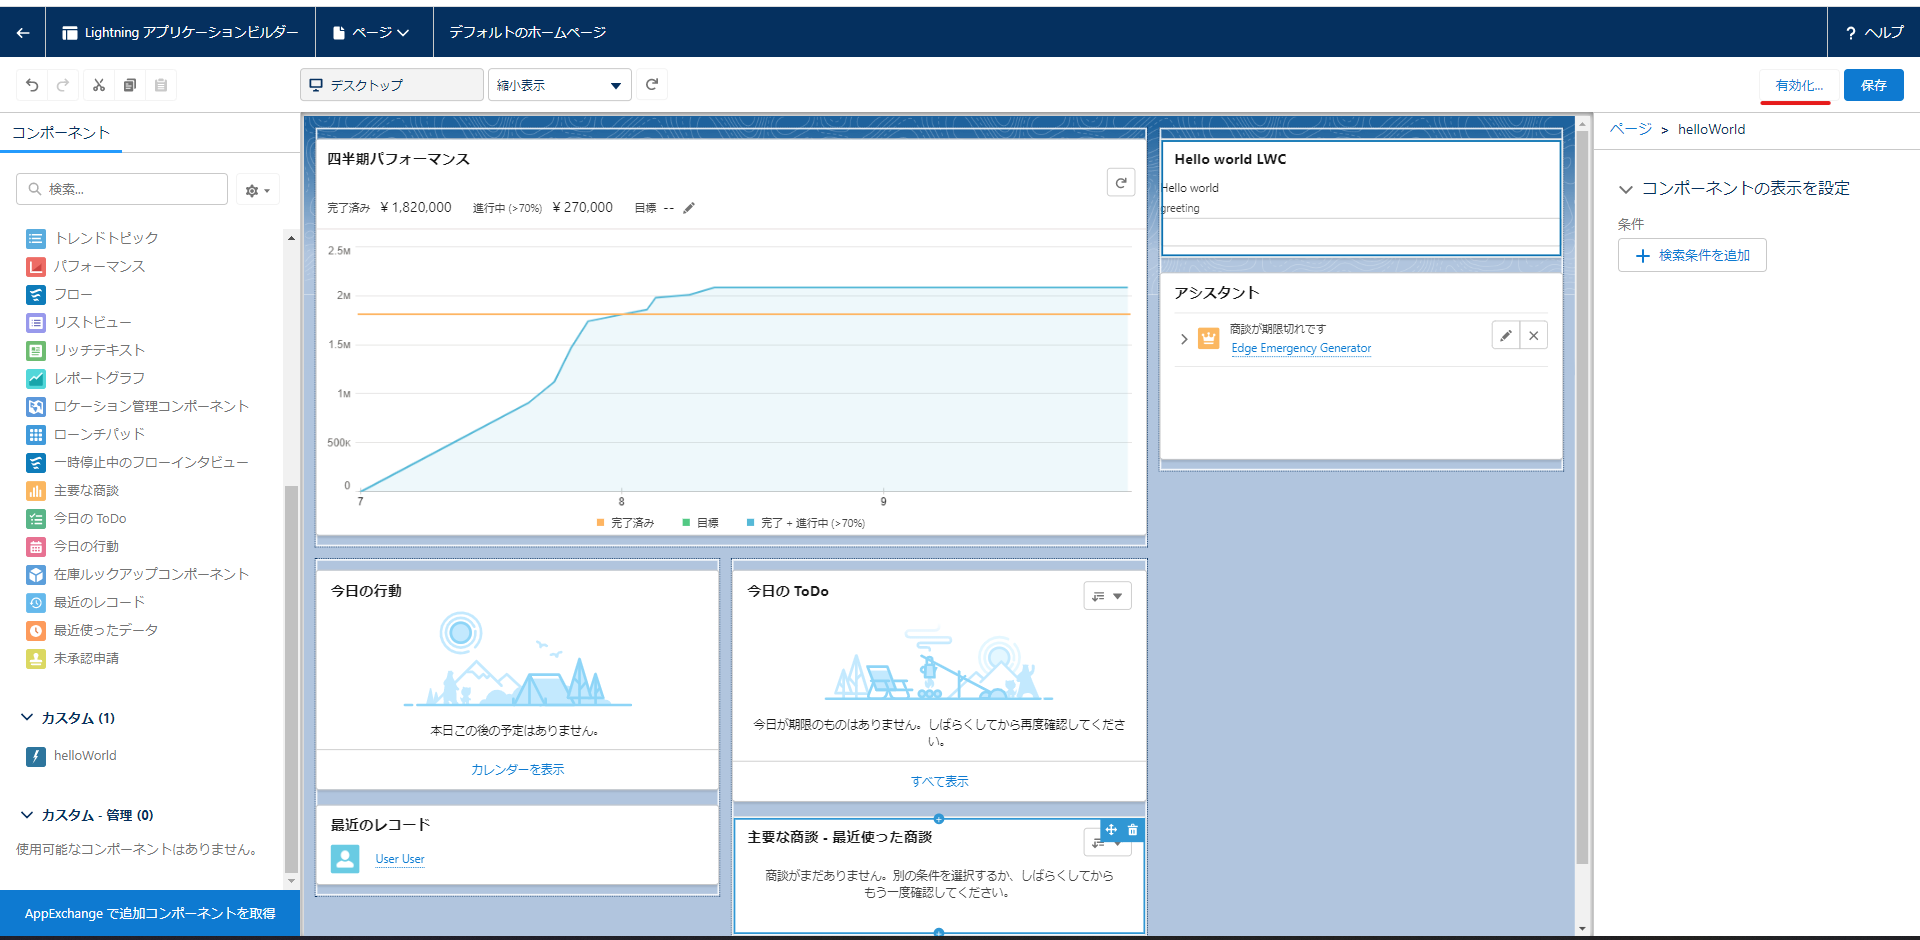
組織のデフォルトとして設定


セールスのアプリを開いて確認しましょう。

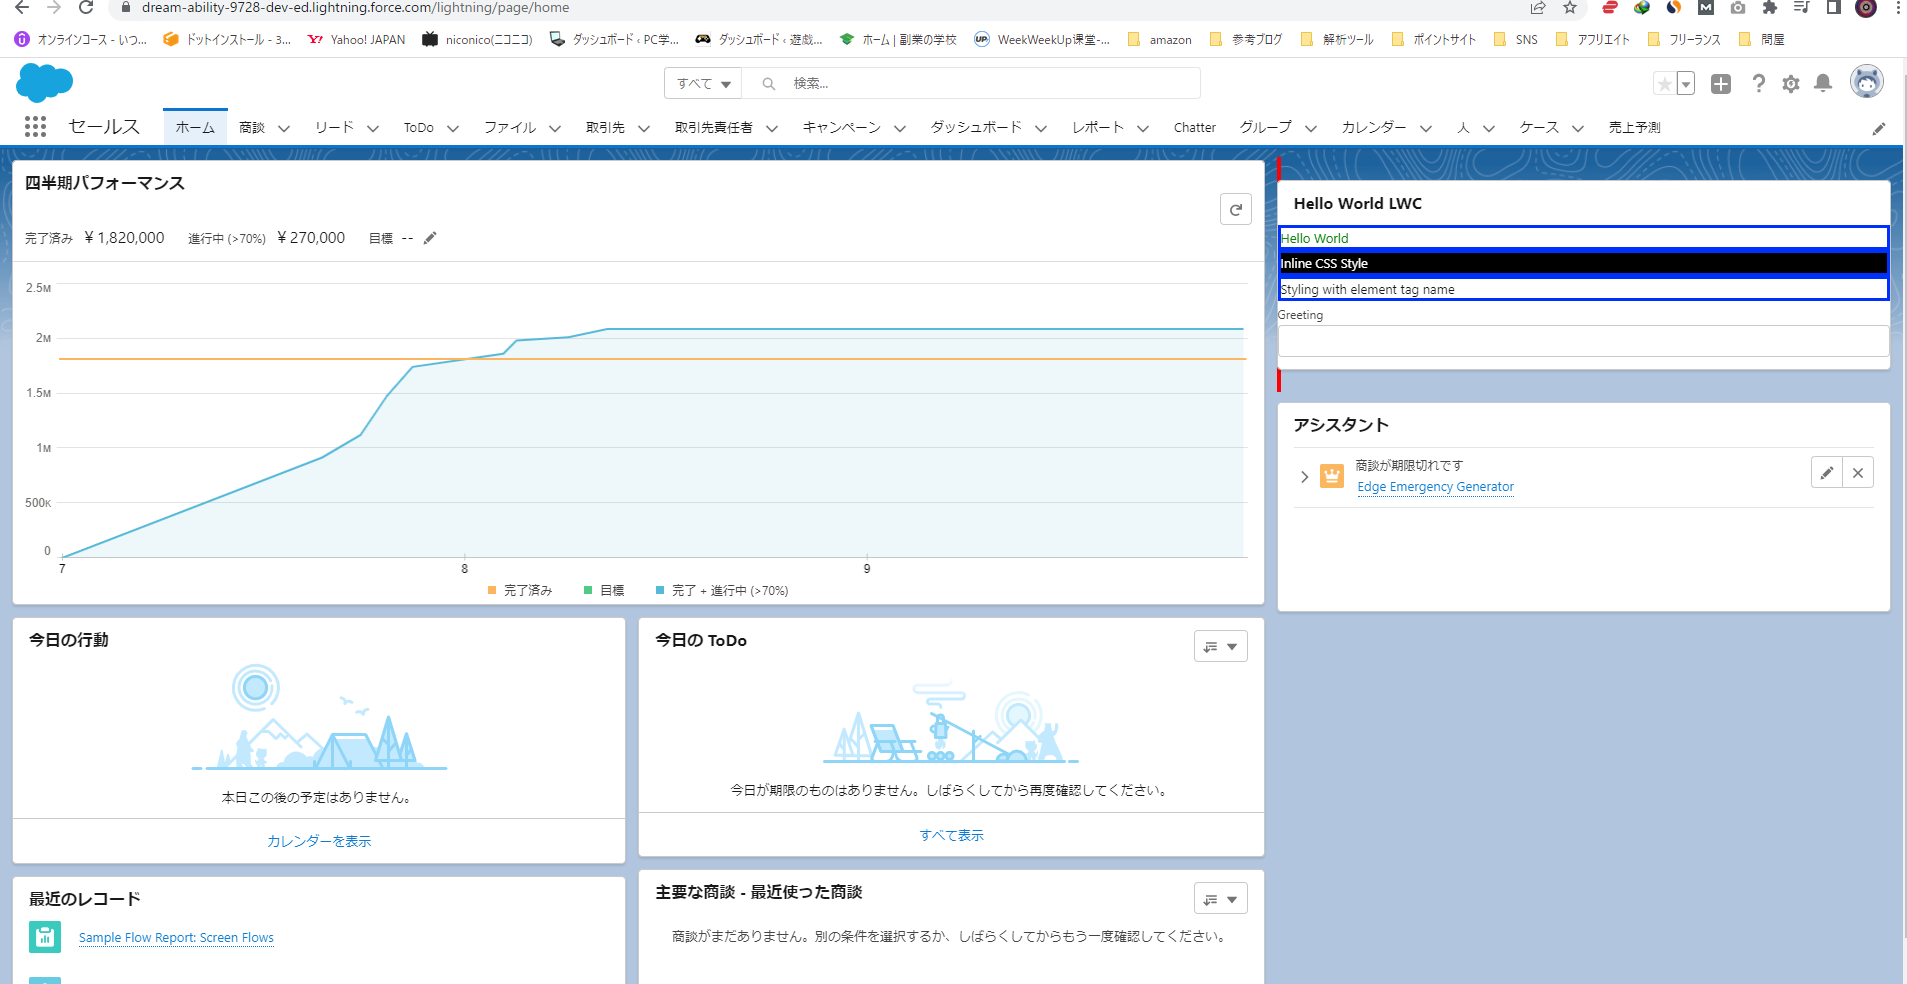
helloworldのフォルダにcssファイルを作成しましょう。htmlも変更しましょう。
.greeting-class{
    color: green;
}

div{
    border : 3px solid blue;
}

:host{
    border : 4px solid red;
}
<template>
   <lightning-card title="Hello World LWC">
       <div class="greeting-class">Hello {dynamicGreeting}</div>
       <div style="color: white; background:black;">Inline CSS Style</div>

       <div>Styling with element tag name</div>
       <lightning-input label="Greeting" onchange={greetingChangeHandler}></lightning-input>
   </lightning-card>
</template>
デプロイしましょう。
sfdx force:source:push
変更したかを確認してみよう。

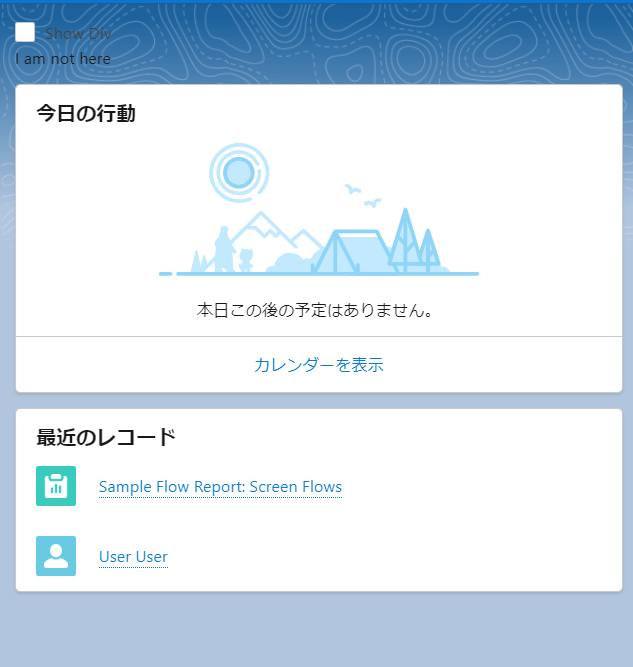
1-2.条件付きレンダリング(表示)
条件で表示内容を決めるLWCを作成する、名前をconditionalRenderingExampleとする。

今回はチェックボックスに反応して表示内容を変更するLWCを作成するため、conditionalRenderingExampleを以下内容に変更しましょう。
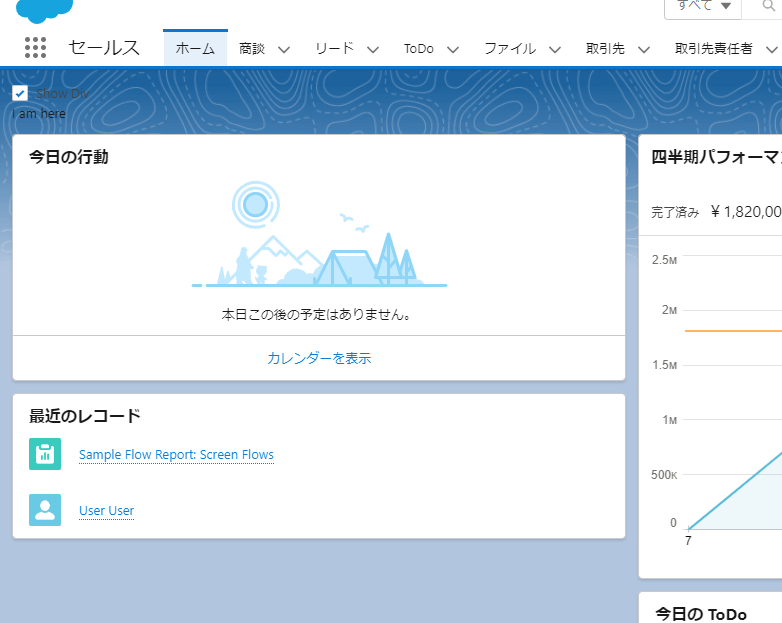
<template>

    <lightning-input type="checkbox" label="Show Div" onchange={showDivHandler}></lightning-input>
    <template if:true={displayDiv}>
        <div>I am here</div>
    </template>
    <template if:false={displayDiv}>
        <div>I am not here</div>
    </template>
</template>
import { LightningElement, track } from 'lwc';

export default class ConditionalRenderingExample extends LightningElement {
    @track displayDiv = false;

    showDivHandler(event){
        this.displayDiv = event.target.checked;
    }

}
デプロイして実装して確認しましょう。
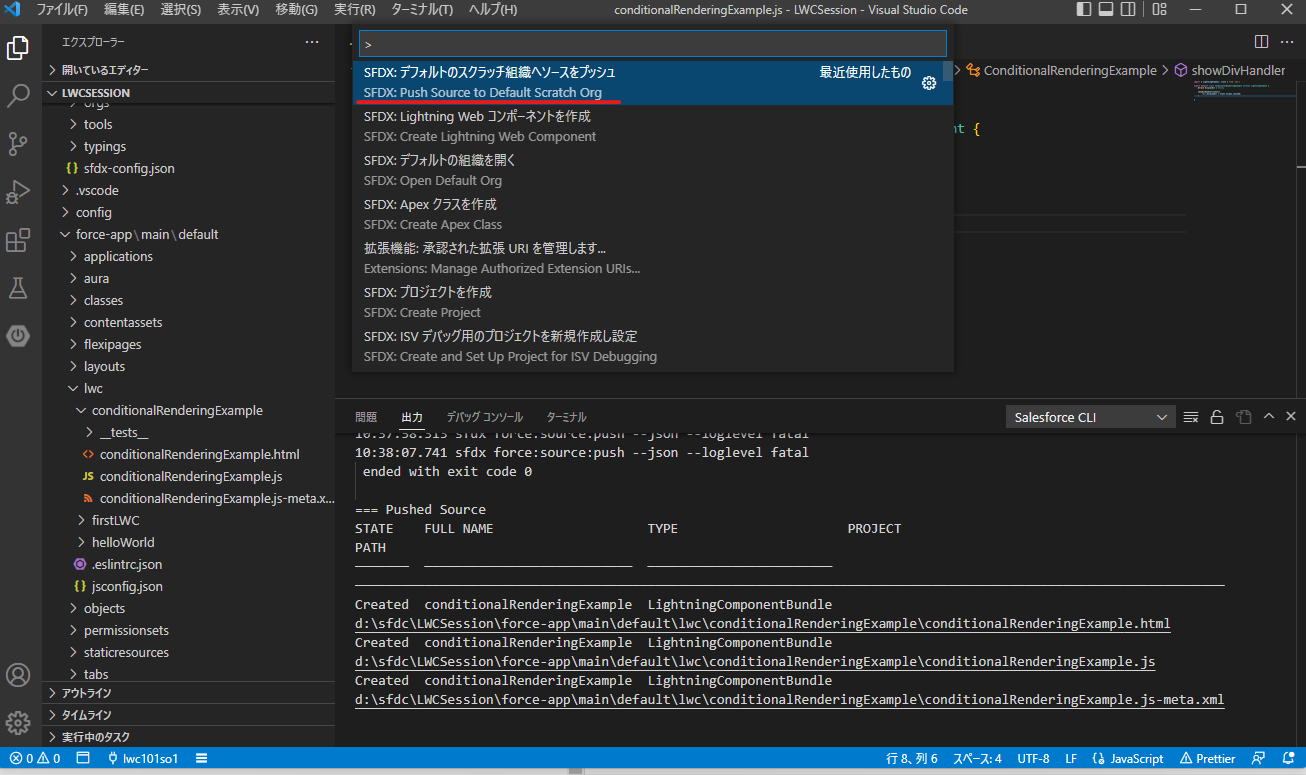
カスタムに今回作成したコンポーネントがない

メタデータファイルを開き、isExposedを変更してtargetsの内容も変更してもう一度pushしましょう。
<?xml version="1.0" encoding="UTF-8"?>
<LightningComponentBundle xmlns="http://soap.sforce.com/2006/04/metadata">
    <apiVersion>55.0</apiVersion>
    <isExposed>true</isExposed>
       <targets>
        <target>lightning__RecordPage</target>
        <target>lightning__AppPage</target>
        <target>lightning__HomePage</target>
    </targets>
</LightningComponentBundle>
lwcをアップロードするときにisExposedを変更して表示するページ指定も忘れずに

実装した結果を確認しましょう。
1-5.ループと反復処理
ここではlwcでループと反復処理を実現する。まず、jsにcity名になる配列を準備する。
import { LightningElement, track } from 'lwc';

export default class ConditionalRenderingExample extends LightningElement {
    @track displayDiv = false;
    @track cityList = ['Tokyo', 'Beijing', 'New York', 'Moscow'];
    showDivHandler(event){
        this.displayDiv = event.target.checked;
    }

}
次に、htmlでcity名をfor:eachループ方法で一覧表示する内容を追加する
<template>

    <lightning-input type="checkbox" label="Show Div" onchange={showDivHandler}></lightning-input>
    <template if:true={displayDiv}>
        <div>I am here</div>
    </template>
    <template if:false={displayDiv}>
        <div>I am not here</div>
    </template>

    <template for:each={cityList} for:item="city">
        <p key={city}>{city}</p>
    </template>
</template>
デプロイして確認しましょう。

反復処理の方法を追加して確かめましょう
<template>

    <lightning-input type="checkbox" label="Show Div" onchange={showDivHandler}></lightning-input>
    <template if:true={displayDiv}>
        <div>I am here</div>
    </template>
    <template if:false={displayDiv}>
        <div>I am not here</div>
    </template>

    <template for:each={cityList} for:item="city">
        <p key={city}>{city}</p>
    </template>

    <h1>Below is an example of iterator directive</h1>
    <template iterator:it={cityList}>
        <p key={it.value}>{it.value}</p>
    </template>
</template>

1-6.少し複雑なLWCを作成する
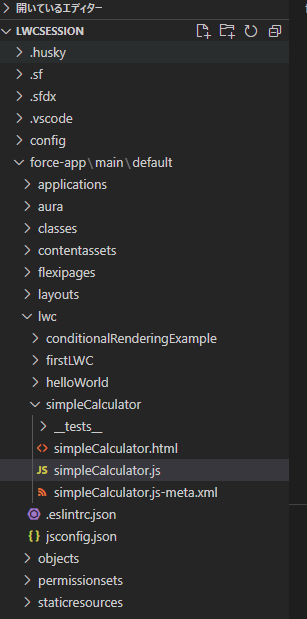
前のセクションで基本的なLWC作成とアップロードを学びました。ここで簡単な計算機をLWCで作成する。名前をsimpleCalculatorとする。
作成完了後はまず、メタデータを以下内容に変更しましょう。
  <?xml version="1.0" encoding="UTF-8"?>
<LightningComponentBundle xmlns="http://soap.sforce.com/2006/04/metadata">
    <apiVersion>55.0</apiVersion>
    <isExposed>true</isExposed>
    <description>Simple Calculator app build with LWC</description>
    <targets>
        <target>lightning__AppPage</target>
        <target>lightning__HomePage</target>
        <target>lightning__RecordPage</target>
    </targets>
</LightningComponentBundle>
次に、htmlを以下内容に変更しましょう。イベントとメソッドの呼び出しは{}を使う
<template>
    <lightning-card title="Simple Calculator" icon-name="standard:formula">
        <lightning-layout multiple-rows>
            <lightning-layout-item size="12" padding="around-medium">
                <lightning-input type="number" name="firstNumber" onchange={numberChangeHandler}></lightning-input>
            </lightning-layout-item>
            <lightning-layout-item size="12"  padding="around-medium">
                <lightning-input type="number" name="secondNumber"  onchange={numberChangeHandler}></lightning-input>
            </lightning-layout-item>
            <lightning-layout-item size="12" padding="around-medium">
                <lightning-button-group>
                    <lightning-button label="Add" icon-name="utility:add" icon-position="right" onclick={addHandler}></lightning-button>
                    <lightning-button label="Subtract" icon-name="utility:dash" icon-position="right" onclick={subHandler}></lightning-button>
                    <lightning-button label="Multiply" icon-name="utility:close" icon-position="right" onclick={multiplyHandler}></lightning-button>
                    <lightning-button label="Divide" icon-name="utility:magicwand" icon-position="right"  onclick={divisionHandler}></lightning-button>
                </lightning-button-group>
            </lightning-layout-item>
            <lightning-layout-item size="12" padding="around-medium">
                <lightning-formatted-text value={currentResult}></lightning-formatted-text>
            </lightning-layout-item>
        </lightning-layout>
    </lightning-card>
</template>
iconなどデザインに関わる内容をカスタマイズしたいならlightning design systemで確認しましょう。完成したらデプロイしましょう。
https://www.lightningdesignsystem.com/icons/
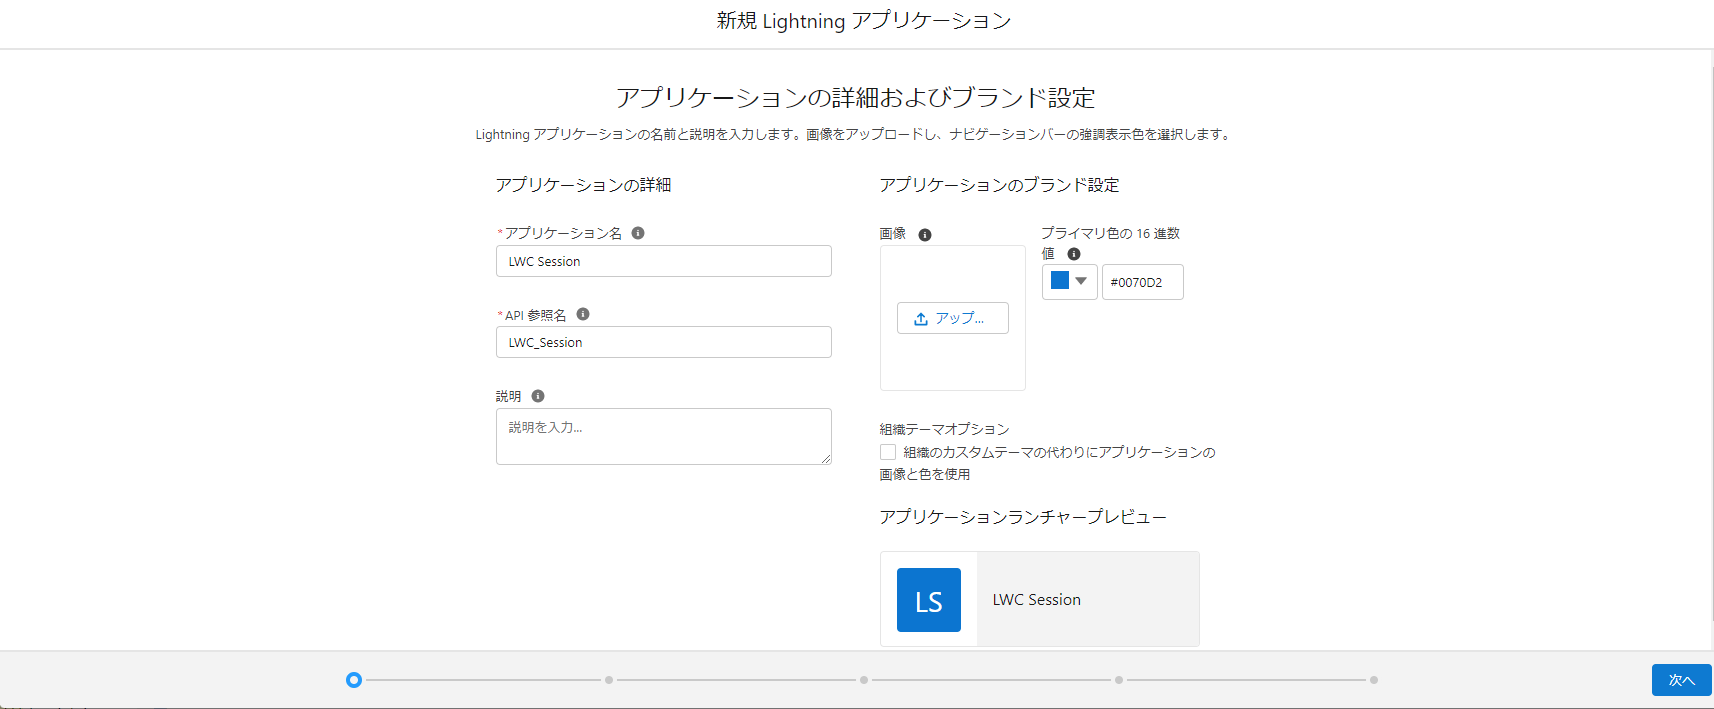
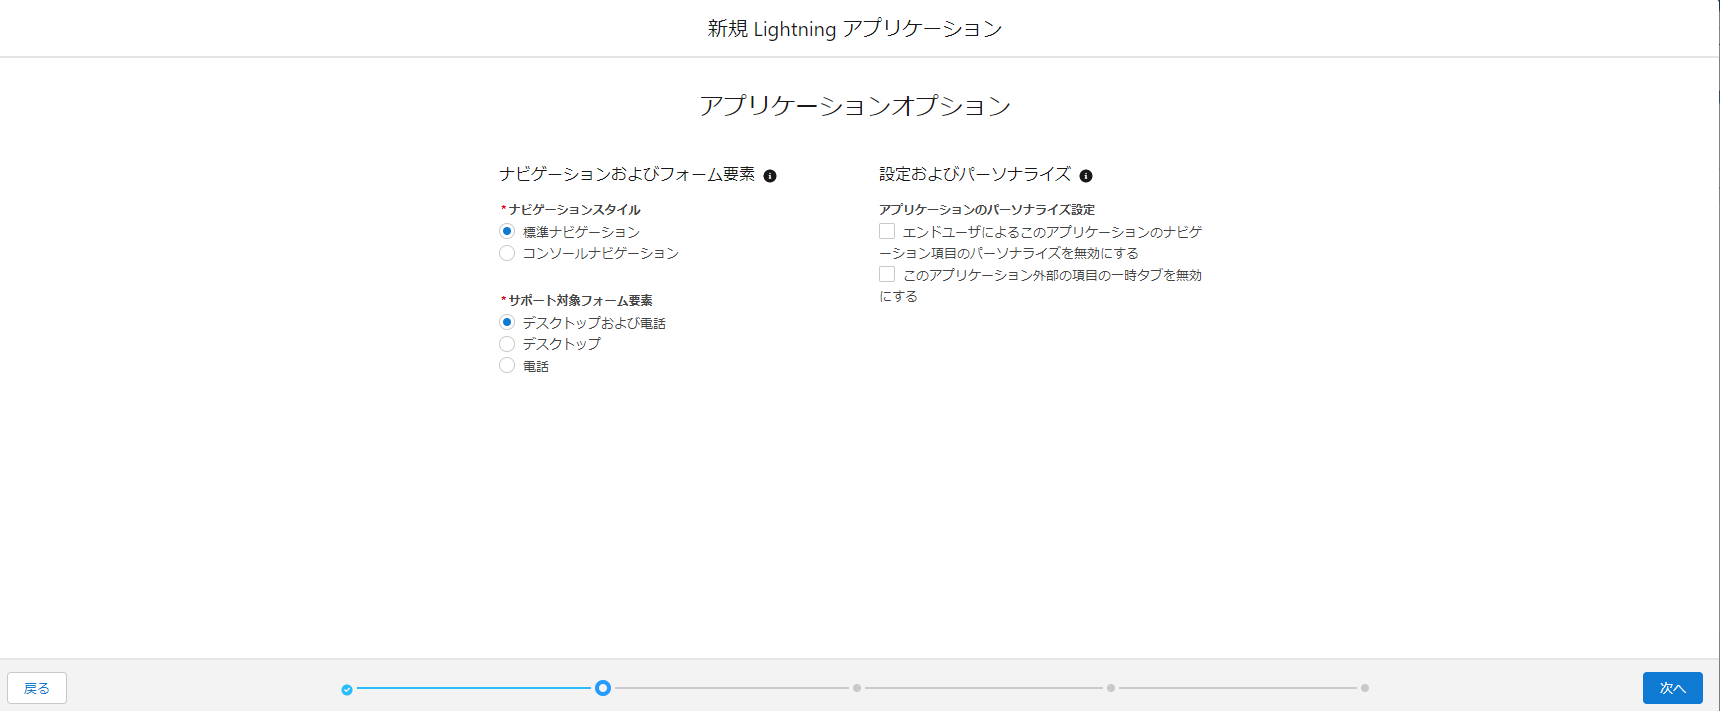
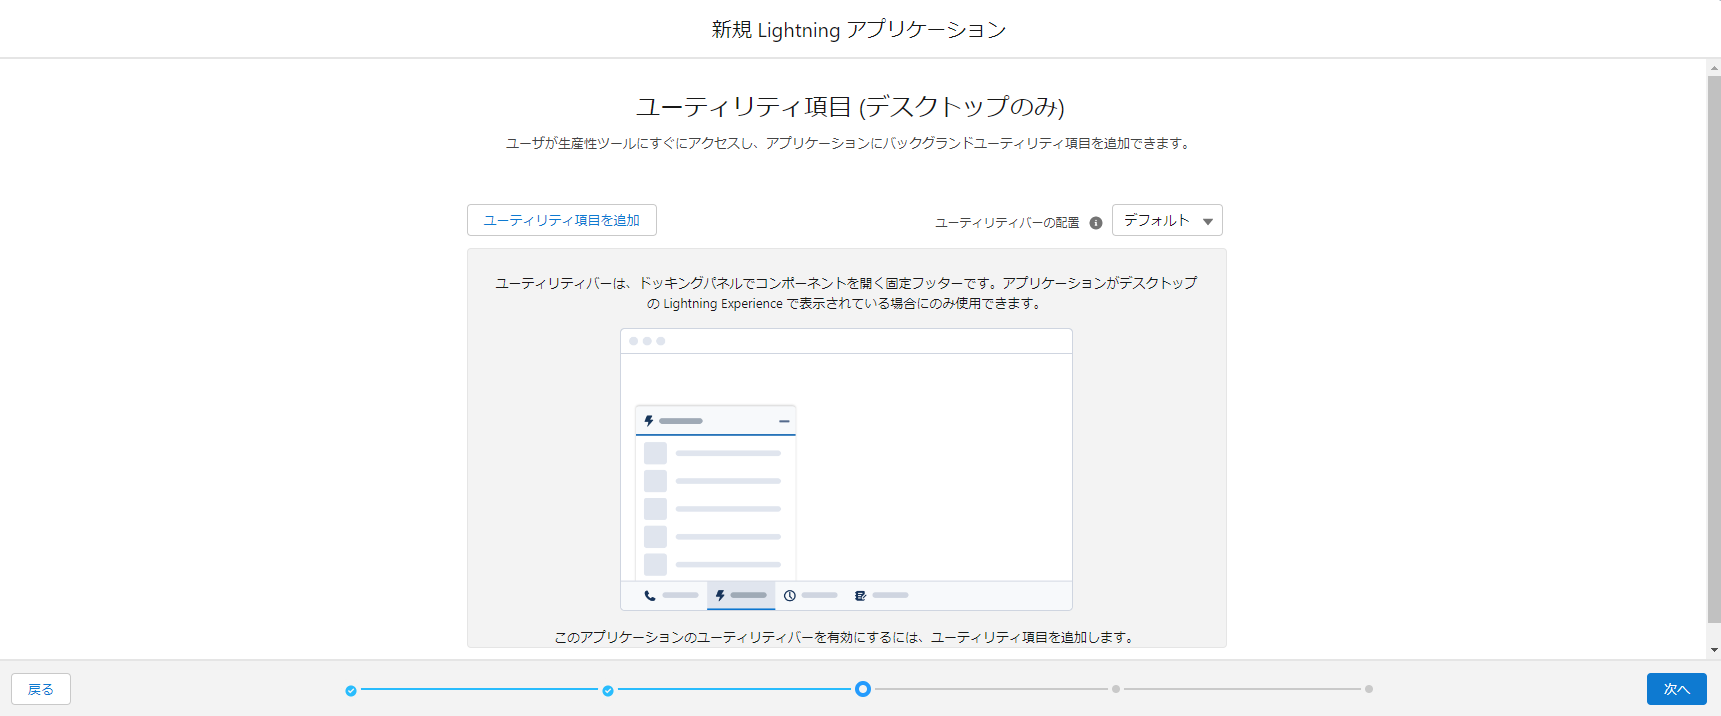
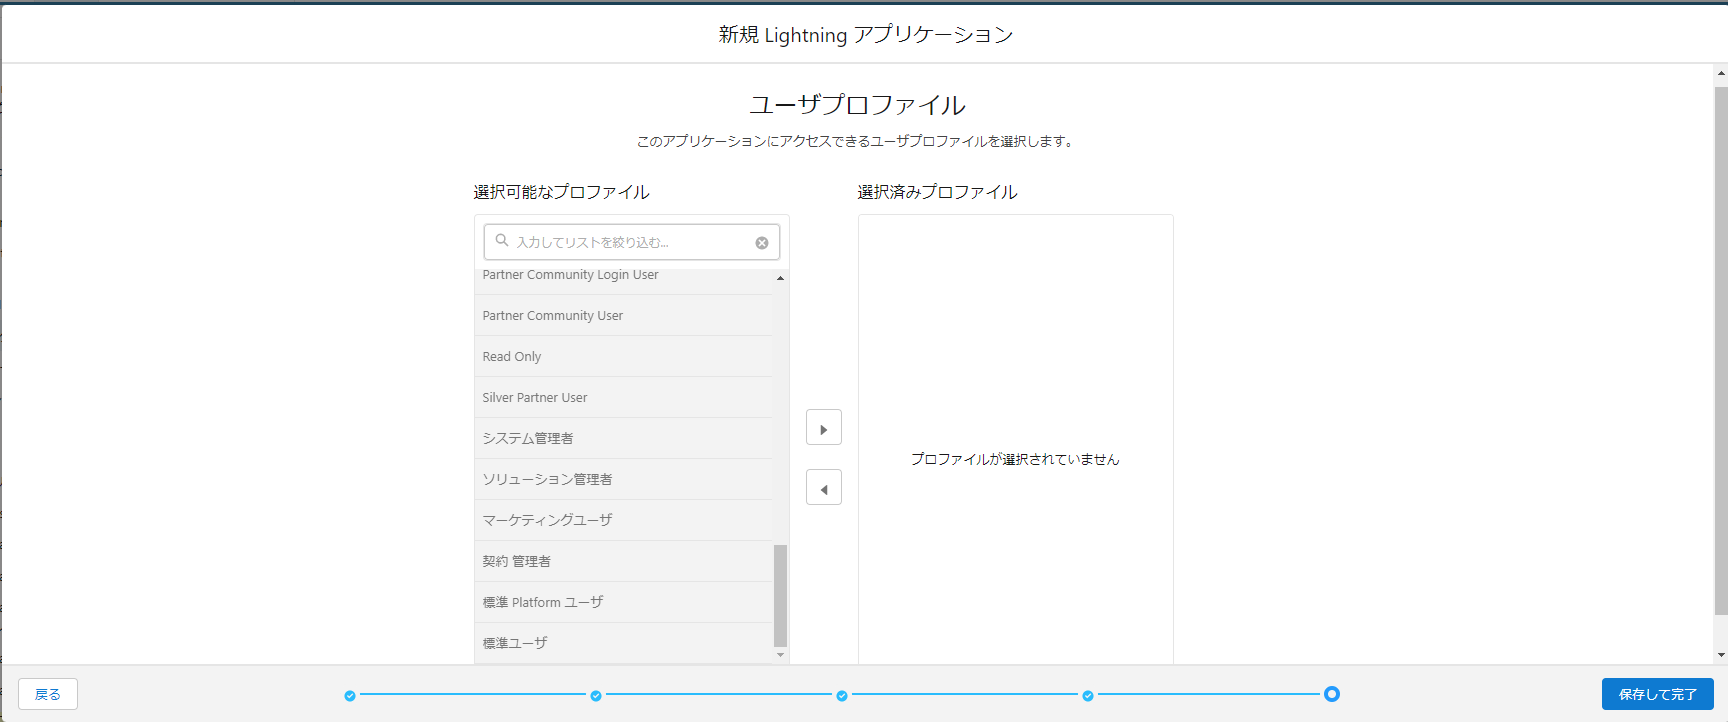
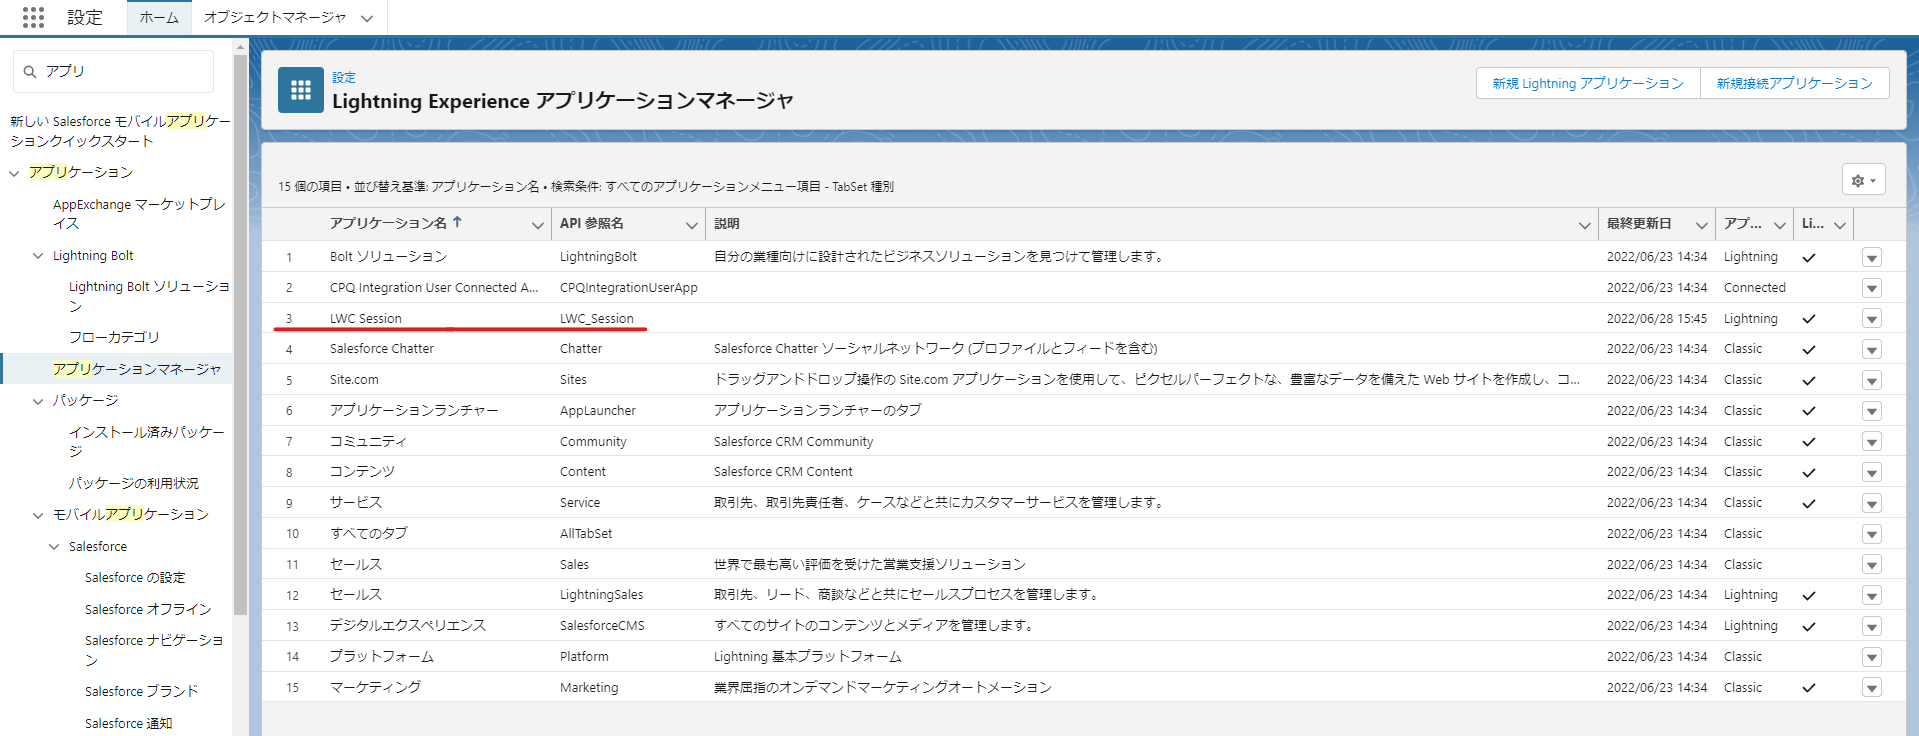
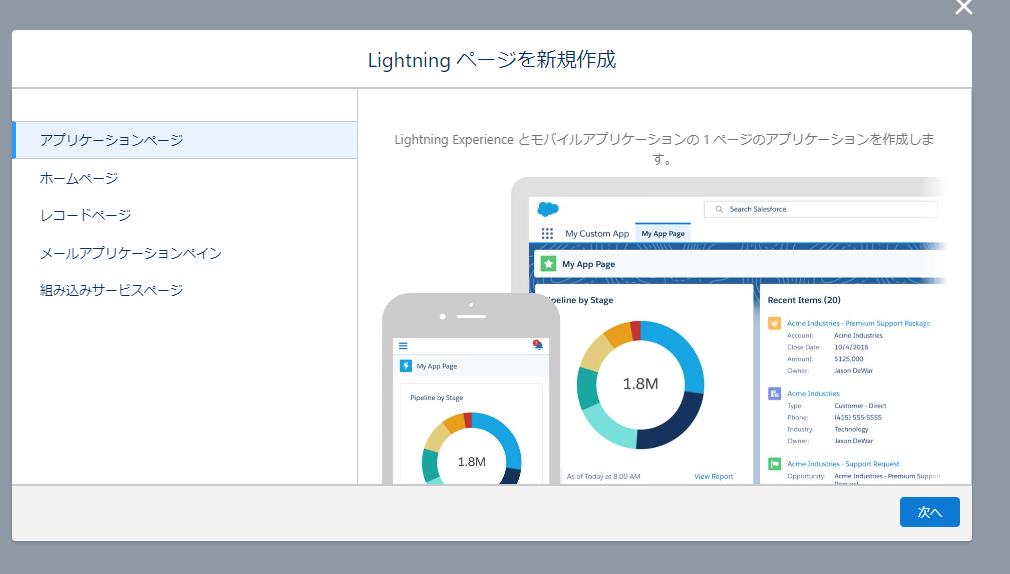
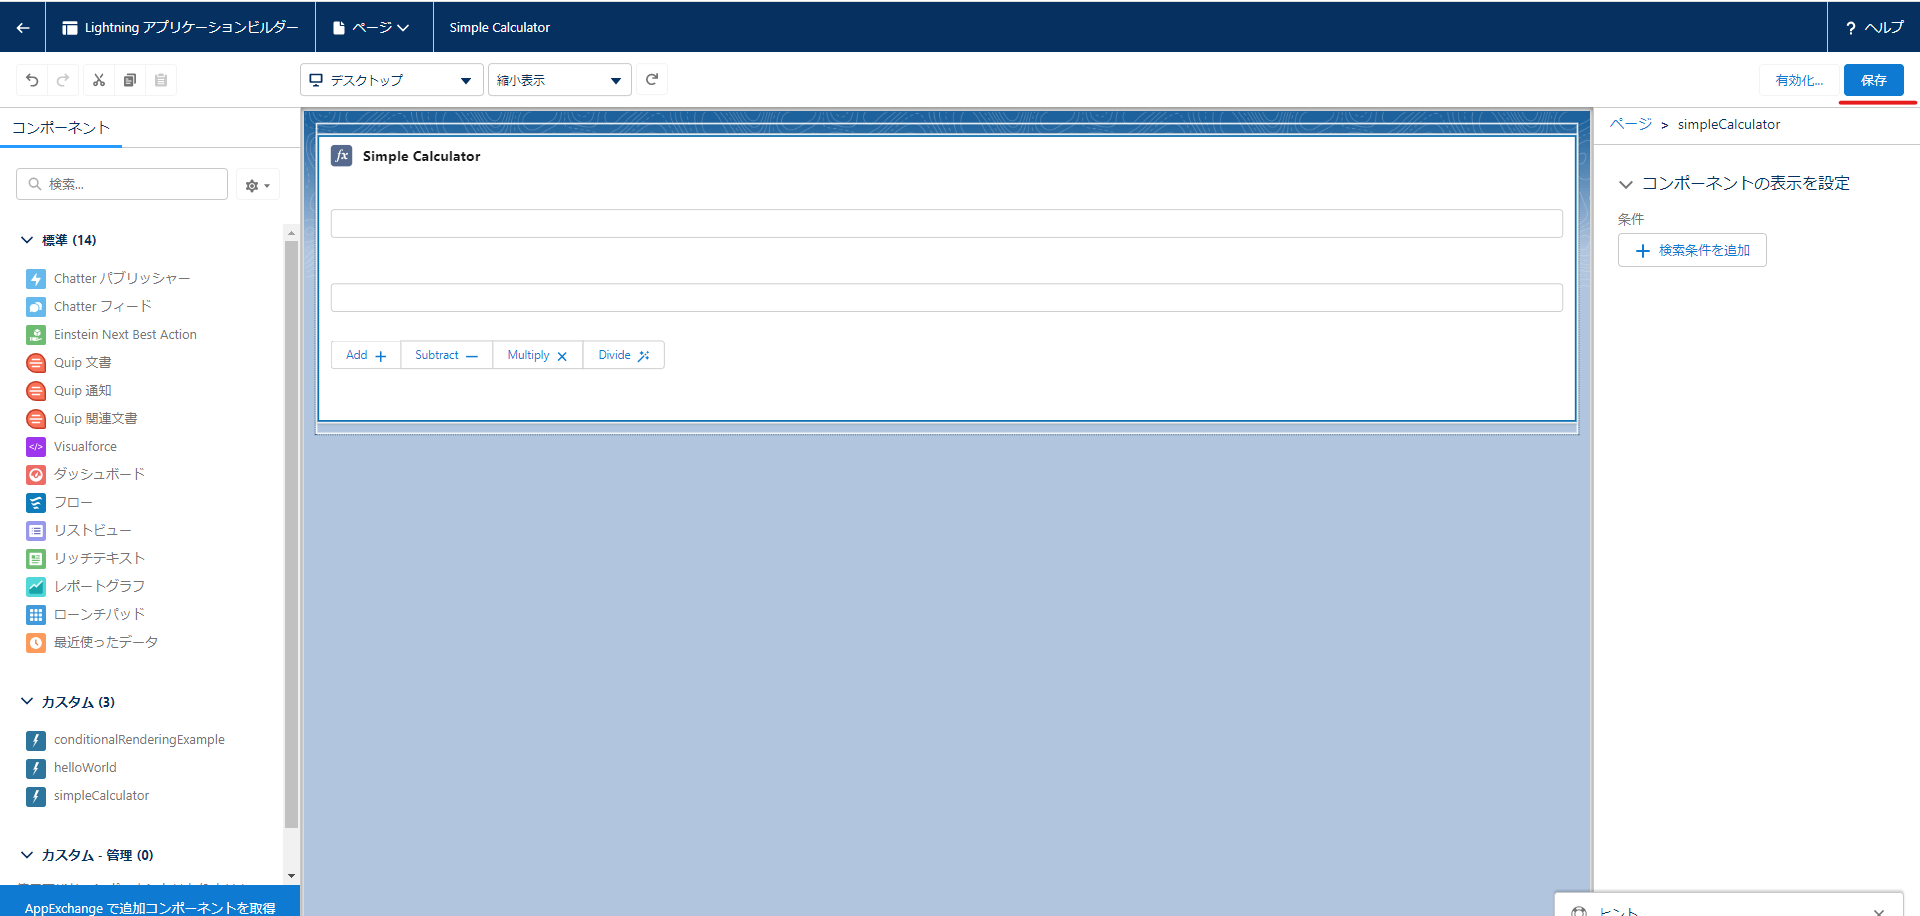
今回はホームページではなく新規lightning ページに実装するので先ずは新規lightningアプリケーションを作成しましょう。アプリ名を
LWC Sessionとする。ユーザープロファイルはすべてを追加。


次はアプリケーションビルダーを開いて新規lightning ページを作成しましょう。
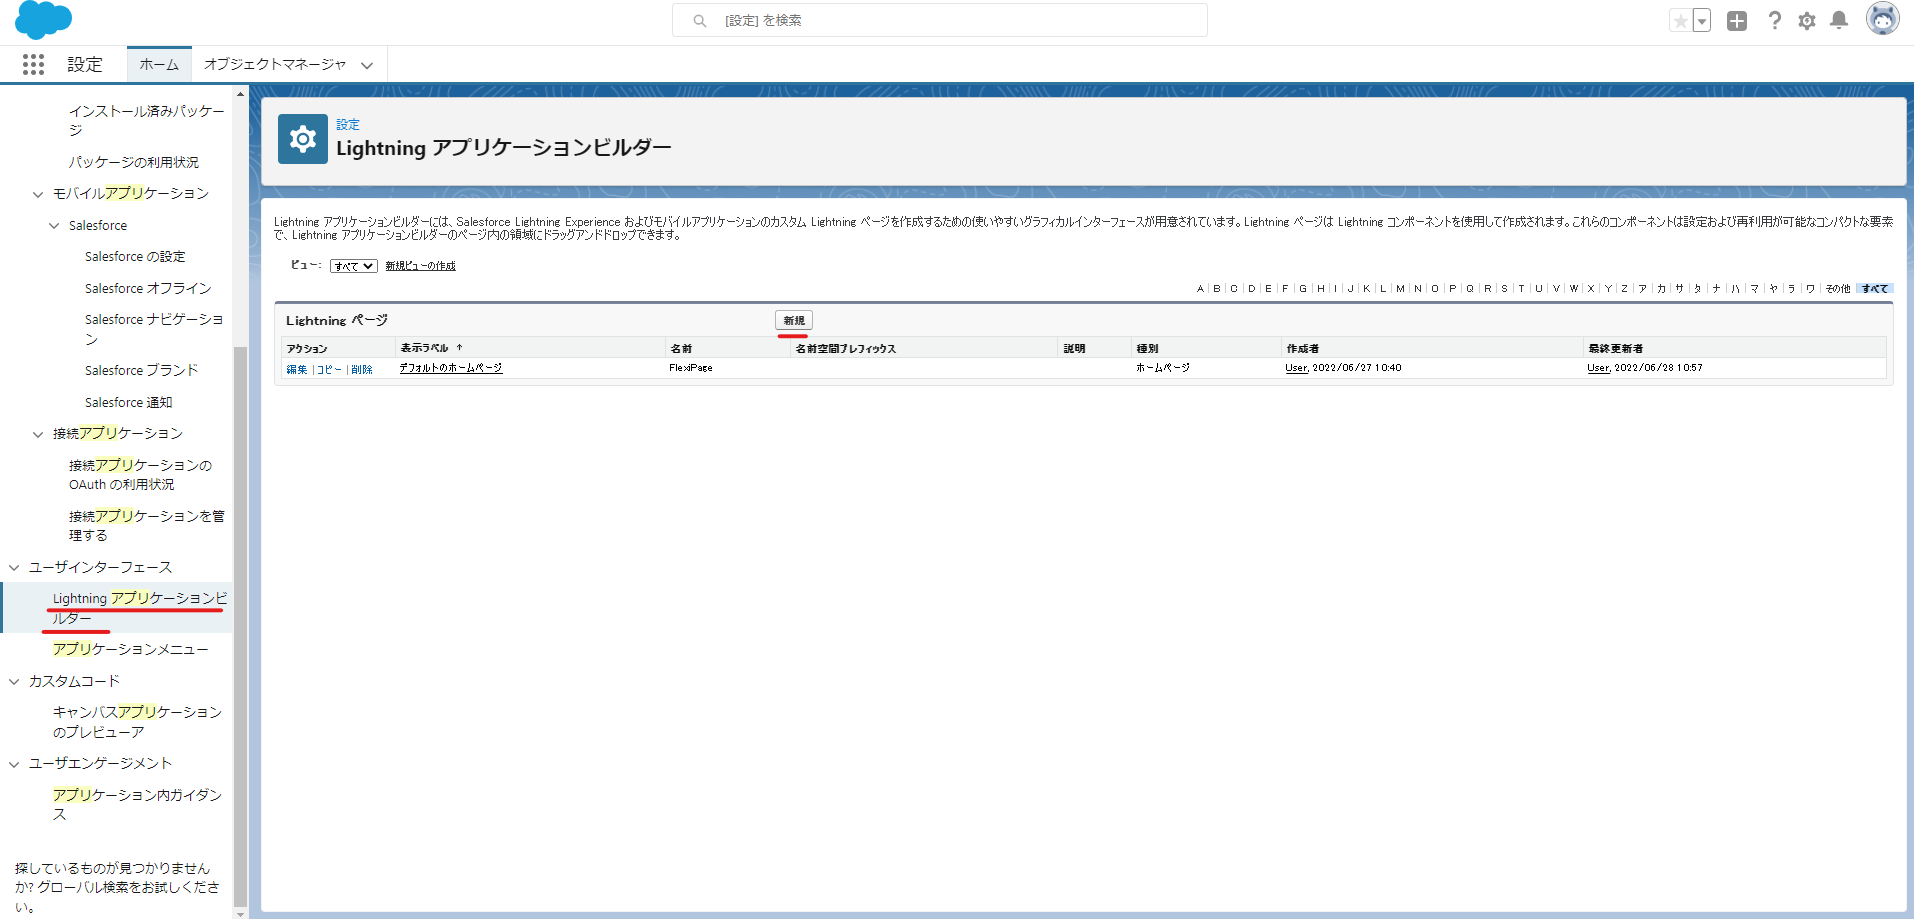
次へを推してラベル名をSimple Calculatorとする
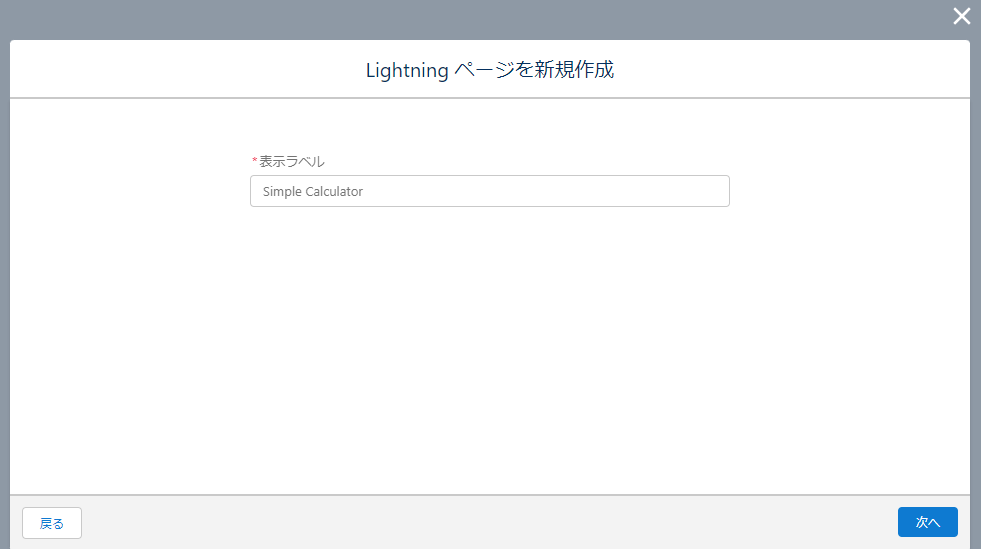
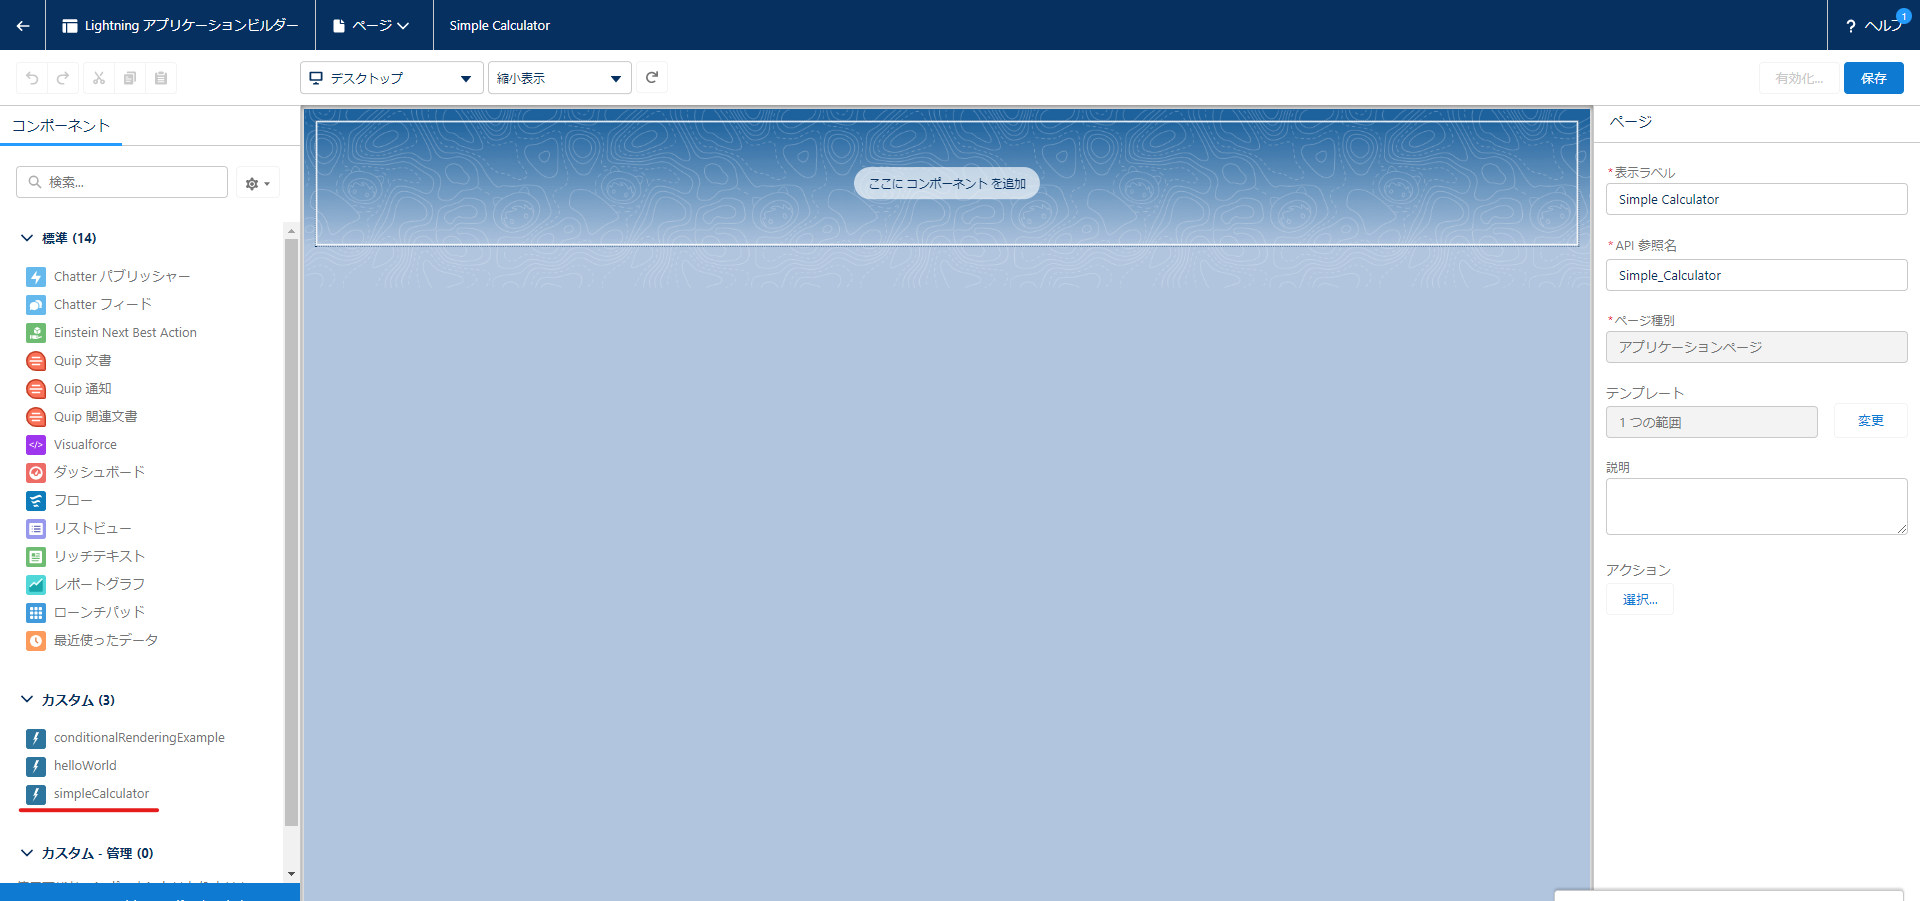
1つの範囲と選択する

SimpleCalculatorのLWCをドラッグして保存しましょう
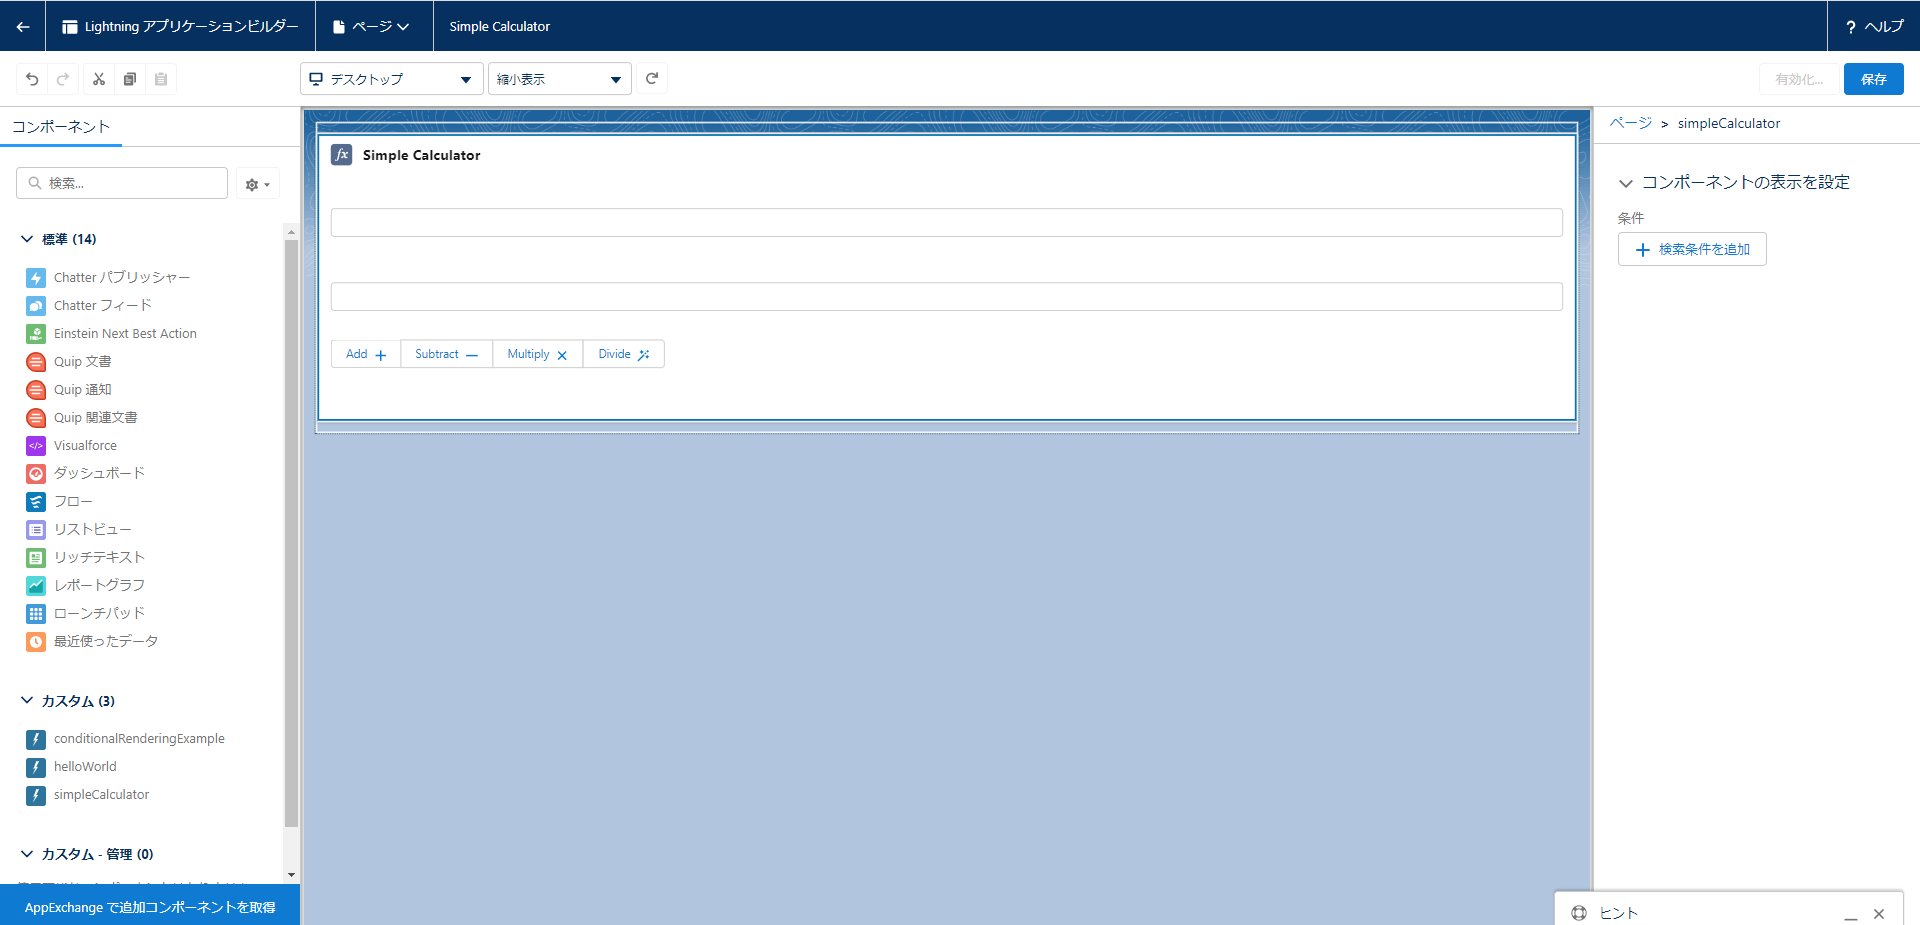
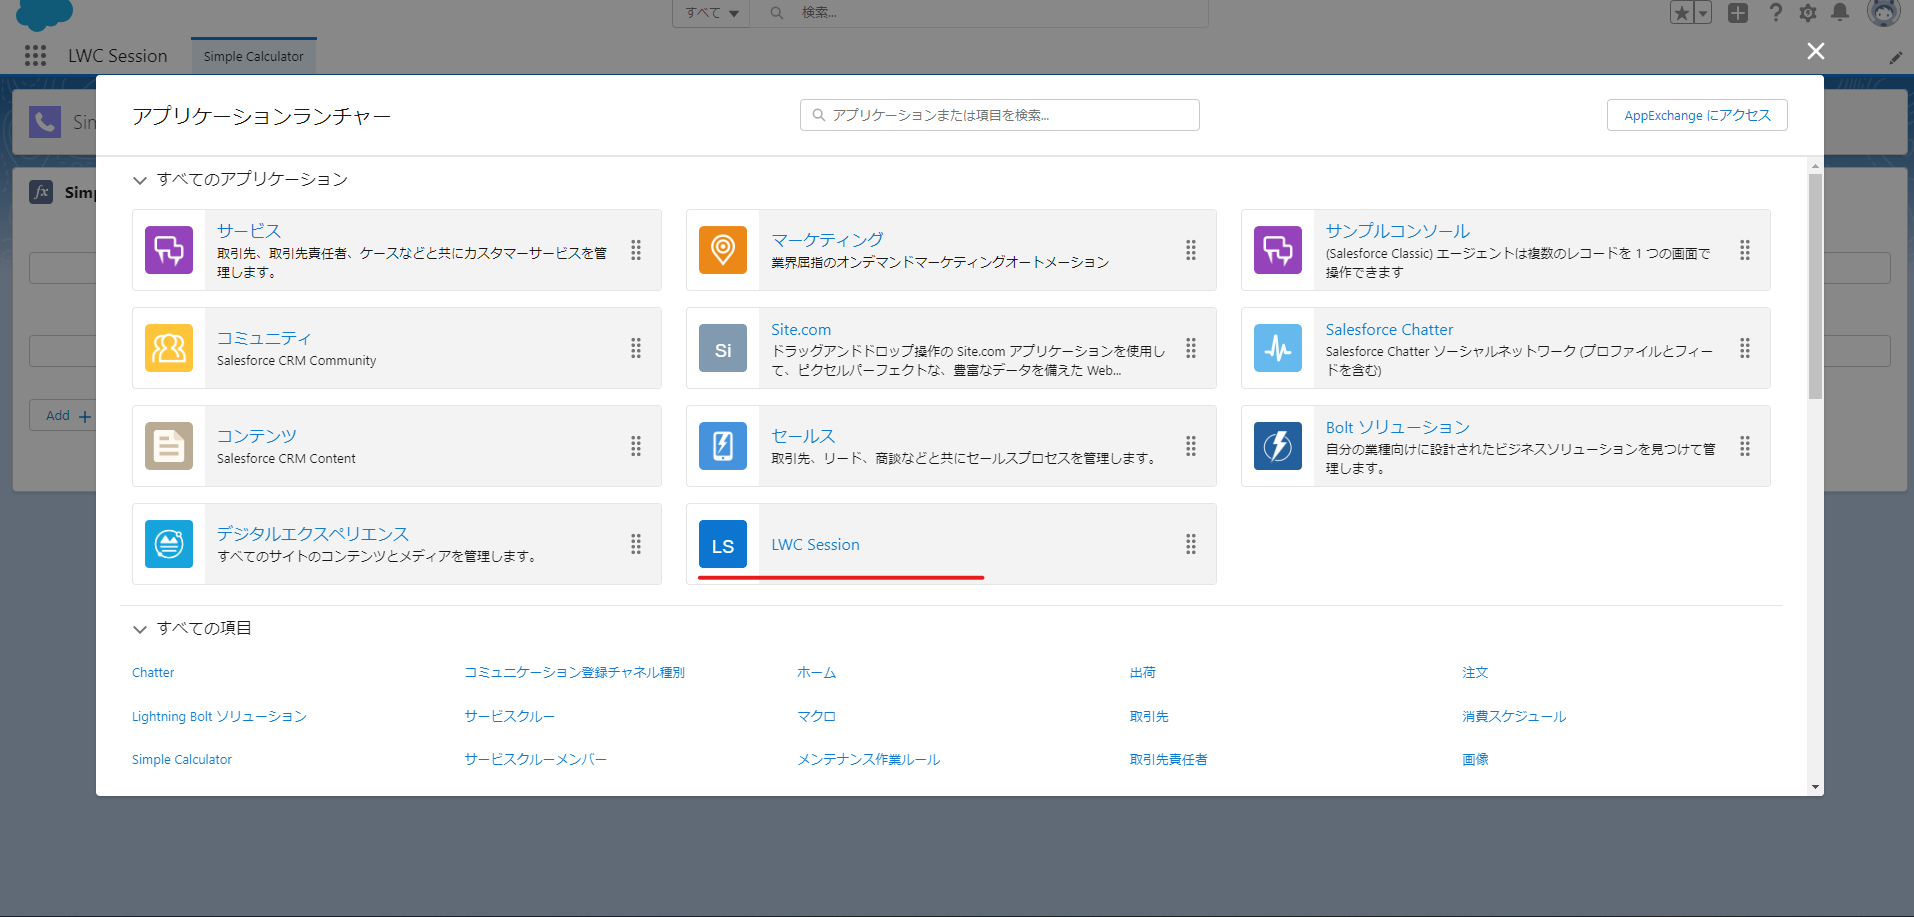
アプリケーションランチャーで作成したアプリを確認しましょう。
jsファイルを以下内容に変更してpushしましょう。
import { LightningElement, track } from 'lwc';
export default class SimpleCalculator extends LightningElement {
@track currentResult;
firstNumber;
secondNumber;
numberChangeHandler(event){
const inputBoxName = event.target.name;
if(inputBoxName === 'firstNumber'){
this.firstNumber = event.target.value;
} else if(inputBoxName === 'secondNumber'){
this.secondNumber = event.target.value;
}
}
addHandler(){
const firstN = parseInt(this.firstNumber);
const secondN = parseInt(this.secondNumber);
//this.currentResult = 'Result of '+firstN+'+'+secondN+' is '+(firstN+secondN);
this.currentResult = `Result of ${firstN}+${secondN} is ${firstN+secondN}`;
}
subHandler(){
const firstN = parseInt(this.firstNumber);
const secondN = parseInt(this.secondNumber);
//this.currentResult = 'Result of '+firstN+'+'+secondN+' is '+(firstN+secondN);
this.currentResult = `Result of ${firstN}-${secondN} is ${firstN-secondN}`;
}
multiplyHandler(){
const firstN = parseInt(this.firstNumber);
const secondN = parseInt(this.secondNumber);
//this.currentResult = 'Result of '+firstN+'+'+secondN+' is '+(firstN+secondN);
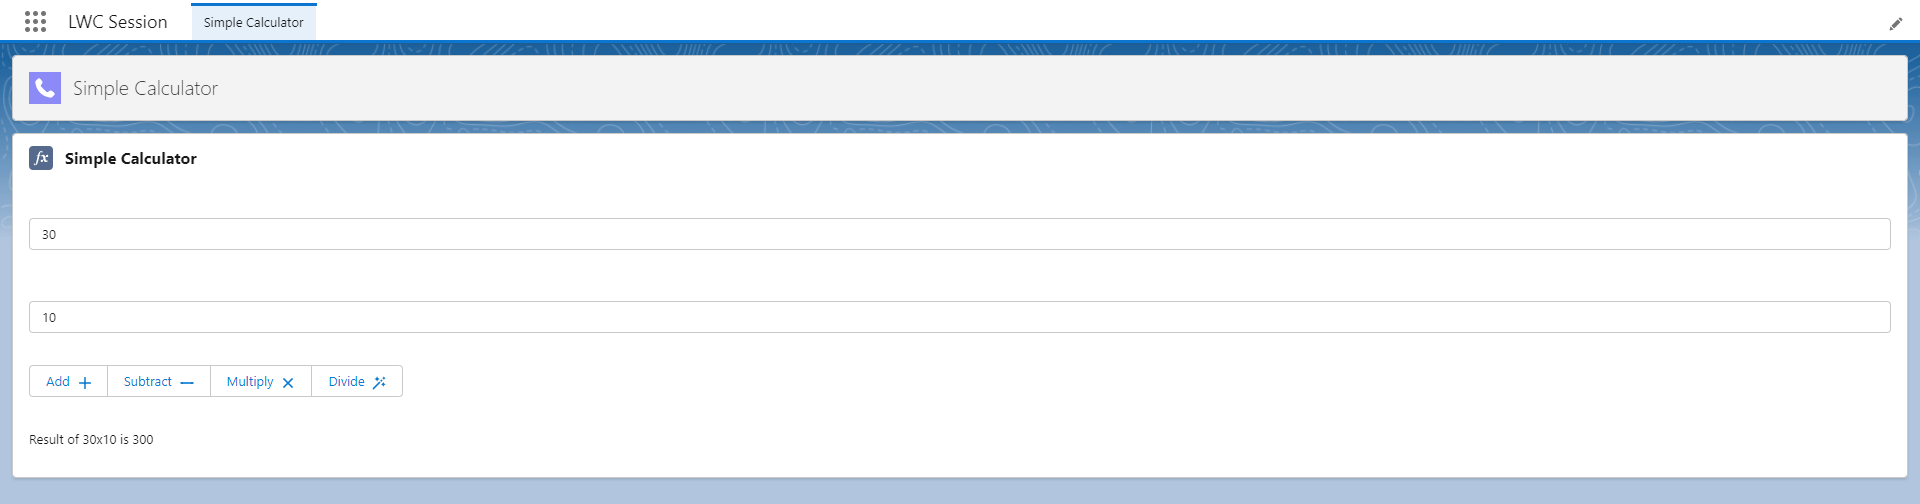
this.currentResult = `Result of ${firstN}x${secondN} is ${firstN*secondN}`;
}
divisionHandler(){
const firstN = parseInt(this.firstNumber);
const secondN = parseInt(this.secondNumber);
//this.currentResult = 'Result of '+firstN+'+'+secondN+' is '+(firstN+secondN);
this.currentResult = `Result of ${firstN}/${secondN} is ${firstN/secondN}`;
}
}
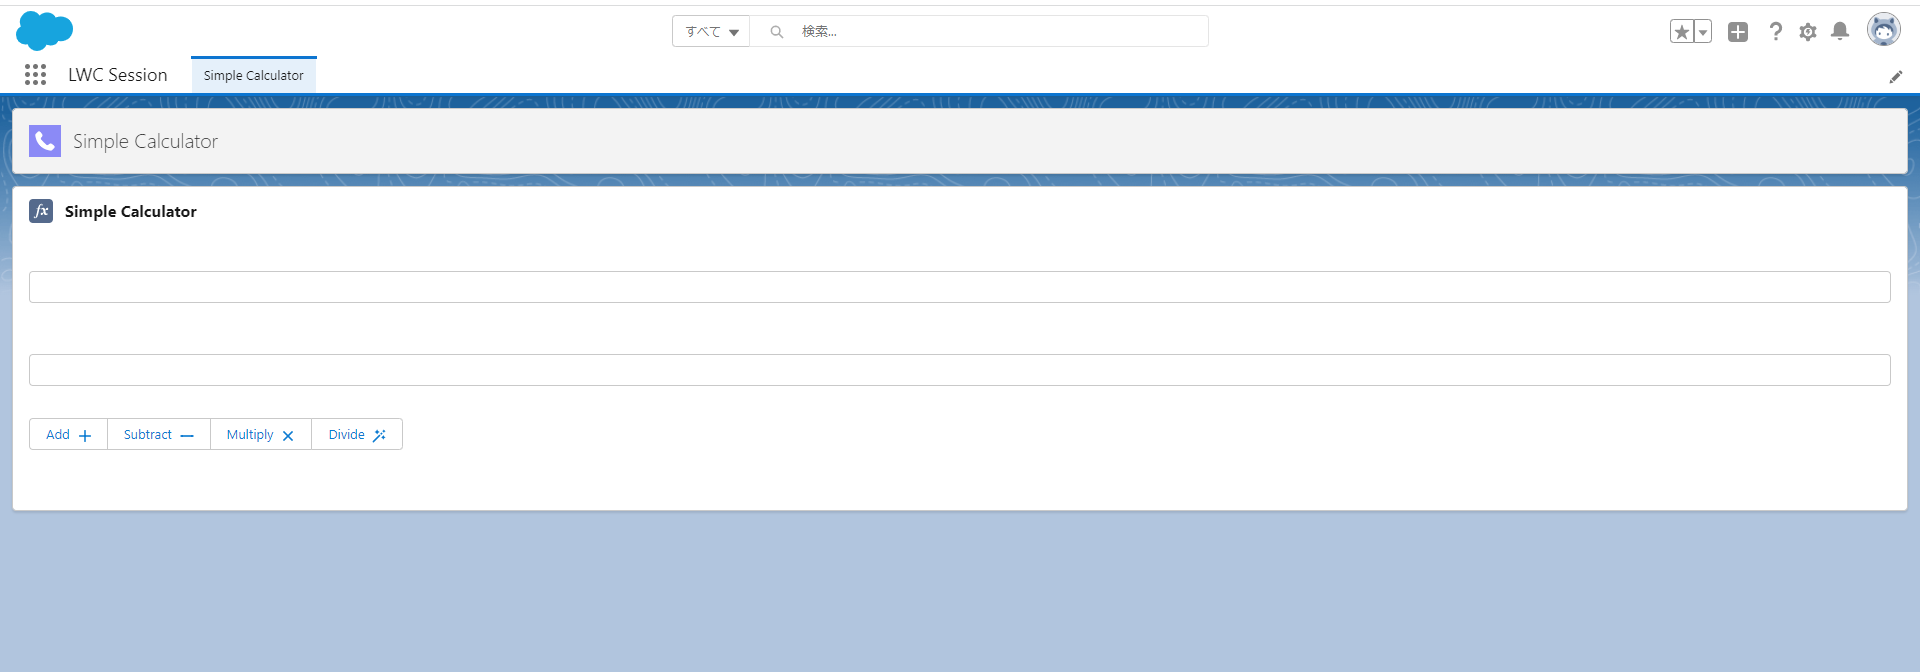
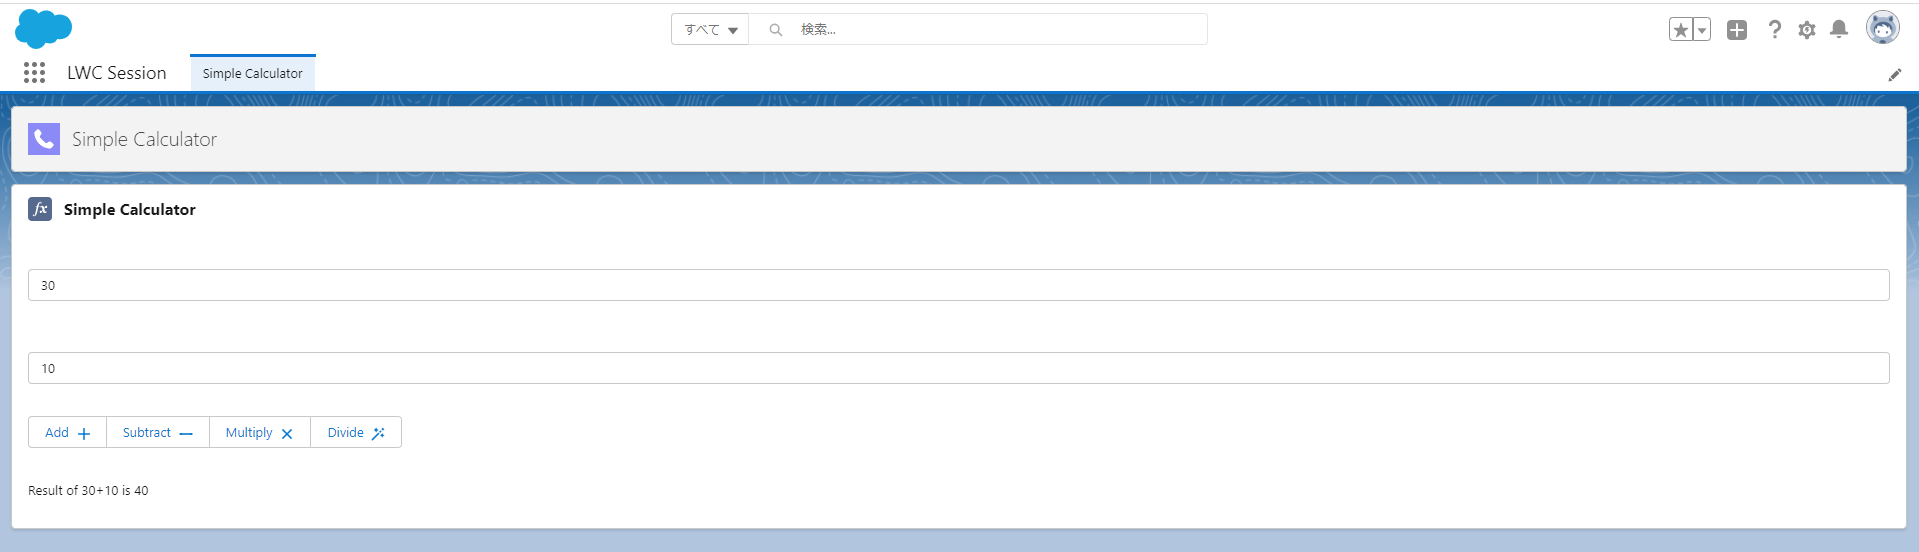
実装した内容を確かめましょう


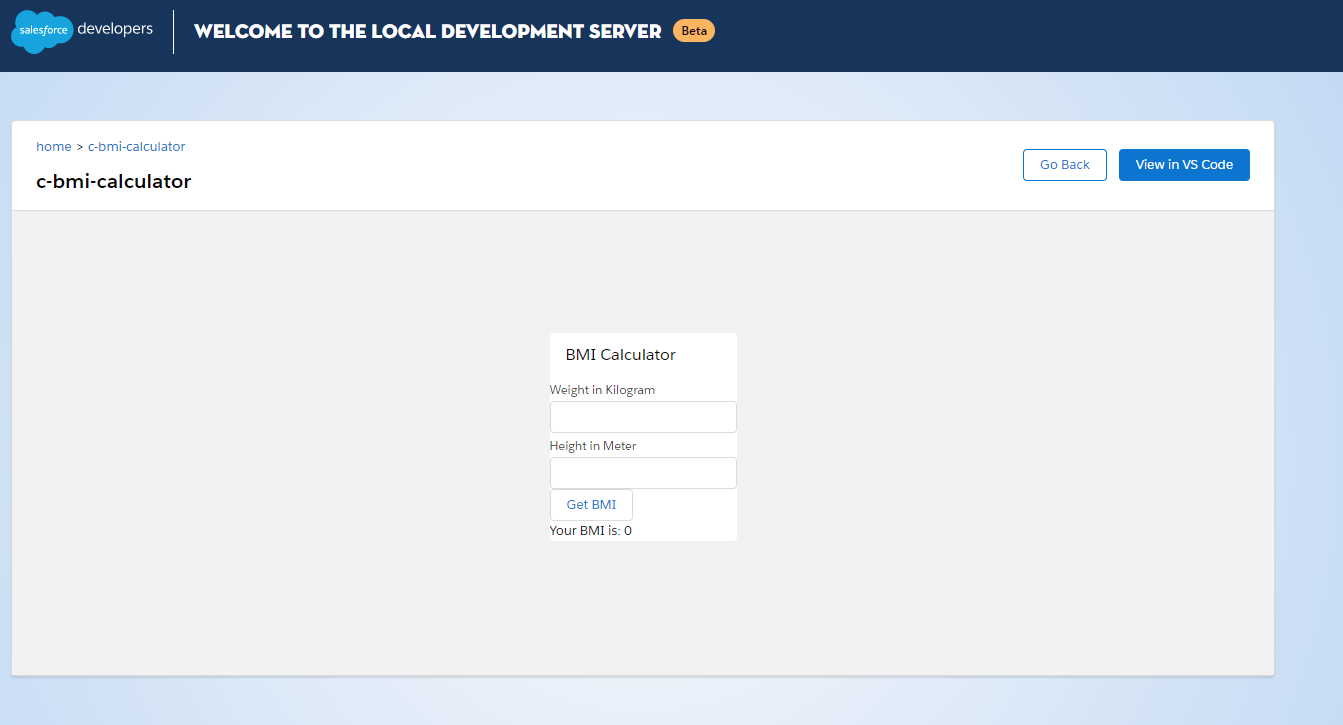
1-7.@trackの応用
2020年以降LWCのバージョンは関数とメソッドの公開はtrackライブラリを使わずに公開することができる。しかし、ハッシュマップと配列を呼び出したい場合は@trackが必須のまま。その試しに新規LWCを作成しましょう、名前がbmiCalculator。
作成後はまずメタデータをアプリページで作れるように変更しましょう。
<?xml version="1.0" encoding="UTF-8"?>
<LightningComponentBundle xmlns="http://soap.sforce.com/2006/04/metadata" fqn="bmiCalculator">
    <apiVersion>45.0</apiVersion>
          <isExposed>true</isExposed>
    <targets>
        <target>lightning__RecordPage</target>
        <target>lightning__AppPage</target>
        <target>lightning__HomePage</target>
    </targets>
</LightningComponentBundle>
次に、BMI計算用配列と計算メソッドを用意しましょう。
import { LightningElement, track } from 'lwc';

export default class BmiCalculator extends LightningElement {
    cardTitle = 'BMI Calculator';

     bmiData={
        weight:0,
        height:0,
        result:0
    }

    onWeightChange(event){
        this.bmiData.weight = parseFloat(event.target.value);
    }

    onHeightChange(event){
        this.bmiData.height = parseFloat(event.target.value);
    }

    calculateBMI(){
        try{
        this.bmiData.result = this.bmiData.weight/(this.bmiData.height*this.bmiData.height);
        } catch(error){
            this.bmiData.result = undefined;
        }
    }
}
htmlで呼び出し用のタグを作成しましょう。
<template>
    <lightning-card title={cardTitle}>
        <lightning-input type="number" step="0.01" label="Weight in Kilogram" onchange={onWeightChange} ></lightning-input>
        <lightning-input type="number" step="0.01" label="Height in Meter" onchange={onHeightChange} ></lightning-input>
        <lightning-button label="Get BMI" onclick={calculateBMI} ></lightning-button>
        <p>
            Your BMI is: {bmiData.result}
        </p>
    </lightning-card>
</template>
デプロイして実装しましょう。
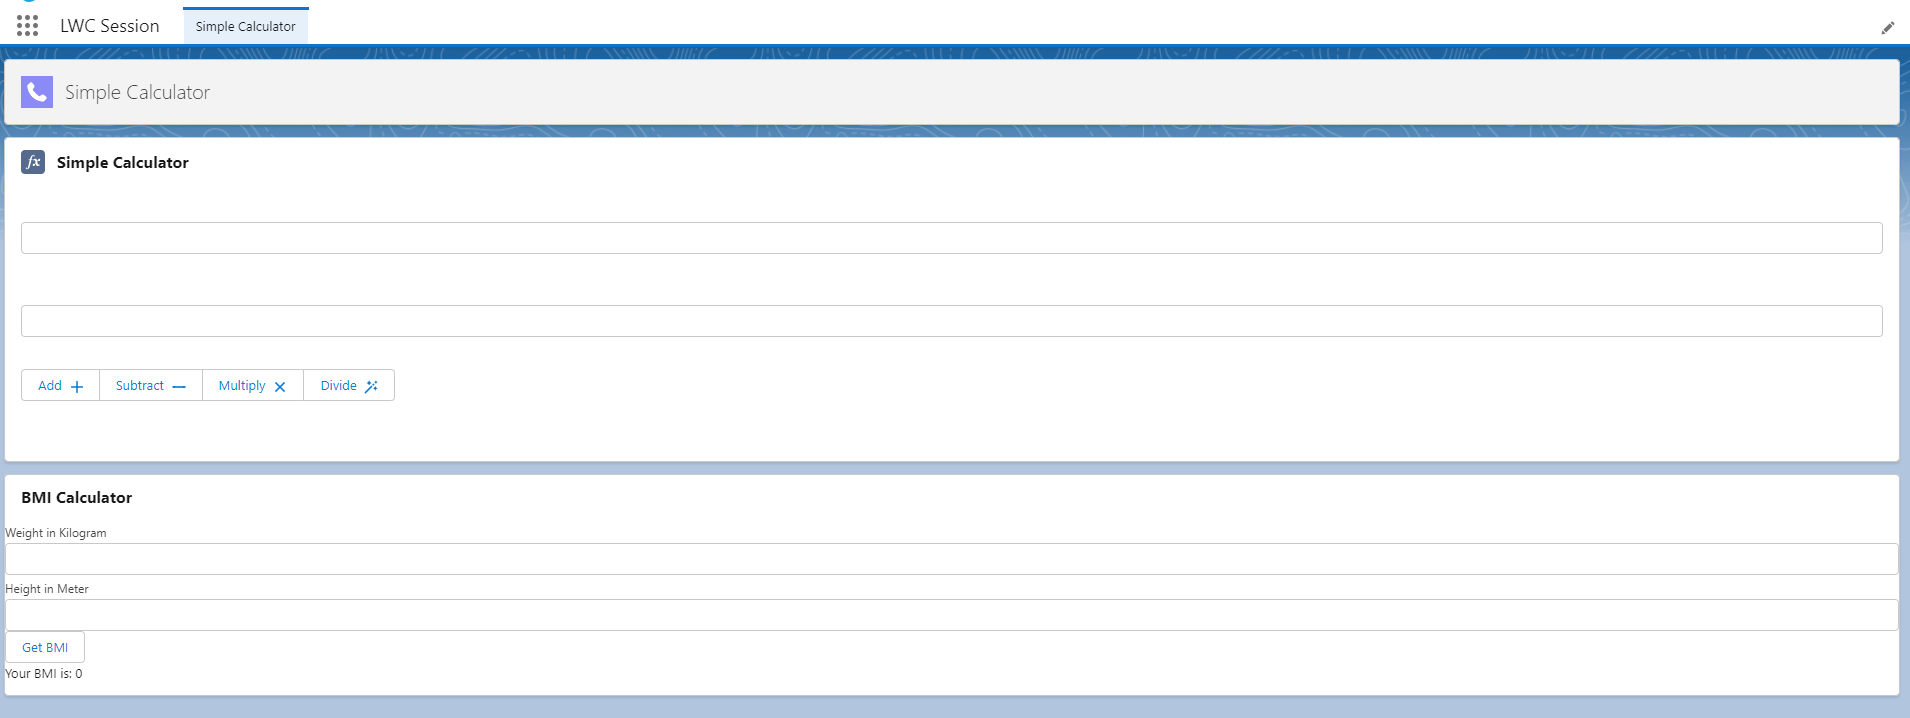
計算して無反応なのでjsを変更してデプロイしてもう一度実装しましょう。
import { LightningElement, track } from 'lwc';

export default class BmiCalculator extends LightningElement {
    cardTitle = 'BMI Calculator';

    @track bmiData={
        weight:0,
        height:0,
        result:0
    }

    onWeightChange(event){
        this.bmiData.weight = parseFloat(event.target.value);
    }

    onHeightChange(event){
        this.bmiData.height = parseFloat(event.target.value);
    }

    calculateBMI(){
        try{
        this.bmiData.result = this.bmiData.weight/(this.bmiData.height*this.bmiData.height);
        } catch(error){
            this.bmiData.result = undefined;
        }
    }
}

配列などをプライベート状態からパブリック状態するには@trackが必要です。
1-8.@apiの使い方
親クラスと子クラスを作成しapiライブラリ繋げてみましょう。
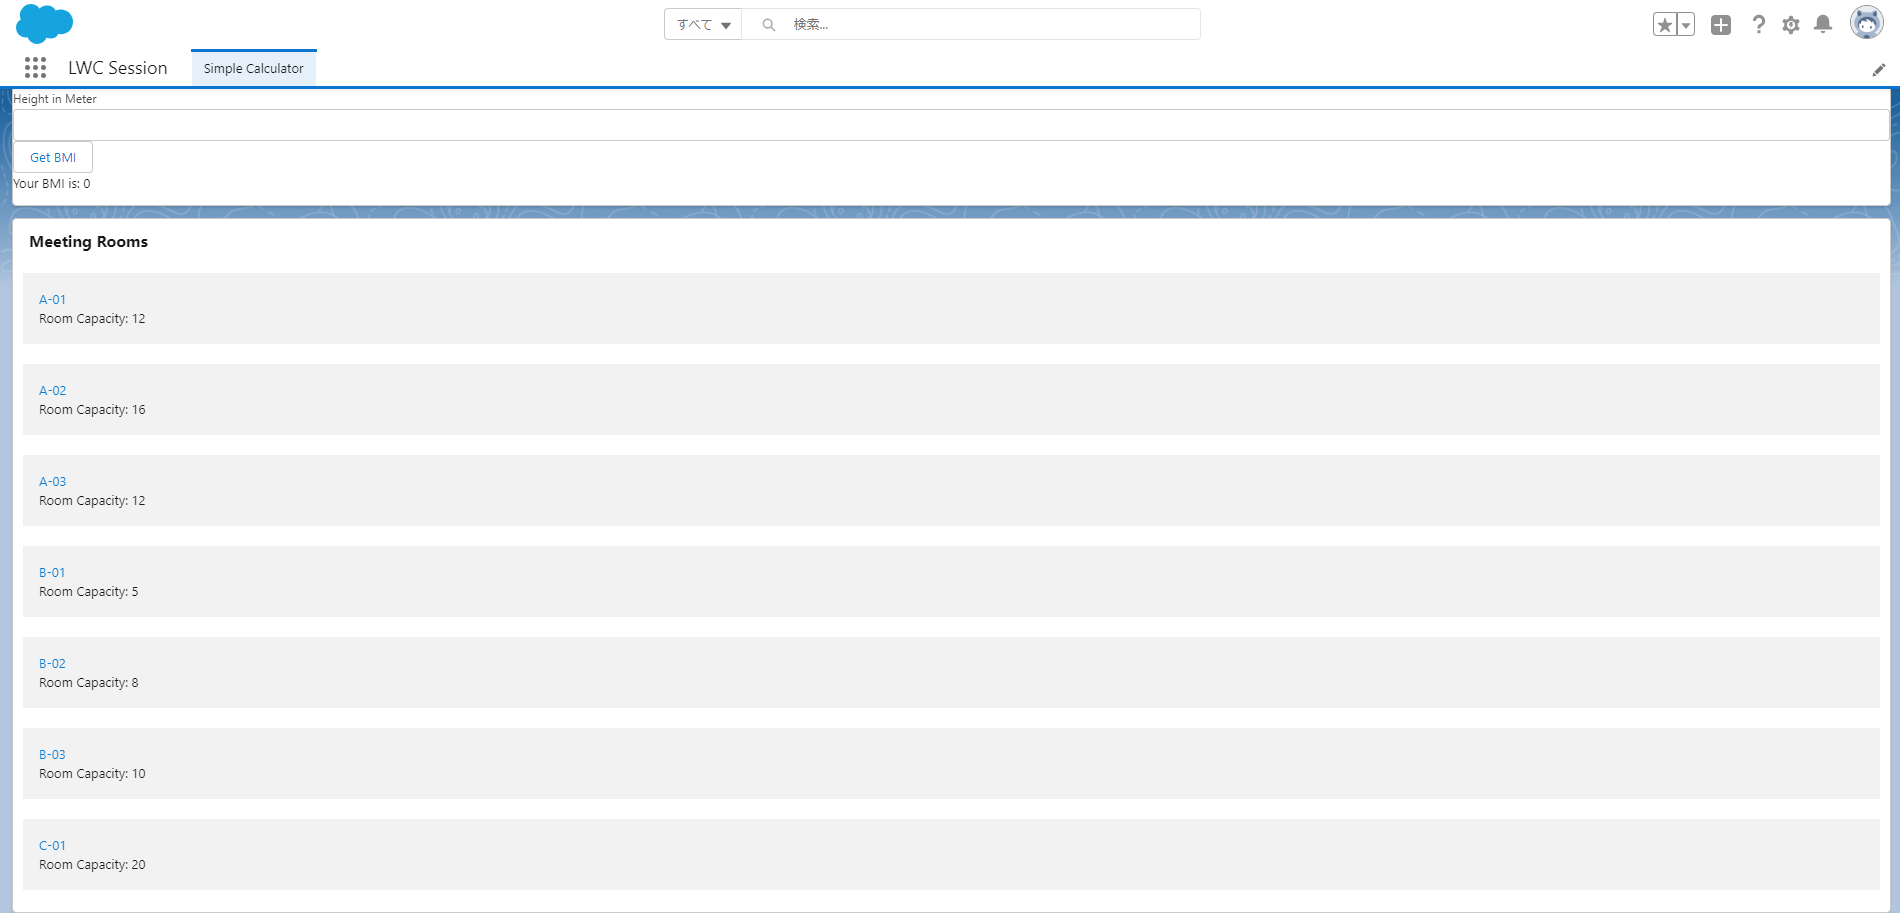
先ずは親クラスのLWC、meetingRoomsを作成しましょう。
<template>
    <lightning-card title="Meeting Rooms">
        <ul>
            <template for:each={meetingRoomsInfo} for:item="room">
                <li key={room.roomName} style="padding: 10px">
                    <c-meeting-room meeting-room-info={room} show-room-info></c-meeting-room>
                </li>
            </template>
        </ul>
    </lightning-card>
</template>
import { LightningElement } from 'lwc';

export default class MeetingRooms extends LightningElement {

    meetingRoomsInfo = [
        {roomName:'A-01', roomCapacity:'12'},
        {roomName:'A-02', roomCapacity:'16'},
        {roomName:'A-03', roomCapacity:'12'},
        {roomName:'B-01', roomCapacity:'5'},
        {roomName:'B-02', roomCapacity:'8'},
        {roomName:'B-03', roomCapacity:'10'},
        {roomName:'C-01', roomCapacity:'20'}

    ];
}
<?xml version="1.0" encoding="UTF-8"?>
<LightningComponentBundle xmlns="http://soap.sforce.com/2006/04/metadata" fqn="meetingRooms">
    <apiVersion>45.0</apiVersion>
    <isExposed>true</isExposed>
    <targets>
        <target>lightning__AppPage</target>
        <target>lightning__HomePage</target>
        <target>lightning__RecordPage</target>
    </targets>
</LightningComponentBundle>
次に、子クラスを作りましょう。apiライブラリを使ってmeetingRoomsInfo を読み込み、showRoomInfo をAPIを使って子クラスに送る
<template>
    <template if:true={showRoomInfo}>
        <div class="slds-p-around_medium lgc-bg">
            <lightning-tile label={meetingRoomInfo.roomName} href="/path/to/somewhere">
                <p class="slds-truncate" title={meetingRoomInfo.roomCapacity}>Room Capacity:
                    {meetingRoomInfo.roomCapacity}</p>
            </lightning-tile>
        </div>
    </template>
</template>
import { LightningElement, api } from 'lwc';

export default class MeetingRoom extends LightningElement {
    @api meetingRoomInfo = {roomName:'A-01', roomCapacity:'12'}

    @api showRoomInfo = false;
}
<?xml version="1.0" encoding="UTF-8"?>
<LightningComponentBundle xmlns="http://soap.sforce.com/2006/04/metadata" fqn="meetingRoom">
    <apiVersion>45.0</apiVersion>
    <isExposed>false</isExposed>
</LightningComponentBundle>
デプロイして確かめましょう
試しにshow-room-infoを外しましょう。
<template>
    <lightning-card title="Meeting Rooms">
        <ul>
            <template for:each={meetingRoomsInfo} for:item="room">
                <li key={room.roomName} style="padding: 10px">
                    <c-meeting-room meeting-room-info={room} ></c-meeting-room>
                </li>
            </template>
        </ul>
    </lightning-card>
</template>

2.ローカル開発環境
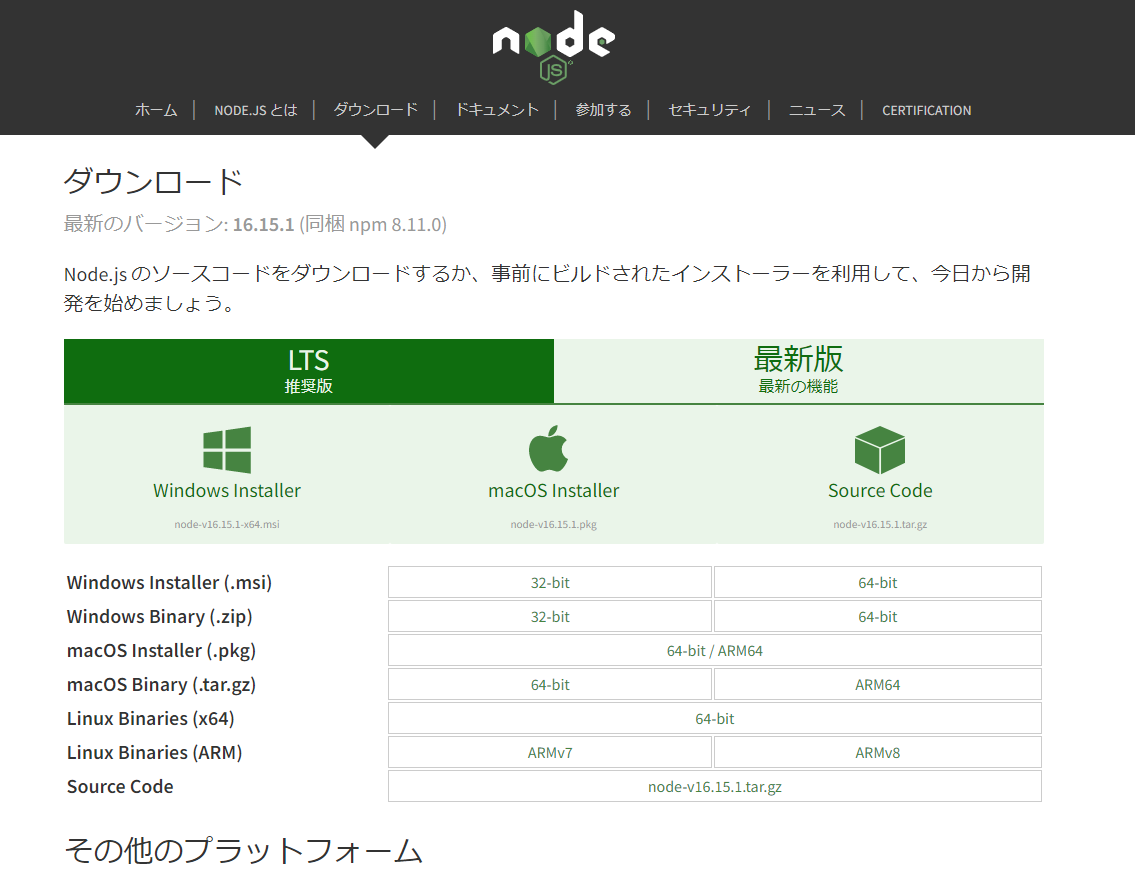
今まではDev Hubを有効化にしてスクラッチ組織で開発を行っています、今からはローカルで開発する環境を準備する。先ずはNode.jsをインストールしましょう。
https://nodejs.org/ja/download/

次に、管理者権限でPowerShellを起動してnode-gypをインストールする
npm install -g node-gyp
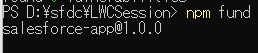
インストールが完了しましたら確認しましょう。
npm fund
最後にローカルサーバーをインストールしましょう。
sfdx plugins:install @salesforce/lwc-dev-server
インストールが完了したら起動してみましょう
sfdx force:lightning:lwc:start
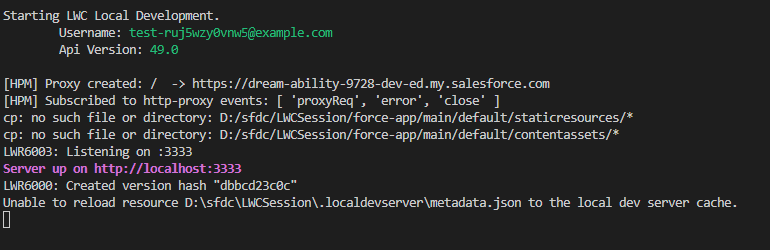
サーバーのアドレスを開いて確認しましょう。
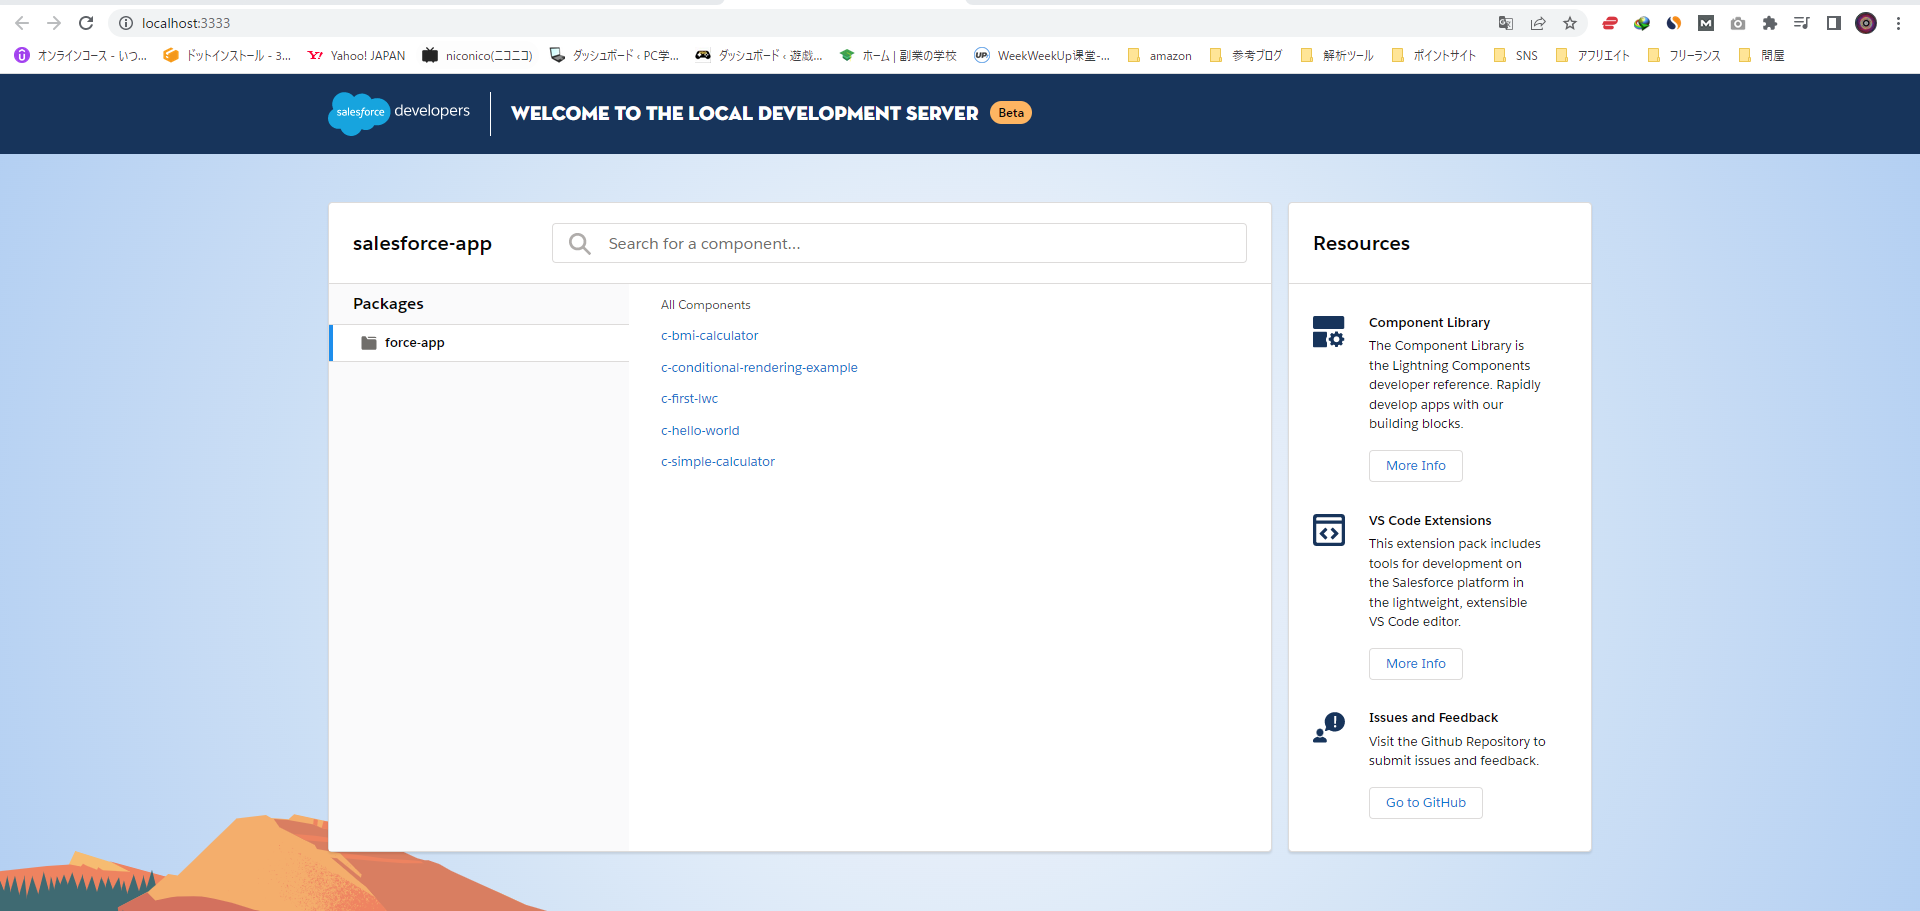
今後のLWC開発内容はpushせずにローカルサーバーで確認することができる。
3.コンポーネントのライフサイクルと構成
LWCではJavaみたいにextendで親クラスを指定することはないけど、apiライブラリを使い子クラスに当たるものを呼び出しすることができる。ここではコンポーネントのライフサイクルと構成を深めましょう。
3-1.slotタグを使ってみよう
1のセクションでは@apiを使い子クラスの内容を親クラス反応することができました。今回は親クラスの内容を子クラスに反応slotタグを使う。
先ずは子クラスが親クラスに関する内容をコメントアウトしましょう。
<template>
    <template if:true={showRoomInfo}>
        <div class="slds-p-around_medium lgc-bg">
            <slot name="roomInfo"></slot>
            <slot></slot>
            <!--<lightning-tile label={meetingRoomInfo.roomName}>
                <p class="slds-truncate" title={meetingRoomInfo.roomCapacity}>Room Capacity:
                    {meetingRoomInfo.roomCapacity}</p>
            </lightning-tile>-->
        </div>
    </template>
</template>
import { LightningElement, api } from 'lwc';

export default class MeetingRoom extends LightningElement {
    //@api meetingRoomInfo = {roomName:'A-01', roomCapacity:'12'}

    @api showRoomInfo = false;
}
meetingRoomsの内容を以下に変更する
<template>
    <lightning-card title="Meeting Rooms">
        <ul>
            <template for:each={meetingRoomsInfo} for:item="room">
                <li key={room.roomName} style="padding: 10px">
                    <c-meeting-room show-room-info>
                        <lightning-tile label={room.roomName} slot="roomInfo">
                            <p class="slds-truncate" title={room.roomCapacity}>Room Capacity:
                                {room.roomCapacity}</p>
                        </lightning-tile>
                        <div>Additional markup will go in unnamed slot</div>
                    </c-meeting-room>
                </li>
            </template>
        </ul>
    </lightning-card>
</template>
これでapiで指定せずにmeetingRoomsの内容をmeetingRoomを反応することができる。

3-2.公開メソッド
前のセクションの内容を踏まえてapiを使って子クラスのメソッドを公開して、親クラスに引用する。
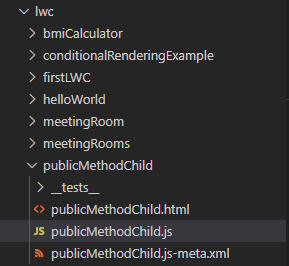
先ずは子クラスを作成しましょう。名前はpublicMethodChildとする。
importするライブラリにtrack, apiを追加して公開配列valueとチェックボックス用配列optionsを作成しましょう。apiで入力内容でチェックボックスを選択するメソッドを公開する。
import { LightningElement, track, api } from 'lwc';

export default class PublicMethodChild extends LightningElement {
    @track value = ['red'];

    options = [
        { label: 'Red Marker', value: 'red' },
        { label: 'Blue Marker', value: 'blue' },
        { label: 'Green Marker', value: 'green' },
        { label: 'Black Marker', value: 'black' },
    ];


    @api
    selectCheckbox(checkboxValue){
        const selectedCheckbox = this.options.find( checkbox =>{
            return checkboxValue === checkbox.value;
        })

        if(selectedCheckbox){
            this.value = selectedCheckbox.value;
            return "Successfully checked";
        }
        return "No checkbox found";

    }

}
lightning-checkbox-groupタグを使い、jsのoptionを呼び出しましょう。
<template>
        <lightning-checkbox-group name="Checkbox Group"
        label="Marker Group"
        options={options}
        value={value}></lightning-checkbox-group>

        <div> I am a DIV in PArent Component</div>
</template>
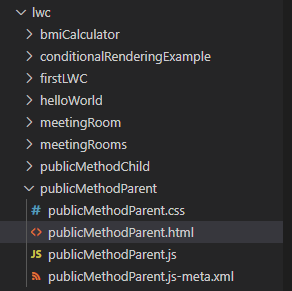
次に、親クラスであるpublicMethodParentのlwcを作りましょう。
まず、jsファイルにtrackで公開する変数value,子クラス呼び出しして獲得値でチェック付けするメソッド checkboxSelectHandlerと入力値を獲得するメソッドonInputChangeHandlerなどを作成する。
import { LightningElement, track } from 'lwc';

export default class PublicMethodParent extends LightningElement {
    @track value;

    checkboxSelectHandler(){
        const childComponent = this.template.querySelector('c-public-method-child');
        const returnedMessage = childComponent.selectCheckbox(this.value);
        console.log('Returned Message: ', returnedMessage);
    }

    onInputChangeHandler(event){
        this.value = event.target.value;
    }
}
htmlでcheckboxSelectHandlerを呼び出すlightning-inputとonInputChangeHandlerを呼び出すlightning-buttonを作成する。最後に子クラスを呼び出すc-public-method-childタグを作成する。
<template>
    <lightning-card title="Call Methods On Child Component">
        <lightning-input value={value} label="Checkbox Value" onchange={onInputChangeHandler}></lightning-input>
        <lightning-button label="Select Checkbox" onclick={checkboxSelectHandler}></lightning-button>
        <div> I am a DIV in PArent Component</div>
        <c-public-method-child ></c-public-method-child>
    </lightning-card>
</template>
メタデータを以下内容に変更して実装しましょう。
<?xml version="1.0" encoding="UTF-8"?>
<LightningComponentBundle xmlns="http://soap.sforce.com/2006/04/metadata" fqn="publicMethodParent">
    <apiVersion>45.0</apiVersion>
    <isExposed>true</isExposed>
    <targets>
        <target>lightning__AppPage</target>
        <target>lightning__HomePage</target>
        <target>lightning__RecordPage</target>
    </targets>
</LightningComponentBundle>
入力に合わせて自動的にチェックすることができました。

3-3.シャドウDOMについて
ウェブコンポーネントにおける重要な側面の一つが、カプセル化です。マークアップ構造、スタイル、動作を隠蔽し、コード上の他のコードから分離することで、他の部分でクラッシュすることを防ぎ、コードをきれいにしておくことができます。シャドウ DOM API はこの主要部分であり、隠蔽され分離された DOM を要素に取り付けるための方法を提供しています。この記事ではシャドウ DOM を使う基本を記述しています。
例えばlwc作成時にそれぞれ
<template>
    <lightning-card title="Call Methods On Child Component">
        <lightning-input value={value} label="Checkbox Value" onchange={onInputChangeHandler}></lightning-input>
        <lightning-button label="Select Checkbox" onclick={checkboxSelectHandler}></lightning-button>
        <div> I am a DIV in PArent Component</div>
        <c-public-method-child ></c-public-method-child>
    </lightning-card>
</template>
<template>
        <lightning-checkbox-group name="Checkbox Group"
        label="Marker Group"
        options={options}
        value={value}></lightning-checkbox-group>

        <div> I am a DIV in PArent Component</div>
</template>
div{
    color: red;
}
div {
    color: green;
}
一つのコンポーネントになったともdivへの影響はそれぞれ

これがシャドウDOMという
3-4.コンポーネントのライフサイクル
前のセクションでlwc構成について色々確かめました。ここでは実行したlwcの始まりから終わりまでのライフサイクルを発生したイベントで説明する。
イベント 説明
constructor: コンポーネントが作成された直後に発生する。通常は使用しない
connectedCallback: 標準的な初期化処理はここで行う。
renderedCallback: コンポーネントへの描画(DOM操作)が終わったタイミングで呼び出される
disconnectedCallback: 終了処理はここで行う。
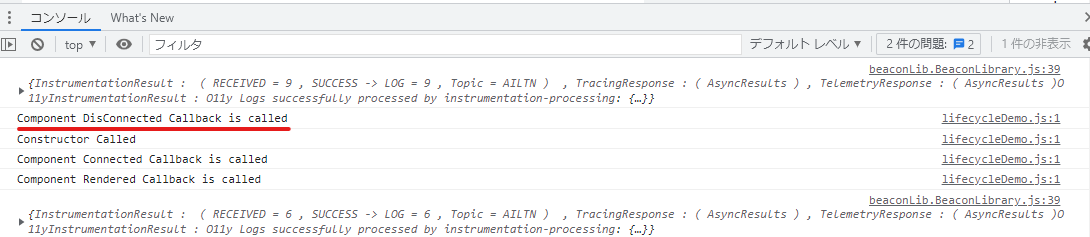
ライフサイクルを確かめるために新規lwcを作成しましょう、名前をlifecycleDemoとする。

作成後jsを以下内容に変更する、イベントが発生したらコンソルにメッセージする。
import { LightningElement } from 'lwc';

export default class LifecycleDemo extends LightningElement {

    constructor(){
        super();
        console.log('Constructor Called');
    }

    connectedCallback(){
        console.log('Component Connected Callback is called');
    }

    renderedCallback(){
        console.log('Component Rendered Callback is called');
    }

    disconnectedCallback(){
        console.log('Component DisConnected Callback is called');
    }
}
メタデータを以下内容に変更する
<?xml version="1.0" encoding="UTF-8"?>
<LightningComponentBundle xmlns="http://soap.sforce.com/2006/04/metadata" fqn="lifecycleDemo">
    <apiVersion>45.0</apiVersion>
    <isExposed>true</isExposed>
    <targets>
        <target>lightning__AppPage</target>
        <target>lightning__HomePage</target>
        <target>lightning__RecordPage</target>
    </targets>
</LightningComponentBundle>
組織にpushして確かめましょう、セールスアプリに実装しましょう。
コンソルを開いてメッセージを確認しましょう。

他のページ切り替えて disconnectedCallbackイベント発生を確認しましょう。
4.イベントを使うコンポーネントの通信
前のセクションまではslotタグ及びapiライブラリなどを使ってLWC同士の通信をしました。ここではevent方法を使ってデータの転送を行う。
4-1.eventを使ってみよう
まず、meetingRoomにtileClickHandlerというメソッドを加えよう
<template>
    <template if:true={showRoomInfo}>
        <div class="slds-p-around_medium lgc-bg" onclick={tileClickHandler}>
            <lightning-tile label={meetingRoomInfo.roomName} href="/path/to/somewhere">
                <p class="slds-truncate" title={meetingRoomInfo.roomCapacity}>Room Capacity:
                    {meetingRoomInfo.roomCapacity}</p>
            </lightning-tile>
        </div>
    </template>
</template>
クリックしたときにからdetailでmeetingRoomInfoをセットする、bubblesで親に公開するためTRUEに設定。dispatchEventでtileClicked 発送。
import { LightningElement, api } from 'lwc';

export default class MeetingRoom extends LightningElement {
    @api meetingRoomInfo = {roomName:'A-01', roomCapacity:'12'}

    @api showRoomInfo = false;

    tileClickHandler(){
        const tileClicked = new CustomEvent('tileclick', {detail : this.meetingRoomInfo, bubbles :true});

        this.dispatchEvent(tileClicked);
    }
}
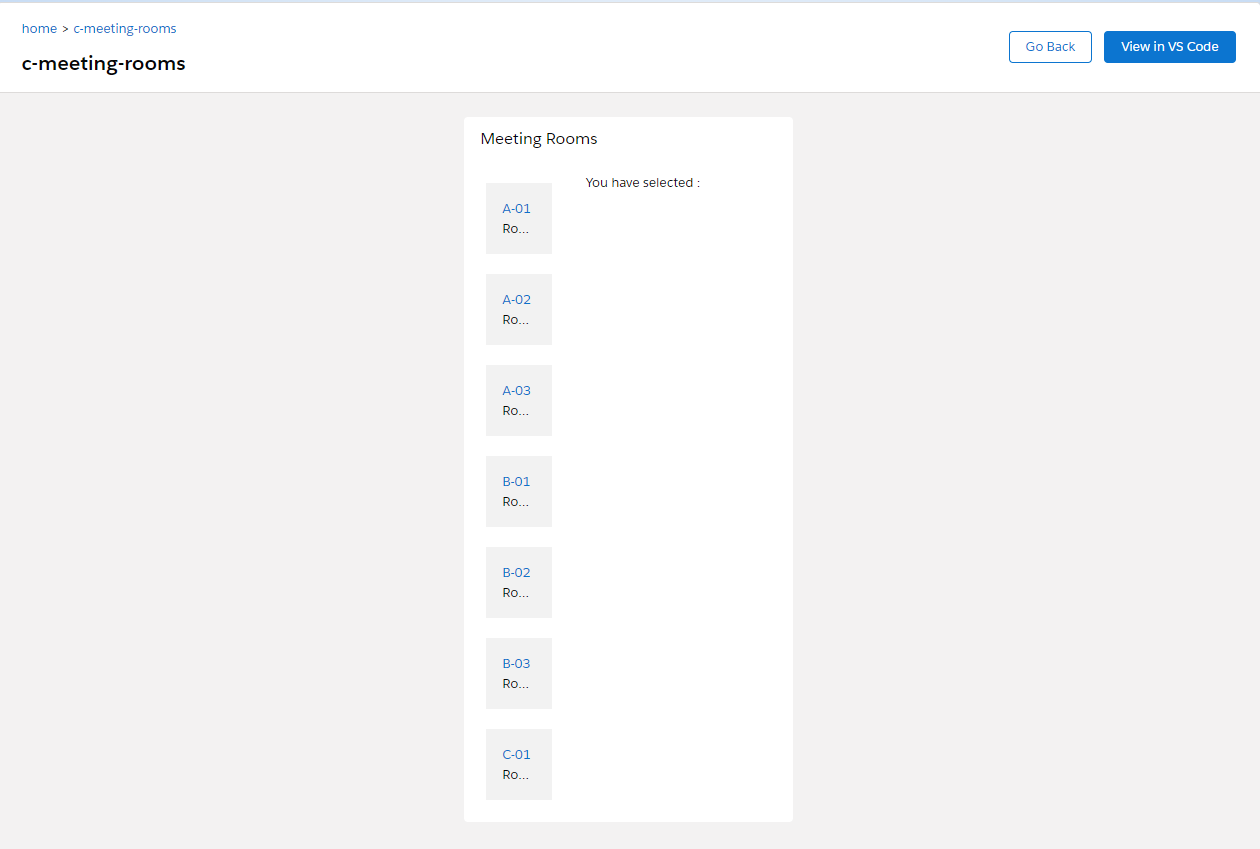
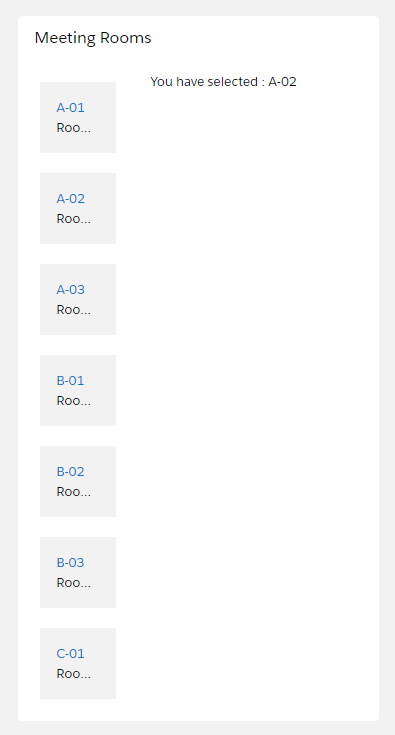
次に、meetingRoomsに変更と修正を加えよう。htmlに取得内容の表示部分を追加する。
<template>
    <lightning-card title="Meeting Rooms">
        <lightning-layout>
            <lightning-layout-item size="4" padding="around-small">
                <ul>
                    <template for:each={meetingRoomsInfo} for:item="room">
                        <li key={room.roomName} style="padding: 10px">
                            <c-meeting-room meeting-room-info={room} show-room-info></c-meeting-room>
                        </li>
                    </template>
                </ul>
            </lightning-layout-item>
            <lightning-layout-item size="8" padding="around-small">
                You have selected : {selectedMeetingRoom}
            </lightning-layout-item>
        </lightning-layout>

    </lightning-card>
</template>
コンストラクタ生成時親コンポーネントにaddEventListenerでtileclickの名イベントを受け取りonTileSelectHandlerにbindする。
イベント取得した後にdetailをmeetingRoomInfoに代入しroomNameを取得してselectedMeetingRoomに表示する。
import { LightningElement, track } from 'lwc';

export default class MeetingRooms extends LightningElement {

    @track selectedMeetingRoom;

    meetingRoomsInfo = [
        {roomName:'A-01', roomCapacity:'12'},
        {roomName:'A-02', roomCapacity:'16'},
        {roomName:'A-03', roomCapacity:'12'},
        {roomName:'B-01', roomCapacity:'5'},
        {roomName:'B-02', roomCapacity:'8'},
        {roomName:'B-03', roomCapacity:'10'},
        {roomName:'C-01', roomCapacity:'20'}

    ];

    onTileSelectHandler(event){
        const meetingRoomInfo = event.detail;
        this.selectedMeetingRoom = meetingRoomInfo.roomName;
    }

    constructor(){
        super();
        this.template.addEventListener('tileclick', this.onTileSelectHandler.bind(this));
    }
}
変更した内容を確かめましょう
4-2.公開ライブラリの作成
前のセクションまでの親子関係のコンポーネント同士の通信をやりました。無関連のコンポーネント同士の通信を行うには共通ライブラリが必要、ここでは試しに作成してみよう。今回変更するLWCはbmiCalculator
const getBMI = function (weightInKg, heightInMt) {
    try {
        return weightInKg / (heightInMt * heightInMt);
    } catch (error) {
        return undefined;
    }
}

export{getBMI};
作成したライブラリをimportをするにはc/をつけましょう。変更した身長と体重をcalculateBMIに送りましょう
import { LightningElement, track } from 'lwc';
import {getBMI} from 'c/bmi';

export default class BmiCalculator extends LightningElement {
    cardTitle = 'BMI Calculator';

    weight;
    height;

    @track bmi;
    onWeightChange(event){
        this.weight = parseFloat(event.target.value);
    }

    onHeightChange(event){
        this.height = parseFloat(event.target.value);
    }

    calculateBMI(){
        this.bmi = getBMI(this.weight, this.height);
    }

    get bmiValue(){
        if(this.bmi === undefined){
            return "";
        }
        return `Your BMI is: ${this.bmi}`;
    }
}
<template>
    <lightning-card title={cardTitle}>
        <lightning-input type="number" step="0.01" label="Weight in Kilogram" onchange={onWeightChange} ></lightning-input>
        <lightning-input type="number" step="0.01" label="Height in Meter" onchange={onHeightChange} ></lightning-input>
        <lightning-button label="Get BMI" onclick={calculateBMI} ></lightning-button>
        <p>
            {bmiValue}
        </p>
    </lightning-card>
</template>
変更した後に確かめましょう

無事に作用しました。
4-3.独立のlwcに通信を行う
前のセクションでは自作したライブラリの導入を成功しました。ここでは自作したライブラリを使い独立したコンポーネント同士の通信を行う
5.salesforce dataへのアクセス
前のセクションではコンポーネントの作成、実装などを学びました。ここではjs及びapexを使いLWCでsalesforce dataの変更と作成を行います。
5-1 レコードの作成
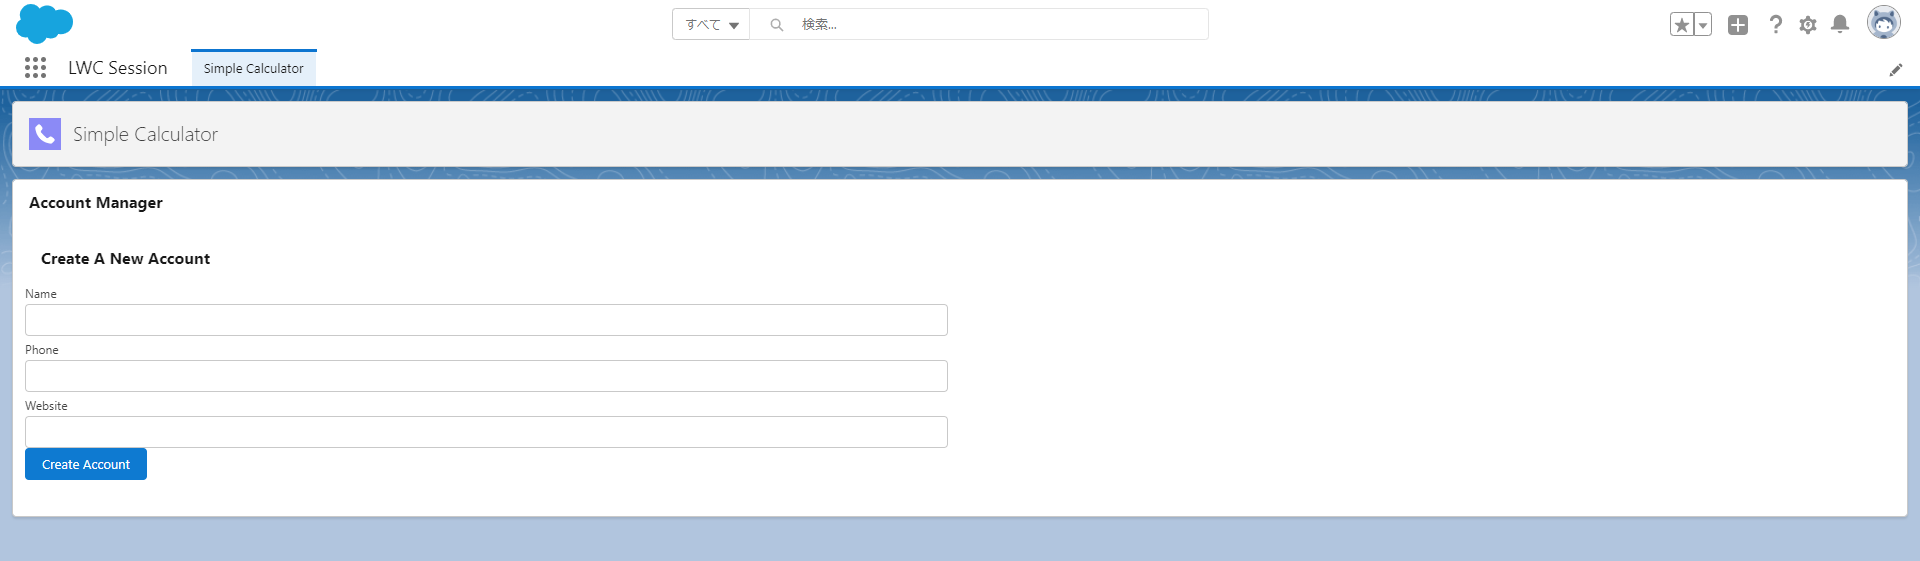
ここからレコードの作成するlwcを作成する、名前をaccountManagerLDSとする。

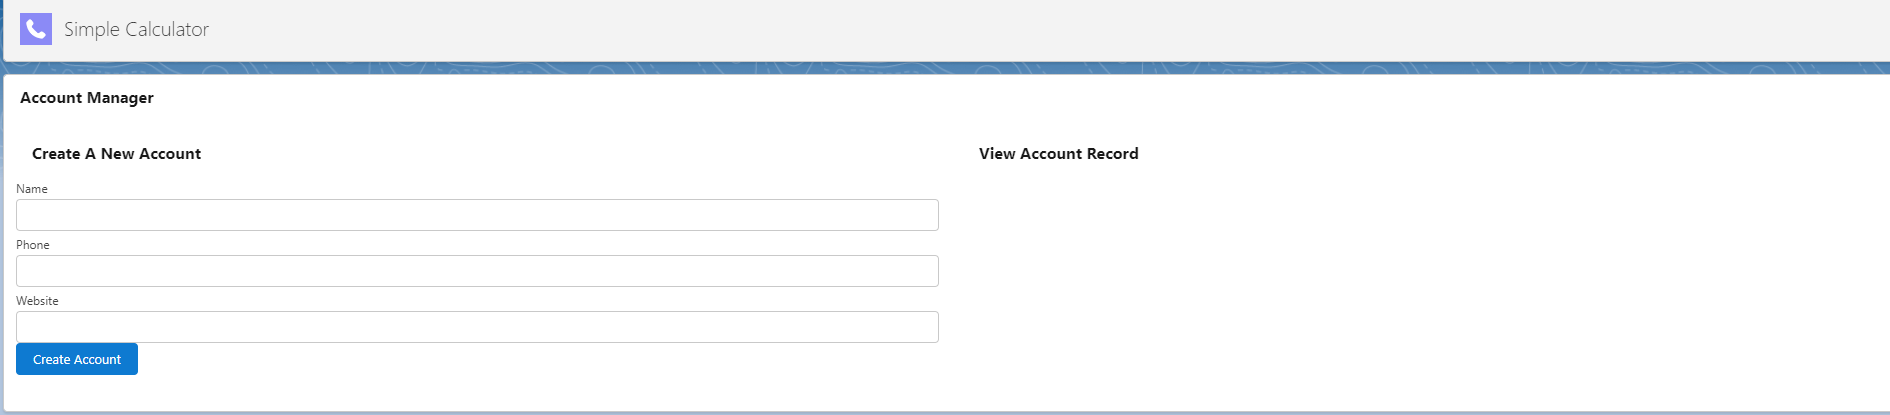
まず、htmlの内容を以下に変更する。アカウント名、アカウント電話番号、アカウントウェブサイトを入力するタグとアカウント作成する
<template>
    <lightning-card title="Account Manager">
        <lightning-layout>
            <lightning-layout-item size="6" padding="around-small">
                <lightning-card title="Create A New Account">
                    <lightning-input name="Account Name" label="Name" onchange={accountNameChangeHandler} ></lightning-input>
                    <lightning-input name="Account Phone" type="phone" label="Phone" onchange={accountPhoneChangeHandler} ></lightning-input>
                    <lightning-input name="Account Website" type="url" label="Website" onchange={accountWebsiteChangeHandler} ></lightning-input>

                    <lightning-button label="Create Account" onclick={createAccount} variant="brand" ></lightning-button>
                </lightning-card>
            </lightning-layout-item>
            <lightning-layout-item size="6" padding="around-small">
            </lightning-layout-item>
        </lightning-layout>
    </lightning-card>

</template>
jsの作成に入ります。ます、レコードの作成、削除、更新を行う JavaScript API も含むモジュール(lightning/uiRecordApi)をインポートしましょう。入力値を獲得するメソッドaccountNameChangeHandler、accountPhoneChangeHandler、accountWebsiteChangeHandlerを作成しましょう。入力内容を登録するメソッドcreateAccountを作成する。
import { LightningElement,track } from 'lwc';
import { createRecord } from "lightning/uiRecordApi";

export default class AccountManagerLDS extends LightningElement {
    @track accountName;
    @track accountPhone;
    @track accountWebsite;

    accountNameChangeHandler(event){
        this.accountName = event.target.value;
    }

    accountPhoneChangeHandler(event){
        this.accountPhone = event.target.value;
    }

    accountWebsiteChangeHandler(event){
        this.accountWebsite = event.target.value;
    }

    createAccount(){
        const fields = {'Name' : this.accountName, 'Phone' : this.accountPhone, 'Website': this.accountWebsite};
        const recordInput = {apiName : 'Account', fields};

        createRecord(recordInput).then(response => {
            console.log('Account has been created : ', response.id);
        }).catch(error =>{
            console.error('Error in creating account : ', error.body.message);
        });
    }

}
メタデータを以下内容に変更する。
<?xml version="1.0" encoding="UTF-8"?>
<LightningComponentBundle xmlns="http://soap.sforce.com/2006/04/metadata" fqn="accountManagerLDS">
    <apiVersion>45.0</apiVersion>
    <isExposed>true</isExposed>
    <targets>
        <target>lightning__RecordPage</target>
        <target>lightning__AppPage</target>
        <target>lightning__HomePage</target>
    </targets>
</LightningComponentBundle>
実装して確かめよう

作成後コンソルでIDを確認する。

IDを入力して結果を確かめる。

入力通りのアカウントを作成できました。
5-2.レコードの確認
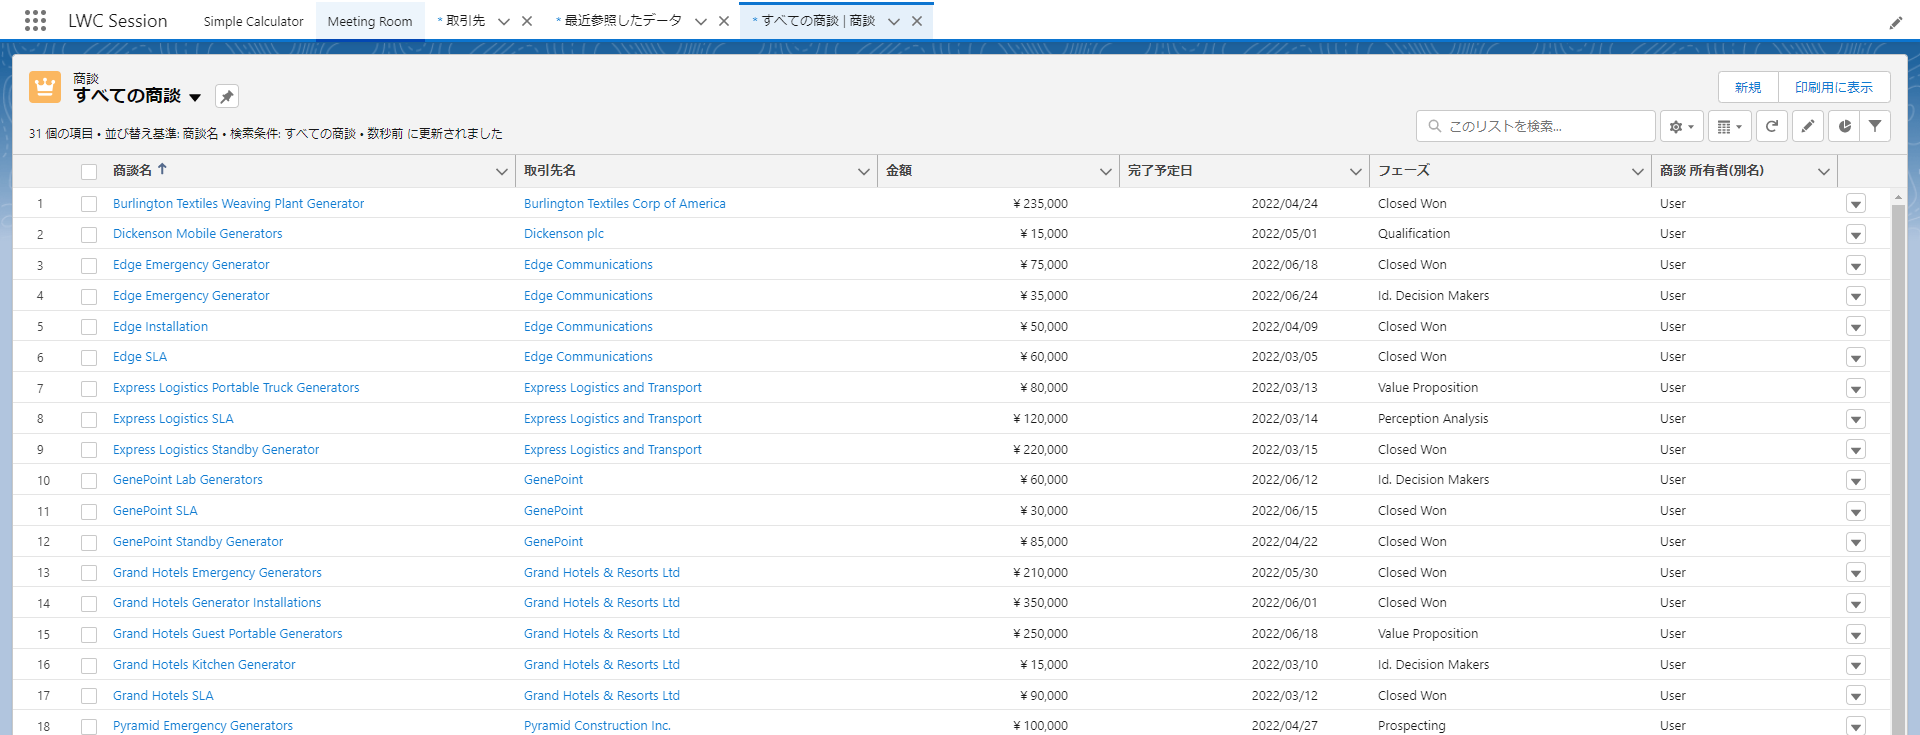
前のセクションではsalesforceDataのレコード作成するlwcを実装しました。次は作成したレコードをsalesforceDataから確認するlwcを作成する。
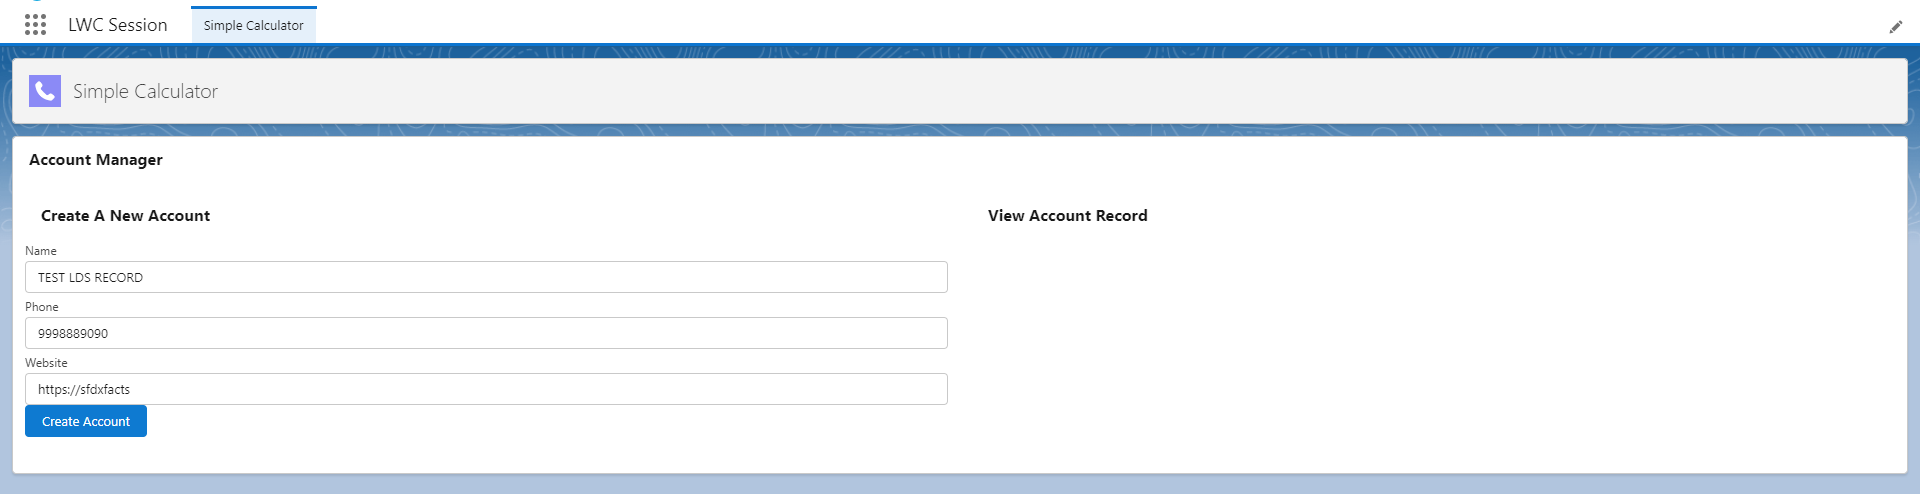
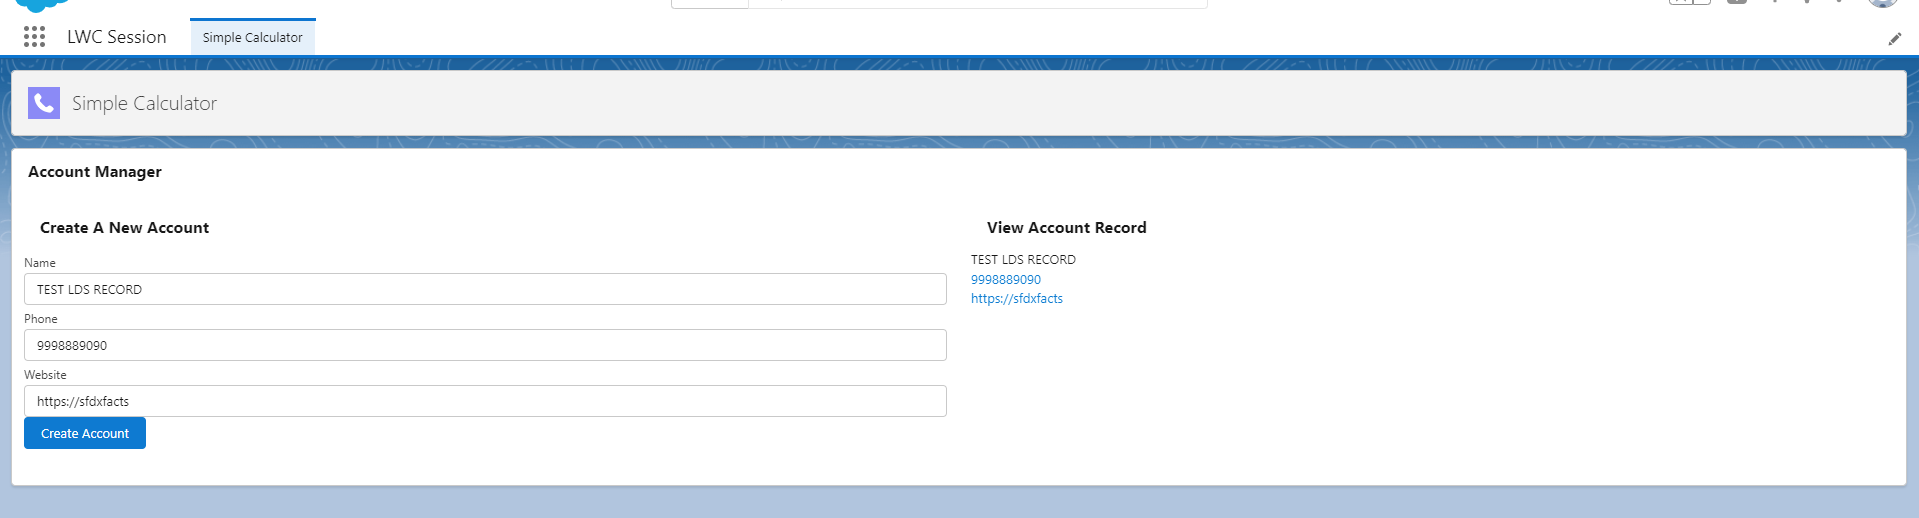
まず、2個目のlightning-layout-itemに同じ形式で作成したアカウントの入力値を表示するタグを作成する。表示タグはlightning-formattedタグを使います。
<template>
    <lightning-card title="Account Manager">
        <lightning-layout>
            <lightning-layout-item size="6" padding="around-small">
                <lightning-card title="Create A New Account">
                    <lightning-input name="Account Name" label="Name" onchange={accountNameChangeHandler} ></lightning-input>
                    <lightning-input name="Account Phone" type="phone" label="Phone" onchange={accountPhoneChangeHandler} ></lightning-input>
                    <lightning-input name="Account Website" type="url" label="Website" onchange={accountWebsiteChangeHandler} ></lightning-input>

                    <lightning-button label="Create Account" onclick={createAccount} variant="brand" ></lightning-button>
                </lightning-card>
            </lightning-layout-item>
            <lightning-layout-item size="6" padding="around-small">
                <lightning-card title="View Account Record">
                    <p><lightning-formatted-text value={retAccountName} ></lightning-formatted-text></p>
                    <p><lightning-formatted-phone value={retAccountPhone} ></lightning-formatted-phone></p>
                    <p><lightning-formatted-url value={retAccountWebsite} ></lightning-formatted-url></p>
                </lightning-card>
            </lightning-layout-item>
        </lightning-layout>
    </lightning-card>

</template>
次に、jsファイルのlightning/uiRecordApiモジュールにgetRecordとlwcのモジュールにwireをインポートする。
定数配列fieldArrayを宣言してアカウント名、アカウント電話番号、アカウントウェブなどの入力値を代入するために使う。
生成したアカウントのレコードidを代入するための変数recordIdを@trackで宣言する。@wireでgetRecord関連のデータaccountRecord宣言する、recordIdとfieldArrayを代入する。createAccountメソッドに変更加えて生成したレコードをrecordId 変数に代入する。accountRecordから生成値を表示する
import { LightningElement,track, wire } from 'lwc';
import { createRecord, getRecord } from "lightning/uiRecordApi";

const fieldArray= ['Account.Name', 'Account.Phone', 'Account.Website'];

export default class AccountManagerLDS extends LightningElement {
    @track accountName;
    @track accountPhone;
    @track accountWebsite;

    @track recordId;

    @wire(getRecord, {recordId: '$recordId', fields: fieldArray})
    accountRecord;

    accountNameChangeHandler(event){
        this.accountName = event.target.value;
    }

    accountPhoneChangeHandler(event){
        this.accountPhone = event.target.value;
    }

    accountWebsiteChangeHandler(event){
        this.accountWebsite = event.target.value;
    }

    createAccount(){
        const fields = {'Name' : this.accountName, 'Phone' : this.accountPhone, 'Website': this.accountWebsite};
        const recordInput = {apiName : 'Account', fields};

        createRecord(recordInput).then(response => {
            console.log('Account has been created : ', response.id);
            this.recordId = response.id;
        }).catch(error =>{
            console.error('Error in creating account : ', error.body.message);
        });
    }

    get retAccountName(){
        if(this.accountRecord.data){
            return this.accountRecord.data.fields.Name.value;
        }
        return undefined;
    }

    get retAccountPhone(){
        if(this.accountRecord.data){
            return this.accountRecord.data.fields.Phone.value;
        }
        return undefined;
    }

    get retAccountWebsite(){
        if(this.accountRecord.data){
            return this.accountRecord.data.fields.Website.value;
        }
        return undefined;
    }

}
変更をpushして確かめよう。
生成したアカウントのデータを無事に表示できた。
5-3.標準タグを使うレコードの作成と表示
先のセクションで自作したjs及びhtmlのlwcでレコードの作成及び作成レコードの表示を実現しました。レコードの作成及びレコードの表示は専門lightningタグ及びjsメソッドが存在しているため、ここでは専門タグ及び専門のjsメソッドを使って簡潔再現します。
まず、新規lwcaccountManagerLDSFormsを作成しましょう。
次に、accountManagerLDS.htmlの内容をコピーして標準lightningタグを使って以下に変更する
<template>
    <lightning-card title="Account Manager Via Forms">
        <lightning-layout>
            <lightning-layout-item size="6" padding="around-small">
                <lightning-card title="Create A New Account">
                    <lightning-record-edit-form object-api-name="Account" onsuccess={successHandler}>
                        <p>
                            <lightning-input-field field-name='Name'></lightning-input-field>
                        </p>
                        <p>
                            <lightning-input-field field-name='Phone'></lightning-input-field>
                        </p>
                        <p>
                            <lightning-input-field field-name='Website'></lightning-input-field>
                        </p>

                        <p>
                            <lightning-button type="submit" variant="brand" name="save" label="Create Account">
                            </lightning-button>
                        </p>
                    </lightning-record-edit-form>
                </lightning-card>
            </lightning-layout-item>
            <lightning-layout-item size="6" padding="around-small">
                <lightning-card title="View An Account Record">
                    <lightning-record-view-form record-id={recordId} object-api-name="Account">
                        <div class="slds-box">
                            <p>
                                <lightning-output-field field-name="Name"></lightning-output-field>
                            </p>
                            <p>
                                <lightning-output-field field-name="Phone"></lightning-output-field>
                            </p>
                            <p>
                                <lightning-output-field field-name="Website"></lightning-output-field>
                            </p>
                        </div>
                    </lightning-record-view-form>
                </lightning-card>
            </lightning-layout-item>
        </lightning-layout>
    </lightning-card>
</template>
専門のメソッドsuccessHandlerを使って生成したレコードIDと入力値を送信する。
import { LightningElement, track } from 'lwc';

export default class AccountManagerLDSForms extends LightningElement {

    @track recordId;
    successHandler(event){
        this.recordId = event.detail.id;
    }
}
実装して見比べてみよう

標準タグなので自動的に組織設定した言語に変換する、複雑な処理を行うメソッドをコーディングせずにレコードIDの取得だけで必要なデータを表示と編集をすることができる。
5-4.アカウント関連のレコードをまとめて編集
先までアカウント関連のレコードのデータの表示と作成をタグで項目指定という方法を使いました。ここではlightning-record-formタグとobject-api-nameプロパティで一気に関連の項目を表示し編集可能にする。
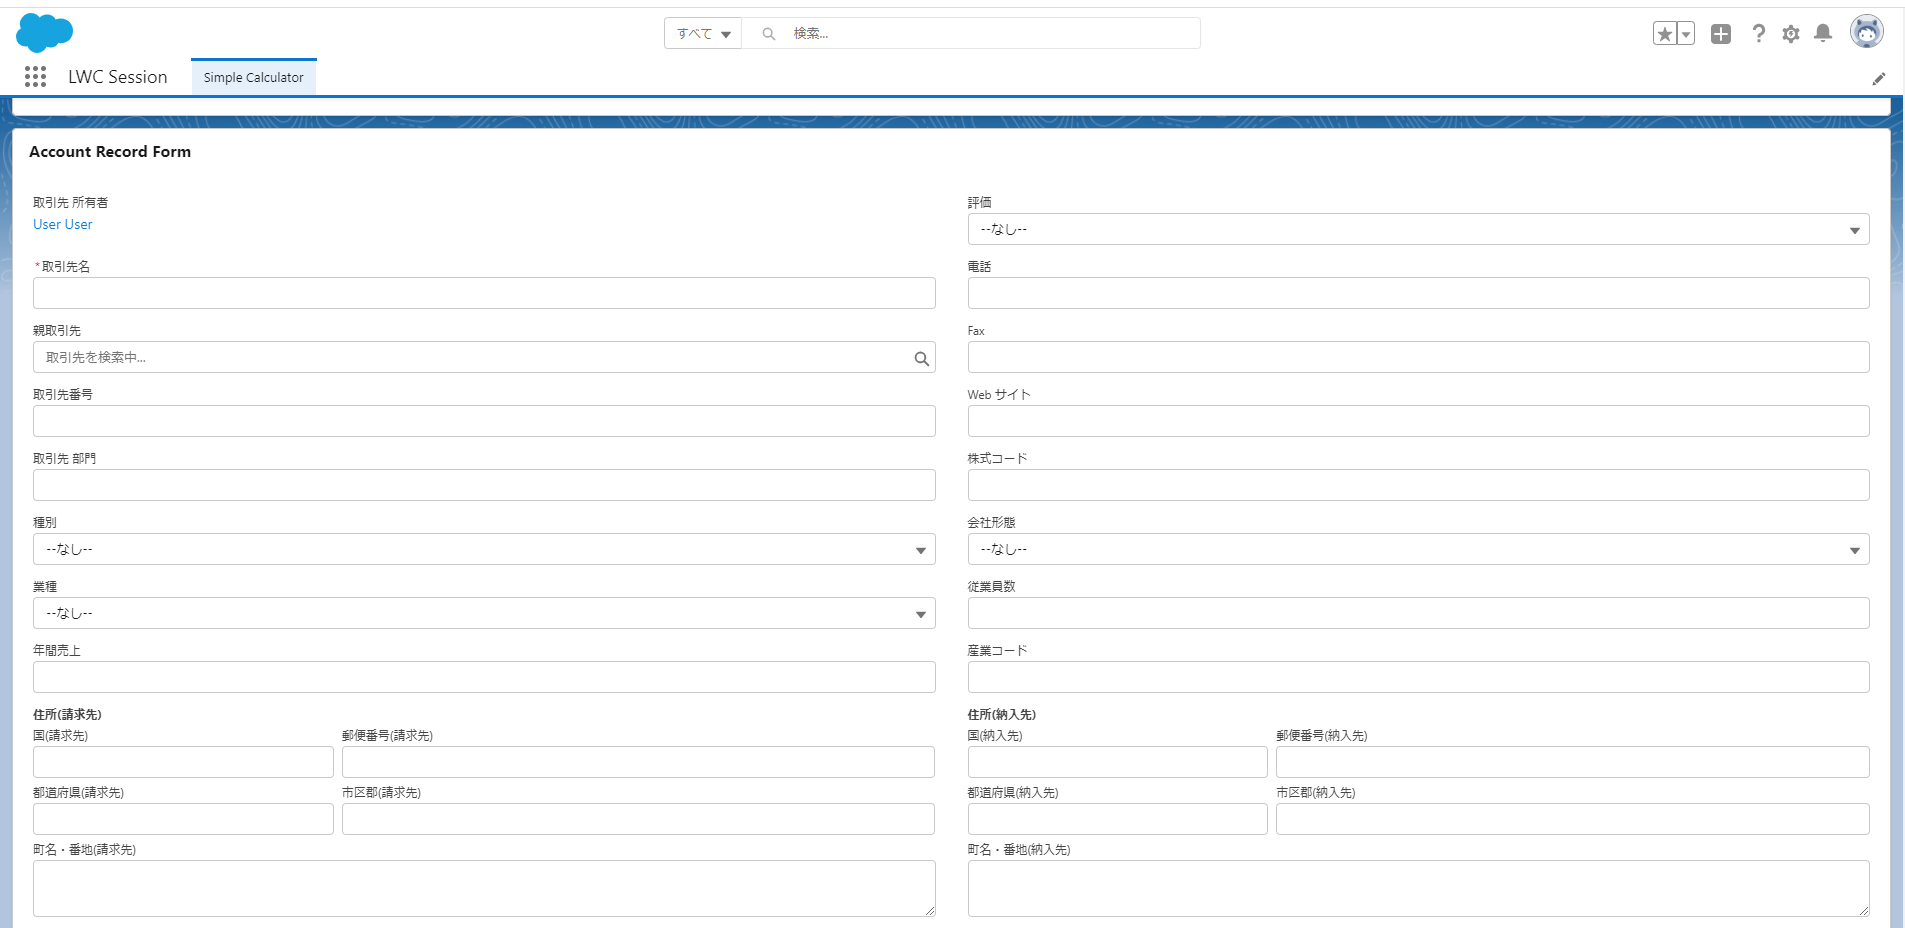
まず、新規lwcを作成しましょう。名前をaccountRecordFormとする。

html,js,xmlを以下内容に変更して実装しましょう。
<template>
    <lightning-card title="Account Record Form">
        <div class="slds-p-around_medium">
            <lightning-record-form object-api-name="Account" record-id={recordId} columns="2" mode="edit"
                layout-type="Full" onsuccess={handleSuccess}></lightning-record-form>
        </div>
    </lightning-card>
</template>
import { LightningElement, track } from 'lwc';

export default class AccountRecordForm extends LightningElement {
    @track recordId;


    handleSuccess(event){
        this.recordId = event.detail.id;
    }
}
<?xml version="1.0" encoding="UTF-8"?>
<LightningComponentBundle xmlns="http://soap.sforce.com/2006/04/metadata" fqn="accountRecordForm">
    <apiVersion>45.0</apiVersion>
    <isExposed>true</isExposed>
    <targets>
        <target>lightning__RecordPage</target>
        <target>lightning__AppPage</target>
        <target>lightning__HomePage</target>
    </targets>
</LightningComponentBundle>
このようにアカウントに関連する項目が全て表示して編集できるようになりました。

前のセクションと同じく名前、電話、ウェブサイトだけを表示したいならjsに指定する配列を加えよう。
import { LightningElement, track } from 'lwc';

export default class AccountManagerLDSForms extends LightningElement {

    @track recordId;
    fieldsArray=['Name','Phone','Website']
    successHandler(event){
        this.recordId = event.detail.id;
    }
}
layout-type="Full"をフィールド指定に変更する
<template>
    <lightning-card title="Account Record Form">
        <div class="slds-p-around_medium">
            <lightning-record-form object-api-name="Account" record-id={recordId} columns="2" mode="edit"
               fields={fieldsArray} onsuccess={handleSuccess}></lightning-record-form>
        </div>
    </lightning-card>
</template>

入力内容を保存したらそのままに表示する、編集をクリックしたら編集に戻る


5-5.wireを使ってapexメソッドの呼び出し
前のセクションではLDSで用いるSalesforceDataとの通信を実現しました。ここではwireライブラリを使いlwcをapexに通じてSalesforceDataとの通信を実現します。
まず、新規クラスAccountManagerを作成しましょう。soqlで必要なレコードを取り出し@AuraEnabledで内容をブラウザに保存する。
public with sharing class AccountManager {

    @AuraEnabled(cacheable=true)
    public static List<Account> getAccount(){

        return [SELECT Id, Name, Phone FROM Account Limit 10];

    }
}
<?xml version="1.0" encoding="UTF-8"?>
<ApexClass xmlns="urn:metadata.tooling.soap.sforce.com" fqn="AccountManager">
    <apiVersion>45.0</apiVersion>
    <status>Active</status>
</ApexClass>
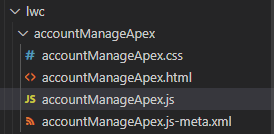
apexクラスを使用するlwcを作りましょう、名前はaccountManageApexとする。
まず、jsを変更しましょう。AccountManagerからgetAllAccountsをインポートしましょう。@wireでgetAllAccountsを用いる変数accountsを宣言する。
getメソッドresponseReceivedを作成しaccountsと一致する場合はtrueと返す。
import { LightningElement, wire } from 'lwc';
import getAllAccounts from '@salesforce/apex/AccountManager.getAccount'

export default class AccountManageApex extends LightningElement {

    @wire(getAllAccounts)
    accounts;

    get responseReceived(){
        if(this.accounts){
            return true;
        }
        return false;
    }

}
次はhtmlを変更しましょう。lightning-cardのtitleをAll Accountsにする。ulタグを使うリスト構造にする、templateタグでresponseReceivedメソッドの値がtrueかを判断する。取得したアカウントのデータをfor:each方法を使い循環してaccountをitemとして取り出す、liタグにアカウントIDをkey指定して,lightning-tileタグでアカウント名を表示する、p タグでアカウント電話番号を表示する。
<template>
    <lightning-card title="All Accounts">
        <ul>
            <template if:true={responseReceived}>
                <template for:each={accounts.data} for:item="account">
                    <li key={account.Id}>
                        <div class="slds-p-around_medium lgc-bg">
                            <lightning-tile label={account.Name} type="media">
                                <lightning-icon slot="media" icon-name="standard:account"></lightning-icon>
                                <p class="slds-truncate" title={account.Phone}>{account.Phone}</p>
                            </lightning-tile>
                        </div>
                    </li>
                </template>
            </template>
        </ul>
    </lightning-card>
</template>
メタデータを以下内容に変更して実装しましょう。
<?xml version="1.0" encoding="UTF-8"?>
<LightningComponentBundle xmlns="http://soap.sforce.com/2006/04/metadata" fqn="accountManageApex">
    <apiVersion>45.0</apiVersion>
    <isExposed>true</isExposed>
    <targets>
        <target>lightning__RecordPage</target>
        <target>lightning__AppPage</target>
        <target>lightning__HomePage</target>
    </targets>
</LightningComponentBundle>
アカウント一覧を設計通りに表示しました。

5-6.lwcから値をapexに送信する
前のセクションではapexに通じてsalsesforceDataをlwcに反応しました。ここではlwcでの操作して送信した値をapexに送信必要なデータをsalsesforceDataから取り出すことを実現する。
ます、AccountManager.clsを変更しましょう。getAccountにパラメータを追加する、取得するレコードの上限をパラメータに基づくものに変更する。
public with sharing class AccountManager {

    @AuraEnabled(cacheable=true)
    public static List<Account> getAccount(Integer numberOfRecords){

        return [SELECT Id, Name, Phone FROM Account Limit :numberOfRecords];

    }
}
次に、jsを以下に変更する。@trackでレコード数を代入する変数numberOfRecordsを宣言する。入力値をnumberOfRecordsに代入するメソッドnumberOfAccountChangeHandlerを作成する。numberOfRecordsをapexファイルに送信するメソッドgetAccountsを作成する。
import { LightningElement, track } from 'lwc';
import getAllAccounts from '@salesforce/apex/AccountManager.getAccount'

export default class AccountManageApex extends LightningElement {

    @track numberOfRecords;
    @track accounts;

    get responseReceived(){
        if(this.accounts){
            return true;
        }
        return false;
    }

    numberOfAccountChangeHandler(event){
        this.numberOfRecords = event.target.value;
    }

    getAccounts(){
        getAllAccounts({numberOfRecords:this.numberOfRecords}).then(response =>{
            this.accounts = response;
        }).catch(error =>{
            console.error('Error in getting the accounts', error.body.message);
        })
    }


}
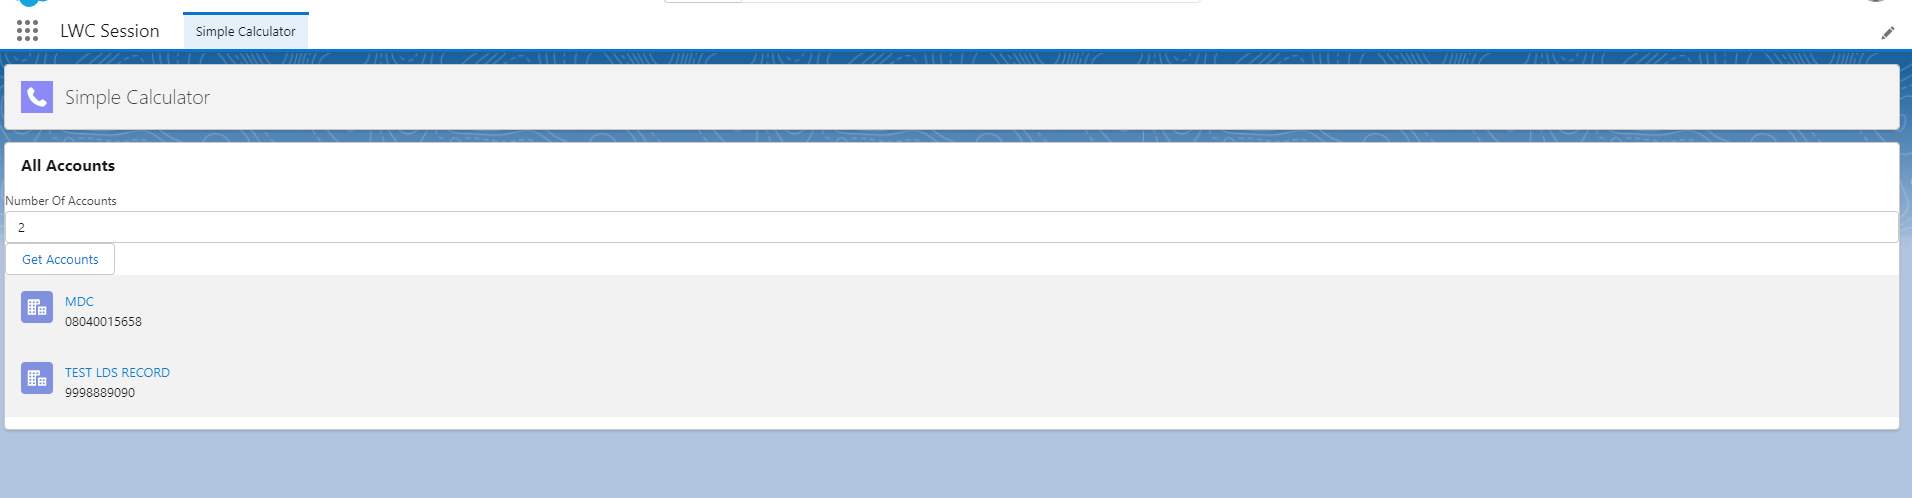
最後に、accountManageApex.htmlを変更する。lightning-inputタグを追加し入力値をjsのnumberOfAccountChangeHandlerに送信する。lightning-buttonで決定した入力値をjsのgetAccountsに送信する。
<template>
    <lightning-card title="All Accounts">
        <lightning-input type="number" label="Number Of Accounts" onchange={numberOfAccountChangeHandler} ></lightning-input>
        <p>
            <lightning-button label="Get Accounts" onclick={getAccounts} ></lightning-button>
        </p>
        <ul>
            <template if:true={responseReceived}>
                <template for:each={accounts} for:item="account">
                    <li key={account.Id}>
                        <div class="slds-p-around_medium lgc-bg">
                            <lightning-tile label={account.Name} type="media">
                                <lightning-icon slot="media" icon-name="standard:account"></lightning-icon>
                                <p class="slds-truncate" title={account.Phone}>{account.Phone}</p>
                            </lightning-tile>
                        </div>
                    </li>
                </template>
            </template>
        </ul>
    </lightning-card>
</template>
実装して確かめましょう。

無事に変更しました。
6.標準搭載機能とその他
前のセクションではLDSやapexなどを通じてsalesforceDataと通信を実現しました。このセクションでは標準搭載機能や良く使われる3rdパーティーライブラリなどを実践してみよう。
6-1.標準メッセージの搭載
lwcを実行した後に成功とエラー及びエラー種類を表示するメッセージがあります、以下が例です。
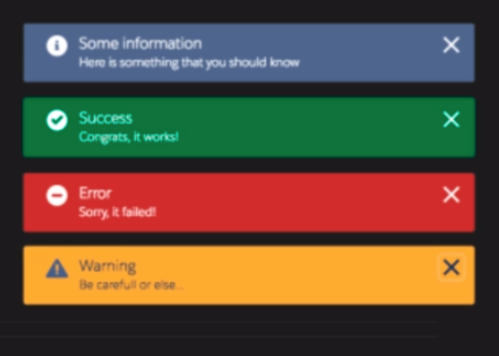
前のセクションで作成したlwcのaccountManageApex.jsを変更して実装しましょう。ShowToastEventをインポートしましょう。getAccountsメソッド内容に成功とエラー二通り定数配列toastEvent を用意して状況に合わせてdispatchEventで表示する。
import { LightningElement, track } from 'lwc';
import getAllAccounts from '@salesforce/apex/AccountManager.getAccount'
import {ShowToastEvent} from 'lightning/platformShowToastEvent';

export default class AccountManageApex extends LightningElement {

    @track numberOfRecords;
    @track accounts;

    get responseReceived(){
        if(this.accounts){
            return true;
        }
        return false;
    }

    numberOfAccountChangeHandler(event){
        this.numberOfRecords = event.target.value;
    }

    getAccounts(){
        getAllAccounts({numberOfRecords:this.numberOfRecords}).then(response =>{
            this.accounts = response;
            const toastEvent = new ShowToastEvent({
                title : 'Accounts Loaded',
                message : this.numberOfRecords + ' Accounts Fetched From Server',
                variant : 'success',
            });
            this.dispatchEvent(toastEvent);
        }).catch(error =>{
            console.error('Error in getting the accounts', error.body.message);
            const toastEvent = new ShowToastEvent({
                title : 'ERROR',
                message : error.body.message,
                variant : 'error',
            });
            this.dispatchEvent(toastEvent);
        })
    }


}
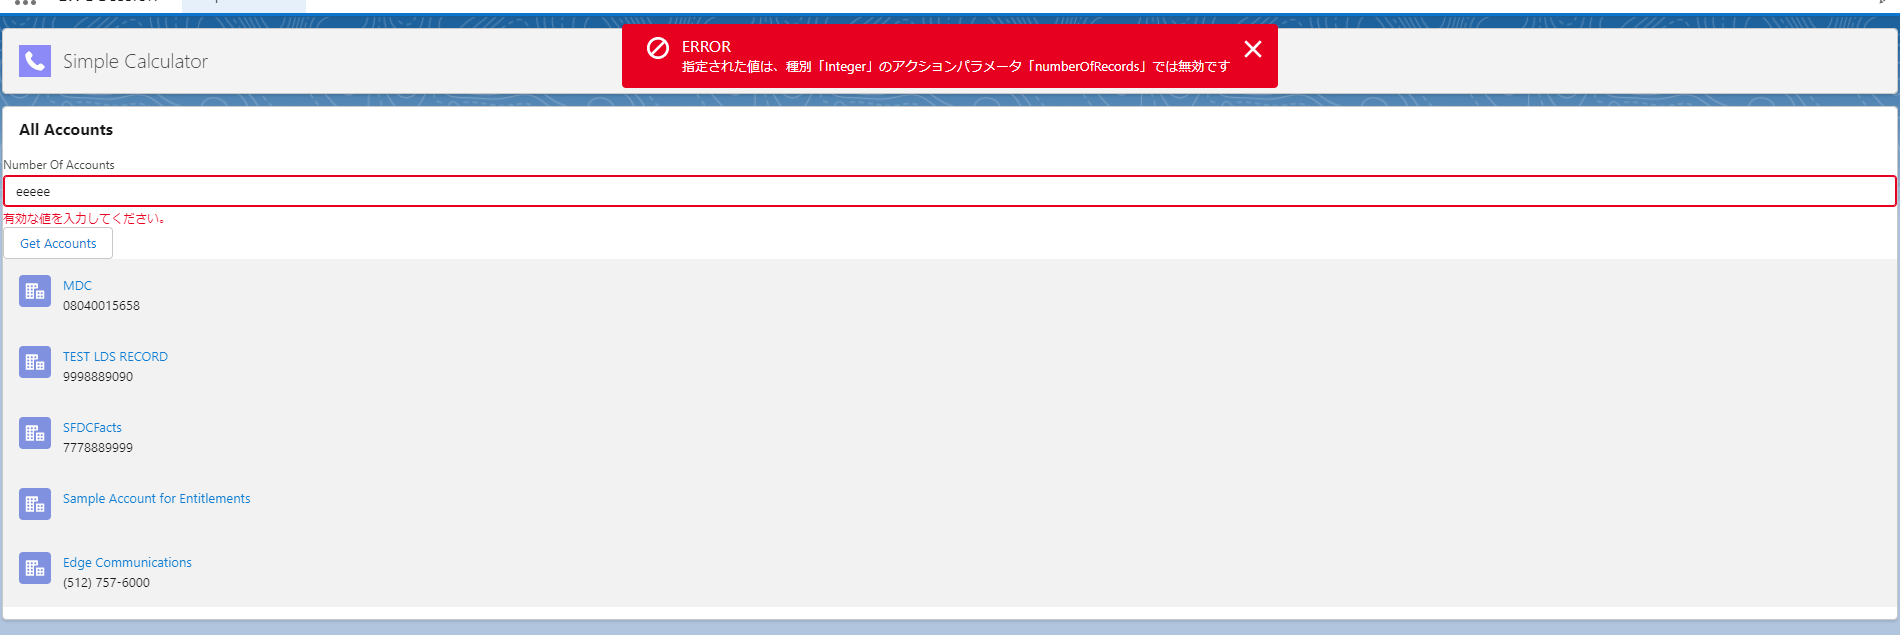
実装して確かめましょう。

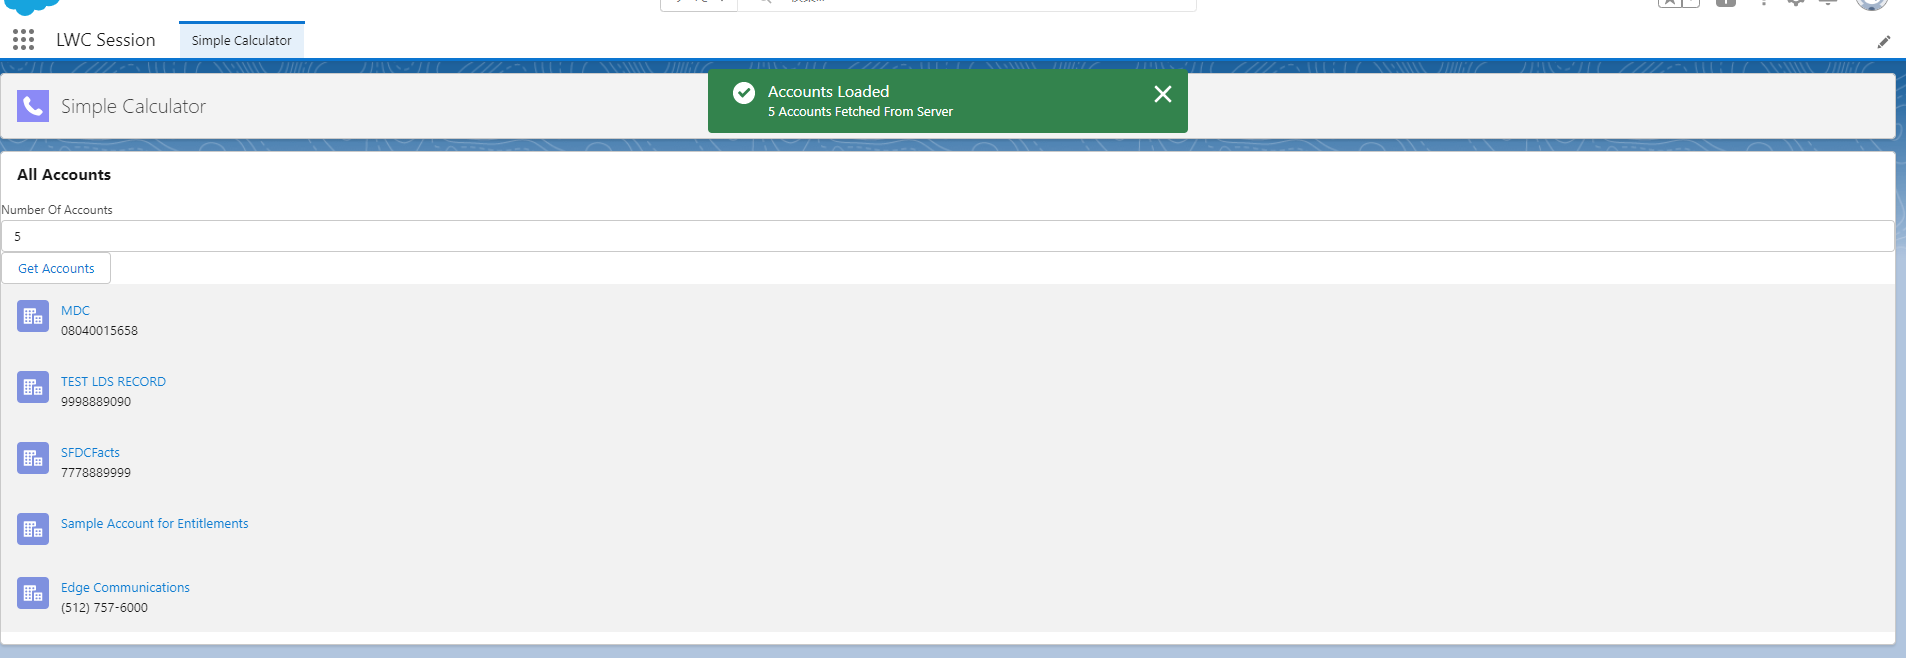
成功とエラーがそれぞれのメッセージを提示しました。
6-2.フレームワークからレコードID及びオブジェクト名を取得
自分から作成して公開しなくでもライブラリに標準搭載している変数はたくさんありますので、apiを使えばメタデータファイルで指定すれば自動的に正しいものを実装します。
前のセクションで作成したlwcのaccountRecordFormで指定したapi名及レコードIDを標準搭載したものに変更してみよう。
trackライブラリをapiライブラリに変更する。@apiで宣言する変数objectApiNameを追加
import { LightningElement, api } from 'lwc';

export default class AccountRecordForm extends LightningElement {
    @api recordId;
    @api objectApiName;


    handleSuccess(event){
        this.recordId = event.detail.id;
    }
}
object-api-nameの部分を{objectApiName} と指定する。
<template>
    <lightning-card title="Custom Record Form">
        <div class="slds-p-around_medium">
            <lightning-record-form object-api-name={objectApiName} record-id={recordId} columns="2" mode="edit"
                layout-type="Full" onsuccess={handleSuccess}></lightning-record-form>
        </div>
    </lightning-card>
</template>
メタデータを以下内容に変更する、オブジェクトのデータソースを指定する。
<?xml version="1.0" encoding="UTF-8"?>
<LightningComponentBundle xmlns="http://soap.sforce.com/2006/04/metadata" fqn="accountRecordForm">
    <apiVersion>45.0</apiVersion>
    <isExposed>true</isExposed>
    <description>A Generic component to show edit object records</description>
    <masterLabel>Generic Record Handler</masterLabel>
    <targets>
        <target>lightning__RecordPage</target>
        <target>lightning__AppPage</target>
        <target>lightning__HomePage</target>
    </targets>
    <targetConfigs>
        <targetConfig targets="lightning__AppPage,Lightning__HomePage">
            <property name="objectApiName" type="String" datasource="Account,Contact,Opportunity"/>
        </targetConfig>
    </targetConfigs>
</LightningComponentBundle>
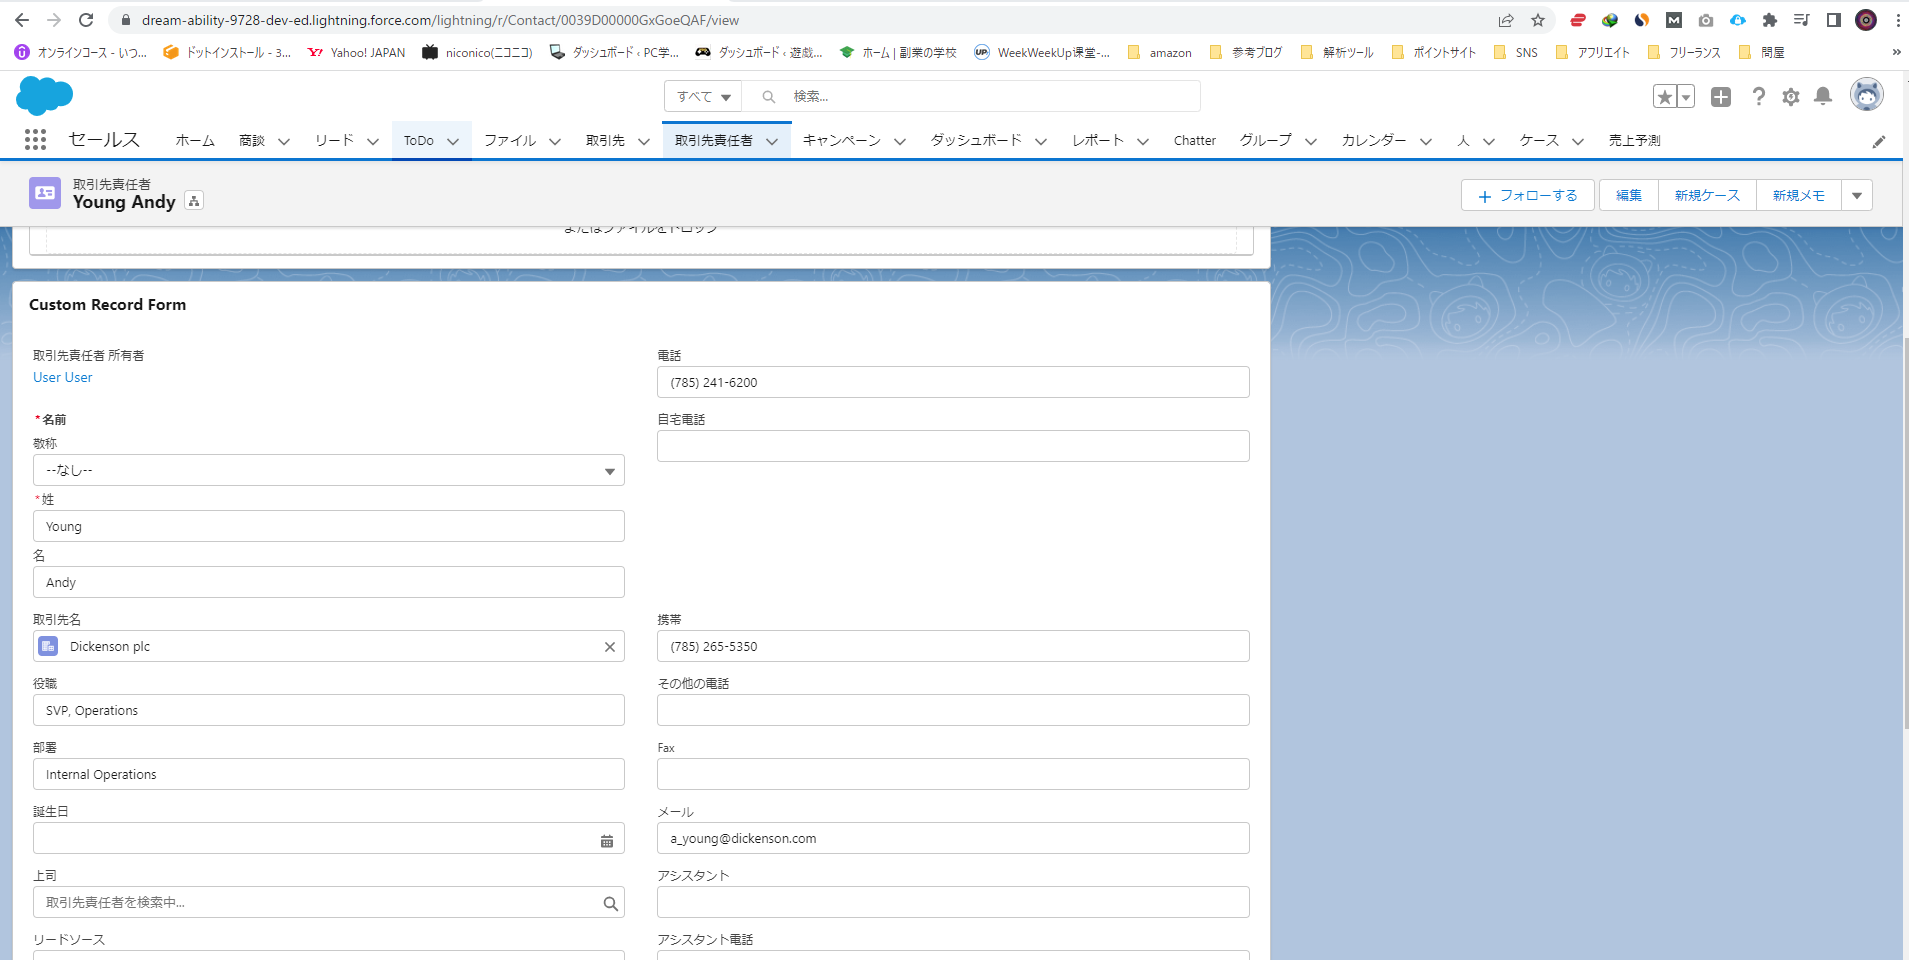
実装しましょう。適当にセールスアプリを開いて取引責任者を一つ選択して開く編集ページで加えてみよう。
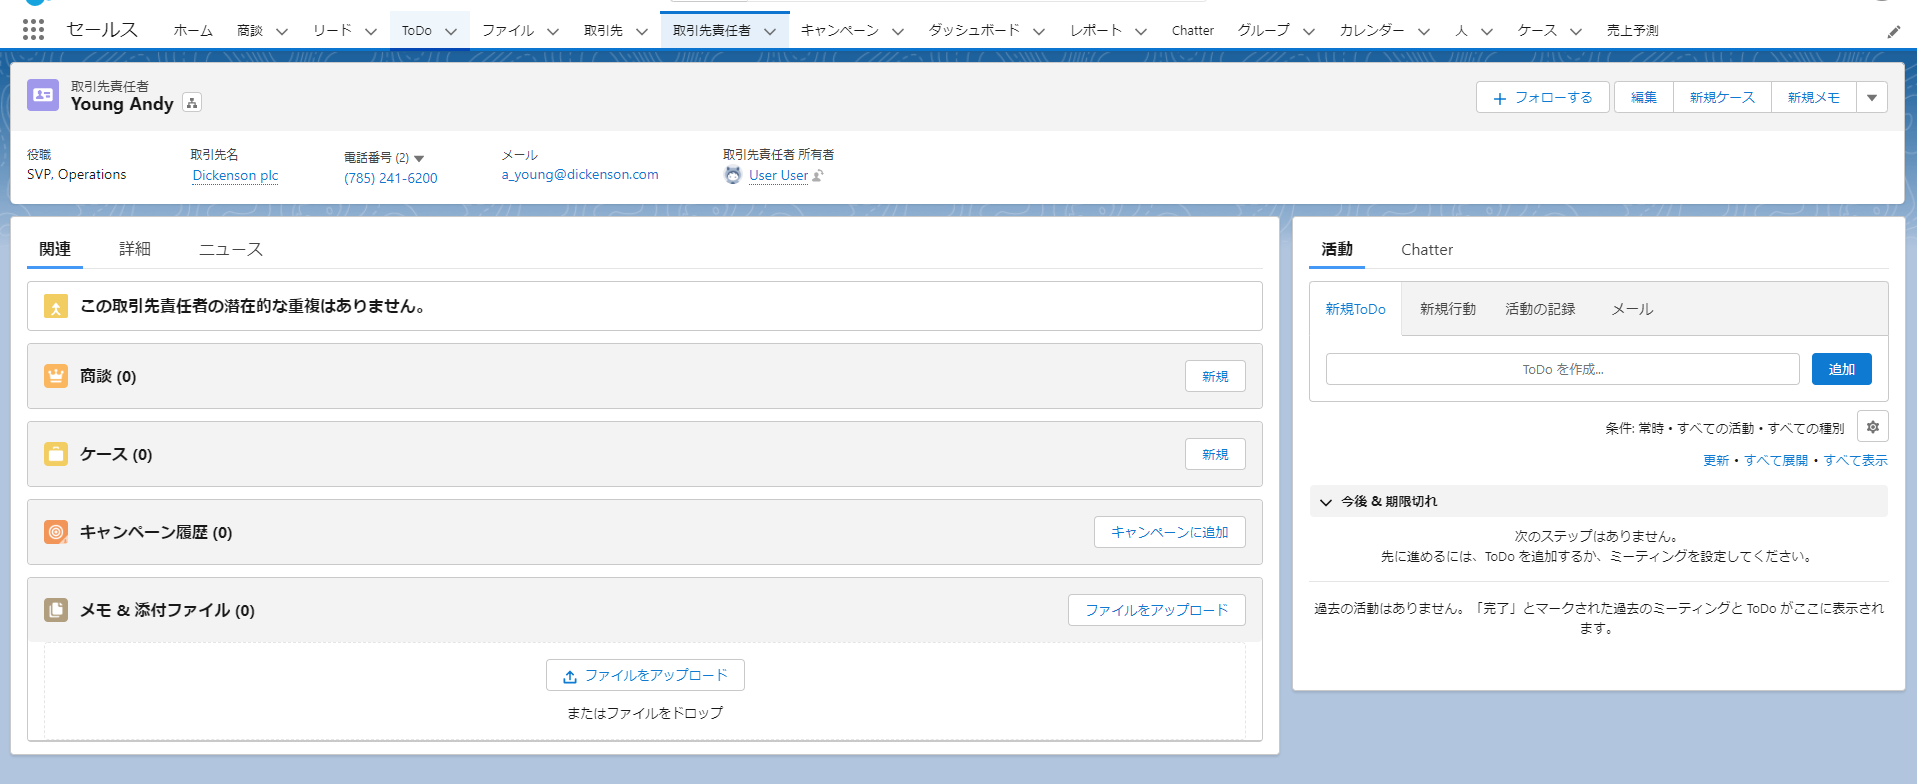
自動的に必要なレコードを表示するようになりました。
6-3.ナビゲーションサービスを使ってみよう
ここではlwcにナビゲーションサービスを実装する、外部urlへ飛出し、タブの切り替え、外部アプリの呼び出し、ファイルのプレイビューなど多彩な機能を持ちlwc開発において欠かせない機能とも言える。
新規lwcを作成する。名前がnavigationExample
lightning/navigationモジュールからNavigationMixinライブラリをインポートしましょう。以下メソッドを作成しましょう。
import { LightningElement } from 'lwc';
import { NavigationMixin } from 'lightning/navigation';
export default class NavigationExample extends NavigationMixin(LightningElement) {

    openSFDCFacts(){
        this[NavigationMixin.Navigate]({
            type : 'standard__webPage',
            attributes: {
                url : 'https://sfdcfacts.com'
            }
        });
    }

    openAccountHome(){
        this[NavigationMixin.Navigate]({
            type : 'standard__objectPage',
            attributes: {
                objectApiName: 'Account',
                actionName: 'home'
            }
        });
    }

    createNewContact(){
        this[NavigationMixin.Navigate]({
            type : 'standard__objectPage',
            attributes: {
                objectApiName: 'Contact',
                actionName: 'new'
            }
        });
    }

    openOppListView(){
        this[NavigationMixin.Navigate]({
            type : 'standard__objectPage',
            attributes: {
                objectApiName: 'Opportunity',
                actionName: 'list'
            }
        });
    }

    openCaseRecord(){
        this[NavigationMixin.Navigate]({
            type : 'standard__recordPage',
            attributes: {
                recordId: "5009D000004AhQVQA0",
                objectApiName: 'Case', // objectApiName is optional
                actionName: 'view'
            }
        });
    }

    openMeetingRoom(){
        this[NavigationMixin.Navigate]({
            type : 'standard__navItemPage',
            attributes: {
                apiName: 'Meeting_Room'
            }
        });
    }

    previewFile(){
        this[NavigationMixin.Navigate]({
            type: 'standard__namedPage',
            attributes: {
                pageName: 'filePreview'
            },
            state : {
                recordIds: '0699D000001AtrOQAS',
                selectedRecordId:'0699D000001AtrOQAS'
            }
        });
    }

}
作成したメソッドをlightning-buttonタグに実装しましょう。
<template>
    <lightning-card title="Navigation Example">
        <div class="slds-p-around_medium">
            <lightning-button label="Open SFDCFacts" onclick={openSFDCFacts}></lightning-button>
        </div>
        <div class="slds-p-around_medium">
            <lightning-button label="Account Home" onclick={openAccountHome}></lightning-button>
        </div>
        <div class="slds-p-around_medium">
            <lightning-button label="Create New Contact" onclick={createNewContact}></lightning-button>
        </div>
        <div class="slds-p-around_medium">
            <lightning-button label="Opportunity List View" onclick={openOppListView}></lightning-button>
        </div>
        <div class="slds-p-around_medium">
            <lightning-button label="Open Case Record" onclick={openCaseRecord}></lightning-button>
        </div>
        <div class="slds-p-around_medium">
            <lightning-button label="Meeting Room Tab" onclick={openMeetingRoom}></lightning-button>
        </div>
        <div class="slds-p-around_medium">
            <lightning-button label="Preview A File" onclick={previewFile}></lightning-button>
        </div>
    </lightning-card>
</template>
実装して確かめましょう

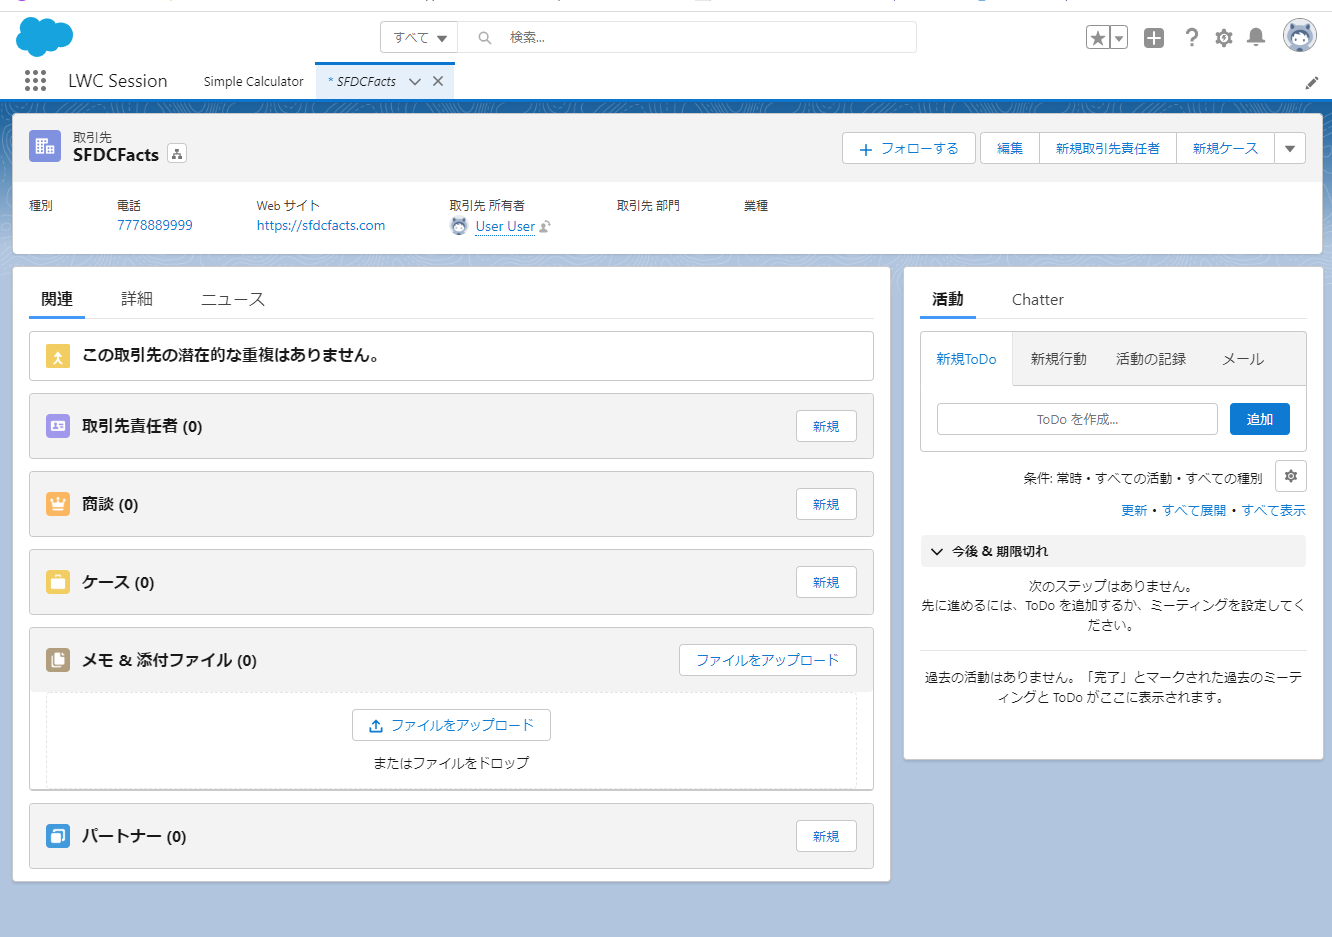
最初のボタンOpen SFDCFactsはtypeがstandard__webPage、url指定ができますので実在するurlを指定して確かめましょう
    openSFDCFacts(){
        this[NavigationMixin.Navigate]({
            type : 'standard__webPage',
            attributes: {
                url : 'https://sfdcfacts.com'
            }
        });
    }
二番目から四番はtypeがstandard__objectPage、アプリの操作が可能なので操作したいアプリをobjectApiNameで呼び出し、具体的な操作はactionNameで指定する
 openAccountHome(){
        this[NavigationMixin.Navigate]({
            type : 'standard__objectPage',
            attributes: {
                objectApiName: 'Account',
                actionName: 'home'
            }
        });
    }
    createNewContact(){
        this[NavigationMixin.Navigate]({
            type : 'standard__objectPage',
            attributes: {
                objectApiName: 'Contact',
                actionName: 'new'
            }
        });
    }

   openOppListView(){
        this[NavigationMixin.Navigate]({
            type : 'standard__objectPage',
            attributes: {
                objectApiName: 'Opportunity',
                actionName: 'list'
            }
        });
    }
openCaseRecordボタンはtypeがstandard__recordPageなので具体的なレコードの内容を操作できる、アプリ指定するobjectApiNameと操作指定するactionName以外に実在するレコードIDをrecordIdで指定しよう。

   openCaseRecord(){
        this[NavigationMixin.Navigate]({
            type : 'standard__recordPage',
            attributes: {
                recordId: "5009D000004AhQVQA0",
                objectApiName: 'Case', // objectApiName is optional
                actionName: 'view'
            }
        });
    }
openMeetingRoomボタンのtypeがstandard__navItemPageなのでアプリ内部の切り替えを指定することができる。
openMeetingRoom(){
        this[NavigationMixin.Navigate]({
            type : 'standard__navItemPage',
            attributes: {
                apiName: 'Meeting_Room'
            }
        });
    }

previewFileボタンのtypeはstandard__namedPageなのでsalsesforceのページ指定ができる。pageNameでページの種類を指定してrecordIdsとselectedRecordIdで具体的なページを指定する
    previewFile(){
        this[NavigationMixin.Navigate]({
            type: 'standard__namedPage',
            attributes: {
                pageName: 'filePreview'
            },
            state : {
                recordIds: '0699D000001AtrOQAS',
                selectedRecordId:'0699D000001AtrOQAS'
            }
        });
    }

7.3rdパーティーライブラリの実装
salesforceの標準搭載ライブラリ以外に開発において3rdパーティーライブラリも欠かせないのでその実装方法をこのセクションで確かめましょう。
今回の実装する例としてこのsimpleLightboxという公開ライブラリを実装しましょう。
https://dbrekalo.github.io/simpleLightbox/#section-Installation

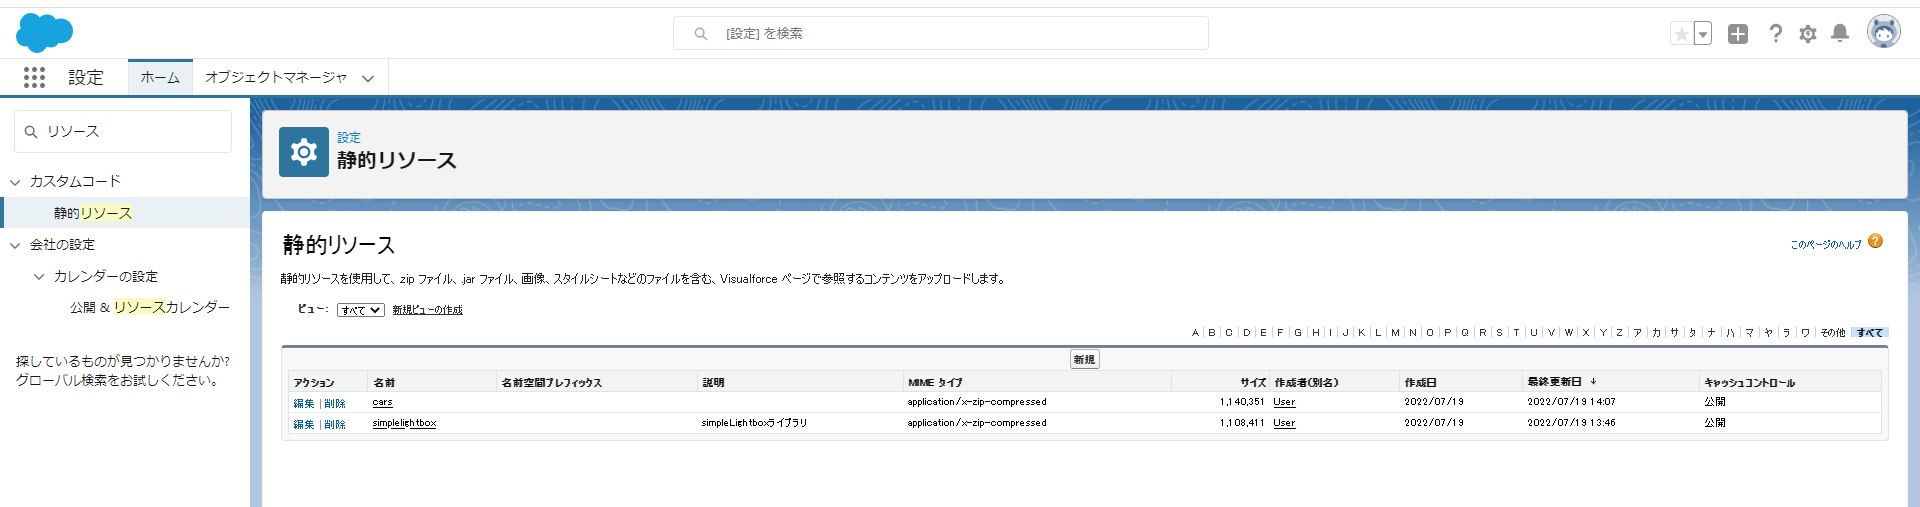
組織の設定を開いて検索欄にリソースを入力して静的リソースを選択しましょう。
simpleLightboxライブラリをアップロードしましょう。

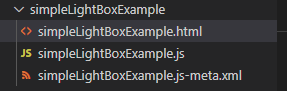
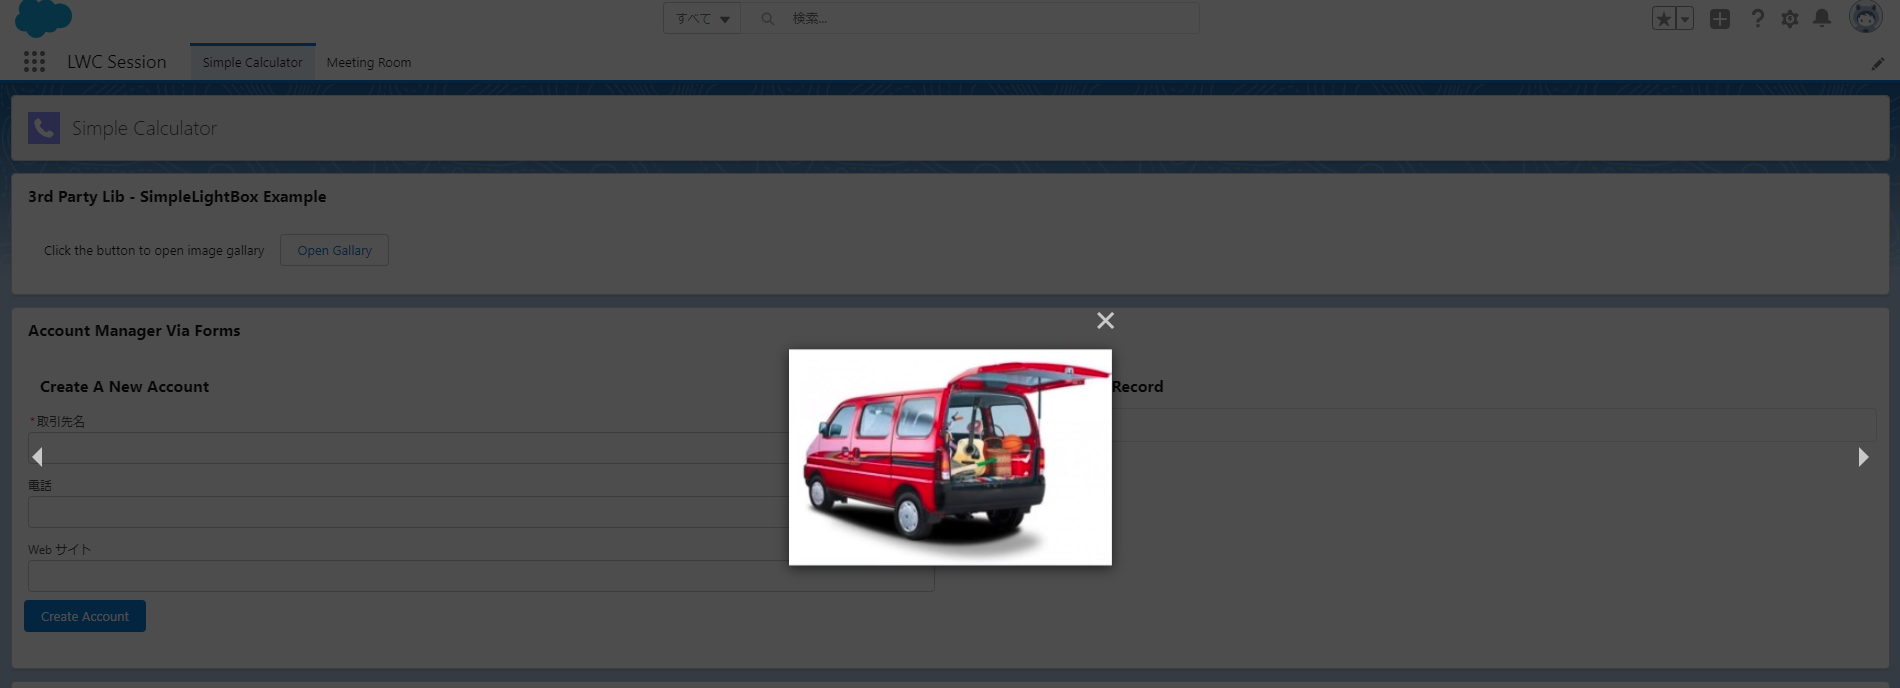
新規lwcを作成しましょう。名前はsimpleLightBoxExampleとする
まず、htmlを以下内容に変更しましょう。ボタンをクリックすることでopenGallaryメソッドを呼び出す。
<template>
    <lightning-card title="3rd Party Lib - SimpleLightBox Example">
        <div class="slds-p-around_medium">
            <span class="slds-p-horizontal_medium">Click the button to open image gallary</span>
            <lightning-button label="Open Gallary" onclick={openGallary} ></lightning-button>
        </div>
    </lightning-card>
</template>
次に、jsを以下内容に変更しましょう。SLライブラリをインポートしましょう。
import { LightningElement } from 'lwc';
import SL from '@salesforce/resourceUrl/simpleLightbox';
import { loadStyle, loadScript } from 'lightning/platformResourceLoader';


export default class SimpleLightBoxExample extends LightningElement {

    slLoaded = false;

    renderedCallback(){
        if(!this.slLoaded){
            Promise.all([
                loadStyle(this, SL+'/simpleLightbox-master/dist/simpleLightbox.css'),
                loadScript(this, SL+'/simpleLightbox-master/dist/simpleLightbox.js')
            ]).then(()=>{
                this.slLoaded = true;
            }).catch((error)=>{
                console.error('Could not initilize simple light box-', error);
            });
        }
    }

    openGallary(){
        SimpleLightbox.open({
            items: ['/resource/car/van/maruti_suzuki_eeco.jpg', '/resource/cars/luxury/mercedes_benz_gls.jpg', '/resource/cars/sports/Audi_R8_V10_Plus.jpg']
        });
    }

}
最後はメタデータを変更しましょう。
<?xml version="1.0" encoding="UTF-8"?>
<LightningComponentBundle xmlns="http://soap.sforce.com/2006/04/metadata" fqn="simpleLightBoxExample">
    <apiVersion>46.0</apiVersion>
    <isExposed>true</isExposed>
    <targets>
        <target>lightning__AppPage</target>
        <target>lightning__HomePage</target>
        <target>lightning__RecordPage</target>
    </targets>
</LightningComponentBundle>
openGallaryで開くcarリソース関連の内容を実装しましょう。
https://pmmexd-my.sharepoint.com/:u:/g/personal/rmxfz_fqv_me/Ea4-tKL64TxKs2FSH-rFcNMBNoorB1jcB2mFQQFvXDAwhg?e=Po8EMr

8.LWCテストとデバッグ
LWC開発の最後のステップはテストとデバッグを行うことです。一般的に使われる方法がJtest、ブラウザ追跡、エディタのエラーメッセージです。
8-1.Jest テスト
sfdx-lwc-jest Node モジュールでは、Lightning Web コンポーネントの Jest テストを記述して実行し、デバッグすることができます。Salesforce CLI を使用すると、Jest とその連動関係をプロジェクトに簡単にインストールできます。まず、実行の準備をしましょう。
1.コマンドラインから次のコマンドを実行して、CLI が適切にインストールされていて最新バージョンであることを確認します。
sfdx update
2.Visual Studio Code ターミナルの Salesforce DX プロジェクトの最上位ディレクトリで、次のコマンドを実行します。
sfdx force:lightning:lwc:test:setup
sfdx-lwc-jest Node コマンドを実行してみよう。
node node_modules/@salesforce/sfdx-lwc-jest/bin/sfdx-lwc-jest
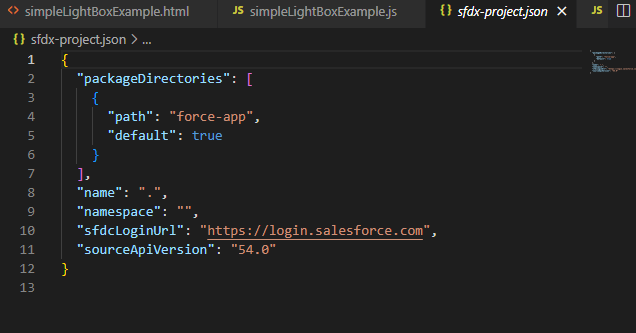
3.Visual Studio Code の最上位ディレクトリで sfdx-project.json を開きます。
「sourceApiVersion」が含まれているコード行を、受信したエラーメッセージに記載されている想定されるバージョンに変更します。
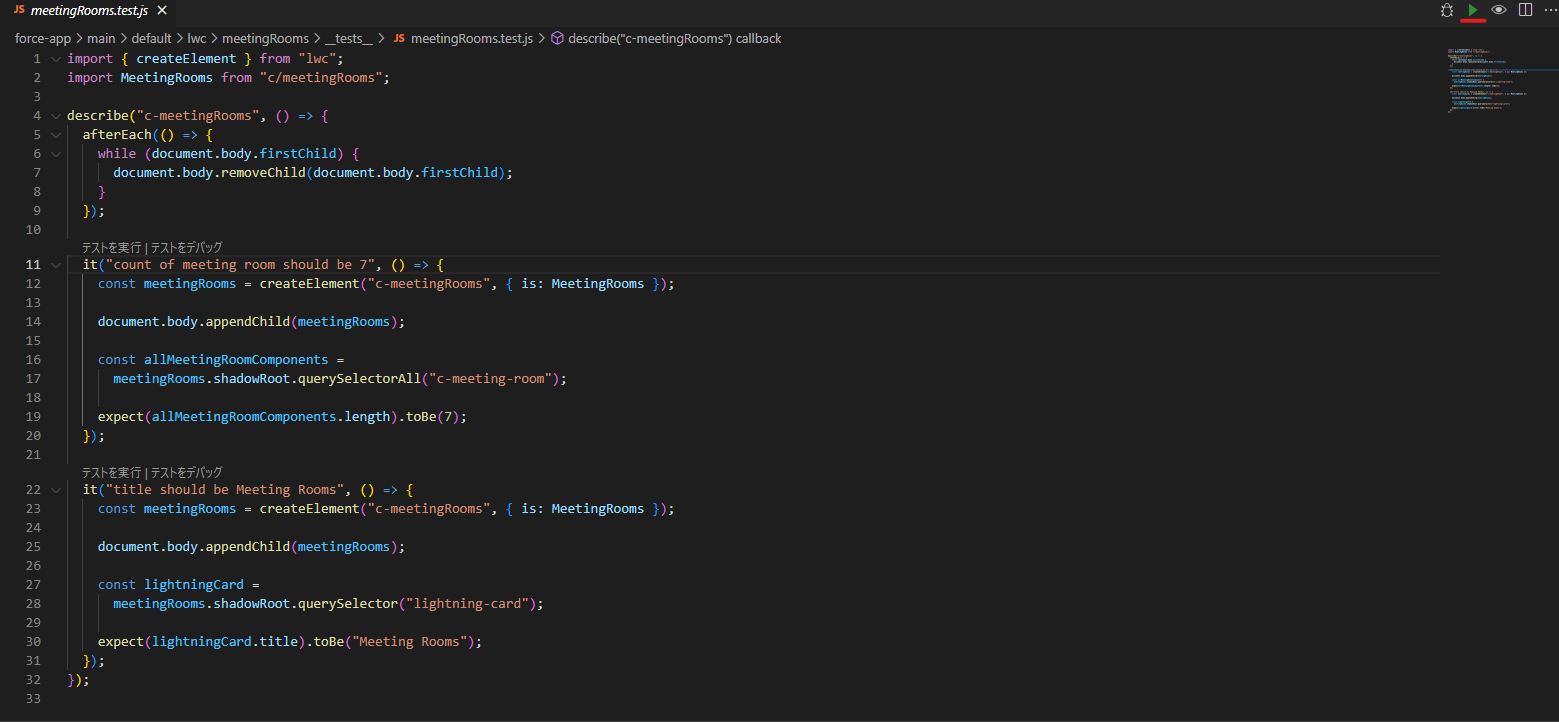
4.試しに前のセクションで作成したlwcのテストクラスを書いてみましょう。
import { createElement } from "lwc";
import MeetingRooms from "c/meetingRooms";

describe("c-meetingRooms", () => {
  afterEach(() => {
    while (document.body.firstChild) {
      document.body.removeChild(document.body.firstChild);
    }
  });

  it("count of meeting room should be 7", () => {
    const meetingRooms = createElement("c-meetingRooms", { is: MeetingRooms });

    document.body.appendChild(meetingRooms);

    const allMeetingRoomComponents =
      meetingRooms.shadowRoot.querySelectorAll("c-meeting-room");

    expect(allMeetingRoomComponents.length).toBe(7);
  });

  it("title should be Meeting Rooms", () => {
    const meetingRooms = createElement("c-meetingRooms", { is: MeetingRooms });

    document.body.appendChild(meetingRooms);

    const lightningCard =
      meetingRooms.shadowRoot.querySelector("lightning-card");

    expect(lightningCard.title).toBe("Meeting Rooms");
  });
});
5.実際にテストしてみよう。

8-2.chromeを使うデバッグ
ここではクロムを使うデバッグ方法を紹介します。まず、htmlを以下内容に変更しましょう。
/* eslint-disable no-debugger */

import { createElement } from "lwc";
import MeetingRooms from "c/meetingRooms";

describe("c-meetingRooms", () => {
  afterEach(() => {
    while (document.body.firstChild) {
      document.body.removeChild(document.body.firstChild);
    }
  });

  it("count of meeting room should be 7", () => {
    const meetingRooms = createElement("c-meetingRooms", { is: MeetingRooms });

    document.body.appendChild(meetingRooms);

    const allMeetingRoomComponents =
      meetingRooms.shadowRoot.querySelectorAll("c-meeting-room");

    debugger;
    expect(allMeetingRoomComponents.length).toBe(7);
  });

  it("title should be Meeting Rooms", () => {
    const meetingRooms = createElement("c-meetingRooms", { is: MeetingRooms });

    document.body.appendChild(meetingRooms);

    const lightningCard =
      meetingRooms.shadowRoot.querySelector("lightning-card");

    debugger;
    expect(lightningCard.title).toBe("Meeting Rooms");
  });
});
expectの前にdebuggerを付ければテスト実行時は自動的に止まり、debuggerに通じて実際に取得したデータを知ることができる。
ターミナルで以下命令を実行しましょう。
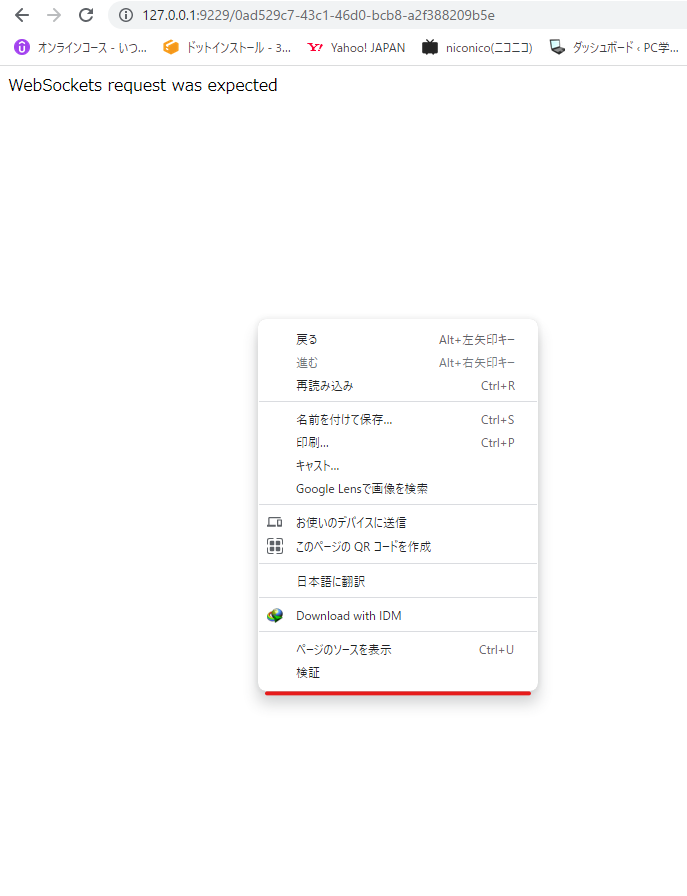
npm run test:unit:debug
実際にデバッグを行っているアドレスをクロムを使って開きましょう。

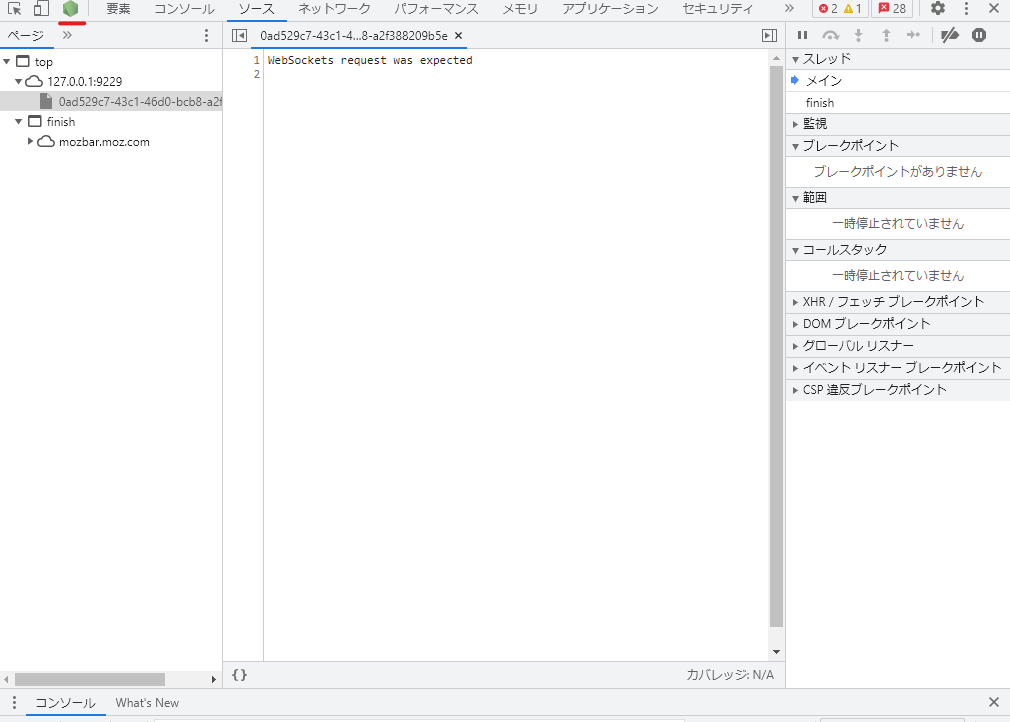
次に、検証をクリックして開く
devtoolを開きましょう。
スクリプト再開をクリックしましょう。

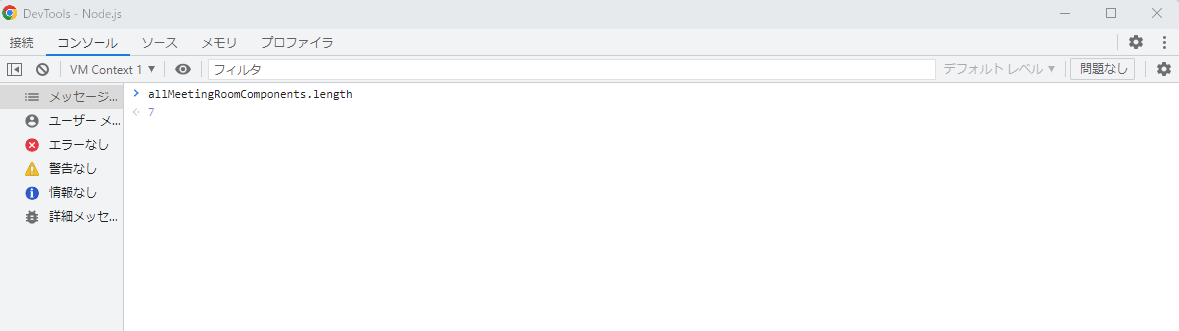
debuggerのところで止まりました。
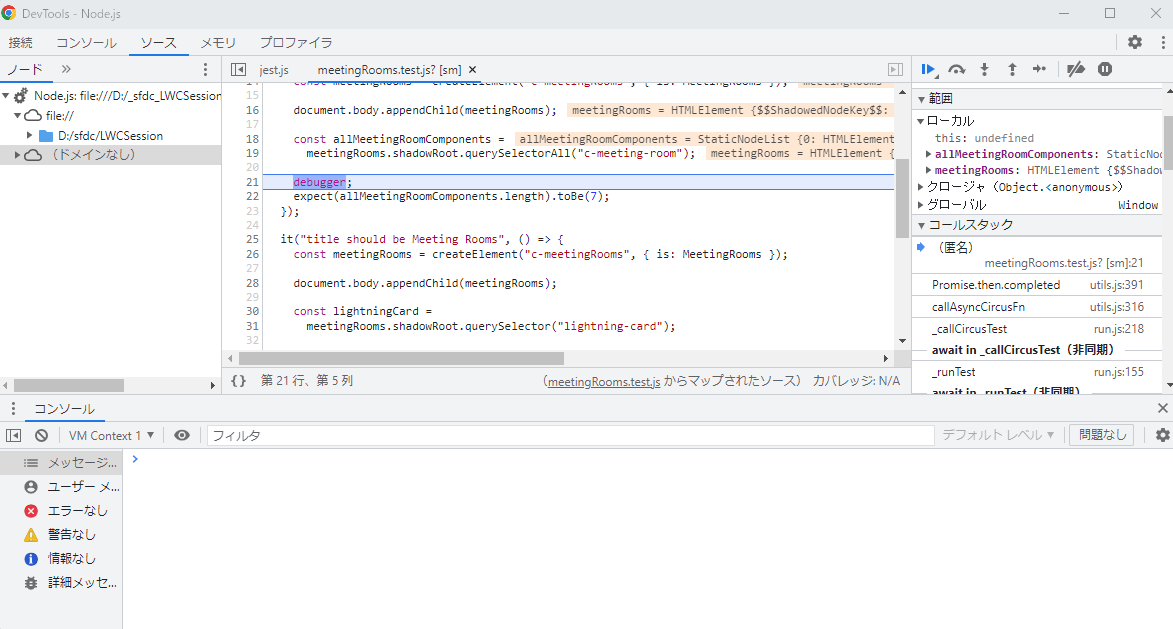
コンソルで取得値allMeetingRoomComponents.lengthとlightningCard.titleをコンソルで確かめましょう。
次のテストを実行する前にlightningCard.titleを確かめましょうとしたらエラーメッセージが出る

スクリプトの実行再開を押しましょう。二個目のdebuggerの前で止まりました。

lightningCard.titleを確かめましょう

まとめ
以上がLWC開発環境や実際の開発そしてテスト方法などを説明したものとなります。不足の面や正しく説明出来なかった部分きっとあります。今後はsalesforceについてもっと学習します。