Line NotifyというLINEのサービスを使うと、コマンドベースで任意のグループにメッセージを送れるようになります。
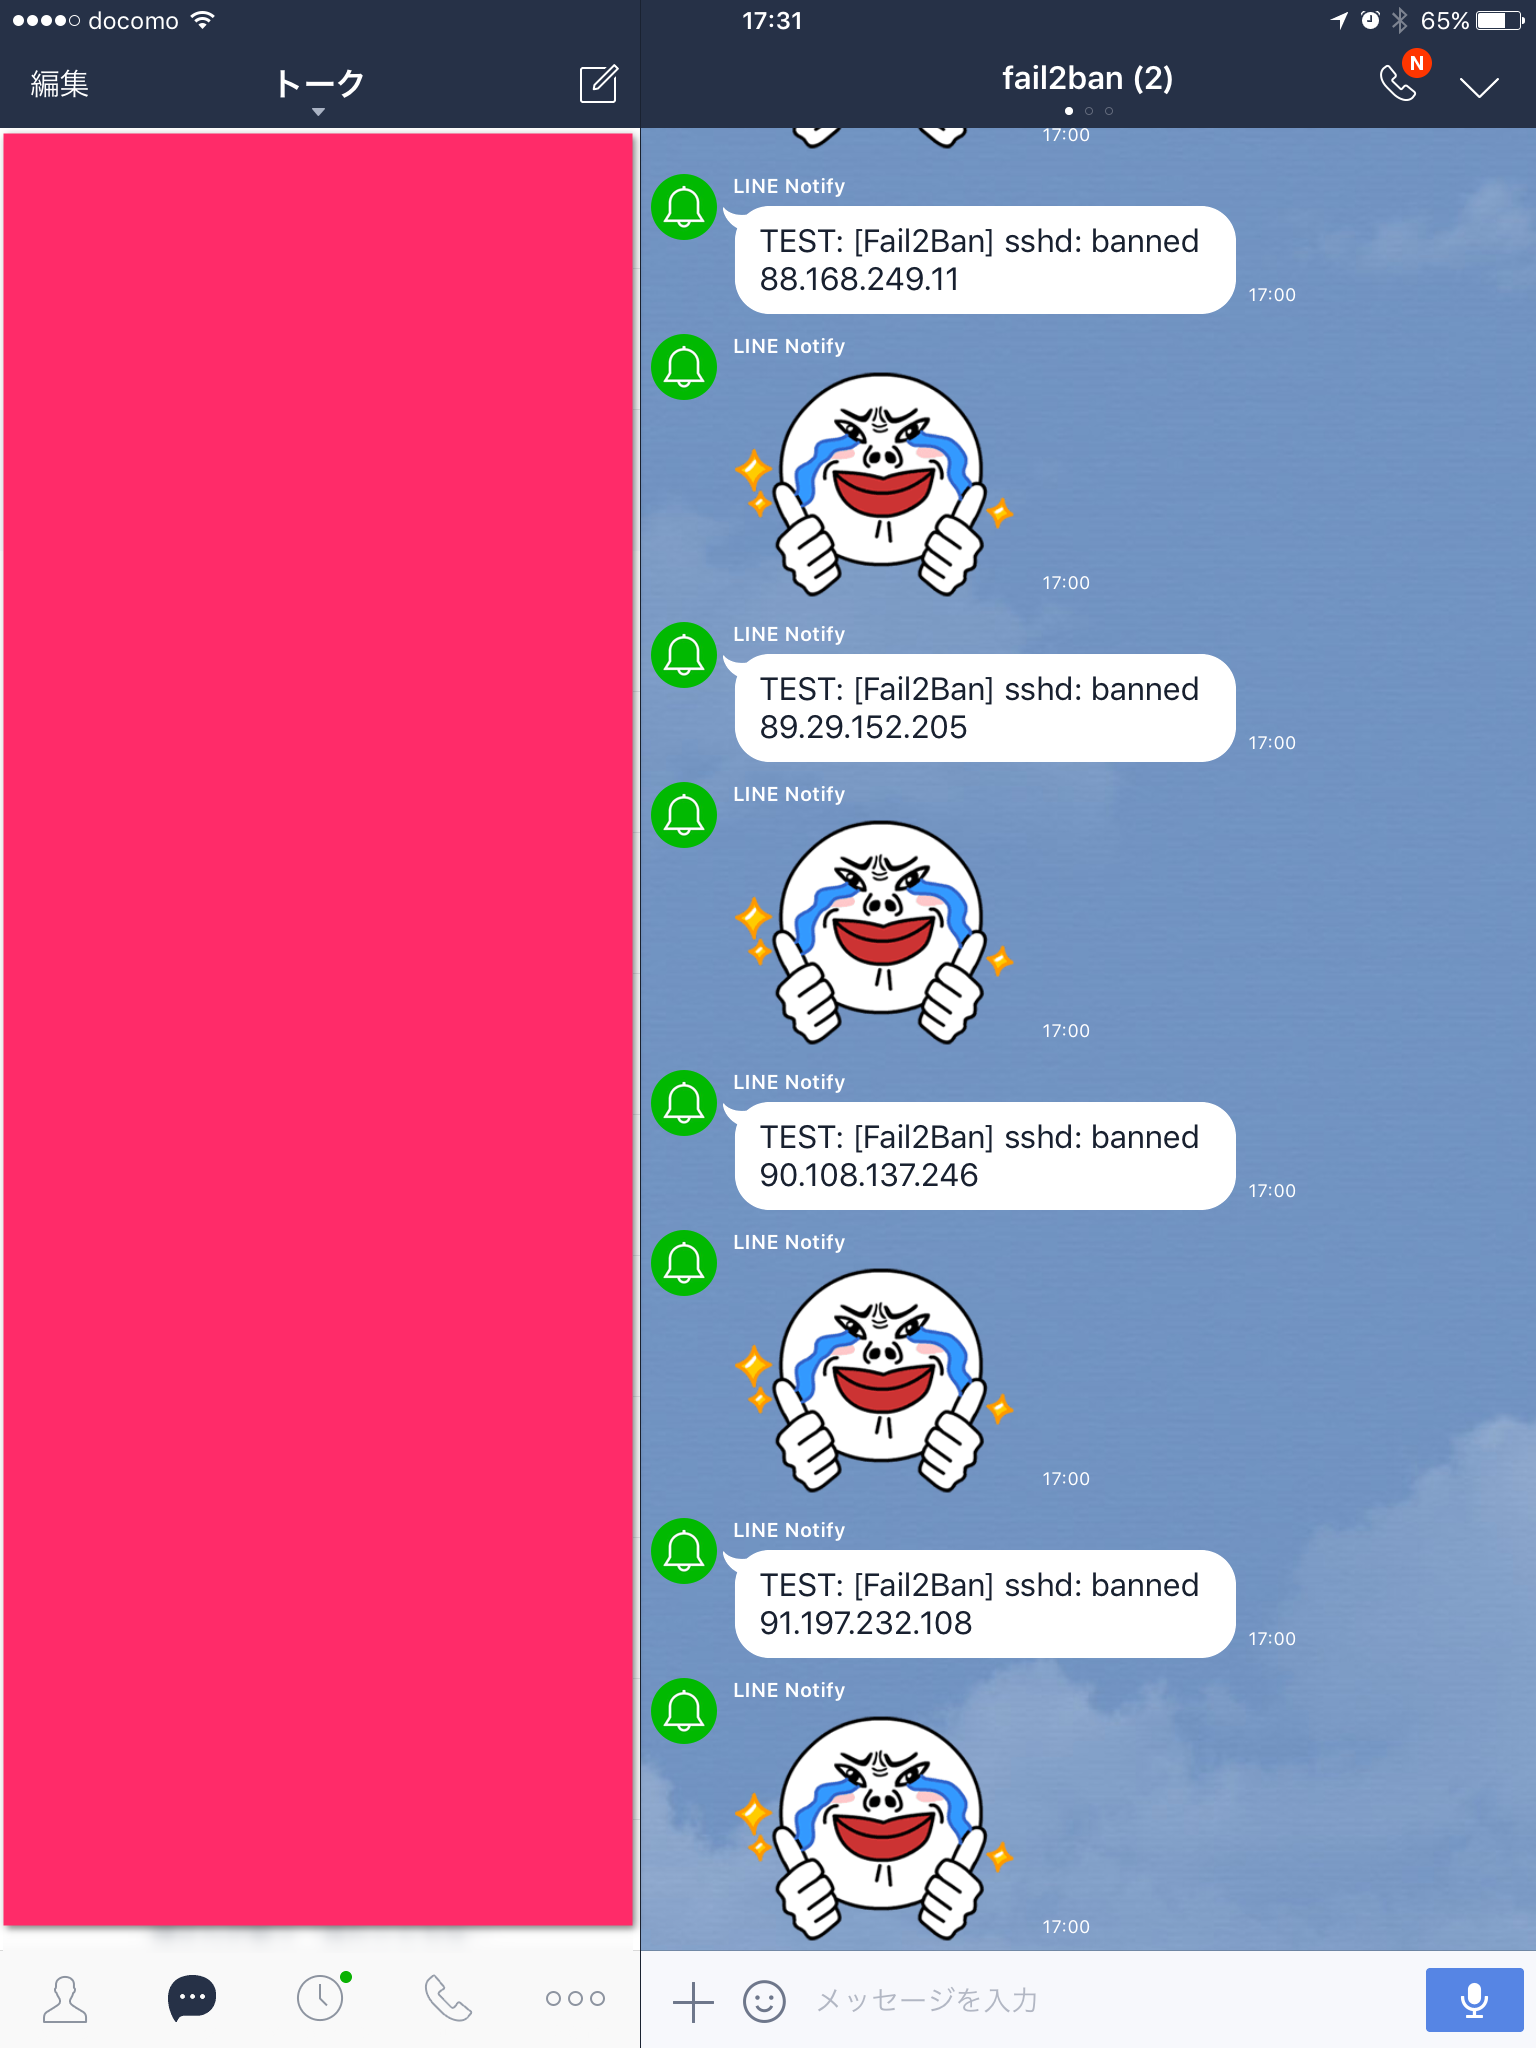
そこで、不正アクセスなどを検知したfail2banが、特定のIPアドレスをbanしたときに、LINEグループに通知するようにしてみました。
バージョン
CentOS 7.3
fail2ban 0.9.6
LINE側の準備
Line Notifyはブラウザ上で操作します。 また通知用のLINEグループを作成するため、スマートフォンとブラウザの両方で操作が必要になります。
LINEアプリに通知用のグループ作成
- Line Notifyをブラウザで開き、自分のLINEアカウントでログインします。
- 自分のLINEアプリのトークに、LINE Notifyから通知が来ていることを確認してください。
- fail2ban通知用のグループを自身のLINEアプリ上に作成します。 今回は、fail2banというグループ名で作成しました。
- 作ったグループのメンバーにLINE Notifyを追加します。 これで、LINEアプリ側の準備は整いました。
Line Notifyの通知用トークン作成
- 次に、ブラウザ上のLine Notifyのマイページ にいきます。

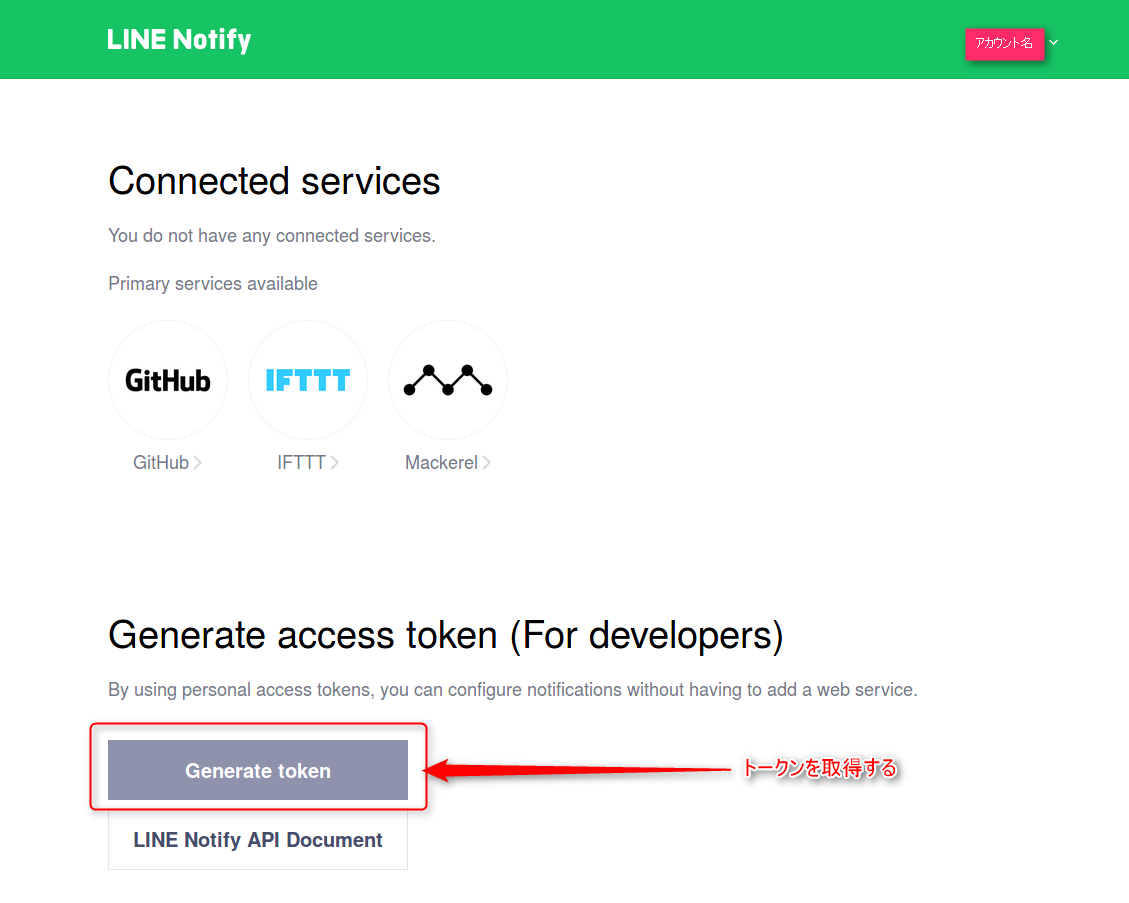
- Generate tokenをクリックます。

- トークン用の設定画面が出るので、トークン名と事前に作成したfail2ban用のグループを選択します。今回は、トークン名はTESTとしています。 Ganarate tokenをクリックします。

- トークンが画面に出てくるので、コピーしてとっておきます。

fail2banの設定
fail2banにはLINE通知用のアクションは無いため、新規に作成します。 作成したactionをjailの定義に組み込みます。
actionの作成
/etc/fail2ban/action.d下にLINE通知用のactionファイルを新規に作成します。 今回は、send-line.confというファイルにしています。
vi /etc/fail2ban/action.d/send-line.conf
設定内容は、これだけです。
xxxxxxxxxxxxxxxxxxxxxxxxxxxxxxxxxxxxxxxxxxxは、Line Notifyで取得したトークンです。差し替えてください。
[Definition]

actionban = curl -X POST -H 'Authorization: Bearer xxxxxxxxxxxxxxxxxxxxxxxxxxxxxxxxxxxxxxxxxxx' -F 'message=[Fail2Ban] <name>: banned <ip>' -F 'stickerPackageId=1' -F 'stickerId=14' https://notify-api.line.me/api/notify

[Init]
name = default
- message : テキストメッセージ
- stickerPackageId : スタンプグループID
- stickerId : スタンプID
スタンプグループIDやスタンプIDの一覧は、以下URLにて公開されています。
Lineスタンプ一覧:ttps://devdocs.line.me/files/sticker_list.pdf
テキスト通知だけで良いのであれば、stickerPackageIdとstickerIdを適宜外してください。
jailの設定
今回は、sshdのjail設定に、先ほど作成したLINE通知設定を組み込んでみました。
vi /etc/fail2ban/jail.d/02-enable-jail.conf
sshdのセクションのactionにsend-line[name=sshd]を追加します。
[sshd]
enabled = true
action  = firewallcmd-multiport[name=sshd, port="ssh", protocol=tcp, blocktype=DROP]
          sendmail-whois-ipjailmatches[name=sshd, sender=fail2ban@xxx.co.jp, dest=root@xxx.co.jp]
          send-line[name=sshd]
これで、準備は完了です。
確認
sshdのjailをリロードしてみます。
# fail2ban-client reload sshd
参考
LINE Engineers' Blog: http://developers.linecorp.com/blog/ja/?p=3819
