※本記事は描画ツールGraphvizのWindows環境での実行を確認していません。ご留意ください。
人は図で説明されると安心する生き物である
ビジネスモデル図解シリーズという記事を最近良く見かける。ヒト、モノ、カネを中心にビジネスがどのようにして回っているのかを図解するシリーズである。様々な要素がお互いに持つ関係を解きほぐし、それらを全体で1枚の図解にまとめあげるプロセスは、骨が折れるが非常にクリエイティブで刺激的な営みなのだろう。「図にする」という行為は人々から好意的に捉えられるのは間違いなさそうである。
モデルファイルのリレーションの記述に不安を抱いていた日々
Laravelでアプリケーション開発をする際、かなりの初期段階でモデルファイル内に各テーブル同士のリレーションを記述する(Laravelに限らない話ではあるが)。**この時に私は不安を抱くのである。「正しく書けているのだろうか」**と。もちろん、開発を進める上でtinkerコマンドやSeeder、Factoryなどを使うことでリレーションが間違っていないかどうか検証する機会はある。しかし、それでもなんとなく落ち着かない時間が多少ではあるが存在する。本記事はそんな気持ちを和らげることを目的としている。
Laravel Entity Relation Diagram Generatorの登場
2018年7月6日、laravel-news.comに「Laravel Entity Relation Diagram Generator」というパッケージのリリース情報が流れた。作成者のMarcelPociotさんによるとLaravelアプリの「モデルファイルからER図を作成するパッケージ」だそうである。**これはまさに私の悩みを解決すものではないか。**その答えを明らかにすべく我々はアマゾンへ向かった。
事前準備の手順
このパッケージでER図を描画するためには①モデルファイルへのリレーションの記述と②マイグレーションファイルへのカラム定義の記述及びマイグレートの実行を事前に行う必要がある。
今回は以前私が書いた基礎的なLaravelスキルを確かめるサンプルプロジェクトで使用したリレーションを使用する。独立したUsersと、親子関係のCompanies、Employees(company_idが外部キー)の非常にシンプルなテーブル構成である。念の為、実行コマンドと編集内容を下記に記載する。
プロジェクトを作成する
今回は「er-diagram-generator」というプロジェクト名で進める。
composer create-project --prefer-dist laravel/laravel er-diagram-generator "5.5.*"
DBを作成する
各々の環境で今回のためのDBを作成する。今回は「er-diagram-generator」というDB名で進める。
.envでDBとの接続の設定をする
  DB_CONNECTION=mysql
  DB_HOST=127.0.0.1
  DB_PORT=3306
  DB_DATABASE=er-diagram-generator
  DB_USERNAME=root
  DB_PASSWORD=
モデル、マイグレーションファイルの作成
前述の記事と同様にCompany.phpとEmployee.phpの2つを作る。「-m」オプションをつければモデルとマイグレーションの2つのファイルを同時に作れる。
php artisan make:model Company -m
php artisan make:model Employee -m
マイグレーションファイルでカラムの定義をする
  public function up()
  {
      Schema::create('companies', function (Blueprint $table) {
          $table->increments('id');
          $table->string('name');
          $table->string('email')->nullable();
          $table->binary('logo')->nullable();
          $table->string('website')->nullable();
          $table->timestamps();
      });
  }
  public function up()
  {
      Schema::create('employees', function (Blueprint $table) {
          $table->increments('id');
          $table->string('first_name');
          $table->string('last_name');
          $table->integer('company_id')->unsigned();
          $table->timestamps();
         // 外部キーの設定
          $table->foreign('company_id')->references('id')->on('companies');
      });
  }
モデル間のリレーションの定義をする
  class Company extends Model
  {
      protected $table = 'companies';

      protected $guarded = array('id');

      public $timestamps = true;

      protected $fillable = [
         'name', 'email', 'website', 'created_at', 'updated_at'
      ];

 	 // Employeeモデルとのリレーションを記述する
      public function employees()
      {
          return $this->hasMany('App\Employee');
      }
  }
  class Employee extends Model
  {
      protected $table = 'employees';

      protected $guarded = array('id');

      public $timestamps = true;

      protected $fillable = [
         'first_name', 'last_name', 'company_id', 'email', 'website', 'created_at', 'updated_at'
      ];

 	 // Companyモデルとのリレーションを記述する
      public function company()
      {
         return $this->belongsTo('App\Company');
      }
  }
migrateコマンドを実行する
php artisan migrate
無事に実行されたらいよいよLaravel Entity Relation Diagram Generatorの導入に進む。
Laravel Entity Relation Diagram Generatorの導入
だいたいのことはGithubのページを見れば書いてあることではあるが、多少行き詰まった箇所があったので備忘録の意味も込めて記載する。なお、本記事冒頭の通り、下記はMacで実行したものである。
homebrewでGraphvizをインストールする
Laravel Entity Relation Diagram Generatorは描画ツールとしてGraphvizの利用を前提としているため下記コマンドでインストールする。
brew install graphviz
パッケージをインストールする
composer require beyondcode/laravel-er-diagram-generator --dev
Laravelのバージョンが5.5以上ならばサービスプロバイダーに自動的に登録してくれるらしい
(If you are using Laravel 5.5+, the package will automatically register the service provider for you)
configuration fileをpublishする
下記コマンドでvendor:publishを実行する(vendor:publishについてはただいま勉強中のため、ひとまず言われるがまま打ち込んでいる)。
php artisan vendor:publish --provider=BeyondCode\\ErdGenerator\\ErdGeneratorServiceProvider
configuration fileを開き定義したモデルファイルが含まれるフォルダを記載する
configフォルダ配下に作成されたerd-generator.phpファイルを下記の通り編集する。編集内容はモデルファイルを含むディレクトリ構成に左右されるので、ご自身のアプリで実行する際は注意してほしい。
 'directories' => [
     // app_path('models'),
 ],
 ↓
 // 今回のモデルファイルは全てappフォルダ直下にあるため、下記の通り記述する
 'directories' => [
     app_path(''),
 ],
ダイアグラム図を作成する
下記コマンドでダイアグラム図が作成できる。指定がなければファイル名は「graph.png」になる
php artisan generate:erd
ファイル名は下記の通り簡単に指定できる
php artisan generate:erd output.png
画像ファイルはプロジェクトフォルダ直下に作成される(今回は「er-diagram-generator」)。
実行結果
成功例
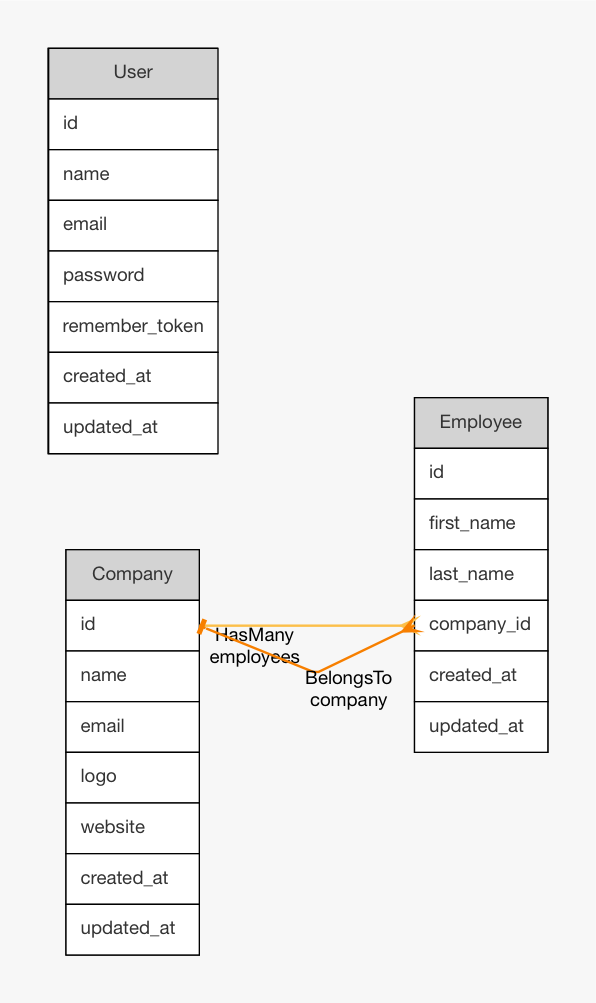
当初の想定通り、CompanyテーブルのidとEmployeeテーブルのcompany_idが結びつき、親子テーブルとして定義されていることがER図で確認することができた。これで安心して次の開発ステップに進める。
失敗例① 〜モデル/マイグレーションファイルの記述をしなかった場合〜
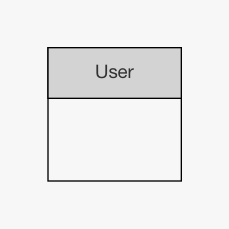
Laravelプロジェクト作成時から存在するUserテーブルのみ描画されている。
失敗例② 〜モデルファイルを記述したがマイグレーションの実行をしなかった場合〜
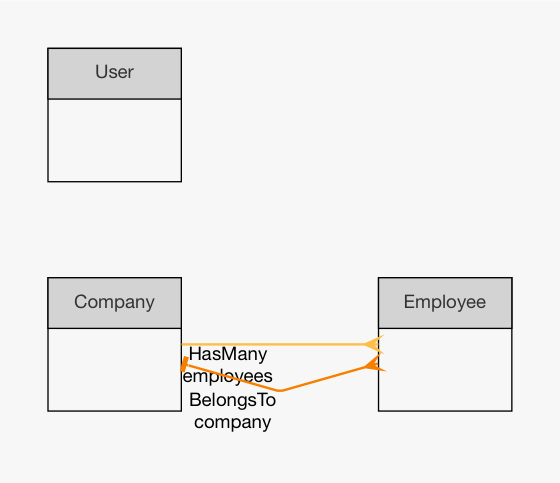
ダイアグラムの描画設定を変えたければ「config/erd-generator.php」を編集する。今回は割愛する。


