ローカルの Ubuntu 22.04 TLS に Overleaf をインストールして日本語をコンパイルできるようにします。日本語化がうまくいかなかったので忘備録として公開します(前半は公式の docs ファイルと同じ内容です)。
私の場合は Windows11上で VMware Workstation 17 を実行し、仮想マシンとして Ubuntu 22.04 LTS を動作させました。Windows11 側の Chrome で Ubuntu仮想マシンにアクセスして Overleaf を使っています。仮想マシンは NAT 接続させています。
最初は https://github.com/overleaf/toolkit/blob/master/doc/quick-start-guide.md の手順通り進めます。
docker などをインストール
% sudo apt install docker docker-compose

overleaf toolkit をクローン
% git clone https://github.com/overleaf/toolkit.git ./overleaf-toolkit

% cd ./overleaf-toolkit
% bin/init
% ls config
(コンフィグファイルが3つできる)

docker グループに taro を追加(実行する一般ユーザの名前を指定)
% sudo usermod -aG docker taro

Ubuntu を再起動
% sudo reboot
Ubuntu の外からアクセスする場合には、以下のように Ubuntu の IPアドレスを config/overleaf.rc で指定します。(この例では Ubuntu のIPアドレスは 192.168.186.10)
SHARELATEX_LISTEN_IP=192.168.186.10

=== 以下は TLS を使う場合のみ ===

# Replace these IP addresses with the external IP address of your host
NGINX_HTTP_LISTEN_IP=192.168.186.10
NGINX_TLS_LISTEN_IP=192.168.186.10
最後に、以下のように bin/up を実行すると、docker-compose で overleaf が起動します。
% bin/up
Ubuntu でブラウザから http://192.168.186.10/launchpad にアクセスします。ブラウザ上の操作でユーザ登録して英語のデモプロジェクトをコンパイルできることを確認しましょう。
日本語化パッケージのインストール
Docker の sharelatex コンテナに入って TexLive マネージャーで日本語パッケージなどすべてインストールします。
% docker exec -it sharelatex bash
または
% bin/shell

TexLive のバージョンを確認
# tlmgr --version
tlmgr revision 66798 (2023-04-08 02:15:21 +0200)
tlmgr using installation: /usr/local/texlive/2023
TeX Live (https://tug.org/texlive) version 2023

パッケージを更新、フルインストール
# tlmgr update --self
# tlmgr install scheme-full

インストール完了したか確認(たまにインストール残がある)
# tlmgr install scheme-full
tlmgr: package repository https://mirror.ox.ac.uk/sites/ctan.org/systems/texlive/tlnet (verified)
tlmgr install: package already present: scheme-full

いったんコンテナから出る
# exit

Dockerイメージを commit
% docker commit sharelatex sharelatex/sharelatex:with-texlive-full-20240106

コンテナを停止させて、sharelatex コンテナを削除
% bin/stop && bin/docker-compose rm -f sharelatex
https://github.com/overleaf/toolkit/blob/master/doc/ce-upgrading-texlive.md の指示のとおり、config/ 以下にファイル docker-compose.override.yml を追加、以下を入力します。
---
version: '2.2'
services:
    sharelatex:
        image: sharelatex/sharelatex:with-texlive-full-20240106
もういちど docker-compose で overleaf を起動します。
% bin/up
日本語化の続き
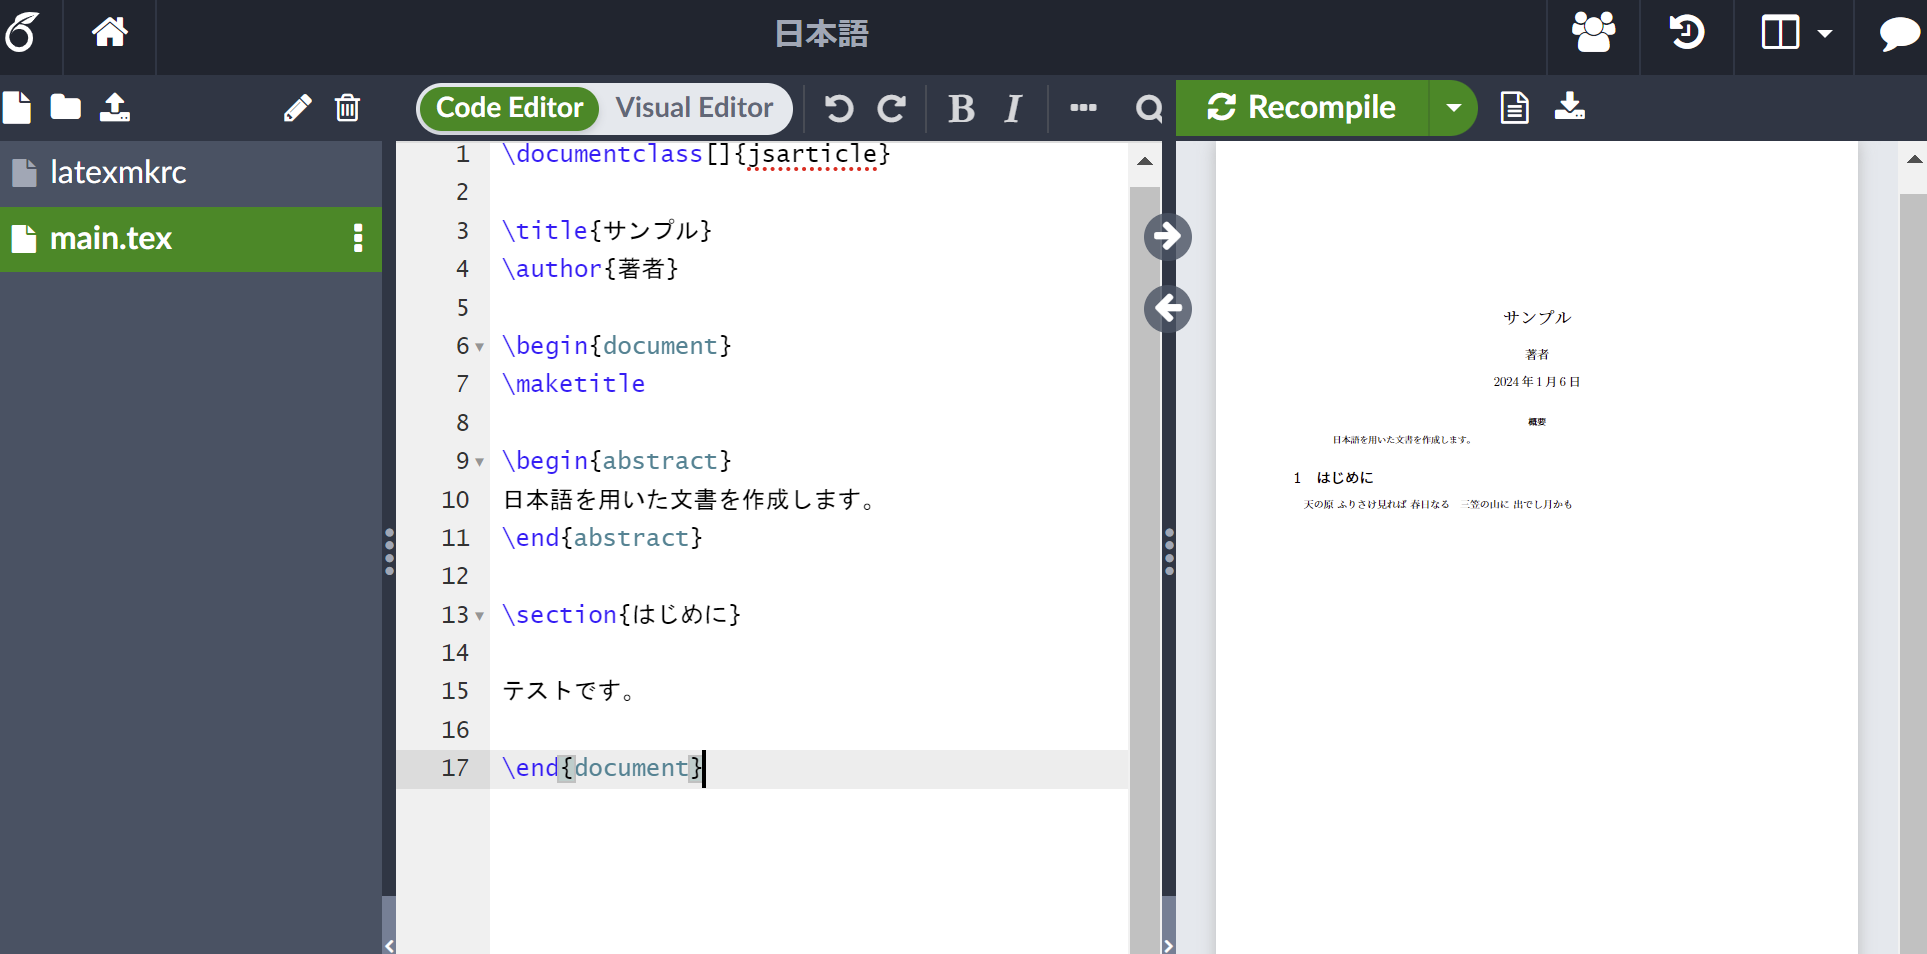
新しいプロジェクトを作り、main.tex を以下のように作成します。
\documentclass[]{jsarticle}

\title{サンプル}
\author{著者}

\begin{document}
\maketitle

\begin{abstract}
日本語を用いた文書を作成します。
\end{abstract}

\section{はじめに}

テストです。

\end{document}
パスの最上位に latexmkrc を作成し、以下を入力します。
サブフォルダに latexmkrc を置いても認識されません
$latex = 'uplatex';
$bibtex = 'upbibtex';
$dvipdf = 'dvipdfmx %O -o %D %S';
$makeindex = 'mendex -U %O -o %D %S';
$pdf_mode = 3;
$ENV{TZ} = 'Asia/Tokyo';
$ENV{OPENTYPEFONTS} = '/usr/share/fonts//:';
$ENV{TTFONTS} = '/usr/share/fonts//:';
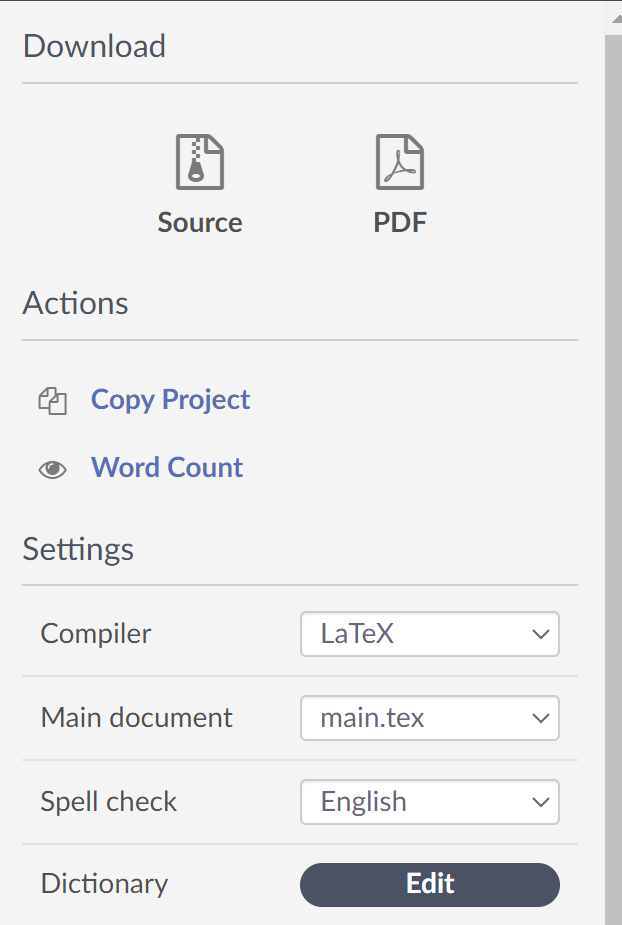
最後に latex コンパイラを使うように設定します。ブラウザ左上のメニューをクリックして、以下のように latex を選択します。
Recompile を右クリックして Recompile from scratch を実行します。右下の Other logs and files をクリックし、output.stdout をダウンロードして中身を確認してみます。以下のように uplatex が呼ばれていることを確認できます。
Rc files read:
  latexmkrc
Latexmk: This is Latexmk, John Collins, 4 Apr. 2023. Version 4.80.
Latexmk: Changing directory to '/var/lib/sharelatex/data/compiles/6599285eeca7e50408063049-
(省略)
------------
Run number 1 of rule 'latex'
------------
------------
Running 'uplatex  -synctex=1 -interaction=batchmode -recorder --jobname="output" -output-directory="/var/lib/sharelatex/data/compiles/6599285eeca7e50408063049-659803cceca7e504080626b2"  "main.tex"'
(省略)
Docker コンテナ内に入ってみます。上記ログにあるディレクトリへ移動してlatexmk コマンドで main.tex をコンパイルできるか試してみます。
% bin/shell
# cd /var/lib/sharelatex/data/compiles/6599285eeca7e5040806304...(上記ログに記載のディレクトリ名を指定)

# ls
(さきほど作成した main.tex ファイルと latexmkrc ファイルが表示される)

# latexmkrc main.tex
(エラーが表示され、中に uplatex not found と書かれている)

# which latex
(すると /usr/local/bin/latex が出てくる)

# which uplatex
(command not found と表示される)

よって、以下のようにシンボリックリンクを張って、uplatex などを実行できるようにします

# ln -s /usr/local/texlive/2023/bin/x86_64-linux/uplatex  /usr/local/bin/uplatex
# ln -s /usr/local/texlive/2023/bin/x86_64-linux/upbibtex /usr/local/bin/upbibtex
# ln -s /usr/local/texlive/2023/bin/x86_64-linux/mendex   /usr/local/bin/mendex

(/usr/local/bin/dvipdfmx は既に存在するため何もしない)

# latexmk main.tex
(ここで pdf が作成されることを確認する)
ここまでで日本語化ができました。以下の手順でいったん Docker イメージを commit します。
コンテナから出ます
# exit

イメージをコミットします
% docker commit sharelatex sharelatex/sharelatex:with-texlive-full-20240107

コンテナを一度止めます
% bin/stop && bin/docker-compose rm -f sharelatex
さきほどコミットしたイメージで sharelatex コンテナが起動するようにします。config/docker-compose.override.yml を開き、さきほどコミットしたイメージのタグに変更します。
---
version: '2.2'
services:
    sharelatex:
        image: sharelatex/sharelatex:with-texlive-full-20240107
最後にコンテナを再起動します。
% bin/up
以下のように日本語でコンパイルできました。お疲れさまでした。