レンダリング合宿とは
目的
リアルタイムレンダリングに関しての知見を得るため、新人からベテランまでの全エンジニアが勉強する目的で株式会社スパーククリエイティブ内で行われている社内勉強会の一種です。
内容
第1回目はソフトウェアラスタライザーを自作します。
シェーダーだけを学習するわけではなく3Dグラフィックス全般をゼロから勉強していこうという試みになっています。
2019年9~11月で実装から工夫した点や実装方法などを各々で発表します、今後はレイトレーサーやシェーダーなども行っていき、最終的には自作のゲームライブラリを作るといった事も視野に入っています。
ソフトウェアラスタライザー基本実装編 01.座標変換
初回はまずウインドウを生成してモデルを読込、頂点単位で点を打つところまでの処理を行います。
モデルはCrytek Sponzaを用いています。
別途ローダーのソースが入ると面倒になるので簡素なバイナリフォーマットに変換して扱っています。
リポジトリ
ビルドして実行するとこんな感じの絵が出ます。
頂点データを座標変換して画面上に点を打っています。

ウインドウの生成
まずはウインドウの生成を行います。
このへんはWindowsプログラムをする場合はだいたい作ってあとは使いまわしになるのでさっと流します。
	//------------------------------------------------------------
	// ウィンドウクラス
	//------------------------------------------------------------
	WindowClass.style = CS_DBLCLKS;
	WindowClass.lpfnWndProc = MessageProc;
	WindowClass.cbClsExtra = 0;
	WindowClass.cbWndExtra = 0;
	WindowClass.hInstance = hInstance;
	WindowClass.hIcon = nullptr;
	WindowClass.hCursor = LoadCursor(nullptr, IDC_ARROW);
	WindowClass.hbrBackground = (HBRUSH)GetStockObject(WHITE_BRUSH);
	WindowClass.lpszMenuName = nullptr;
	WindowClass.lpszClassName = APPLICATION_TITLE;
	RegisterClass(&WindowClass);

	//------------------------------------------------------------
	// ウィンドウ生成
	//------------------------------------------------------------
	auto x = 0;
	auto y = 0;
	auto w = SCREEN_WIDTH;
	auto h = SCREEN_HEIGHT;
	auto Style = WS_POPUP | WS_CAPTION | WS_SYSMENU;
	RECT Rect = { 0, 0, w, h };
	::AdjustWindowRect(&Rect, Style, FALSE);
	w = Rect.right - Rect.left;
	h = Rect.bottom - Rect.top;
	x = ::GetSystemMetrics(SM_CXSCREEN) / 2 - w / 2;
	y = ::GetSystemMetrics(SM_CYSCREEN) / 2 - h / 2;

	hWnd = ::CreateWindowEx(
		WS_EX_APPWINDOW,
		APPLICATION_TITLE,
		APPLICATION_TITLE,
		Style,
		x, y, w, h,
		nullptr,
		nullptr,
		hInstance,
		nullptr);

	::ShowWindow(hWnd, SW_NORMAL);
	::UpdateWindow(hWnd);
フレームバッファの用意
当初DirectX9を利用するかOpenGLを利用するか考えたのですがデバイスの初期化が面倒だったのでGDIを利用することにしました。
昔のPCゲームなんかでは主流だったかと思いますが今では見ることは殆どないような気がします。
自分がMatroxのG200とかを使っていたころの話なので20年くらい前ですが。
こんな感じでウインドウハンドルからデバイスコンテキストを取得してそれに合わせてバッファを生成します。
	void Create(HWND hWnd, HDC hWindowDC, int32 w, int32 h)
	{
		_Width = w;
		_Height = h;

		BITMAPINFOHEADER BmpInfoHeader = { sizeof(BITMAPINFOHEADER) };
		BmpInfoHeader.biWidth = +_Width;
		BmpInfoHeader.biHeight = -_Height;	// BMPはYが下から上だけど高さをマイナスにすると上から下になる
		BmpInfoHeader.biPlanes = 1;
		BmpInfoHeader.biBitCount = 32;
		BmpInfoHeader.biCompression = BI_RGB;

		_hWnd = hWnd;
		_hWindowDC = hWindowDC;
		_hBitmap = ::CreateDIBSection(_hWindowDC, (BITMAPINFO*)&BmpInfoHeader, DIB_RGB_COLORS, (void**)&_pSurface, nullptr, 0);
		_hSurfaceDC = ::CreateCompatibleDC(_hWindowDC);
		::SelectObject(_hSurfaceDC, _hBitmap);
	}
	void Release()
	{
		::ReleaseDC(_hWnd, _hSurfaceDC);
		::DeleteObject(_hBitmap);
		::ReleaseDC(_hWnd, _hWindowDC);
	}
ここで座標変換に関する説明をする予定・・・
(´ω`)
レンダリング
レンダリング処理は以下のメソッドで行っています。
void Application::OnRendering(ColorBuffer* pColorBuffer)
{
	_VertexCount = 0;
	_TriangleCount = 0;

	// 描画を開始する
	_pRenderer->BeginDraw(pColorBuffer, _mView, _mProj);

	// メッシュの描画
	for (auto&& Mesh : _MeshDatas)
	{
		_pRenderer->DrawIndexed(&Mesh, Matrix::IDENTITY);

		_VertexCount += Mesh.GetVertexCount();
		_TriangleCount += Mesh.GetIndexCount() / 3;
	}

	// 描画を完了する
	_pRenderer->EndDraw();
}
BeginDraw()で描画の準備を行い、DrawIndex()で描画のリクエストをし、EndDraw()で最終的な描画処理を行っています。
DrawIndex()の中身は以下のようになっており描画をするためにパラメーターをリストに追加しているだけです。
void Renderer::DrawIndexed(const IMeshData* pMeshData, const Matrix& mWorld)
{
	_RenderMeshDatas.emplace_back(RenderMeshData{ pMeshData, mWorld });
}
実際のレンダリング処理はEndDraw()でまとめて行っています。
描画のリクエストがあったメッシュを1つずつ座標変換し描画を行います。
void Renderer::EndDraw()
{
	Matrix mViewProj;
	Matrix_Multiply4x4(mViewProj, _ViewMatrix, _ProjMatrix);

	// メッシュ毎に処理する
	{
		const int32 MeshCount = int32(_RenderMeshDatas.size());
		for (int32 i = 0; i < MeshCount; ++i)
		{
			const auto& Mesh = _RenderMeshDatas[i];

			Matrix mWorldViewProj;
			Matrix_Multiply4x4(mWorldViewProj, Mesh.mWorld, mViewProj);

			auto pPosTbl = Mesh.pMeshData->GetPosition();
			const auto VertexCount = Mesh.pMeshData->GetVertexCount();
			ASSERT(VertexCount <= MAX_VERTEX_CACHE_SIZE);
			static Vector4 Positions[MAX_VERTEX_CACHE_SIZE];
			for (auto i = 0; i < VertexCount; ++i)
			{
				Matrix_Transform4x4(Positions[i], pPosTbl[i], mWorldViewProj);
			}

			RenderTriangle(
				Mesh.pMeshData,
				Positions,
				VertexCount,
				Mesh.pMeshData->GetIndex(),
				Mesh.pMeshData->GetIndexCount());
		}
	}
}
最終的にはRenderTriangle()メソッド内で画面の座標に変換し点を打っています。
void Renderer::RenderTriangle(const IMeshData* pMeshData, const Vector4 Positions[], const int32 VertexCount, const uint16* pIndex, const int32 IndexCount)
{
	const auto WidthF  = SCREEN_WIDTH_F  - 1.0f;
	const auto HeightF = SCREEN_HEIGHT_F - 1.0f;

	auto index = 0;
	while (index < IndexCount)
	{
		auto pt = Positions[pIndex[index++]];
		pt.x = (+pt.x / pt.w * 0.5f + 0.5f) * WidthF;
		pt.y = (-pt.y / pt.w * 0.5f + 0.5f) * HeightF;

		auto dx = int32(pt.x + 0.5f);
		auto dy = int32(pt.y + 0.5f);
		if ((0 <= dx) && (dx < SCREEN_WIDTH) && (0 <= dy) && (dy < SCREEN_HEIGHT))
		{
			_pColorBuffer->SetPixel(dx, dy, 0xFFFFFFFF);
		}
	}
}
最後に
とりあえずQiitaで色々とまとめていこうかと思い始めました。
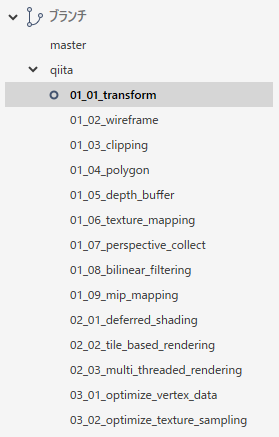
今回始めたソフトウェアラスタライザーだけでもgitのブランチ数が結構いってるのでそれが書き終わるまでは続きます。