はじめに
画像処理系のコードをPythonのNotebook形式で実行していると、画像をインライン表示したいときありませんか? それも複数枚同時にラベルテキストを付けてグリッド表示したいとき。
OpenCVだと別ウィンドウで開くし、PILのshowはグリッド表示できないし、matplotlibのImageGridはなんか重いし扱いづらいし...なんかいい感じに使えるものがほしい
作成したもの
そこで、HTML形式で画像をグリッド状でインライン表示するものを作成しました。
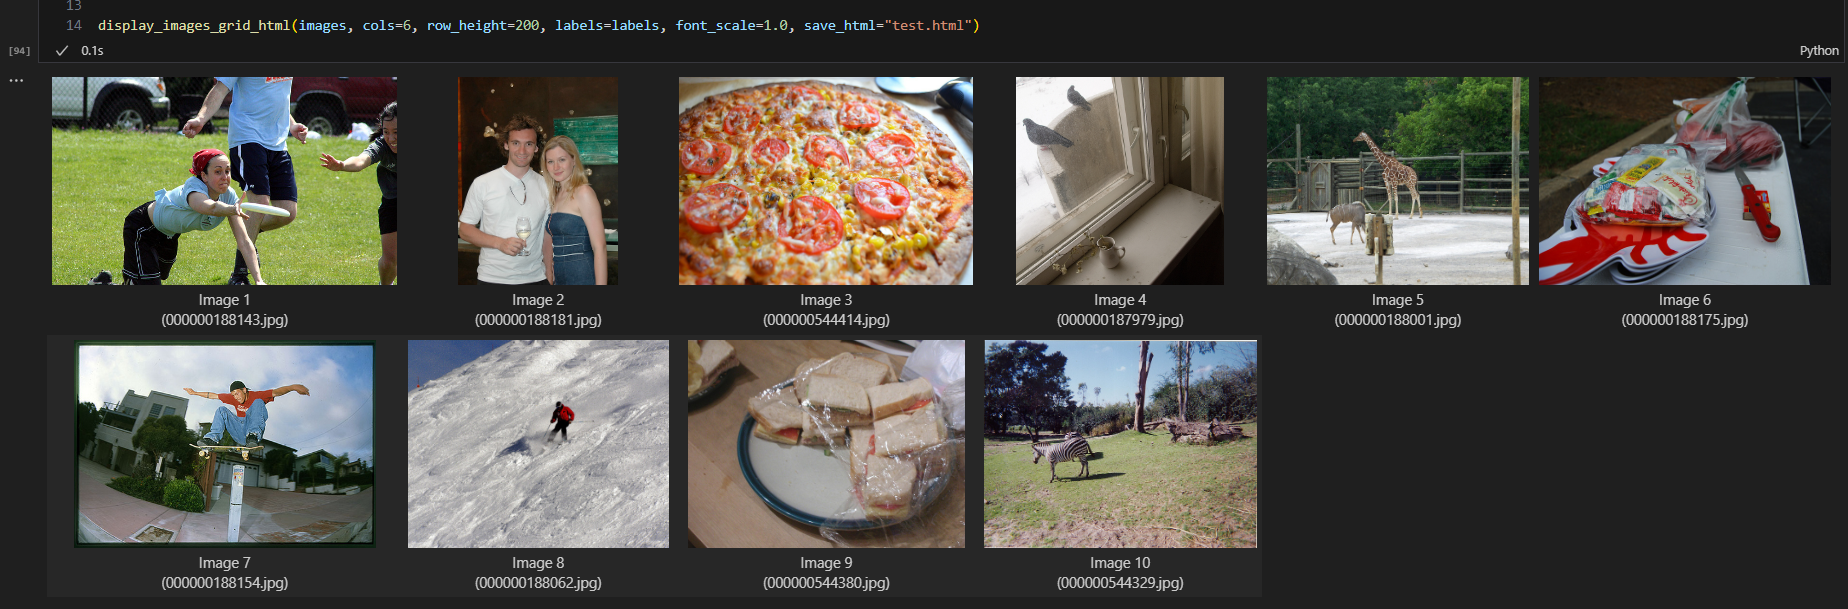
(VSCodeでCOCOデータセットを表示した結果)
扱えるのは
- 画像ファイルパス(str, pathlib)
- 画像のURL(str)
- 画像データ(ndarray, pillow)
です。
グリッドは、カラム数を変更して表示でき、列の高さは指定できます。
また、必要に応じて各画像にラベルを表示できるようにし、改行もフォントサイズの調節も可能です。
実行環境
動作確認済みの環境
- OS:Windows 11
- エディタ:VSCode(Jupyter拡張機能)、Google Colaboratory
- Python仮想環境:conda(mini-forge)
ライブラリのインストール
pipを使って以下のライブラリをインストール。
$ pip install opencv-python ipykernel numpy pillow
コード
import io
import cv2
import base64
import requests
import numpy as np
from PIL import Image
from pathlib import Path
from IPython.display import HTML, display
from typing import Any, List, Optional, Union

def display_images_grid_html(
    images: Union[str, Path, np.ndarray, Image.Image, List[Union[str, Path, np.ndarray, Image.Image]]],
    cols: int = 3,
    row_height: int = 200,
    labels: Optional[Union[str, List[str]]] = None,
    font_scale: float = 1.0,
    save_html: Optional[str] = None
) -> None:
    def _convert_imageType_for_html(image: Any) -> Optional[Union[Path, str]]:
        if isinstance(image, str):
            if image.startswith("http://") or image.startswith("https://"):
                try:
                    resp = requests.get(image)
                    if resp.status_code == 200:
                        content_type = resp.headers.get("Content-Type", "image/png")
                        img_base64: str = base64.b64encode(resp.content).decode("utf-8")
                        return f"data:{content_type};base64,{img_base64}"
                    return None
                except Exception:
                    return None
            else:
                path: Path = Path(image)
                return path if path.is_file() and path.exists() else None

        if isinstance(image, (str, Path)):
            path: Path = Path(image)
            return path if path.is_file() and path.exists() else None
        if isinstance(image, Image.Image):
            buffered: io.BytesIO = io.BytesIO()
            image.save(buffered, format="PNG")
            img_base64: str = base64.b64encode(buffered.getvalue()).decode("utf-8")
            return f"data:image/png;base64,{img_base64}"
        if isinstance(image, np.ndarray):
            ret, buf = cv2.imencode('.png', image)
            if ret:
                img_base64: str = base64.b64encode(buf.tobytes()).decode("utf-8")
                return f"data:image/png;base64,{img_base64}"
            return None
        return None

    if not isinstance(images, (list, tuple)):
        images = [images]
    if labels is not None:
        if not isinstance(labels, (list, tuple)):
            labels = [labels] * len(images)
        elif len(labels) != len(images):
            raise ValueError("labels の要素数は images の要素数と一致する必要があります")

    base_font_size: int = 14
    font_size: float = base_font_size * font_scale

    html: str = "<table style='border-collapse: collapse;'>"
    for i, img in enumerate(images):
        if i % cols == 0:
            html += "<tr>"
        converted: Optional[Union[Path, str]] = _convert_imageType_for_html(img)
        if converted is None:
            converted = ""
        cell_content: str = f"<img src='{converted}' style='max-width: 100%; height: {row_height}px;'>"
        if labels is not None:
            label_text: str = labels[i].replace("\n", "<br>")
            cell_content += f"<br><div style='text-align: center; font-size: {font_size}px;'>{label_text}</div>"
        html += f"<td style='padding: 5px; text-align: center;'>{cell_content}</td>"
        if i % cols == cols - 1:
            html += "</tr>"
    if len(images) % cols:
        html += "</tr>"
    html += "</table>"

    display(HTML(html))

    if save_html is not None:
        html_save: str = f"<div style='max-width: 100%; overflow-x: auto;'>{html}</div>"
        with open(save_html, "w", encoding="utf-8") as f:
            f.write(html_save)
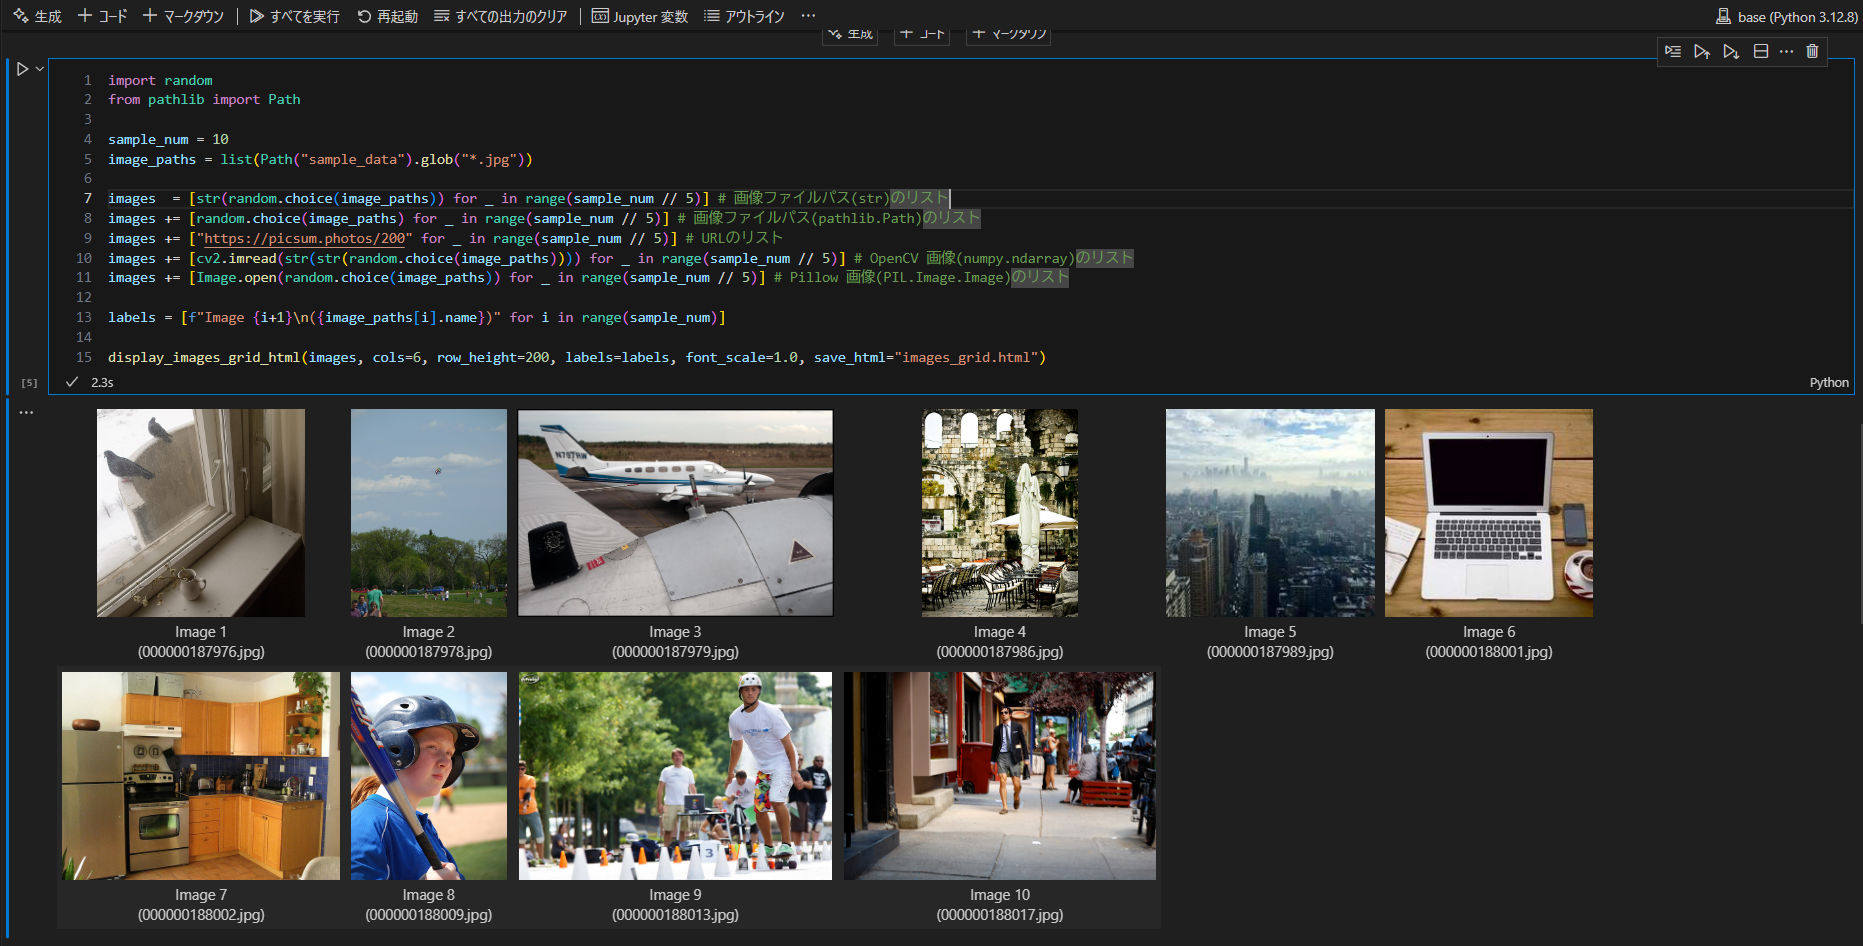
実行例
サンプルコード
VSCodeでローカルの画像ファイルとLorem Picsumの画像を表示するサンプルコード
import random
from pathlib import Path

sample_num = 10
image_paths = random.sample(list(Path("画像ファイルが格納されたフォルダのパス").glob("*.jpg")), sample_num)

images  = [str(random.choice(image_paths)) for _ in range(sample_num // 5)] # 画像ファイルパス(str)のリスト
images += [random.choice(image_paths) for _ in range(sample_num // 5)] # 画像ファイルパス(pathlib.Path)のリスト
images += ["https://picsum.photos/200" for _ in range(sample_num // 5)] # URLのリスト
images += [cv2.imread(str(str(random.choice(image_paths)))) for _ in range(sample_num // 5)] # OpenCV 画像(numpy.ndarray)のリスト
images += [Image.open(random.choice(image_paths)) for _ in range(sample_num // 5)] # Pillow 画像(PIL.Image.Image)のリスト

labels = [f"Image {i+1}\n({image_paths[i].name})" for i in range(sample_num)]

display_images_grid_html(images, cols=6, row_height=200, labels=labels, font_scale=1.0)
実行結果
おまけ
save_htmlの引数を使って実行結果をHTMLファイルとして保存可能です。
display_images_grid_html(images, cols=6, row_height=200, labels=labels, font_scale=1.0, save_html="images_grid.html")
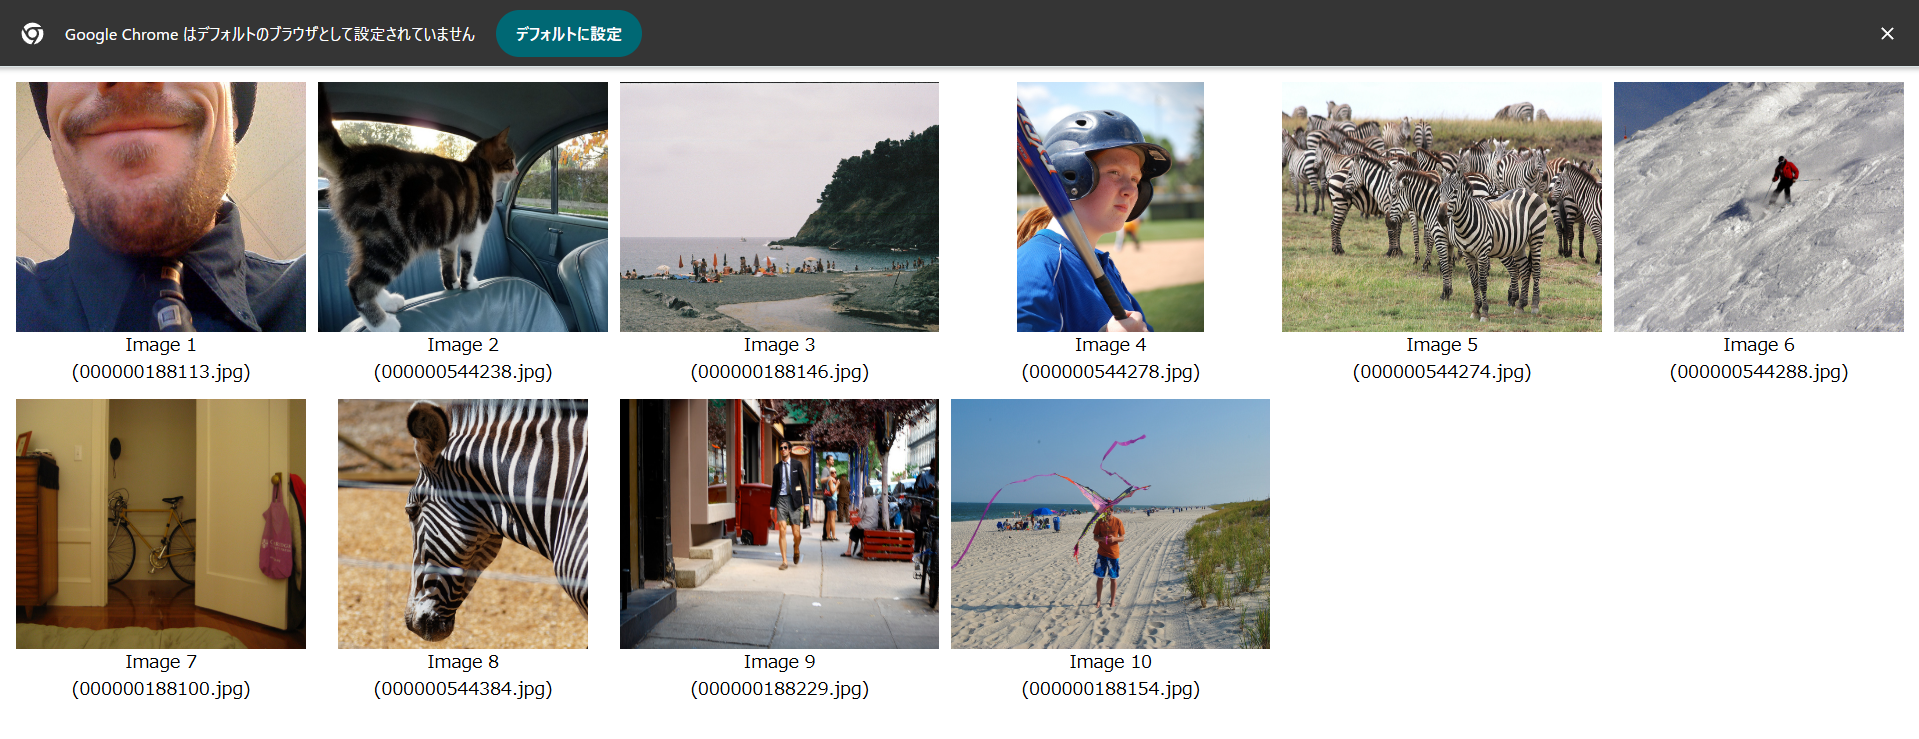
(相対パスを指定している場合は、作成されたHTMLファイルを移動すると画像が表示されなくなってしまうので注意)
おわりに
良い感じのが作れたのでこれからはこれを使っていこうかな
(ちょっとコード量多いのがネックですね...)