PWA [3] Markdownで画像自動アップロード貼り付け
![]() Polymerと
Polymerと![]() Firebase で、よくあるMarkdownを編集中に、画面キャプチャのコピーペーストやファイルのドラッグ&ドロップで画像を貼り付ける機能を実装してみます。
Firebase で、よくあるMarkdownを編集中に、画面キャプチャのコピーペーストやファイルのドラッグ&ドロップで画像を貼り付ける機能を実装してみます。
※ Polymer サンプルコード (5) PWA [2] の続きです。
- 動作確認
- Windows 10 : ○ Chrome60 Firefox56 × Edge40 IE11
- Mac 10.3 : ○ Chrome60 Safari10.1
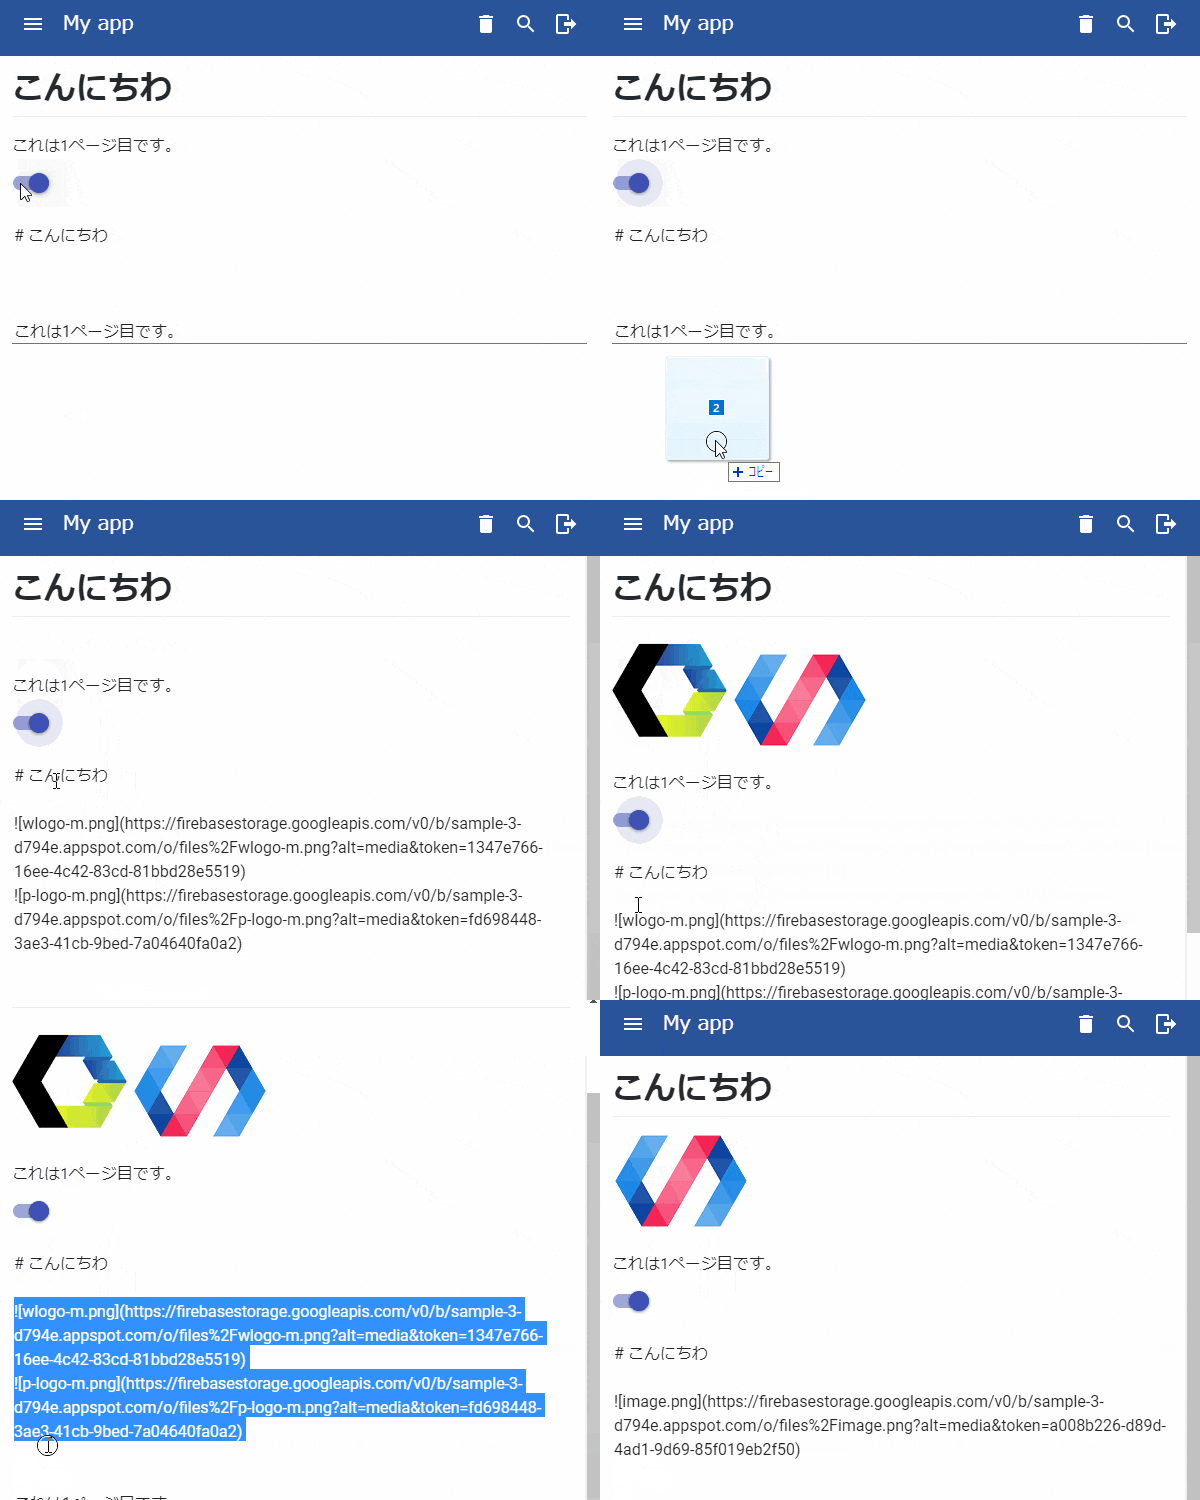
画面イメージ
![]() デモサイト (Firebase)
デモサイト (Firebase)
・Googleでログインすれば編集できますが、いたずら無しでお願いします
・定期的にデータクリアしてます
機能
- コピーペーストやドラッグアンドドロップで画像のURLをMarkdownに挿入
- 対応画像ファイル形式の指定(jpg,gif,png)
- 複数ファイル同時アップロード
実行ステップ
ビルドツール(Polymer CLI)やFirebaseのプロジェクトの準備は前回と同じです。
1. ストレージの準備
Firebaseの管理コンソールの左メニューから「Storage」を選択します。
Realtime Databaseと同じように初期状態では認証されたユーザしか読み書きできないので、「ルール」タブをクリックし、下記のルールをペーストして上書きして、「公開」ボタンをクリックしてください(/files以下のデータの読み込みを許可し、認証されたユーザのみ書きこみを許可します)。
service firebase.storage {
  match /b/{bucket}/o {
    match /files {
      match /{allFiles=**} {
        allow read;
      }
      match /{allFiles=**} {
        allow write : if request.auth != null;
      }
    }
  }
}
2. ファイルの取得とAPIキーの設定
ファイル一式をこちらからダウンロード(sample-3ブランチ)してください。
src/my-fire.htmlの<firebase-app>タグのapi-key、auth-domain、storage-bucket、database-urlはご自分のプロジェクトのものを使用してください。
# githubからダウンロードする場合
$ git clone -b sample-3 https://github.com/howking/polymer-sample-pwa sample-3

# 作業ディレクトリに移動
$ cd sample-3

# my-fire.htmlを修正
$ emacs src/my-fire.html
    <firebase-app
      api-key="AIzaSyDwrbEx_4RHcIUVfMAZgLN4edNoRo-tlvw"
      auth-domain="sample-3-d794e.firebaseapp.com"
      storage-bucket="sample-3-d794e.appspot.com"
      database-url="https://sample-3-d794e.firebaseio.com"></firebase-app>
書換える文字列は前回の方法を参考にして取得してください。
3. ビルドとファイルのアップロード
下記を入力するとビルドされ、サイトへアップロードされます。
!!注意!! polymerfireをビルドするとバグが発生するので、ここの修正が必要です。
# 必要なツールのインストール
$ npm install -g bower polymer-cli firebase-tools

# 利用するWebライブラリを取得
$ bower install

# ローカルでサーバを立ち上げて動作確認
$ polymer serve

# アップロードするファイルを構築
$ polymer build

# Firebaseにログイン
$ firebase login

# 使用するプロジェクトを指定
$ firebase use [プロジェクトID]

# ファイルをアップロード
$ firebase deploy
https://[プロジェクトID].firebaseapp.com/ で確認できます。 ![]()
サンプルコードの説明
前回説明した部分は省いてます。 差分はこちらから確認できます。
src/my-marked.html
<link rel="import" href="../bower_components/polymerfire/firebase-storage-multiupload.html">
<link rel="import" href="../bower_components/polymerfire/firebase-storage-upload-task.html">
...
    <firebase-storage-multiupload
      path="/files" upload-tasks="{{uploadTasks}}"></firebase-storage-multiupload>
    <template is="dom-repeat" items="[[uploadTasks]]">
      <firebase-storage-upload-task task="[[item]]" metadata="{{_metaData}}"></firebase-storage-upload-task>
    </template>
先週(9/6)リリースされたpolymerfire v2.2.0からとうとうStorageが使えるようになったので、さっそく使ってみます。
<firebase-storage-multiupload>でバケットの/filesディレクトリにアップロード処理がされ、<firebase-storage-upload-task>で個々のアップロードのステータスが取得されます。
        <paper-textarea value="{{contents}}" hidden="[[!_edit]]"
                        on-drop="_onDrop" on-paste="_onPaste"></paper-textarea>
テキスト編集エリアにドラッグ&ドロップされた時とペーストがされた時のイベントを拾う為に、それぞれon-dropとon-pasteで処理を指定します。
          allowedTypes: {
            type: Array,
            value: [
              'image/jpeg',
              'image/png',
              'image/jpg',
              'image/gif'
            ]
          },
          progressText: {
            type: String,
            value: '![Uploading file...]()'
          },
allowedTypeでアップロード対象とするファイル形式、progressTextでアップロードしている最中に表示する文字を指定します。
プロパティとしているので、呼出し側で
<my-marked allowed-type='["image/png","image/svg"]' progress-text="アップロード中..."></my-marked>
といったカスタマイズがしやすいです(配列の指定は'シングルクォーテーションを使用してください)
      _onDrop(e){
        e.stopPropagation()
        e.preventDefault()
        this.shadowRoot.querySelector('firebase-storage-multiupload').upload(
          Array.from(e.dataTransfer.files)
               .filter(f=>this.allowedTypes.indexOf(f.type) !== -1)
               .map(f=>{this._insertImageText(this.progressText); return f;}))
      }
ファイルがドラッグ&ドロップされた時の処理として、e.stopPropagation()とe.preventDefault()を指定してデフォルトの動作(別ページに画像を開いて遷移するなど)をキャンセルさせます。
querySelectorで<firebase-storage-multiupload>を指定してupload(files)メソッドでファイルがアップロードされます。
ドラッグ&ドロップされたファイルはe.dataTransfer.filesに格納されていますがArray(配列)ではないので、Array.fromで配列にした上でfilterで対象ファイルを制限し、mapで戻しつつ、アップロード中を示す文字列を本文に挿入します。
      _onPaste(e){
        this.shadowRoot.querySelector('firebase-storage-multiupload').upload(
          Array.from(e.clipboardData.items || e.clipboardData.files || [])
               .filter(f=>this.allowedTypes.indexOf(f.type) !== -1)
               .map(i=>{this._insertImageText(this.progressText); return i.getAsFile();}))
      }
ペースト時も基本同じ要領ですが、clipboardDataに入っているデータを最後にFileとして渡すgetAsFile()を使用します。
<firebase-storage-upload-task task="[[item]]" metadata="{{_metaData}}"></firebase-storage-upload-task>
...
_metaData: {
type: Object,
observer: '_metaDataChanged'
}
...
_metaDataChanged(meta){
if(meta) this._insertImageText(''+"\n")
}
個々のファイルアップロードがされる度に_metadataが更新されるので、最終的にそのファイル名(meta.name)とリンク先(meta.downloadURLs[0])を取得してテキストを挿入をします。
      _insertImageText(text){
        const el = this.shadowRoot.querySelector('paper-textarea')
                       .shadowRoot.querySelector('iron-autogrow-textarea')
        const pos = el.selectionStart
        const ptext = this.progressText
        let offset = 0
        if(this.contents.substr(pos - ptext.length, ptext.length) == ptext)
          offset = ptext.length
        this.contents = this.contents.substring(0, pos - offset) + text +
                        this.contents.substring(pos, this.contents.length)
        el.selectionStart = pos + text.length - offset
        el.selectionEnd = pos + text.length - offset
        el.focus()
      }
_insertImageText(text)はテキストエリアに指定した文字列を挿入します。カーソルがある場所に挿入することと、複数アップロード時にすでにアップロード中を示す文字列(progeressText)がある場合は消す処理を加えています。
ちょっとわかりにくかったのはテキストエリアのカーソル位置を取得するのに、<paper-textarea>ではなく、その中にある<iron-autogrow-textarea>を指定しないと取得できなかったことですが、他にいい方法があるかもしれません。
最後に
イベントの取得やテキストエリアへの文字挿入など Inline Attachment 2.0.3 を参考にさせていただきました。
![]() コメント、編集リクエスト歓迎
コメント、編集リクエスト歓迎
以上
