wsl2のインストール方法
ラボのwikiに書いてたけど、開けなくなるので、その前にこちらに移しておく。
0, wslとは?
windows上でlinux(Ubuntu)を動かすための仕組み
windowsにデフォルトで入ってるので、スムーズに利用可能
linuxにしか対応してないようなソフトフェアやライブラリを動かすときに使用する
1, wslの導入ステップ
windows上で、検索から、「windowsの機能の有効化または無効化」を選択し、その中の「Linux用Windowsサブシステム」、「仮想マシンプラットフォーム」(下の方)を有効にし、PCを再起動

再起動した後、ターミナルアプリを管理者権限で開いて、windows power shellから
wsl --update
wsl --install
の二つを順に実行し、完了後にPCを再起動する。
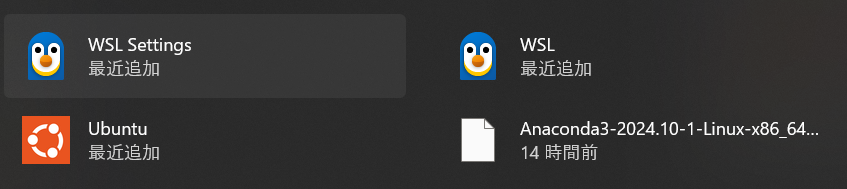
再起動後、windowsのスタートを開くと、ubuntuやwslが入っているはずなので、そこからubuntuを右クリック→管理者権限で実行する
特に問題がなければ、installが自動で始まり、その後user name、passを求められるので、適当に設定する
インストールに関連する注意
基本的に、wslのinstallはあれなので、エラーコードがちょこちょこ出る。
特に、再起動後にubuntuを管理者権限で実行した際に、installエラーが出た場合は、「仮想マシンプラットフォーム」がonになっているか確認するとともに、それでもダメな場合は以下のサイトを参照すること。
参考資料
2, wslにminicondaを導入
minicondaは、仮想環境を入れられるソフトで便利、かつconda-forgeチャンネル限定利用であれば、商用利用に引っかからない(らしい)
今回はminicondaでの議論をする。
参考
ubuntu上で、以下の作業を実施
cd ~
wget https://repo.anaconda.com/miniconda/Miniconda3-latest-Linux-x86_64.sh
#minicopndaのwslへのinstall

#ls -l
#>>Miniconda3-latest-Linux-x86_64.sh
#install後に、このファイルがきちんとubuntu上に存在するかを確認する

sh Miniconda3-latest-Linux-x86_64.sh

#ファイルを実行すると、利用規約が出てくるので、Enterを連打し、最終的にyes/noが出るので、yesを入力

#Do you wish the installer to initialize Miniconda3
#by running conda init? [yes|no] →yesを入力
上記のコマンドを入れると、ダウンロードされる。
pathが通ってるか確認する際は、ubuntuを管理者権限で実行し、
which conda
を押すと、condaまでのパスが出る。
また、
echo $PATH
#/home/username/miniconda3/condabinのようなものがあるか確認

# 作業用ディレクトリを作る場合
# mkdir meep#meepという名前のディレクトリ作成
# cd meep#meepに移動
を入力し、condabin/、のようなものが出力されればOK
3, vscodeでのwslの実行
ここからはvscode上でwslを実行する方法を説明する。
ubuntuをinstallした後にvscodeを起動すると、自動で
「あなたのPCにwslが入りました。拡張機能をinstallしますか?」
的な文言が出るので承認する(or extensionからwslをinstallする)
その後、画面左下の青いマークをクリックする

すると、画面上部にこれが出るのでconnect to wslをクリックする

すると、windowが新たに出現するので、左下がWSL:Ubuntuになっている状態で、open folderをクリックし、先ほど作ったであろう作業用ディレクトリを選択する。
作業用ディレクトリを開いた状態で、.ipynbファイルを適当に作り、適当なコードを走らせると、pythonのextensionやJupyterのextensionがwsl上で勝手に入るので、そのあとに仮想環境を選択して適当に走らせる(ipykernelのinstallが必要ですとかも出るけど、そこも適当に承諾する)
これによって、vscode上でwslを使えるようになる。
注意
もしかしたら、画面左下の青いマークをクリックしてもなにも出ない可能性がある。
その場合は、extensionから「RemoteDevelopment」をinstallする
すると、自動で「Remote-WSL」も入るのでできるようになるはず
https://blog.masuyoshi.com/vscodeを使ってサーバー環境にsshリモート接続手順/
4, cudaを使える環境の整備(+pytorch)
ここからは、nvidia GPU限定環境(+pytorch)の話になる。
基本的に、windows環境でnvidia driverが入っていればOK
参考
The latest NVIDIA Windows GPU Driver will fully support WSL 2. With CUDA support in the driver, existing applications (compiled elsewhere on a Linux system for the same target GPU) can run unmodified within the WSL environment.
To compile new CUDA applications, a CUDA Toolkit for Linux x86 is needed. CUDA Toolkit support for WSL is still in preview stage as developer tools such as profilers are not available yet. However, CUDA application development is fully supported in the WSL2 environment, as a result, users should be able to compile new CUDA Linux applications with the latest CUDA Toolkit for x86 Linux.
Once a Windows NVIDIA GPU driver is installed on the system, CUDA becomes available within WSL 2. The CUDA driver installed on Windows host will be stubbed inside the WSL 2 as libcuda.so, therefore users must not install any NVIDIA GPU Linux driver within WSL 2.
入っていない場合はNVIDIA appとかからinstall
20250331現在、NVIDIAのドライバー関連が不安定になっているようです。
https://www.nichepcgamer.com/archives/even-game-developers-recommend-geforce-566-36-driver.html
ですので、ドライバーのバージョンアップなどをする場合は十分注意して行うことを推奨します。
問題がなければ、power shellから
nvidia-smi
を入れて、cudaバージョンなどを確認できる。
その後、ターミナルなどから、cudaのバージョンに合わせて、pytorchのinstallコマンドを走らせる。
pip3 install torch torchvision torchaudio
# pytorch 2.6
# OS:Linux
# package:pip
# Language:Python
# compute platform:cuda 12.4
参考
その後、installした仮想環境上で、適当にjupyter notebookを開き、以下のコマンドを入力する
import torch
print(torch.cuda.is_available())
# TrueならOK
これで、pytorchでcudaを使えることを確認できた。
まとめ
wsl2のinstallについては、手元のノートパソコンと、デスクトップの両方で問題なくできたので、おそらく問題ないと思われる。