0. はじめに
AWS Cloud9 で GUIのGitクライアント( ungit )を設定する手順です。
1. ungitをインストールする
ungitの公式サイトの通り、npm でインストールします。
$ npm install -g ungit
2. ungitにポートを割り当てる
ユーザのホームディレクトリにungit用の設定ファイルを作ります。
$ touch ~/.ungitrc
設定ファイルにungitに割り当てたい任意のポートとIPアドレスを書いておきます。
{
  "port": 8080,
  "ungitBindIp": "0.0.0.0"
}
ちなみに、AWS Cloud9では、ターミナル上のパス形式の文字列を選択すると、OPENからエディタが開きます。

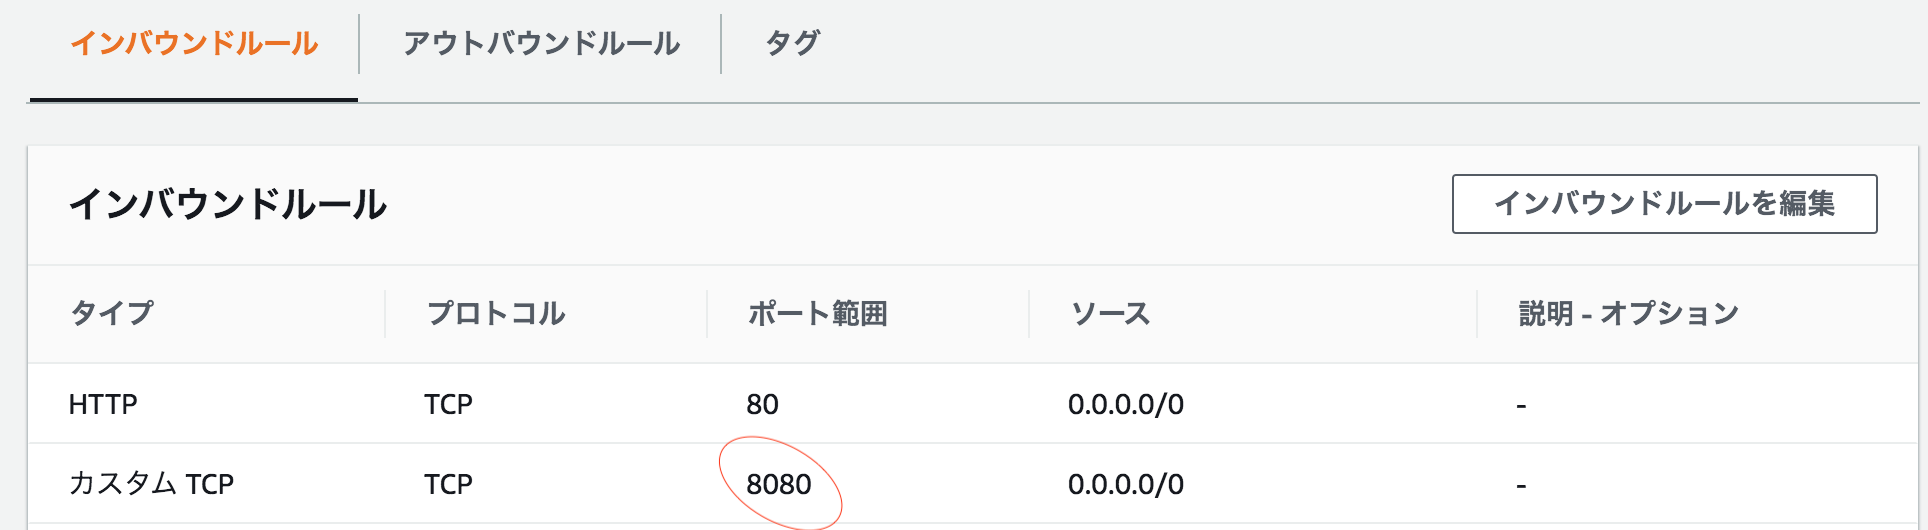
3. ポートを開放する
AWS Cloud9 の [View Details] からIDEの詳細画面を開きます。

詳細画面の [Security groups] のリンクを開きます。

インバウンドルールを編集して、.ungitrc に書いたポートを開放します。
3. ungitを起動する
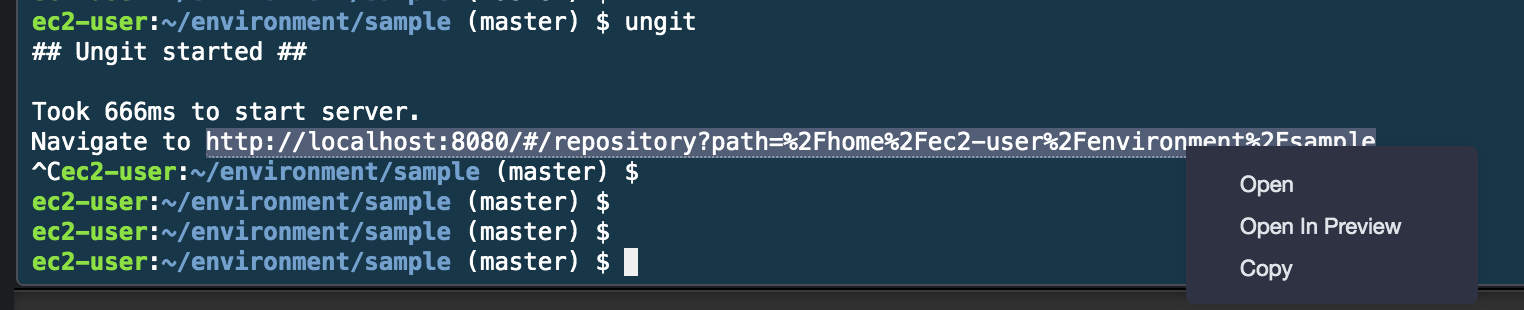
gitリポジトリがあるディレクトリで、ターミナルからungitを起動します。
$ ungit
ターミナルに表示されるリンクをクリックしてOPENを選択すると、ungitの画面が表示されます。
ungitの使い方は公式サイトを参考にしてください。
4. 最後に
AWS Cloud9で利用できる他のGit クライアントがあればぜひ教えてください。