0. この記事について
この記事はdva.js のチュートリアルです。
Reactの知識がある方を対象にしています。
1. はじめに
dva.js はアリババが作っているRaectのフレームワークです。
以下のライブラリが最初から統合されているため※、煩わしい設定をしなくてもすぐに開発を開始できます。
- react-router(ルーティング)
- redux(状態管理)
- redux-saga(副作用)
※ この記事では上記のライブラリに関する記載はありません(リクエストいただければ追記します)。
これらのライブラリの役割を加味した上で、dva.jsを使ったプロジェクトでは以下のディレクトリ構成が推奨されています。
├ src
    ├ assets                # 画像、フォント、アイコンなど
    ├ components            # コンポーネント(react)
    ├ models                # モデル(状態管理・アクション・副作用の取り扱い)(redux, redux-saga)
    ├ routes                # ルーティング(react-router)
    ├ services              # サーバーとの通信やデータの変換などのロジック
    └ utils                 # ユーティリティ
特に models はdva.jsの代表的な機能で、状態管理やアクションの書き方、副作用の取り扱い方を提供してくれます。
なお、dva.jsのアーキテクチャについては 本家ドキュメント が参考になります。
2. チュートリアル
2-1. 作成するもの
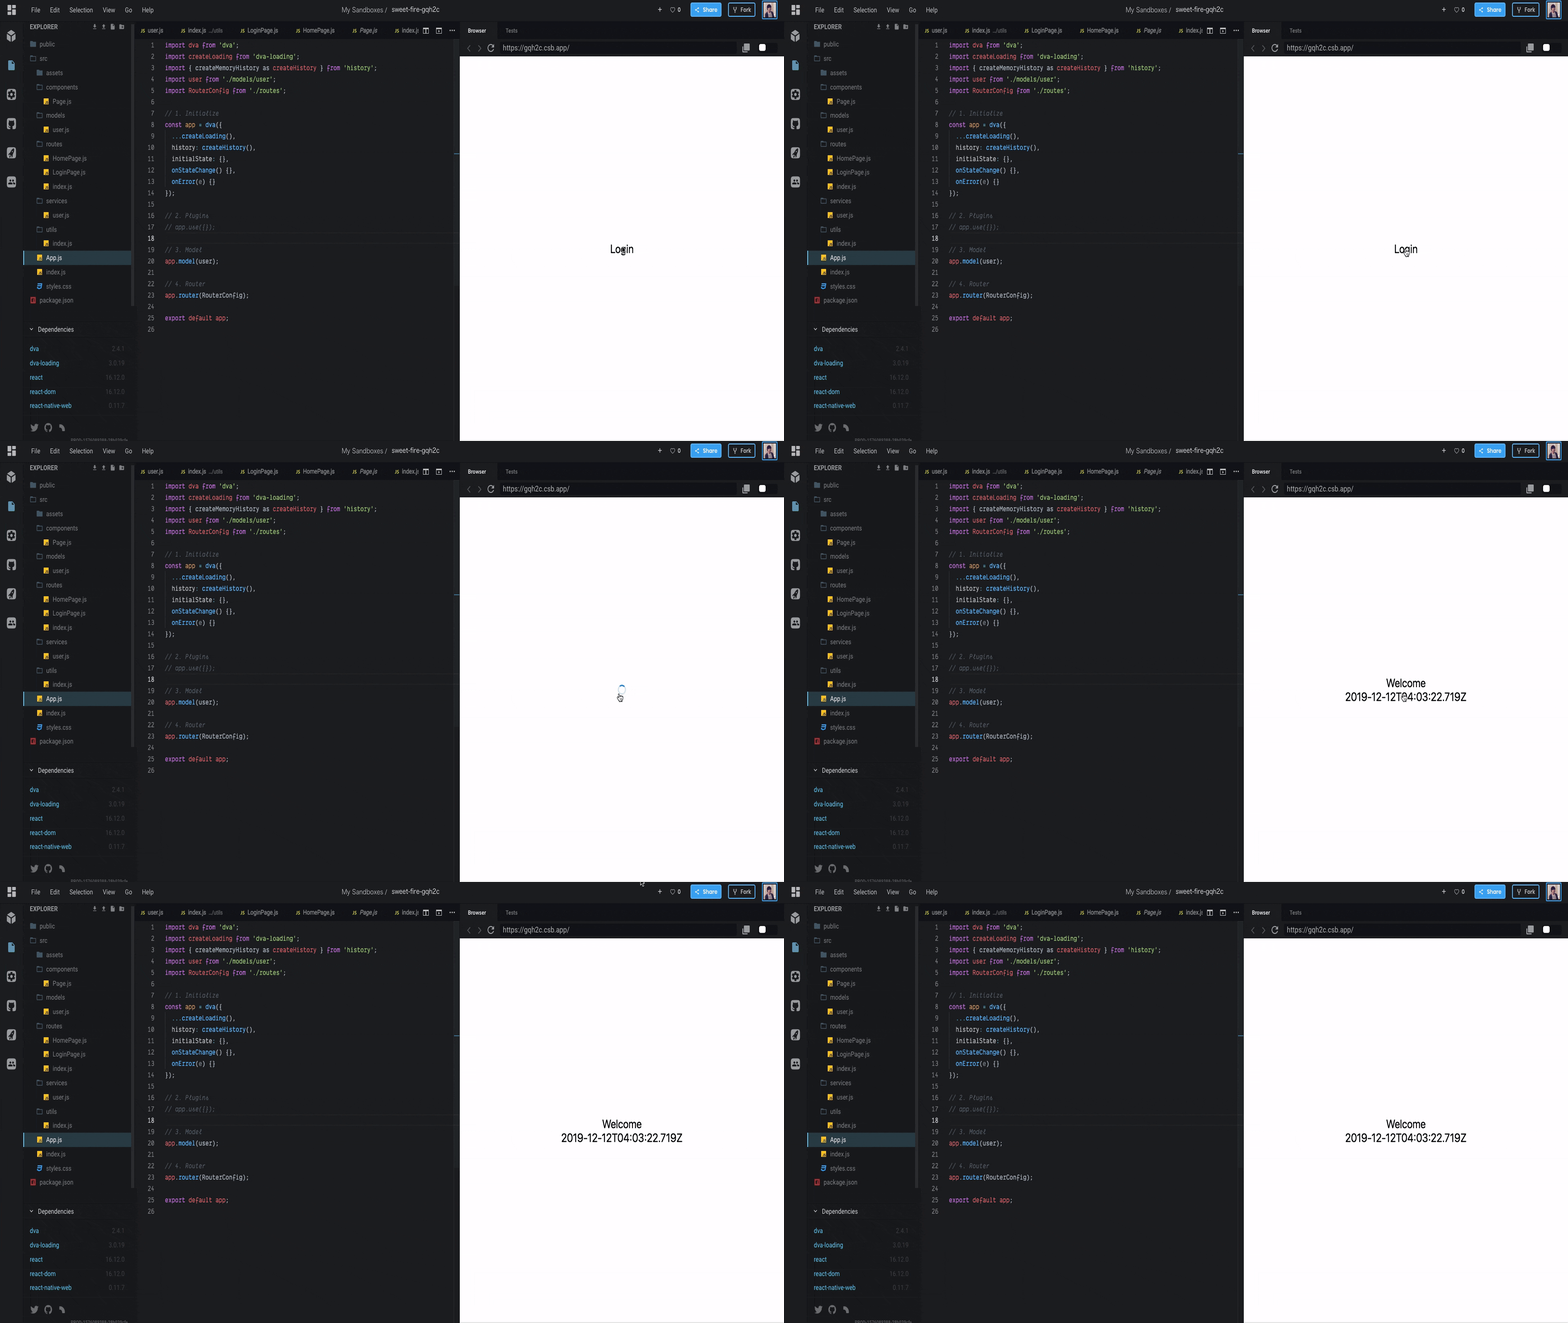
ログインボタンを押してホーム画面に到達するシンプルなアプリケーションを作成します(認証処理はありません)。
チュートリアルが終わったあとは、dvaを使ったプロジェクトの雛形としてそのまま利用できます。
画面遷移
完成後のイメージ
2-2. プロジェクトを作成する
以下の手順でプロジェクトを作成します。
2-2-1. こちらを参考にyarnをインストールします。
2-2-2. create-react-appをインストールして、プロジェクトを作成します。
npx create-react-app my-app
2-2-3. 必要なフレームワークを追加します。
cd my-app
yarn add react-native-web dva dva-loading
2-3. ディレクトリを作成する
以下のようにディレクトリとファイルを作成します。
my-app/
  ├ public/
  ├ src/
  ├ assets/
  ├ components/
  ├ models/
   └ user.js
  ├ routes/
   ├ HomePage.js
   ├ index.js
   └ LoginPage.js
  ├ services/
   └ user.js
  └ utils/
   └ index.js
  ├ App.js
  ├ index.css
  └ index.js
2-4. モデルを定義する
ユーザのログイン状態を管理するモデルを定義します。ここで定義するモデルはreduxのstateと全く同じ原理で動作します(dva.jsではこれをモデルと呼んでいます)。
2-4-1. userモデルをmodels/user.jsに定義します。
import { routerRedux } from 'dva/router';
import { api } from '../services/user';

export default {
  namespace: 'user',
  state: {
    loggedIn: null  // ログインした時刻のタイムスタンプ
  },
  reducers: {
    loginSucceeded
  },
  effects: {
    login
  },
  subscriptions: {
  }
};

///////////////////////////// reducers(状態更新を処理するアクションの定義) ////////////////////////////
function loginSucceeded (state, action) {
  const { timestamp } = action.payload;
  return { ...state, loggedIn: timestamp };
}

///////////////////////////// effects(副作用を処理するアクションの定義) //////////////////////////////
function* login (action, helpers) {
  const { put, call } = helpers;

  // ログインAPIをたたく
  const { timestamp } = yield call(api.login, { userId: 'xxx', password: 'yyy' });

  // ログイン成功時の状態更新
  yield put({ type: 'loginSucceeded', payload: { timestamp } });

  // Home画面へ遷移させる
  yield put(routerRedux.push({ pathname: '/home' }));
}
2-4-2. ログインAPIをコールするダミー処理をservices/user.jsに作成します。
import { delay } from '../utils';

const login = async params => {
  await delay(1000);  // サーバーにログインAPIをリクエストするダミー処理
  return { timestamp: Date.now() };
};

export const api = {
  login
};
2-4-3. 上記ダミー処理で利用したdelay関数をutils/index.jsに作成します。
export const delay = time => new Promise(resolve => setTimeout(resolve, time));
2-5. 画面を作成する
2-5-1. 各画面の大枠を担うPageコンポーネントをcomponents/Page.jsに定義します。
import React, { PureComponent } from 'react';
import { View, StyleSheet } from 'react-native';

class Page extends PureComponent {

  render () {
    const { style, children, ...props } = this.props;
    return (
      <View
        {...props}
        style={[styles.baseStyle, style]}>
        {children}
      </View>
    );
  };
}

const styles = StyleSheet.create({
  baseStyle: {
    width: '100%',
    minWidth: '100%',
    height: '100vh',
    minHeight: '100vh'
  }
});

export default Page;
2-5-3. ログイン画面(routes/LoginPage.js)を定義します。
import React from 'react';
import { connect } from 'dva';
import { Text, TouchableOpacity, StyleSheet, ActivityIndicator } from 'react-native';
import Page from '../components/Page';

const LoginPage = ({ loading, onPressLogin }) => (
  <Page style={styles.page}>
    {
      loading
        ? <ActivityIndicator />  // ログイン処理実行中はインジケーターを表示する
        : <TouchableOpacity onPress={onPressLogin}>
            <Text style={styles.loginText}>Login</Text>
          </TouchableOpacity>
    }
  </Page>
);

const styles = StyleSheet.create({
  page: {
    flexDirection: 'column',
    alignItems: 'center',
    justifyContent: 'center'
  },
  loginText: {
    fontSize: 24
  }
});

const mapStateToProps = ({ loading: { effects } /* <- dva-loading */ }) => {
  const loading = effects['user/login'];
  return { loading };
};

const mapDispatchToProps = dispatch => ({
  onPressLogin () {
    dispatch({ type: 'user/login' });  // userモデルのloginsエフェクトを呼び出す
  }
});

export default connect(mapStateToProps, mapDispatchToProps/*, mergeProps, options */)(LoginPage);
2-5-4. ホーム画面(routes/HomePage.js)を定義します。
import React from 'react';
import { connect } from 'dva';
import { Text, StyleSheet } from 'react-native';
import Page from '../components/Page';

const HomePage = ({ datetime }) => (
  <Page style={styles.page}>
    <Text style={styles.message}>Welcome</Text>
    <Text style={styles.message}>{datetime}</Text>
  </Page>
);

const styles = StyleSheet.create({
  page: {
    flexDirection: 'column',
    alignItems: 'center',
    justifyContent: 'center'
  },
  message: {
    fontSize: 24
  }
});

const mapStateToProps = ({ user }) => {
  const { loggedIn } = user;
  return { datetime: new Date(loggedIn).toISOString() };
};

export default connect(mapStateToProps/*, mapDispatchToProps, mergeProps, options */)(HomePage);
2-6. ルーティングを定義する
作成した画面へのルーティングをroutes/indexに定義します。
import React from 'react';
import { Router, Route, Switch } from 'dva/router';
import LoginPage from './LoginPage';
import HomePage from './HomePage';

function RouterConfig ({ history }) {
  return (
    <Router history={history}>
      <Switch>
        <Route path="/" exact component={LoginPage} />
        <Route path="/home" exact component={HomePage} />
      </Switch>
    </Router>
  );
}

export default RouterConfig;
ログイン認証について
厳密には認証処理にはPrivateRouteコンポーネントを用意するなどして、以下の対応をとる必要があります。
- 認証が必要な画面へはPrivateRouteでパスを紐付け
- 認証が必要ない画面へは通常通りRouteでパスを紐付け
2-7. 統合する
モデルとルーティングをアプリケーションに統合するためのApp.jsを src直下 に作成します。
import dva from 'dva';
import createLoading from 'dva-loading';
import { createMemoryHistory as createHistory } from 'history';
import user from './models/user';
import RouterConfig from './routes';

// 1. Initialize
const app = dva({
  ...createLoading(),
  history: createHistory(),
  initialState: {},
  onStateChange() {},
  onError(e) {}
});

// 2. Plugins
// app.use({});

// 3. Model
app.model(user);

// 4. Router
app.router(RouterConfig);

export default app;
src直下 のindex.jsからApp.jsを読み込みます。
import { AppRegistry } from 'react-native';
import App from './App';
import './styles.css';

AppRegistry.registerComponent('App', () => App.start());  // () => でラップする必要あり
AppRegistry.runApplication('App', { rootTag: document.getElementById('root') });
2-8. 実行する
yarn start
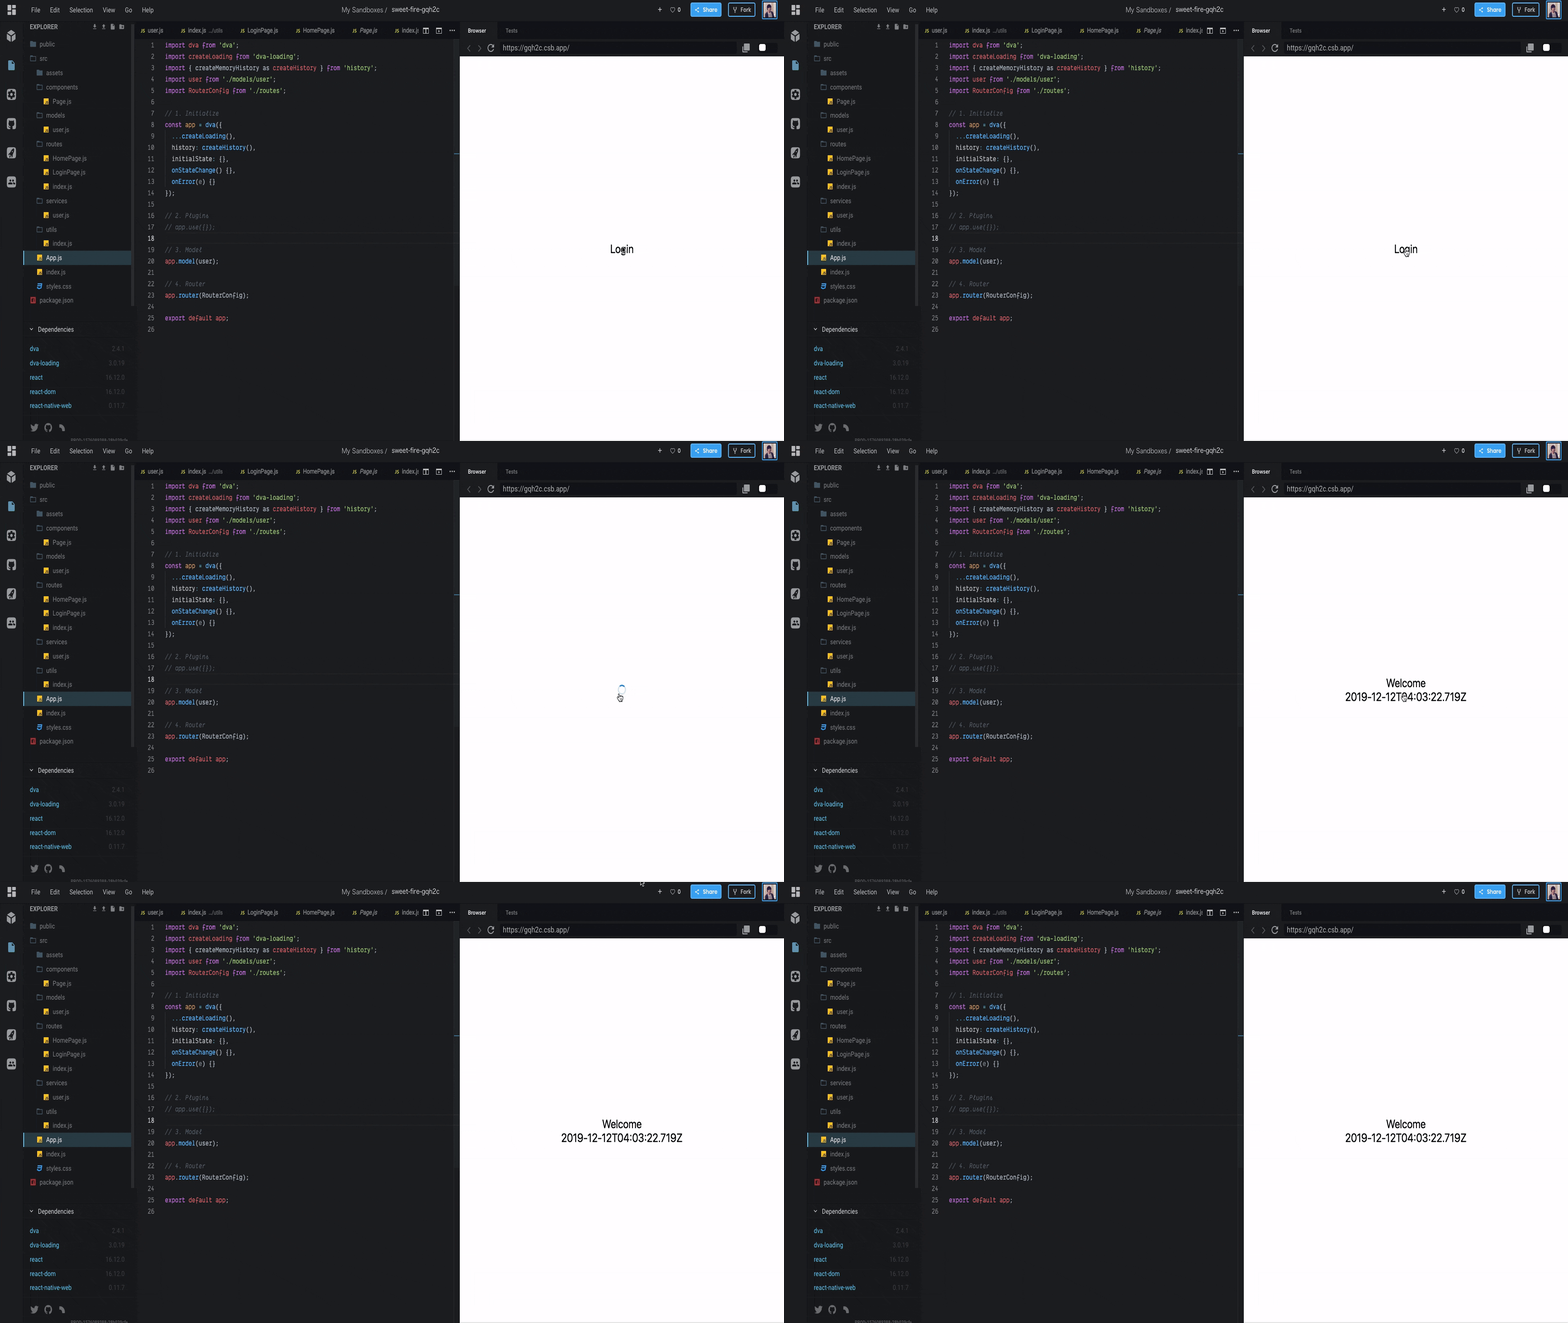
コンソールに表示されるlocaohostのリンクにアクセスすると以下の画面が表示されます。
完成後のイメージ(再掲)
3. 最後に
以上、駆け足なdva.jsのチュートリアルでした。間違いや改善点等があればご指摘ください。
redux-sagaやreact-router等の記載は一切省いてしまったので、リクエストいただければ自分のためにも書きたいと思います。
また、本チュートリアルはReact Nativeでも動作させることが可能です。React Nativeで動作させる場合は以下をご覧ください。
https://github.com/horiuchie/react-native-dva-starter-with-builtin-router
参考リンク
- 本チュートリアルの完成形を codesandbox に残しました。すぐに試したい方は使ってください。
- dva.js本家のチュートリアルは こちら にあります。


