概要
AWS IoTの重要な機能のひとつにThing ShadowsというIoTデバイスの状態管理をしてくれる仕組みがあります。
AWS IoTのThing Shadowsを図と実行例で理解するを参考にして、AWS SDKでデバイスの状態を送信するコードと管理アプリケーションからあるべき状態を送信して、状態に差分が出たら通知を行うコードを書いてみました。
コード
クラスメソッドさんの記事そのままだったりするのですが、powerというデバイスの状態を判定する項目を作ります。この項目に対して、onとoffという状態を使い分けてデバイスの状態をやり取りします。
まずは以下のソースが管理アプリケーション側のソースです。panpan-deviceというThing Shadowsを定義してAWS IoTに登録します。そして、{"state":{"desired":{"power":"on"}}という管理アプリケーションで定義される望ましい状態desiredを"power":"on"として登録しています。要はpowerはonにってる状態が正常ですよということですね。当たり前です。
そして、deltaというイベントを登録していますが、あるべき状態とデバイスから送信されるデバイスの現在の状態であるreportedがdesiredと差異があるとこのイベントが発火して差分を通知してくれます。
const thingShadow = require('../thing');
const isUndefined = require('../common/lib/is-undefined');
const cmdLineProcess   = require('./lib/cmdline');

function processTest( args, argsRemaining ) {
	const thingShadows = thingShadow({
							keyPath: args.privateKey,
							certPath: args.clientCert,
							caPath: args.caCert,
							clientId: args.clientId,
							region: args.region,
							reconnectPeriod: args.reconnectPeriod,
						});


	var clientToken;

	thingShadows
	  .on('connect', function() {
          console.log('connected to things instance, registering thing name');
          thingShadows.register( 'panpan-device' );

          setTimeout( function() {
          	var panpanpanState = {"state":{"desired":{"power":"on"}}};
       		clientToken = thingShadows.update('panpan-device', panpanpanState  );
       	  }, 2000 );
       });

    thingShadows.on('status',
    function(thingName, stat, clientToken, stateObject) {
       console.log('received '+stat+' on '+thingName+': '+
                   JSON.stringify(stateObject));
    });

    thingShadows
     .on('delta', function(thingName, stateObject) {
         console.log('panpan-device:delta on '+thingName+': '+
                     JSON.stringify(stateObject));
     });
}


module.exports = cmdLineProcess;

if (require.main === module) {
  cmdLineProcess('connect to the AWS IoT service',
                 process.argv.slice(2), processTest )
}
以下がIoTデバイス側の状態を通知するためのコードです。'$aws/things/<デバイス名>/shadow/update'というトピックに状態をpublish送信することで状態が通知されます。
今回は敢えてあるべき状態との差分を検知させるために{"reported" : {"power" : "off"}}という状態を永遠と通知させることにします。
const deviceModule   = require('../device');
const cmdLineProcess = require('./lib/cmdline');

function processTest( args, argsRemaining ) {

const device = deviceModule({
  keyPath: args.privateKey,
  certPath: args.clientCert,
  caPath: args.caCert,
  clientId: args.clientId,
  region: args.region,
  reconnectPeriod: args.reconnectPeriod,
});

var timeout;
var count=0;

device
  .on('connect', function() {
    const minimumDelay=250;
    console.log('connect');

    timeout = setInterval( function() {
        device.publish('$aws/things/panpan-device/shadow/update', '{"state": {"reported" : {"power" : "off"}}}');
    }, Math.max(args.delay,minimumDelay) );
    });
}

module.exports = cmdLineProcess;

if (require.main === module) {
  cmdLineProcess('connect to the AWS IoT service',
                 process.argv.slice(2), processTest )
}
実行
管理ツール側のコードを実行
$node examples/mobile-app.js -f ~/certs/
これで管理ツールのプロセスを実行しました。Thing Shadowsが登録されあるべき状態power:onが定義されます。
デバイス側のコードを実行
$ node examples/device-sample.js -f ~/certs/
そして敢えて現在の状態としてpower:offをデバイスから送信し続けます
結果
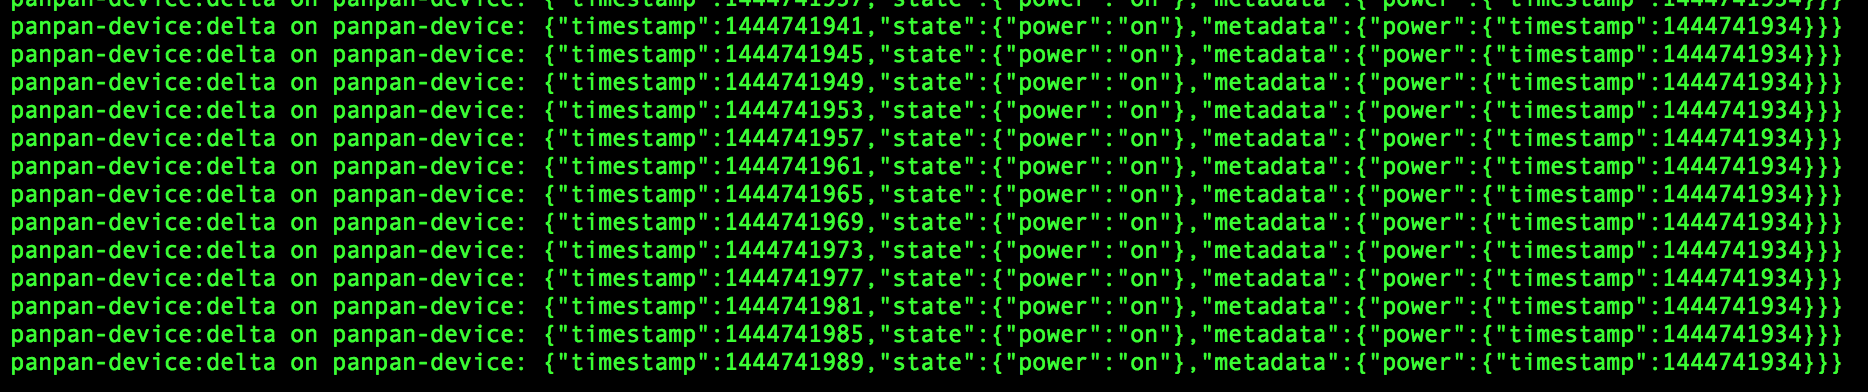
正しく管理ツール側のdeltaイベントが発火して、power:onであるべきだよと状態の差分を通知してくれました。
まとめ
コードを書くことでThing Shadowsの仕組は理解できました。常時稼働し続けるIoTデバイスを運用管理するにあたってはすごく便利な仕組みだなと思いました。
ただ、遊びで使っているうちはPublish/Subscribeのみで事足りるかなという感じっすね。