はじめに
PowerShellを使用してシステムのパフォーマンス情報を計測し、CVS形式で出力する方法を調査・実装してみました。
本記事は調査・実装したことを備忘としてまとめたものとなります。
実行環境
OS:Windows 10 Enterprise
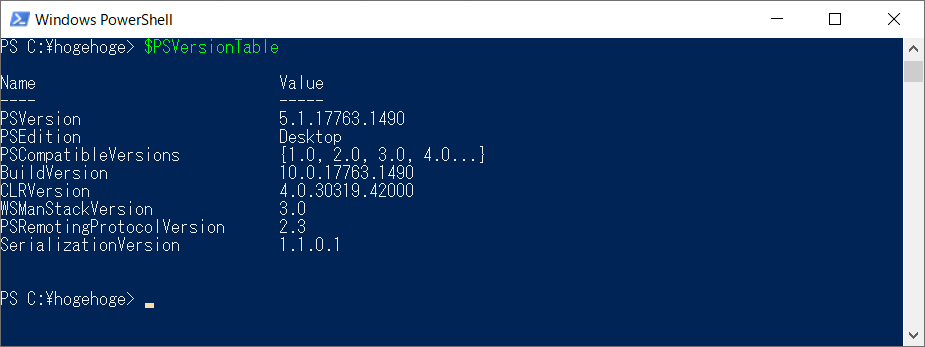
PowerShellのバージョン:5.1.17763.1490
PowerShellのバージョン確認方法
PowerShellを起動して$PSVersionTableを入力してEnterを押すとPowerShellのバージョンが表示される。
Get-Counterコマンドレットを使用して計測情報を取得する
Get-Counterコマンドレットの説明
Get-Counterコマンドレットを使用して計測情報を取得することができる。
| Get-Counterコマンドレットの書式 |
|---|
| Get-Counter [カウンター] [オプション] |
下記はGet-Counterコマンドレットの主なオプションです。
| オプション | 意味 |
|---|---|
| -Counter | 計測するカウンターを指定する。省略可能 |
| -ListSet | カウンターセットの情報を取得する |
| -Continuous | [Ctrl]+[C]キーが押されるまで継続的に取得する |
| -MaxSamples | 取得するサンプルデータの数を指定する |
| -SampleInterval | 計測間隔を秒単位で指定する |
計測するカウンターを指定して、CSV形式で出力してみる
参考サイトをもとにして、計測対象とするカウンターを決めていく。
今回はCPU、メモリ、ディスクのカウンターからボトルネック指標として使えそうなものを抜粋してみる。
下記をPowerShellで実行すると計測結果がCSVとして出力される。
# カウンターの指定
$Counters = @(
    '\Processor(_Total)\% Processor Time',
    '\System\Processor Queue Length',
    '\Memory\Available Mbytes',
    '\Memory\Pages/sec',
    '\Process(_Total)\Working Set',
    '\PhysicalDisk(*)\Avg. Disk Queue Length',
    '\LogicalDisk(*)\Avg. Disk Queue Length'
)
# 例:1秒間隔で計測し、1つのカウンターにつき最大5つのデータを取得してCSV形式で出力
Get-Counter -Counter $Counters -MaxSamples 5  -SampleInterval 1 | ForEach {
    $_.CounterSamples | ForEach {
        [pscustomobject]@{
            TimeStamp = $_.TimeStamp
            Path = $_.Path
            Value = $_.CookedValue
        }
    }
} | Export-Csv -Path PerfMonCounters.csv -NoTypeInformation
例:CSV出力結果
PerfMonCounters.csv

"TimeStamp","Path","Value"
"2020/12/16 23:54:04","\\desktop-5gk0ns1\processor(_total)\% processor time","24.1294437645353"
"2020/12/16 23:54:04","\\desktop-5gk0ns1\system\processor queue length","1"
"2020/12/16 23:54:04","\\desktop-5gk0ns1\memory\available mbytes","608"
"2020/12/16 23:54:04","\\desktop-5gk0ns1\memory\pages/sec","11.8296868159422"
"2020/12/16 23:54:04","\\desktop-5gk0ns1\process(_total)\working set","3208744960"
"2020/12/16 23:54:04","\\desktop-5gk0ns1\physicaldisk(0 c:)\avg. disk queue length","0.0172272941833824"
"2020/12/16 23:54:04","\\desktop-5gk0ns1\physicaldisk(1 e:)\avg. disk queue length","0"
"2020/12/16 23:54:04","\\desktop-5gk0ns1\physicaldisk(2 f:)\avg. disk queue length","0"
"2020/12/16 23:54:04","\\desktop-5gk0ns1\physicaldisk(_total)\avg. disk queue length","0.0172272941833824"
"2020/12/16 23:54:04","\\desktop-5gk0ns1\logicaldisk(c:)\avg. disk queue length","0.0172832084842202"
"2020/12/16 23:54:04","\\desktop-5gk0ns1\logicaldisk(harddiskvolume4)\avg. disk queue length","0"
"2020/12/16 23:54:04","\\desktop-5gk0ns1\logicaldisk(e:)\avg. disk queue length","0"
"2020/12/16 23:54:04","\\desktop-5gk0ns1\logicaldisk(f:)\avg. disk queue length","0"
"2020/12/16 23:54:04","\\desktop-5gk0ns1\logicaldisk(_total)\avg. disk queue length","0.0172832084842202"
・
・
・
バックグラウンド ジョブでパフォーマンス計測を実行
パフォーマンス計測をバックグラウンド ジョブとして実行する方法を考えてみる。
バッチ処理実行中のパフォーマンス計測を行いたい場合は、下記の実装イメージのようにすれば対応可能と確認できた。
# パフォーマンス計測をバックグラウンドジョブとして実行
Start-Job -Name PerfMonCounters -ScriptBlock {
    $Counters = @(
        '\Processor(_Total)\% Processor Time',
        '\System\Processor Queue Length',
        '\Memory\Available Mbytes',
        '\Memory\Pages/sec',
        '\Process(_Total)\Working Set',
        '\PhysicalDisk(*)\Avg. Disk Queue Length',
        '\LogicalDisk(*)\Avg. Disk Queue Length'
    )
    Get-Counter -Counter $Counters -MaxSamples 5  -SampleInterval 1 | ForEach {
        $_.CounterSamples | ForEach {
            [pscustomobject]@{
                TimeStamp = $_.TimeStamp
                Path = $_.Path
                Value = $_.CookedValue
            }
        }
    }
}

-------------------------------------------
~ここで計測対象とするバッチ処理を起動させる~
-------------------------------------------

# バッチ処理が完了したら、パフォーマンス計測結果をCSVへ出力
Receive-Job -Name PerfMonCounters | Export-Csv -Path PerfMonCounters.csv -NoTypeInformation

# パフォーマンス計測ジョブ終了
Stop-Job -Name PerfMonCounters
Remove-Job -Name PerfMonCounters