前回の記事では、注文フォームを作成する手順について説明をしました。
ただ、このままでは、データの整合性やINT型にStringの文字列を入れた時にエラーが出たり、255文字以上の文字列を入力したときにエラーが出たりなど、問題が山積みなので、これらの問題を解決していきましょう。
ファイル構成
.
├── .gradle
├── .idea
├── build
├── gradle
└── src
     ├── main
     |      ├── java
     |      |      └── com
     |      |           └── example
     |      |                 └── practice
     |      |                          PracticeApplication.java
     |      |                          ├── web
     |      |                          |    ├── order
     |      |                          |    |    ├── OrderForm.java
     |      |                          |    |      └── OrderController.java
     |      |                          |    |
     |      |                          |    └── IndexController.java
     |      |                          └── domain
     |      |                                 └── order
     |      |                                       └── OrderEntity.java
     |      |                                       └── OrderService.java
     |      |                                       └── OrderRepository.java
     |      |
     |      └── resources
     |              ├── static
     |              ├── templates
     |              |        └── order
     |              |                  ├── form.html
     |              |                  └── list.html
     |              └── index.html
     |              schema.sql
     |              data.sql
     |                    application.properties
     └── test
.gitignore
build.gradle
gradlew.bat
HELP.md
settings.gradle
トランザクション
トランザクションは、データベース操作やその他のリソースへのアクセスなどの複数の処理を一つのまとまりとして扱うための仕組みです。特徴としては、処理が完全に実行された場合にのみ変更が確定され、途中でエラーや障害が発生した場合には、処理を取り消すことができます。
トランザクションは通常以下のような特性を持ちます。
ACID特性: トランザクションはACID特性を満たす必要があります。
Atomicity(原子性): トランザクション内のすべての操作は、すべて成功するか、すべて失敗するかのいずれかであることを保証します。
Consistency(一貫性): トランザクションの前後でデータベースは一貫性が保たれるように変更されます。
Isolation(分離性): 複数のトランザクションが同時に実行されても、それらがお互いに干渉しないことを保証します。
Durability(耐久性): トランザクションが正常に終了した場合、その変更は永続的に保存されます。
コミットとロールバック: トランザクション内の処理がすべて正常に完了した場合、トランザクションをコミットして変更を確定させます。逆に、途中でエラーが発生した場合、トランザクションはロールバックされて変更を取り消します。
Service層にトランザクションを設定することで、ビジネスロジックの実行中に発生する可能性があるエラーや例外に対処しながら、データベースの一貫性と整合性を保つことができるので、OrderServiceにトランザクションを設定していきたいと思います。
以下がトランザクションを追加した内容となります。
package com.example.practice.domain.order;

import lombok.RequiredArgsConstructor;
import org.springframework.stereotype.Service;
import com.example.practice.web.order.OrderForm;
import java.util.List;
import org.springframework.ui.Model;
import org.springframework.transaction.annotation.Transactional;
import java.lang.IllegalAccessException;

@Service
@RequiredArgsConstructor
public class OrderService {
    private final OrderRepository repository;

    //読み取り専用であり、変更は行われないため、readOnlyとしている。
    @Transactional(readOnly = true)
    public List<OrderEntity> findAll() {
        return repository.findAll();
    }

    @Transactional
    public void create(OrderForm form, Model model) {
        repository.insert(form);
        //トランザクションが行われているかを確認するためのもの。
        //あとで消す。
        throw new RuntimeException("Rollback");
    }
}
意図的に、throw new RuntimeException("Rollback");で、エラーを起こしているので、実際にやってみましょう。
@Transactionalをつけて実行をしてみると、
手順①

手順②

手順③
エラーが起こっても、データが追加されていないことがわかります。
では、@Transactionalを消して実行してみましょう。

そうすると、エラーが起こっているのにも関わらず、データが追加されていることがわかりいます。
確認が終わったら、throw new RuntimeException("Rollback");は消してください。
注文番号をインクリメントする実装
次に、注文番号はprimarykeyになっているので、注文番号をインクリメントしたほうが入力の手間が省けるので、その実装をしていきます。
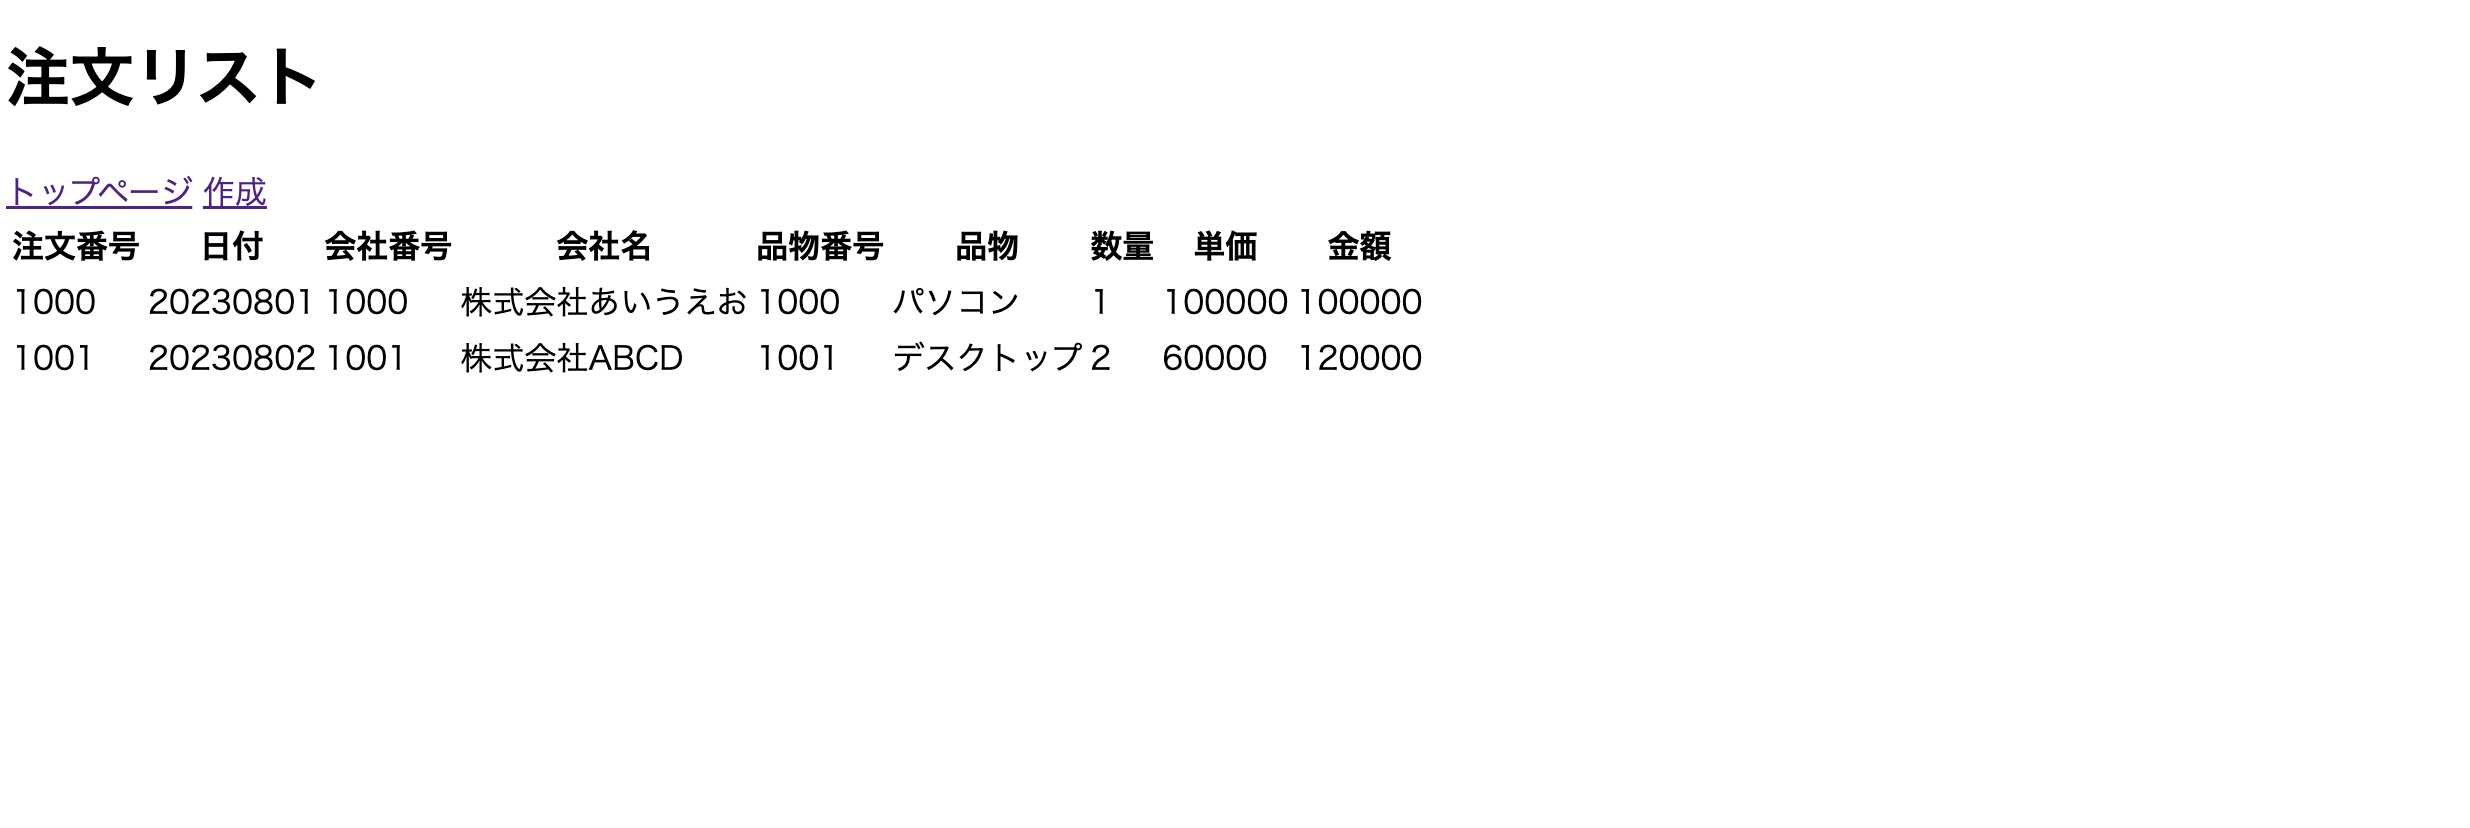
例①

例②

上記のように、注文番号をインクリメントする実装を始めていきたいと思います。
始める前にdata.sqlを以下の通りに変更しましょう。
insert into ORDERS(order_id,order_date,company_no,company_name,item_no,item,quantity,unit_price,price)
       values (1, '20230801', 1000, '株式会社あいうえお', 1000, 'パソコン', 1, 100000,100000);
insert into ORDERS(order_id,order_date,company_no,company_name,item_no,item,quantity,unit_price,price)
       values (2, '20230802', 1001,'株式会社ABCD', 1001, 'デスクトップ', 2, 60000,120000);
また、H2データベースのコンソールはH2データベースは、インメモリデータベースの一種であり、一時的なデータを保存することができますが、セッションが切れるとデータがなくなってしまうのが特徴です。
データを永続的に保つためには、application.propertiesを変更する必要があります。
spring.thymeleaf.prefix=file:src/main/resources/templates/
spring.datasource.data-source-class-name=org.h2.Driver
spring.datasource.url=jdbc:h2:mem:its;DB_CLOSE_ON_EXIT=TRUE;MODE=MySQL
spring.datasource.username=user
spring.datasource.password=user
spring.h2.console.enabled=true //追加
そして、注文番号をインクリメントするには、order_idの最大数を+1する処理を加えたいと思います。
まず、「http://localhost:8080/h2-console」を開き、現時点のデータを確認しましょう。

現在のorder_idの最大数は「2」なので、最大数を取得するSELECT文を作成します。
以下がそのSELECT文です。
きちんと、最大数が表示できていることを確認できました。

Modelの修正
Modelは、データ処理やビジネスロジックを担当する部分であり、データの取得や保存、変更などの操作を行います。まずは、データの取得や保存、変更の処理であるOrderRepositoryで注文番号をインクリメントを追加していきましょう。
コードの説明です。
findMaxOrderId()メソッドは、アノテーション@Select("SELECT MAX(CAST(order_id AS SIGNED)) FROM ORDERS")で指定されたSQLクエリを実行して、データベースから最大の注文番号を取得しています。
取得された結果がInteger型として返され、プログラム内で利用されることになります。
package com.example.practice.domain.order;

import org.apache.ibatis.annotations.Mapper;
import org.apache.ibatis.annotations.Select;
import org.apache.ibatis.annotations.Insert;
import java.util.List;
import com.example.practice.web.order.OrderForm;
import org.apache.ibatis.annotations.Options;

@Mapper
public interface OrderRepository {
    @Select("select * from orders")
    List<OrderEntity> findAll();
    @Insert("insert into ORDERS(order_id,order_date,company_no,company_name,item_no,item,quantity,unit_price,price) values (#{orderId}, #{orderDate}, #{companyNo}, #{companyName}, #{itemNo}, #{item}, #{quantity}, #{unitPrice}, #{price})")
    void insert(OrderForm orderForm);
    @Select("SELECT MAX(CAST(order_id AS SIGNED)) FROM ORDERS")
    Integer findMaxOrderId();
}
次にビジネスロジックを担当する部分を追加していきます。
OrderRepositoryでは、最大数を取得しましたが、最大数に+1をする処理と注文テーブルが0件のときに1を返す処理を追加しましょう。
また、取得したorderIdをOrderFormに値を入れて、Insertできる処理も合わせて追加をします。
package com.example.practice.domain.order;

import lombok.RequiredArgsConstructor;
import org.springframework.stereotype.Service;
import com.example.practice.web.order.OrderForm;
import java.util.List;
import org.springframework.ui.Model;
import org.springframework.transaction.annotation.Transactional;
import java.lang.IllegalAccessException;

@Service
@RequiredArgsConstructor
public class OrderService {
    private final OrderRepository repository;
    @Transactional(readOnly = true)
    public List<OrderEntity> findAll() {
        return repository.findAll();
    }
    @Transactional
    public void create(OrderForm form, Model model) {
        int nextOrderId = getNextOrderId(); // 事前にorderIdを取得するメソッド
        form.setOrderId(nextOrderId); // OrderFormに次のorderIdを設定
        repository.insert(form); // OrderFormをDBに挿入
    }

    // 最大orderId + 1を計算して返すメソッド
    public int getNextOrderId() {
        Integer maxOrderId = repository.findMaxOrderId();
        if (maxOrderId == null) {
            return 1; // 最初の場合、1を返す
        }
        int nextId = maxOrderId + 1;
        System.out.println(nextId);
        return nextId;
    }
}
Controllerの修正
次に、Controllerを修正していきます。 Controllerは、アプリケーション内のユーザーのリクエストを受け取り、適切な処理を実行し、結果をView(ビュー)に渡す役割を持つ部分です。OrderService内の最大orderId + 1を計算して返すメソッドを呼び出して、nextOrderIdに代入をし、Viewに渡すようにしています。
package com.example.practice.web.order;

import com.example.practice.domain.order.OrderService;
import lombok.RequiredArgsConstructor;
import org.springframework.stereotype.Controller;
import org.springframework.ui.Model;
import org.springframework.web.bind.annotation.GetMapping;
import org.springframework.web.bind.annotation.RequestMapping;
import org.springframework.web.bind.annotation.PostMapping;
import org.springframework.web.bind.annotation.ModelAttribute;
import com.example.practice.domain.order.OrderRepository;
@Controller
@RequestMapping("/orders")
@RequiredArgsConstructor
public class OrderController {
    private final OrderService orderService;
    @GetMapping
    public String showList(Model model) {
        //orderServiceクラスのfindAllメソッドで取得されたオーダーリストを、orderListでビューに渡す
        model.addAttribute("orderList", orderService.findAll());
        // "order/list"という名前のThymeleafビューを表示する
        return "order/list";
    }
    @GetMapping("/form")
    public String showForm(@ModelAttribute OrderForm form, Model model) {
        int nextOrderId = orderService.getNextOrderId(); // OrderService内のメソッドを呼び出し
        form.setOrderId(nextOrderId); // OrderFormに次のorderIdを設定
        model.addAttribute("nextOrderId", nextOrderId);
        return "order/form";
    }
    @PostMapping
    public String create(@ModelAttribute OrderForm form, Model model) {
        orderService.create(form, model);
        return showList(model);
    }
}
Viewの修正
Viewはユーザーに表示される情報やインターフェースを表現するための部分です。
Viewはアプリケーションの外部に対して、データの可視化や操作をします。
先ほど、Controllerで渡したnextOrderIdを表示できるような処理を加えます。
<!DOCTYPE html>
<html lang="en" xmlns:th="http://www.thymeleaf.org">
<head>
    <meta charset="UTF-8">
    <title>注文フォーム | 注文管理アプリケーション</title>
</head>
<body>
<h1>注文フォーム</h1>
<form th:action="@{/orders}" th:method="post" th:object="${orderForm}">
    <div>
        <label>注文番号</label>
        <span th:text="${nextOrderId}"></span>
    </div>
    <div>
        <label for="orderDate">日付</label>
        <input type="text" id="orderDate" th:field="*{orderDate}">
    </div>
    <div>
        <label for="companyNo">会社番号</label>
        <input type="text" id="companyNo" th:field="*{companyNo}">
    </div>
    <div>
        <label for="companyName">会社名</label>
        <input type="text" id="companyName" th:field="*{companyName}">
    </div>
    <div>
        <label for="itemNo">品物番号</label>
        <input type="text" id="itemNo" th:value="*{itemNo}">
    </div>
    <div>
        <label for="item">品物</label>
        <input type="text" id="item" th:field="*{item}">
    </div>
    <div>
        <label for="quantity">数量</label>
        <input type="text" id="quantity" th:field="*{quantity}">
    </div>
    <div>
        <label for="unitPrice">単価</label>
        <input type="number" id="unitPrice" th:field="*{unitPrice}">
    </div>
    <div>
        <label for="price">金額</label>
        <input type="number" id="price" th:field="*{price}">
    </div>
    <div>
        <button type="submit">作成</button>
    </div>
</form>
</body>
</html>
以上で、注文番号をインクリメントする実装を追加しました。
二重サブミット対策
次に、二重サブミットの対策をしていきたいと思います。
二重サブミットは、ウェブアプリケーションにおいて、ユーザが同じフォームデータを複数回送信してしまうことをいいます。
通常、フォームを送信すると、WEBサーバー側でそのデータを処理し、データベースへの変更などが行われます。
しかし、ユーザーが何らかの理由でフォームを複数回送信すると、同じ処理が複数回行われ、誤った結果やデータ重複が発生する可能性があります。
たとえば、商品を購入するフォームについて考えていきましょう。
もしユーザが「購入」ボタンを複数回クリックすると、同じ商品が複数回注文されてしまう可能性があります。
これは、データの整合性やセキュリティの問題を引き起こす可能性があります。
以下のコードで対策することができます。
package com.example.practice.web.order;

import com.example.practice.domain.order.OrderService;
import lombok.RequiredArgsConstructor;
import org.springframework.stereotype.Controller;
import org.springframework.ui.Model;
import org.springframework.web.bind.annotation.GetMapping;
import org.springframework.web.bind.annotation.RequestMapping;
import org.springframework.web.bind.annotation.PostMapping;
import org.springframework.web.bind.annotation.ModelAttribute;
import com.example.practice.domain.order.OrderRepository;
@Controller
@RequestMapping("/orders")
@RequiredArgsConstructor
public class OrderController {
    private final OrderService orderService;
    @GetMapping
    public String showList(Model model) {
        //orderServiceクラスのfindAllメソッドで取得されたオーダーリストを、orderListでビューに渡す
        model.addAttribute("orderList", orderService.findAll());
        // "order/list"という名前のThymeleafビューを表示する
        return "order/list";
    }
    @GetMapping("/form")
    public String showForm(@ModelAttribute OrderForm form, Model model) {
        int nextOrderId = orderService.getNextOrderId(); // OrderService内のメソッドを呼び出し
        form.setOrderId(nextOrderId); // OrderFormに次のorderIdを設定
        model.addAttribute("nextOrderId", nextOrderId);
        return "order/form";
    }
    @PostMapping
    public String create(@ModelAttribute OrderForm form, Model model) {
        orderService.create(form, model);
        return "redirect:/orders"; //ここを変更
    }
}
バリデーションの追加
次に、バリデーションの追加をしていきます。現在のsqlは以下の通りになっています。
CREATE TABLE ORDERS (
    order_id int NOT NULL PRIMARY KEY,
    order_date VARCHAR(255) NOT NULL,
    company_no INT NOT NULL,
    company_name VARCHAR(255),
    item_no INT NOT NULL,
    item VARCHAR(255),
    quantity INT DEFAULT 0,
    unit_price INT DEFAULT 0,
    price INT DEFAULT 0
);
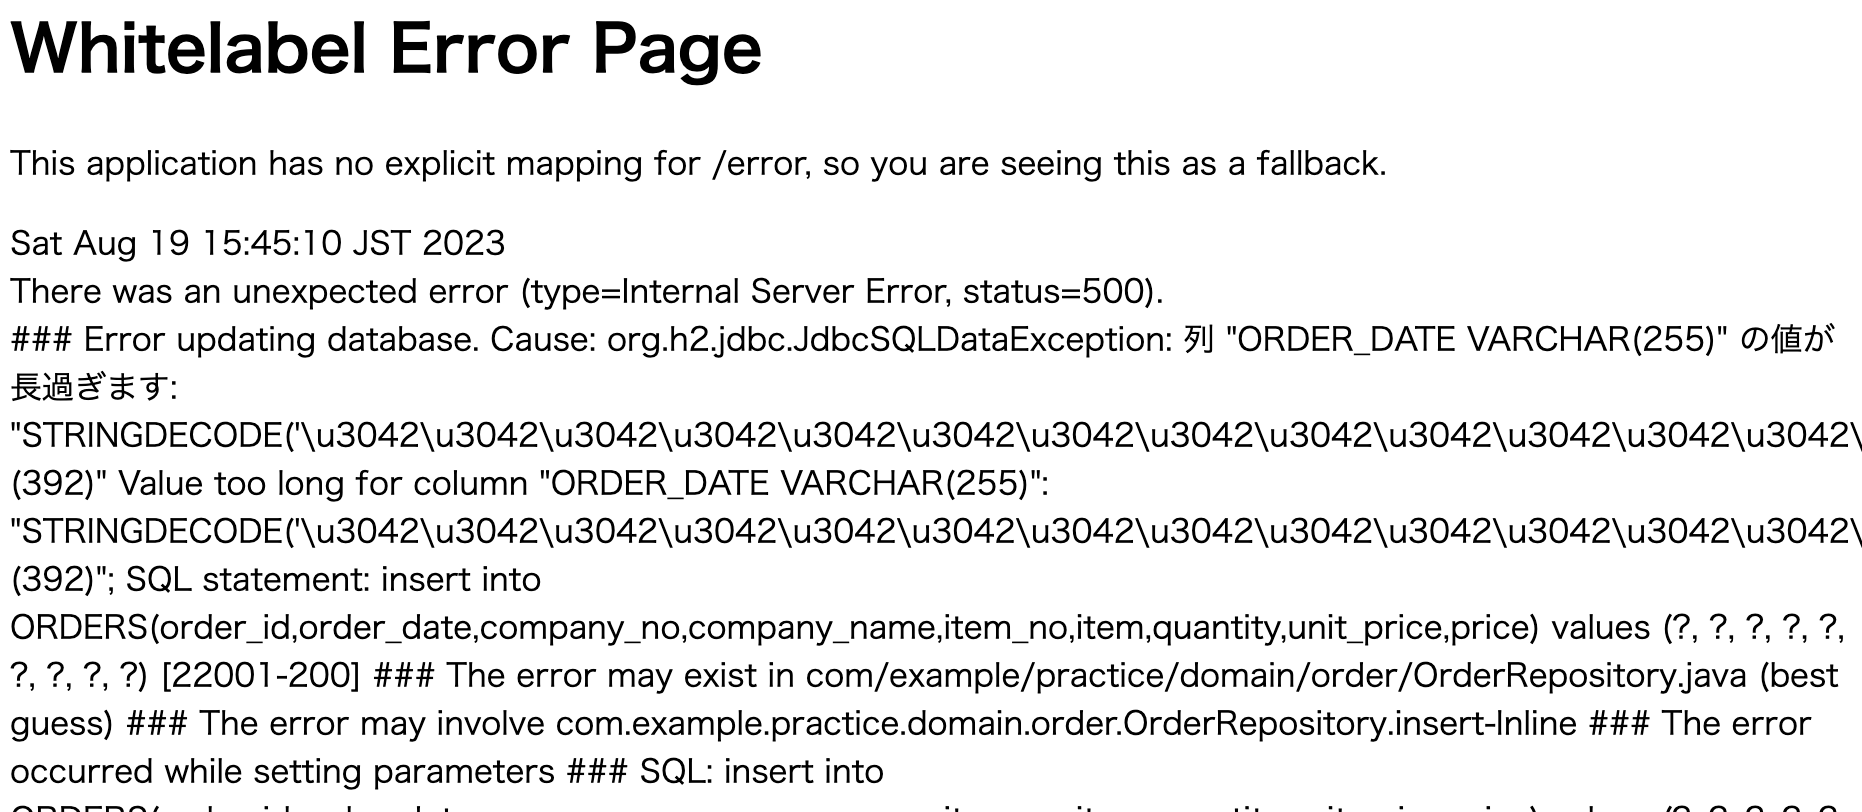
しかし、255文字以上の文字列を追加したり、数値型に文字列を入れると、エラーメッセージが出ます。
今回はバリデーションを追加して、期待している値がきちんと入力できるようにしていきましょう。
エラーメッセージ
まずはバリデーションを追加するために、依存関係を追加していきます。
dependencies {
	implementation 'org.springframework.boot:spring-boot-starter-thymeleaf'
	implementation 'org.springframework.boot:spring-boot-starter-web'
	developmentOnly 'org.springframework.boot:spring-boot-devtools'
	compileOnly 'org.projectlombok:lombok'
	annotationProcessor 'org.projectlombok:lombok'
	implementation 'org.mybatis.spring.boot:mybatis-spring-boot-starter:2.2.0'
	runtimeOnly 'com.h2database:h2'
	testImplementation 'org.springframework.boot:spring-boot-starter-test'
	implementation 'org.springframework.boot:spring-boot-starter-validation'
}
日付型のバリデーションの追加
まず、order_dateの値にバリデーションを設定をしていきます。
その前に、order_dateの日付をシステム日付にし、入力する手間を削減しましょう。
また、「日付」から「納入日付」に変更したいと思います。
CREATE TABLE ORDERS (
    order_id int NOT NULL PRIMARY KEY,
    order_date DATE DEFAULT sysdate NOT NULL,
    company_no INT NOT NULL,
    company_name VARCHAR(255),
    item_no INT NOT NULL,
    item VARCHAR(255),
    quantity INT DEFAULT 0,
    unit_price INT DEFAULT 0,
    price INT DEFAULT 0
);
それに伴い、data.sqlも変更します。
insert into ORDERS(order_id,order_date,company_no,company_name,item_no,item,quantity,unit_price,price)
       values (1, '2023-08-01', 1000, '株式会社あいうえお', 1000, 'パソコン', 1, 100000,100000);
insert into ORDERS(order_id,order_date,company_no,company_name,item_no,item,quantity,unit_price,price)
       values (2, '2023-08-02', 1001,'株式会社ABCD', 1001, 'デスクトップ', 2, 60000,120000);
次に、LocalDateオブジェクトは、"yyyy-MM-dd"パターンに従って変換されるため、日付/時刻の文字列表現を正しく解釈し、Javaの日付/時刻オブジェクトに変換するために、@DateTimeFormat(pattern = "yyyy-MM-dd")を追加します。
package com.example.practice.domain.order;

import lombok.AllArgsConstructor;
import lombok.Data;
import org.springframework.format.annotation.DateTimeFormat;
import java.time.LocalDate;

@AllArgsConstructor
@Data
public class OrderEntity {
    /*
    フィールド(メンバ変数)
    */
    //注文番号
    private int orderId;
    //納入日付
    @DateTimeFormat(pattern = "yyyy-MM-dd")
    private LocalDate orderDate;
    //会社番号
    private int companyNo;
    //会社名
    private String companyName;
    //品物番号
    private int itemNo;
    //品物
    private String item;
    //数量
    private int quantity;
    //単価
    private int unitPrice;
    //金額
    private int price;

}
package com.example.practice.web.order;

import lombok.Data;
import java.time.LocalDate;
import org.springframework.format.annotation.DateTimeFormat;

@Data
public class OrderForm {
        //注文番号
        private int orderId;
        //納入日付
        @DateTimeFormat(pattern = "yyyy-MM-dd")
        private LocalDate orderDate;
        //会社番号
        private int companyNo;
        //会社名
        private String companyName;
        //品物番号
        private int itemNo;
        //品物
        private String item;
        //数量
        private int quantity;
        //単価
        private int unitPrice;
        //金額
        private int price;
}
また、htmlの方も、date型に修正します。
<!DOCTYPE html>
<html lang="en" xmlns:th="http://www.thymeleaf.org">
<head>
    <meta charset="UTF-8">
    <title>注文フォーム | 注文管理アプリケーション</title>
</head>
<body>
<h1>注文フォーム</h1>
<form th:action="@{/orders}" th:method="post" th:object="${orderForm}">
    <div>
        <label>注文番号</label>
        <span th:text="${nextOrderId}"></span>
    </div>
    <div>
        <label for="orderDate">納入日付</label>
        <input type="date" id="orderDate" th:field="*{orderDate}">
    </div>
    <div>
        <label for="companyNo">会社番号</label>
        <input type="text" id="companyNo" th:field="*{companyNo}">
    </div>
    <div>
        <label for="companyName">会社名</label>
        <input type="text" id="companyName" th:field="*{companyName}">
    </div>
    <div>
        <label for="itemNo">品物番号</label>
        <input type="text" id="itemNo" th:value="*{itemNo}">
    </div>
    <div>
        <label for="item">品物</label>
        <input type="text" id="item" th:field="*{item}">
    </div>
    <div>
        <label for="quantity">数量</label>
        <input type="text" id="quantity" th:field="*{quantity}">
    </div>
    <div>
        <label for="unitPrice">単価</label>
        <input type="number" id="unitPrice" th:field="*{unitPrice}">
    </div>
    <div>
        <label for="price">金額</label>
        <input type="number" id="price" th:field="*{price}">
    </div>
    <div>
        <button type="submit">作成</button>
    </div>
</form>
</body>
</html>
また、viewで現在日付をデフォルトで表示させるために、ControllerからViewに現在日付を渡します。
package com.example.practice.web.order;

import com.example.practice.domain.order.OrderService;
import lombok.RequiredArgsConstructor;
import org.springframework.stereotype.Controller;
import org.springframework.ui.Model;
import org.springframework.web.bind.annotation.GetMapping;
import org.springframework.web.bind.annotation.RequestMapping;
import org.springframework.web.bind.annotation.PostMapping;
import org.springframework.web.bind.annotation.ModelAttribute;
import java.time.LocalDate;
@Controller
@RequestMapping("/orders")
@RequiredArgsConstructor
public class OrderController {
    private final OrderService orderService;
    @GetMapping
    public String showList(Model model) {
        //orderServiceクラスのfindAllメソッドで取得されたオーダーリストを、orderListでビューに渡す
        model.addAttribute("orderList", orderService.findAll());
        // "order/list"という名前のThymeleafビューを表示する
        return "order/list";
    }
    @GetMapping("/form")
    public String showForm(@ModelAttribute OrderForm form, Model model) {
        int nextOrderId = orderService.getNextOrderId();
        form.setOrderId(nextOrderId);
        // 現在の日付をセット
        form.setOrderDate(LocalDate.now());
        model.addAttribute("nextOrderId", nextOrderId);
        return "order/form";
    }
    @PostMapping
    public String create(@ModelAttribute OrderForm form, Model model) {
        orderService.create(form, model);
        return "redirect:/orders";
    }
}
文字列型と数値型のバリデーションの追加
まずは、schema.sqlの数値型のデフォルト値を0に変更しましょう。
CREATE TABLE ORDERS (
    order_id int NOT NULL PRIMARY KEY,
    order_date DATE DEFAULT sysdate NOT NULL,
    company_no INT DEFAULT 0,
    company_name VARCHAR(255),
    item_no INT DEFAULT 0,
    item VARCHAR(255),
    quantity INT DEFAULT 0,
    unit_price INT DEFAULT 0,
    price INT DEFAULT 0
);
次にバリデーションを追加するため、build.gradleに依存関係を追加しましょう。
dependencies {
	implementation 'org.springframework.boot:spring-boot-starter-thymeleaf'
	implementation 'org.springframework.boot:spring-boot-starter-web'
	developmentOnly 'org.springframework.boot:spring-boot-devtools'
	compileOnly 'org.projectlombok:lombok'
	annotationProcessor 'org.projectlombok:lombok'
	implementation 'org.mybatis.spring.boot:mybatis-spring-boot-starter:2.2.0'
	runtimeOnly 'com.h2database:h2'
	testImplementation 'org.springframework.boot:spring-boot-starter-test'
	implementation 'org.springframework.boot:spring-boot-starter-validation' //追加
}
次に、OrderControllerでバリデーションの設定をします。
@Validated アノテーションを引数として指定したメソッドの引数に対してバリデーションが行われます。
BindingResult は、バリデーションの結果やエラーメッセージを格納するためのオブジェクトです。BindingResult を使用することで、バリデーションの結果を取得し、適切な処理を行うことができます。
package com.example.practice.web.order;

import com.example.practice.domain.order.OrderService;
import lombok.RequiredArgsConstructor;
import org.springframework.stereotype.Controller;
import org.springframework.ui.Model;
import org.springframework.web.bind.annotation.GetMapping;
import org.springframework.web.bind.annotation.RequestMapping;
import org.springframework.web.bind.annotation.PostMapping;
import org.springframework.web.bind.annotation.ModelAttribute;
import org.springframework.validation.BindingResult;
import org.springframework.validation.annotation.Validated;
import java.time.LocalDate;
@Controller
@RequestMapping("/orders")
@RequiredArgsConstructor
public class OrderController {
    private final OrderService orderService;
    @GetMapping
    public String showList(Model model) {
        //orderServiceクラスのfindAllメソッドで取得されたオーダーリストを、orderListでビューに渡す
        model.addAttribute("orderList", orderService.findAll());
        // "order/list"という名前のThymeleafビューを表示する
        return "order/list";
    }
    @GetMapping("/form")
    public String showForm(@ModelAttribute OrderForm form, Model model) {
        int nextOrderId = orderService.getNextOrderId();
        form.setOrderId(nextOrderId);
        form.setOrderDate(LocalDate.now());
        model.addAttribute("nextOrderId", nextOrderId);
        return "order/form";
    }
    @PostMapping
    public String create(@Validated OrderForm form, BindingResult bindingResult, Model model) {
        if (bindingResult.hasErrors()) {
            return showForm(form, model);
        }
        orderService.create(form, model);
        return "redirect:/orders";
    }

}
バリデーションエラーが発生した際にエラーメッセージを表示するために、form.htmlにも追加しましょう。
<!DOCTYPE html>
<html lang="en" xmlns:th="http://www.thymeleaf.org">
<head>
    <meta charset="UTF-8">
    <title>注文フォーム | 注文管理アプリケーション</title>
</head>
<body>
<h1>注文フォーム</h1>
<form th:action="@{/orders}" th:method="post" th:object="${orderForm}">
    <div>
        <label>注文番号</label>
        <span th:text="${nextOrderId}"></span>
    </div>
    <div>
        <label for="orderDate">納入日付</label>
        <input type="date" id="orderDate" th:field="*{orderDate}">
        <p th:if="${#fields.hasErrors('orderDate')}" th:errors="*{orderDate}">(error)</p>
    </div>
    <div>
        <label for="companyNo">会社番号</label>
        <input type="number" id="companyNo" th:field="*{companyNo}">
        <p th:if="${#fields.hasErrors('companyNo')}" th:errors="*{companyNo}">(error)</p>
    </div>
    <div>
        <label for="companyName">会社名</label>
        <input type="text" id="companyName" th:field="*{companyName}">
        <p th:if="${#fields.hasErrors('companyName')}" th:errors="*{companyName}">(error)</p>
    </div>
    <div>
        <label for="itemNo">品物番号</label>
        <input type="number" id="itemNo" th:value="*{itemNo}">
        <p th:if="${#fields.hasErrors('itemNo')}" th:errors="*{itemNo}">(error)</p>
    </div>
    <div>
        <label for="item">品物</label>
        <input type="text" id="item" th:field="*{item}">
        <p th:if="${#fields.hasErrors('item')}" th:errors="*{item}">(error)</p>
    </div>
    <div>
        <label for="quantity">数量</label>
        <input type="number" id="quantity" th:field="*{quantity}">
        <p th:if="${#fields.hasErrors('quantity')}" th:errors="*{quantity}">(error)</p>
    </div>
    <div>
        <label for="unitPrice">単価</label>
        <input type="number" id="unitPrice" th:field="*{unitPrice}">
        <p th:if="${#fields.hasErrors('unitPrice')}" th:errors="*{unitPrice}">(error)</p>
    </div>
    <div>
        <label for="price">金額</label>
        <input type="number" id="price" th:field="*{price}">
        <p th:if="${#fields.hasErrors('price')}" th:errors="*{price}">(error)</p>
    </div>
    <div>
        <button type="submit">作成</button>
    </div>
</form>
</body>
</html>