はじめに
WPF勉強メモです。XAMLでのページ遷移やフォルダ分けの方法がよくわかってなかったので、メモとして残します。
MainWindowをフォルダにわける方法
下記のようにフォルダを作って、配置するだけ、だとエラーになってしまう。
※他のWidnowはNamespaceとフォルダ構成があっていれば、問題なくできるぽい。
windowsフォルダ直下にMainWindow.xamlを移動

エラー:「System.IO.IOException: 'リソース 'mainwindow.xaml' を検索できません。」
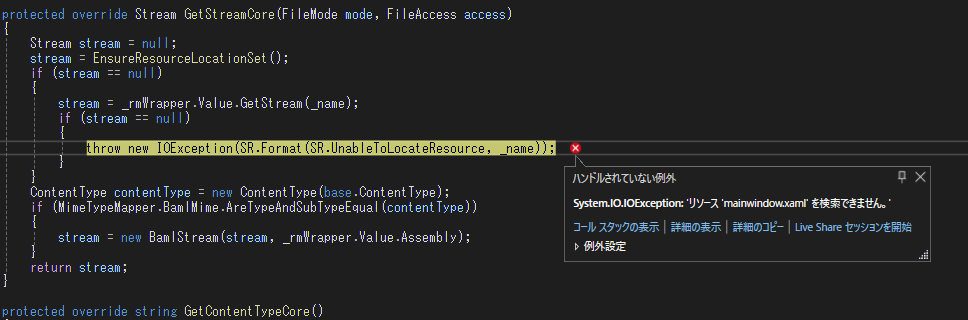
このエラーはApp.xamlの設定を変えると解決できます。
初期状態
<Application x:Class="WpfApp1.App"
             xmlns="http://schemas.microsoft.com/winfx/2006/xaml/presentation"
             xmlns:x="http://schemas.microsoft.com/winfx/2006/xaml"
             xmlns:local="clr-namespace:WpfApp1"
             StartupUri="MainWindow.xaml">
    <Application.Resources>

    </Application.Resources>
</Application>
App.xamlのApplicationタグのStartupUriプロパティにパスを指定する必要があります。
StartupUri="windows/MainWindow.xaml"
このプロパティはWPFアプリを立ち上げた時、1番最初に立ち上がるWindowを指定しているプロパティです。ここの指定が初期状態のままだったから、エラーが出てしまうことが原因でした。
ページ遷移方法
ページ遷移を行うには以下の手順が必要です。
- ページを作成する
- WindowクラスをNavigationWindowクラスに変更する
サンプルコード
フォルダ構成は下記です。

1. ページを作成する
下記を作成します。
最初に表示されるページ:Page1
遷移先のページ :Page2
作成方法はプロジェクトを選択して、右クリック追加からページの追加を選択することで作成できます。
<Page x:Class="WpfApp1.Page1"
      xmlns="http://schemas.microsoft.com/winfx/2006/xaml/presentation"
      xmlns:x="http://schemas.microsoft.com/winfx/2006/xaml"
      xmlns:mc="http://schemas.openxmlformats.org/markup-compatibility/2006"
      xmlns:d="http://schemas.microsoft.com/expression/blend/2008"
      xmlns:local="clr-namespace:WpfApp1"
      mc:Ignorable="d"
      d:DesignHeight="450" d:DesignWidth="800"
      Title="Page1" d:Background="White">

    <Grid>
        <TextBlock Text="Page1" FontSize="20" FontWeight="SemiBold"></TextBlock>

        <TextBlock Margin="10,78,0,0"
                   HorizontalAlignment="Left"
                   VerticalAlignment="Top"
                   TextWrapping="Wrap">
            <Run Text="リンク:"/>
            <Hyperlink NavigateUri="/pages/Page2.xaml">
                <Run Text="Page2へ遷移します"/>
            </Hyperlink>
        </TextBlock>
    </Grid>
</Page>
<Page x:Class="WpfApp1.Page2"
      xmlns="http://schemas.microsoft.com/winfx/2006/xaml/presentation"
      xmlns:x="http://schemas.microsoft.com/winfx/2006/xaml"
      xmlns:mc="http://schemas.openxmlformats.org/markup-compatibility/2006"
      xmlns:d="http://schemas.microsoft.com/expression/blend/2008"
      xmlns:local="clr-namespace:WpfApp1"
      mc:Ignorable="d"
      d:DesignHeight="450" d:DesignWidth="800"
      Title="Page2" d:Background="White">

    <Grid>
        <TextBlock Text="Page2" FontSize="20" FontWeight="SemiBold" />
        <TextBlock Margin="10,78,0,0"
           HorizontalAlignment="Left"
           VerticalAlignment="Top"
           TextWrapping="Wrap">
            <Run Text="リンク:"/>
            <Hyperlink NavigateUri="/pages/Page1.xaml">
                <Run Text="Page1へ遷移します"/>
            </Hyperlink>
        </TextBlock>
    </Grid>
</Page>
2. WindowクラスをNavigationWidowクラスに変更する
MainWindow.xamlのWindowタグをNavigationWindowタグに変更し、それ以外のコントロールタグを削除する。
SourceプロパティにPage1.xamlのパスを指定する。
※Page1.xamlがルートディレクトリにある場合は名前だけでも可。
<NavigationWindow x:Class="WpfApp1.windows.MainWindow"
        xmlns="http://schemas.microsoft.com/winfx/2006/xaml/presentation"
        xmlns:x="http://schemas.microsoft.com/winfx/2006/xaml"
        xmlns:d="http://schemas.microsoft.com/expression/blend/2008"
        xmlns:mc="http://schemas.openxmlformats.org/markup-compatibility/2006"
        xmlns:Icon="http://metro.mahapps.com/winfx/xaml/iconpacks"
        xmlns:local="clr-namespace:WpfApp1"
        mc:Ignorable="d"
        Title="MainWindow" Height="450" Width="800" Source="/pages/Page1.xaml">

        <!-- Gridなどのデザインタグを削除 -->

</NavigationWindow>
MainWindowクラスに継承しているWindowクラスをNavigationWindowクラスへ変更する。
using System.Windows.Navigation;

namespace WpfApp1.windows
{
    /// <summary>
    /// Interaction logic for MainWindow.xaml
    /// </summary>
    public partial class MainWindow : NavigationWindow  // ←ココ
    {
        public MainWindow()
        {
            InitializeComponent();
        }
    }
}
起動して、ページ遷移してみる。
Page1
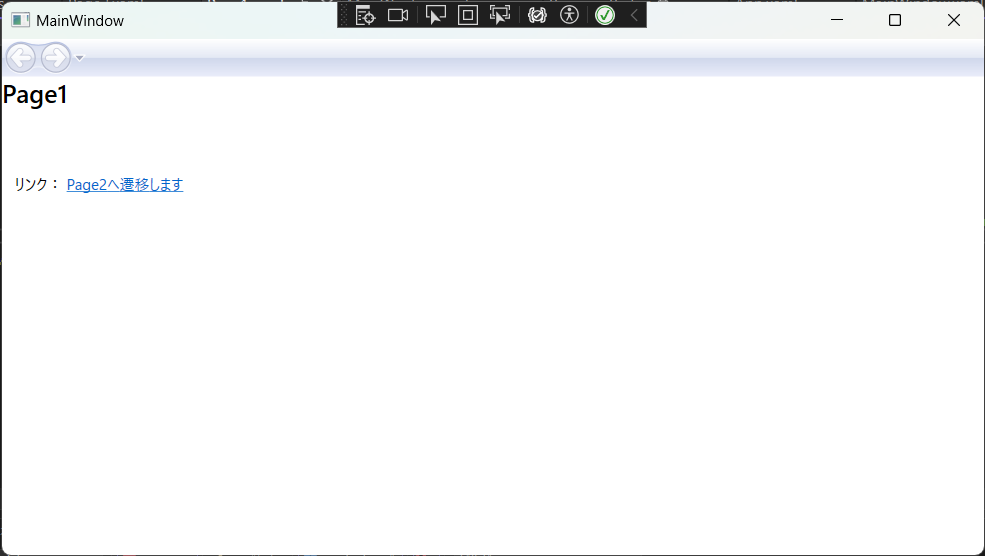
↓リンクをクリックすると・・・
Page2
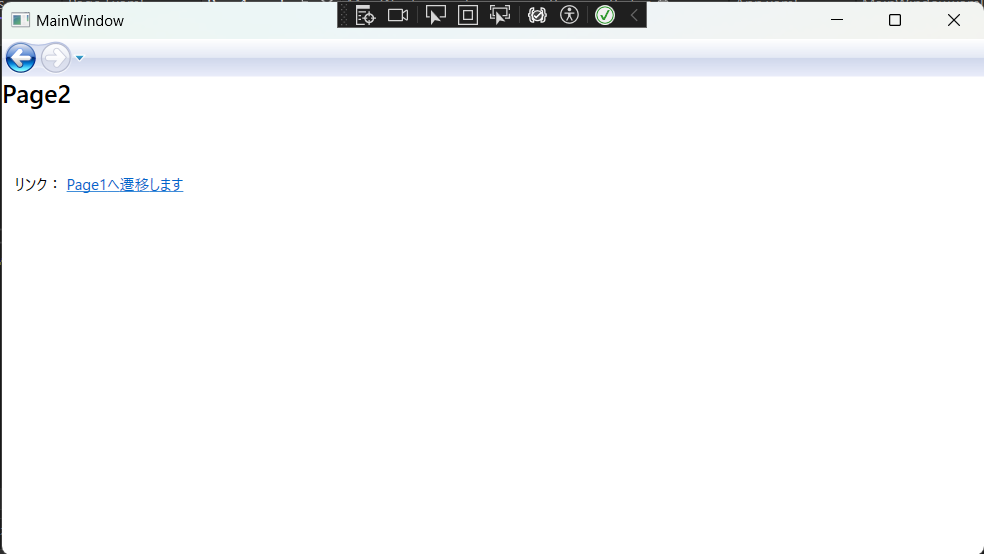
上記のように遷移できる。
WindowクラスとNavigationWidnowの違いについて
NavigationWidnowはWindowクラスを継承したクラスらしく1つのウィンドウで複数ページを扱いたいときに使用するもの。
Windowクラスは単一ページで完結するWidnowを作るときに使用するもの。
別Window起動方法
- 別に開く用のWindow作成
- Page1クラスでボタンを作成し、Windowを開く処理を記述
###サンプルコード
ファイル構成

1. 別に開く用のwindowを作成
上記のファイル構成になるようにwindowフォルダへwindow1を作成します。
<Window x:Class="WpfApp1.windows.Window1"
        xmlns="http://schemas.microsoft.com/winfx/2006/xaml/presentation"
        xmlns:x="http://schemas.microsoft.com/winfx/2006/xaml"
        xmlns:d="http://schemas.microsoft.com/expression/blend/2008"
        xmlns:mc="http://schemas.openxmlformats.org/markup-compatibility/2006"
        xmlns:local="clr-namespace:WpfApp1.windows"
        mc:Ignorable="d"
        Title="Window1" Height="450" Width="800">
    <Grid>
        <TextBlock Text="window2" FontSize="20" FontWeight="SemiBold"/>
    </Grid>
</Window>
2. Page1でボタンを作成し、Windowを開く処理を記述
<Page x:Class="WpfApp1.Page1"
      <!-- // 省略 // -->
      Title="Page1" d:Background="White">

    <Grid>
        <!-- ↓ これ追加 -->
        <Button Content="Open Window1" Width="90" Height="40" HorizontalAlignment="Left" VerticalAlignment="Top" Margin="20 150" Click="OpenWindow1_Click"/>

    </Grid>
</Page>
NameSpaceを指定して、作成した別Widnowのインスタンスを生成する。
.Show()メソッドを使用すると別Windowが開く。
namespace WpfApp1
{
    /// <summary>
    /// Page1.xaml の相互作用ロジック
    /// </summary>
    public partial class Page1 : Page
    {
        public Page1()
        {
            InitializeComponent();
        }

        // ↓これ追加
        private void OpenWindow1_Click(object sender, RoutedEventArgs e)
        {
            var Window1 = new WpfApp1.windows.Window1();
            Window1.Show();
        }
    }
}
起動してみる。。。

↓Open Window1ボタンをクリックすると

Window1が開く。