Difyは結果のExcel出力のようなブロックがなかったので
Google Apps Script(以下GAS) を使用して、GoogleSpreadSheetに結果を記録していくスクリプトを作りました。
ちなみに入力の方はバッチ実行でcsvファイルを設定可能なのでDify内だけでできます。
GoogleDrive側の手順
Google Apps Script プロジェクトを作成
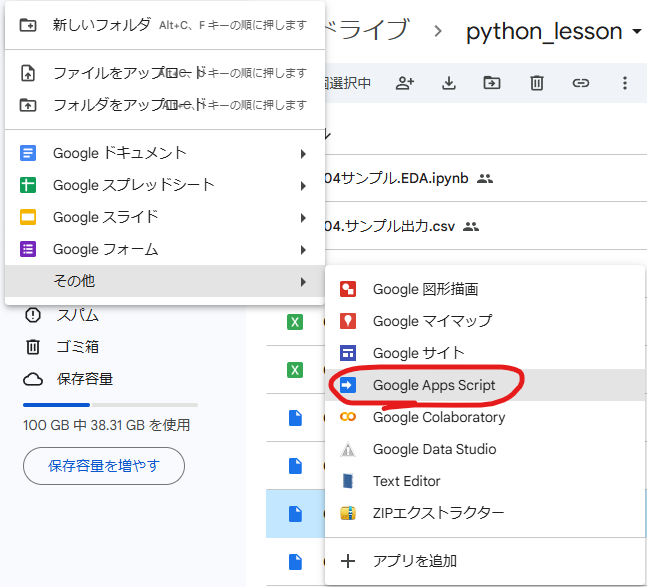
Google Drive上で「+新規」→「その他」→「Apps Script」を開き、新しいプロジェクトを作成します。

スクリプトコードを追加
次のコードをプロジェクトに貼り付けます。
function doPost(e) {
  try {
    // リクエストボディからデータをパースして取得
    const requestData = JSON.parse(e.postData.contents); // JSONデータを取得
    const fileId = requestData.fileId; // JSONからfileIdを取得

    // スプレッドシートを取得
    const sheet = SpreadsheetApp.openById(fileId).getSheets()[0]; // 最初のシートを使用

    // ヘッダーの列インデックスを取得
    const headers = sheet.getRange(1, 1, 1, sheet.getLastColumn()).getValues()[0];
    const newRow = [];

    // ヘッダーに対応する値を取得し、行データを生成
    headers.forEach(header => {
      newRow.push(requestData[header] || ""); // ヘッダーが存在しない場合は空白を入れる
    });

    // 新しい行を追記
    sheet.appendRow(newRow);

    return ContentService.createTextOutput(JSON.stringify({ status: "success" }))
      .setMimeType(ContentService.MimeType.JSON);
  } catch (error) {
    return ContentService.createTextOutput(JSON.stringify({ status: "error", message: error.message }))
      .setMimeType(ContentService.MimeType.JSON);
  }
}
Web APIを公開
- 「デプロイ」→「新しいデプロイ」
- 歯車アイコン→「ウェブアプリ」
- アクセス許可を「全員」に設定してデプロイ

承認を求められるので承認

その際警告が出る場合があるが、このコードの作成者が信頼できない場合があるという警告
「Advanced」を押し「Go to プロジェクト名」を押す

デプロイしたGASのエンドポイント(URL)をメモっておく
SpreadSheetの準備
任意のSpreadSheetをGoogleDrive上に作成する、
1行目に列名を記載しておく(今回はaaa,bbb,ccc)とする

またURLを確認し以下の部分をメモっておく
https://docs.google.com/spreadsheets/d/【この部分】/edit?gid=0
Dify側の設定
環境変数にGAS URLとShpreadSheetのIDを入れておく
今回はendpointとsheetFileIdという環境変数を作成しておく


HTTPリクエストブロックを追加
- API
POSTを選択し、環境変数endpointを - ボディでjsonを選択し以下のように設定
     {
       "fileId": "環境変数sheetFileId",
       "列名": "データ",
       "列名": "データ"
       ...
     }


