ゴール
- MacBookAir で Vagrant を使って仮想環境を構築します。
- ZendFramework2 の SkeletonApplication をインストールします。
- 設定を施し、SkeltonApplication の動作までを確認します。
環境
- CentOS 6.5
- Apache 2以上
- PHP 5.5 以上
- PostgreSQL 9.3 以上
- ZendSkeletonApplication
参考
事前準備1
上記を参考に、VirtualBox と Vagrant をインストールしておいてください。
事前準備2
上記を参考に、CentOSとApahceの構築、及び httpd.conf ファイルを生成しておいてください。
確認
ここまで準備を行うと、作業ディレクトリでは、次のファイルが生成されていると思います。
$ cd centOS65
$ ls
Vagrantfile httpd.conf
これ以外のファイルで、もしかしたら index.php が存在しているかもしれませんが気にしないでください。
Vagrantfile 編集
ここで Vagrantfile を編集します。同時にプロビジョニングの設定も行います。
- config.vm.box
- config.vm.network
- config.vm.provider
network は ssh でアクセスするために設定します。provider は GUI モードを有効にしているだけなので、設定しなくても問題ありません。
プロビジョニング設定は次の通りです。
- Shell でプロビジョニング実施
- タイムゾーン設定
- ローカルな VM のため iptables を停止
- PHP5.5 以上をインストール
- PostgreSQL9.3 以上をインストール
- httpd をインストール
-*- mode: ruby -*-

VAGRANTFILE_API_VERSION = "2"

Vagrant.configure(VAGRANTFILE_API_VERSION) do |config|

  config.vm.box = "CentOS65"

  config.vm.network "private_network", ip: "192.168.33.10"

  config.vm.provider "virtualbox" do |vb|
    vb.gui = true
  end

  config.vm.provision "shell", inline: <<-EOT
        # timezone
        cp -p /usr/share/zoneinfo/Japan /etc/localtime
        # iptables off
        /sbin/iptables -F
        /sbin/service iptables stop
        /sbin/chkconfig iptables off
        # PHP 5.5
        rpm -ivh http://dl.fedoraproject.org/pub/epel/6/x86_64/epel-release-6-8.noarch.rpm
        rpm -ivh http://rpms.famillecollet.com/enterprise/remi-release-6.rpm
        yum -y install php --enablerepo=remi-php55
        # PostgreSQL 9.3
        yum -y install http://yum.postgresql.org/9.3/redhat/rhel-6-x86_64/pgdg-redhat93-9.3-1.noarch.rpm
        yum -y install postgresql93-server postgresql93-contrib
        /sbin/service postgresql-9.3 initdb
        /sbin/chkconfig postgresql-9.3 on
        # Apache
        yum -y install httpd
        cp -a /vagrant/httpd.conf /etc/httpd/conf/
        /sbin/service httpd restart
        /sbin/chkconfig httpd on
  EOT
end
ZendFramework2 の SkeletonApplication を準備
ZendFramework2 の SkeletonApplication は、下記 GitHub の README を参考にします。
cd CentOS65
git clone git://github.com/zendframework/ZendSkeletonApplication.git
cd ZendSkeletonApplication
php composer.phar self-update
php composer.phar install
ここで作業ディレクトリを確認します。
$ ls
Vagrantfile ZendSkeletonApplication httpd.conf
取得した「ZendSkeletonApplication」が存在しているのを確認できます。
httpd.conf ファイルを編集
作業環境にある httpd.conf ファイルに下記を追記します。
- 仮想環境の「/vagrant」が作業環境と同義のディレクトリとなります。
- 「.htaccess」ファイルにて上書き可能にします。
<VirtualHost *:80>
        DocumentRoot /vagrant/ZendSkeletonApplication/public
        SetEnv APPLICATION_ENV "development"
        <Directory /vagrant/ZendSkeletonApplication/public>
                DirectoryIndex index.php
                AllowOverride All
                Order allow,deny
                Allow from all
        </Directory>
</VirtualHost>
DocumentRoot の index.php を編集
DocumentRoot に設定した「/vagrant/ZendSkeletonApplication/public」の 「index.php」が存在します。PATH の設定を施します。
<?php
putenv("ZF2_PATH=" . '/vagrant/ZendSkeltonApplication/vendor/zendframework/zendframework/library');     // --- 追加
/**
 * This makes our life easier when dealing with paths. Everything is relative
 * to the application root now.
 */
chdir("/vagrant/ZendSkeletonApplication/");     // --- 変更

// Decline static file requests back to the PHP built-in webserver
if (php_sapi_name() === 'cli-server' && is_file(__DIR__ . parse_url($_SERVER['REQUEST_URI'], PHP_URL_PATH))) {
    return false;
}

// Setup autoloading
require 'init_autoloader.php';

// Run the application!
Zend\Mvc\Application::init(require 'config/application.config.php')->run();
~
Vagrant を再起動しプロビジョニングを実行
まず、起動していた 仮想環境を停止し、その後再度起動します。(vagrant reload でも大丈夫かと思います。)
$ vagrant halt
$ vagrant up
次に、プロビジョニングを実行します。
$ vagrant provision
問題なく終了すれば成功です。
Vagrant 内で Apache を再起動し SkeletonApplication の動作を確認
Vagrant へログインし、Apache を再起動します。
$ vagrant ssh
[vagrant]$ su -
Password: (vagrant  --- 初期の root パスワードは「vagrant」です)
[vagrant]$ service httpd restart
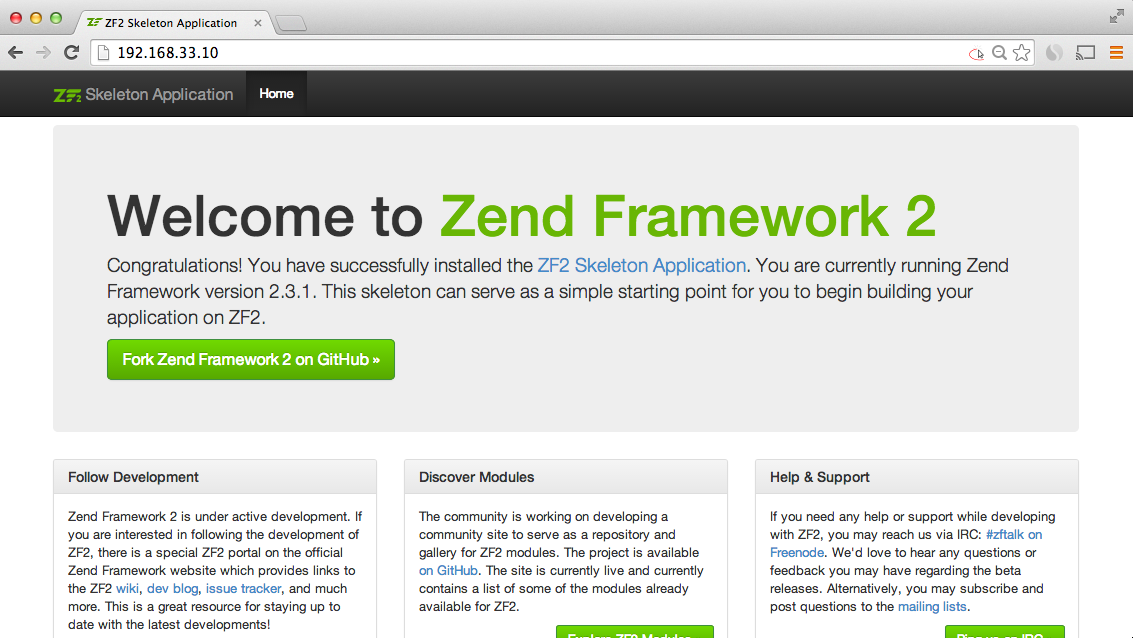
restart が終了したら、ホスト側にてブラウザにアクセスしてください。http://192.168.33.10/
上記のような ZendFramework2 の Welcome ページが表示されれば完了です。
備考
一連の作業を明記してきました。不備、不明点あればご指摘いただけますと幸いです。どうぞよろしくお願い致します。
