Railsのアプリケーションで MySQL を利用しよう(実稼働環境では AWS の RDS を使いたいので)と思い、まずは MacBook Pro に MySQL をインストールしてみたので手順をメモ。
前提
- ローカルの環境(Mac)に MySQL をインストールします。
- 今回の OS X のバージョンは
OS X 10.9.4 (Mavericks)です。
- 今回の OS X のバージョンは
- Homebrew でインストールします。
手順
MySQL のインストール
-
下記コマンドを実行します。
 $ brew update
 $ brew install mysql
するとインストールが始まります。
-
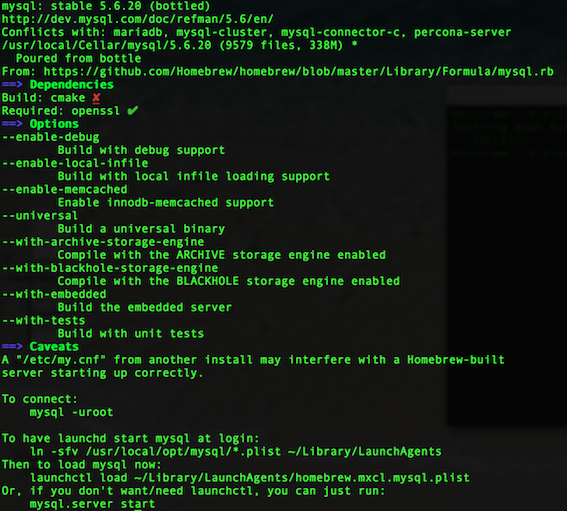
インストールが終わったら、内容を見てみます。
$ brew info mysql私の場合は、次のように表示されました。バージョン
5.6.20がインストールされたようです。 -
この画面の内容をみると、どうやら
$ mysql.server startで MySQL の起動、$ mysql -urootで接続できそうなので、動作確認してみます。$ mysql.server start Starting MySQL . SUCCESS!$ mysql -uroot Welcome to the MySQL monitor. Commands end with ; or \g. Your MySQL connection id is 1 Server version: 5.6.20 Homebrew Copyright (c) 2000, 2014, Oracle and/or its affiliates. All rights reserved. Oracle is a registered trademark of Oracle Corporation and/or its affiliates. Other names may be trademarks of their respective owners. Type 'help;' or '\h' for help. Type '\c' to clear the current input statement. mysql>接続できたようです。いったん、
mysql>プロンプトでexitを入力し接続を切ります。 -
また、上の画面で、ログイン時に MySQL を起動する方法が書いてありますが、停止できなかったり色々あるらしいので、今回は MySQL を使いたいときに
$ mysql.server start(停止は stop)でいいことにします。
MySQL のセキュリティ設定
このままでも使えるのですが、一応、root のパスワードを変更したりします。コマンドラインで、
$ mysql_secure_installation
-
基本的に全て Yes で大丈夫だと思います。次の項目が実施されます。
- root ユーザのパスワード設定
- anonymous ユーザの削除
- root ユーザがリモートサーバからログインできないようにする
- テスト用のデータベースと接続?を削除
-
設定が終わったら、今後は次のように MySQL へ接続します。
$ mysql -uroot -p
Enter password:[設定したパスワード]
```
ほか
いろいろ調べるためにググったら、他の人の書いてる手順ではコマンドラインでデータベースの作成が必要だったりしたのですが、今回は $ brew info mysql でその旨が表示されませんでしたし、実際にちゃんと使えてるので、MySQL のバージョンによるのかな?
追記(2016.08.05)
MySQL のクライアントだけインストールしたい場合は次のようにします。Docker 等で MySQL のサーバが提供されている場合など。
$ brew install mysql --client-only

