ご連絡
この記事に記載している情報は古いです。
Ubuntu24.04と、docker-compose-pluginに対応した新しい記事を書いているので、そちらを参考にしてください。
https://qiita.com/hkusaba/items/e5171ab77e3cacf1ddd2
なんでわざわざWSL2に?
「docker for windowsがあるのに、なんでまたWSL2使うのん?」という話。
確かに、docker for windowsはGUIでコンテナやイメージが管理できるというメリットがあります。。
ですが、なにかと動作が重いと感じたことありませんか? (私や周りの話だとよくある)
そこで、WSL2にdockerを入れてみることにしました!
WSLのインストール
下記の手順を参考にしつつ、導入しましょう。
https://docs.microsoft.com/ja-jp/windows/wsl/install
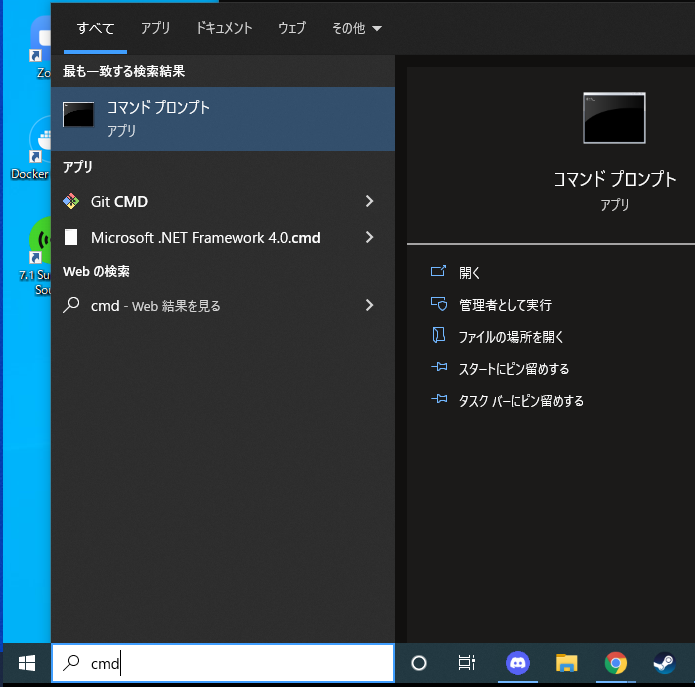
- Windowsのコマンドプロンプトを管理者権限で開く
Windows10であれば、cmdで検索して、「コマンドプロンプトを」右クリックで「管理者として実行」しましょう。
# WSLのインストール
> wsl --install

# インストールされているWSLのディストリビューションをリストで詳細確認
# 下はdocker for windowsが入っている場合の例
> wsl -l -v
  NAME                   STATE           VERSION
* docker-desktop-data    Running         2
  docker-desktop         Running         2

# インストール可能なWSLのディストリビューションを確認
> wsl --list --online
インストールできる有効なディストリビューションの一覧を次に示します。
'wsl --install -d <Distro>' を使用してインストールします。

NAME            FRIENDLY NAME
Ubuntu          Ubuntu
Debian          Debian GNU/Linux
kali-linux      Kali Linux Rolling
openSUSE-42     openSUSE Leap 42
SLES-12         SUSE Linux Enterprise Server v12
Ubuntu-16.04    Ubuntu 16.04 LTS
Ubuntu-18.04    Ubuntu 18.04 LTS
Ubuntu-20.04    Ubuntu 20.04 LTS


# お好みで好きなディストリビューションをインストール
# 今回はUbuntu18.04を選択
> wsl --install -d Ubuntu-18.04
ダウンロード中: Ubuntu 18.04 LTS
インストール中: Ubuntu 18.04 LTS
Ubuntu 18.04 LTS はインストールされました。
Ubuntu 18.04 LTS を起動しています...

# インストールされたか再度確認する
# WSLのバージョンが1で入っているのがわかる
> wsl -l -v
  NAME                   STATE           VERSION
* docker-desktop-data    Running         2
  Ubuntu-18.04           Running         1
  docker-desktop         Running         2

# ubuntuをデフォルトに指定
> wsl --set-default Ubuntu-18.04

# Ubuntu-18.04のWSLバージョンを2に引き上げる
> wsl --set-version Ubuntu-18.04 2
変換中です。この処理には数分かかることがあります...
WSL 2 との主な違いについては、https://aka.ms/wsl2 を参照してください
変換が完了しました。

# バージョンアップとデフォルトになっているかを再度確認
> wsl -l -v
  NAME                   STATE           VERSION
* Ubuntu-18.04           Running         2
  docker-desktop         Running         2
  docker-desktop-data    Running         2

# WSLのデフォルトバージョンを2に指定
# デフォルトバージョンを設定しておくと、ディストリビューションもv2で入るらしい。。
> wsl --set-default-version 2
- Ubuntu18.04のインストール終了後、WSLのターミナルが起動する
- WSLのデフォルトユーザの設定を求められるので入力
- ユーザ名とパスワードを設定
- パスワードは
sudoで求められるので、忘れないようにする
- WSLのデフォルトユーザの設定を求められるので入力
Installing, this may take a few minutes...
.Please create a default UNIX user account. The username does not need to match your Windows username.
For more information visit: https://aka.ms/wslusers
Enter new UNIX username: wsl_user01
Enter new UNIX password:
Retype new UNIX password:
passwd: password updated successfully
Installation successful!
To run a command as administrator (user "root"), use "sudo <command>".
See "man sudo_root" for details.

wsl_user01@DESKTOP-E78LFVQ:~$
ついでに、パーミッションのめんどくささを避けるために、WSLディストリビューションのデフォルトのユーザをrootに設定します。
# インストールしたubuntu-18.04のデフォルトユーザをrootに指定
> ubuntu1804 config --default-user root
WSLにdockerをインストール
下記の記事を参考に、WSLにdockerを入れていきましょう。
Install Docker Engine on Ubuntu
DockerDesktopからWSL2上のみで動くDockerに移行する
# 古いバージョンのdockerを削除
$ apt-get remove docker docker-engine docker.io containerd runc

# パッケージインデックスの更新とパッケージインストール
$ apt-get update
$ apt-get install -y \
    ca-certificates \
    curl \
    gnupg \
    lsb-release

# Dockerの公式GPGキーを追加
$ curl -fsSL https://download.docker.com/linux/ubuntu/gpg | sudo gpg --dearmor -o /usr/share/keyrings/docker-archive-keyring.gpg

# stableのレポジトリを追加
$ echo \
  "deb [arch=$(dpkg --print-architecture) signed-by=/usr/share/keyrings/docker-archive-keyring.gpg] https://download.docker.com/linux/ubuntu \
  $(lsb_release -cs) stable" | sudo tee /etc/apt/sources.list.d/docker.list > /dev/null

# 再度パッケージインデックスを更新し、DockerEngineをインストール
$ apt-get update
$ apt-get install -y docker-ce docker-ce-cli containerd.io

# hello-worldイメージを実行されることを確認
$ docker run hello-world
Unable to find image 'hello-world:latest' locally
latest: Pulling from library/hello-world
2db29710123e: Pull complete
Digest: sha256:cc15c5b292d8525effc0f89cb299f1804f3a725c8d05e158653a563f15e4f685
Status: Downloaded newer image for hello-world:latest

Hello from Docker!
This message shows that your installation appears to be working correctly.

To generate this message, Docker took the following steps:
 1. The Docker client contacted the Docker daemon.
 2. The Docker daemon pulled the "hello-world" image from the Docker Hub.
    (amd64)
 3. The Docker daemon created a new container from that image which runs the
    executable that produces the output you are currently reading.
 4. The Docker daemon streamed that output to the Docker client, which sent it
    to your terminal.

To try something more ambitious, you can run an Ubuntu container with:
 $ docker run -it ubuntu bash

Share images, automate workflows, and more with a free Docker ID:
 https://hub.docker.com/

For more examples and ideas, visit:
 https://docs.docker.com/get-started/


# docker composeのインストール
$ curl -L "https://github.com/docker/compose/releases/download/1.29.2/docker-compose-$(uname -s)-$(uname -m)" -o /usr/local/bin/docker-compose
# バージョン確認
$ docker-compose -v
docker-compose version 1.29.2, build 5becea4c

# dockerの状態を確認
$ service docker status
 * Docker is not running
dockerの自動起動
このままだと、WSL起動のたびにdockerを起動する必要がある。
WSL起動時にdockerも起動するようにしてほしい。。してほしくない?
調べてみると、先駆者がいた。
service docker status | awk '{print $4}')で、notかrunningかを判定して自動起動、なるほど~~~。
早速やってみた。
vi ~/.bashrc
if test $(service docker status | awk '{print $4}') = 'not'; then
        sudo /usr/sbin/service docker start
fi
管理者権限のコマンドプロンプトでwsl --shutdownしてWSLを一度落とし、再度Ubuntu18.04の起動時にservice docker statusで確認してみる。
$ service docker status
 * Docker is running
やった~、成功!
ありがとうございます。
最後に
これでWSLでdockerを使用する環境が整いました。
以前Docker for windowsでPHP・laravelの開発をする際に、単純な画面遷移やphp artisan tinkerなどのコマンド実行が遅いことに悩まされていましたが、WSL2のdockerを使用することでそういった悩みが解消された気がします。
(単純にPC変えた影響もありそうですが。)
皆さんも快適な開発ライフを!