SwiftのiOSアプリとNode.js間のSocket.io通信を実現する方法を調べいたらSocket.IO-Client-Swift というライブラリが非常に使いやすかったので使い方(簡単にサンプル的な挙動を確認できるまでの手順)をメモしておく。
iOS(Swift側の準備)
- XcodeでNew ProjectをSwiftで新規作成
- Podfile をプロジェクトフォルダに作成
source 'https://github.com/CocoaPods/Specs.git'
platform :ios, '8.0'
use_frameworks!

pod 'Socket.IO-Client-Swift', '~> 1.1'
- install
# CocoaPodのVersionは (要0.36以上)
sudo gem update cocoapods

pod install
- xcworkspace にてxcode を open
server (nodejs側の準備)
- 適当な作業フォルダを作成しその中で nodejs socket.ioライブラリをinstall
npm install socket.io
- serverのサンプルプログラム
var http = require("http");
var server = http.createServer(function(req,res) {
    res.write("Hello World!!");
    res.end();
});

// socketioの準備
var io = require('socket.io')(server);

// クライアント接続時の処理
io.on('connection', function(socket) {
    console.log("client connected!!")

    // クライアント切断時の処理
    socket.on('disconnect', function() {
        console.log("client disconnected!!")
    });
    // クライアントからの受信を受ける (socket.on)
    socket.on("from_client", function(obj){
        console.log(obj)
    });
});

// とりあえず一定間隔でサーバ時刻を"全"クライアントに送る (io.emit)
var send_servertime = function() {
    var now = new Date();
    io.emit("from_server", now.toLocaleString());
    console.log(now.toLocaleString());
    setTimeout(send_servertime, 1000)
};
send_servertime();

server.listen(8080);
- サーバを起動しておく
$ node server.js
iOS側の実装
- AppDelegate.swift
import UIKit
import Socket_IO_Client_Swift  //追加

@UIApplicationMain
class AppDelegate: UIResponder, UIApplicationDelegate {

    var window: UIWindow?
    var socket: SocketIOClient!

    func application(application: UIApplication, didFinishLaunchingWithOptions launchOptions: [NSObject: AnyObject]?) -> Bool {
        // Override point for customization after application launch.

        // ここから
        socket = SocketIOClient(socketURL: "http://localhost:8080/socket.io/", opts: nil)
        socket.on("connect") { data in
            println("socket connected!!")
        }
        socket.on("disconnect") { data in
            println("socket disconnected!!")
        }
        socket.connect()
        // ここまで


        return true
    }
    ...(以下省略)
- ViewController.swift
StoryBoardにてLabelとButtonを追加しそれぞれIBOutlet, IBActionで繋ぐ。
import UIKit
import Socket_IO_Client_Swift

class ViewController: UIViewController {

    var socket: SocketIOClient!
    @IBOutlet weak var myLabel: UILabel!

    override func viewDidLoad() {
        super.viewDidLoad()
        // Do any additional setup after loading the view, typically from a nib.

        // ここから
        let appDelegate: AppDelegate = UIApplication.sharedApplication().delegate as AppDelegate
        socket = appDelegate.socket

        socket.on("from_server") { (data, emitter) in
            if let message = data as? [String] {
                self.myLabel.text = message[0]
            }
        }
    }
    @IBAction func pushButton(sender: UIButton) {
        socket.emit("from_client", "button pushed!!")
    }
    //ここまで
    ... 以下省略
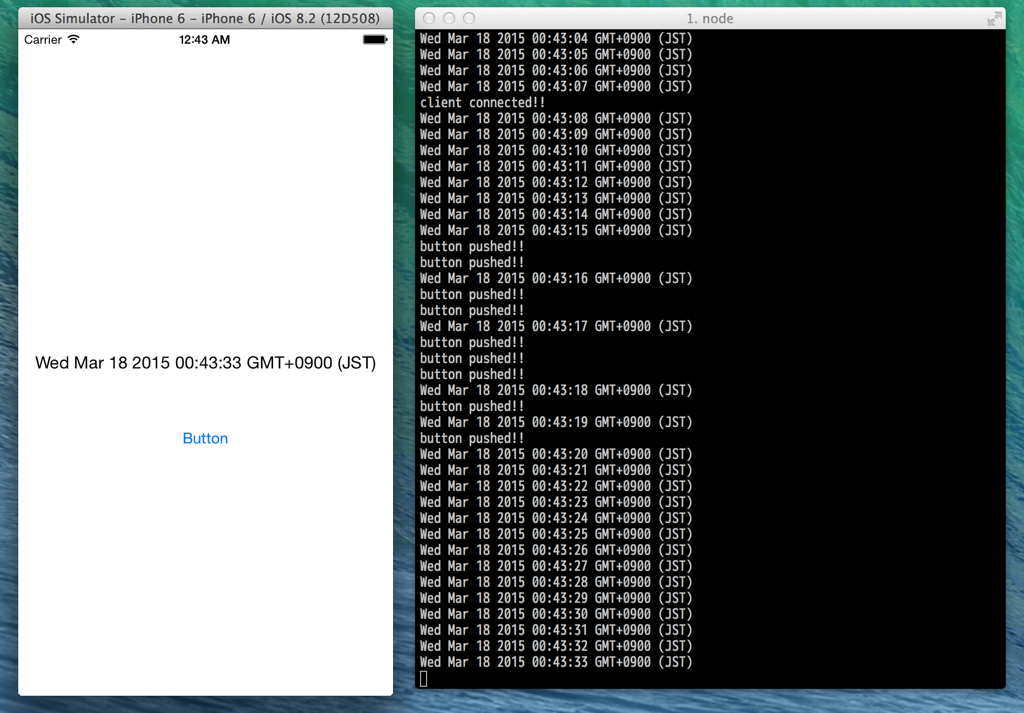
- サンプルアプリをコンパイル&起動
