はじめに
本稿では、electron-vite + Reactで構築した開発環境に、react-devtoolsを導入する手順を紹介します。本稿の設定では、developmentビルドのとき(開発時)のみreact-devtoolsが起動するようにします。
electron-viteとは
ViteをベースにしたElectronアプリの開発環境を提供してくれます。
react-devtoolsとは
React Developer Toolsのnpmパッケージです。Reactでの開発には必須と言っても過言ではないデバッグツールです。
パッケージのインストール
必要なパッケージをインストールします。
npm install electron-vite vite react-devtools npm-run-all -D
npm install react
執筆時の各パッケージのバージョンは以下の通りです。
- electron-vite: 1.0.28
- vite: 4.5.0
- react-devtools: 4.28.5
- npm-run-all: 4.1.5
- react: 18.2.0
プロジェクトの作成はelectron-viteのドキュメントを参考にしてください。本稿ではプロジェクトは作成済みの前提で進めます。
ディレクトリ構成
ディレクトリの構成は以下の通りです。本稿に関係する部分のみを抜粋しています。
/
└ package.json
└ electron.vite.config.ts
└ src/
    └ renderer/
        └ App.tsx
        └ index.tsx
        └ index.html
        └ dev/
            └ index.tsx
            └ index.html
App.tsx
Reactのサンプルです。
import React from 'react';

const App: React.FC = () => {
  return <div>Hello World!</div>;
};

export default App;
index.tsx/html for production
src/renderer直下のindex.tsxおよびindex.htmlです。productionビルド用のファイルになります。
import React from 'react';
import { createRoot } from 'react-dom/client';

import App from './App';

const root = createRoot(document.getElementById('contents')!);
root.render(
  <React.StrictMode>
    <App />
  </React.StrictMode>,
);
<!DOCTYPE html>
<html>
<head>
    <meta charset="utf-8" />
    <title>Electron</title>
    <meta name="viewport" content="width=device-width, initial-scale=1">
</head>
<body>
    <div id="contents"></div>
    <script type="module" src="/index.tsx"></script>
</body>
</html>
index.tsx/html for development
src/renderer/dev直下のindex.tsxおよびindex.htmlです。こちらはdevelopmentビルド用のファイルになります。
import React from 'react';
import { createRoot } from 'react-dom/client';

import App from '../App';  // ここのパスが違うだけ

const root = createRoot(document.getElementById('contents')!);
root.render(
  <React.StrictMode>
    <App />
  </React.StrictMode>,
);
<!DOCTYPE html>
<html>
<head>
    <!-- React DevTools -->
    <script src="http://localhost:8097"></script>

    <meta charset="utf-8" />
    <title>Electron Dev</title>
    <meta name="viewport" content="width=device-width, initial-scale=1">
</head>
<body>
    <div id="contents"></div>
    <script type="module" src="/index.tsx"></script>
</body>
</html>
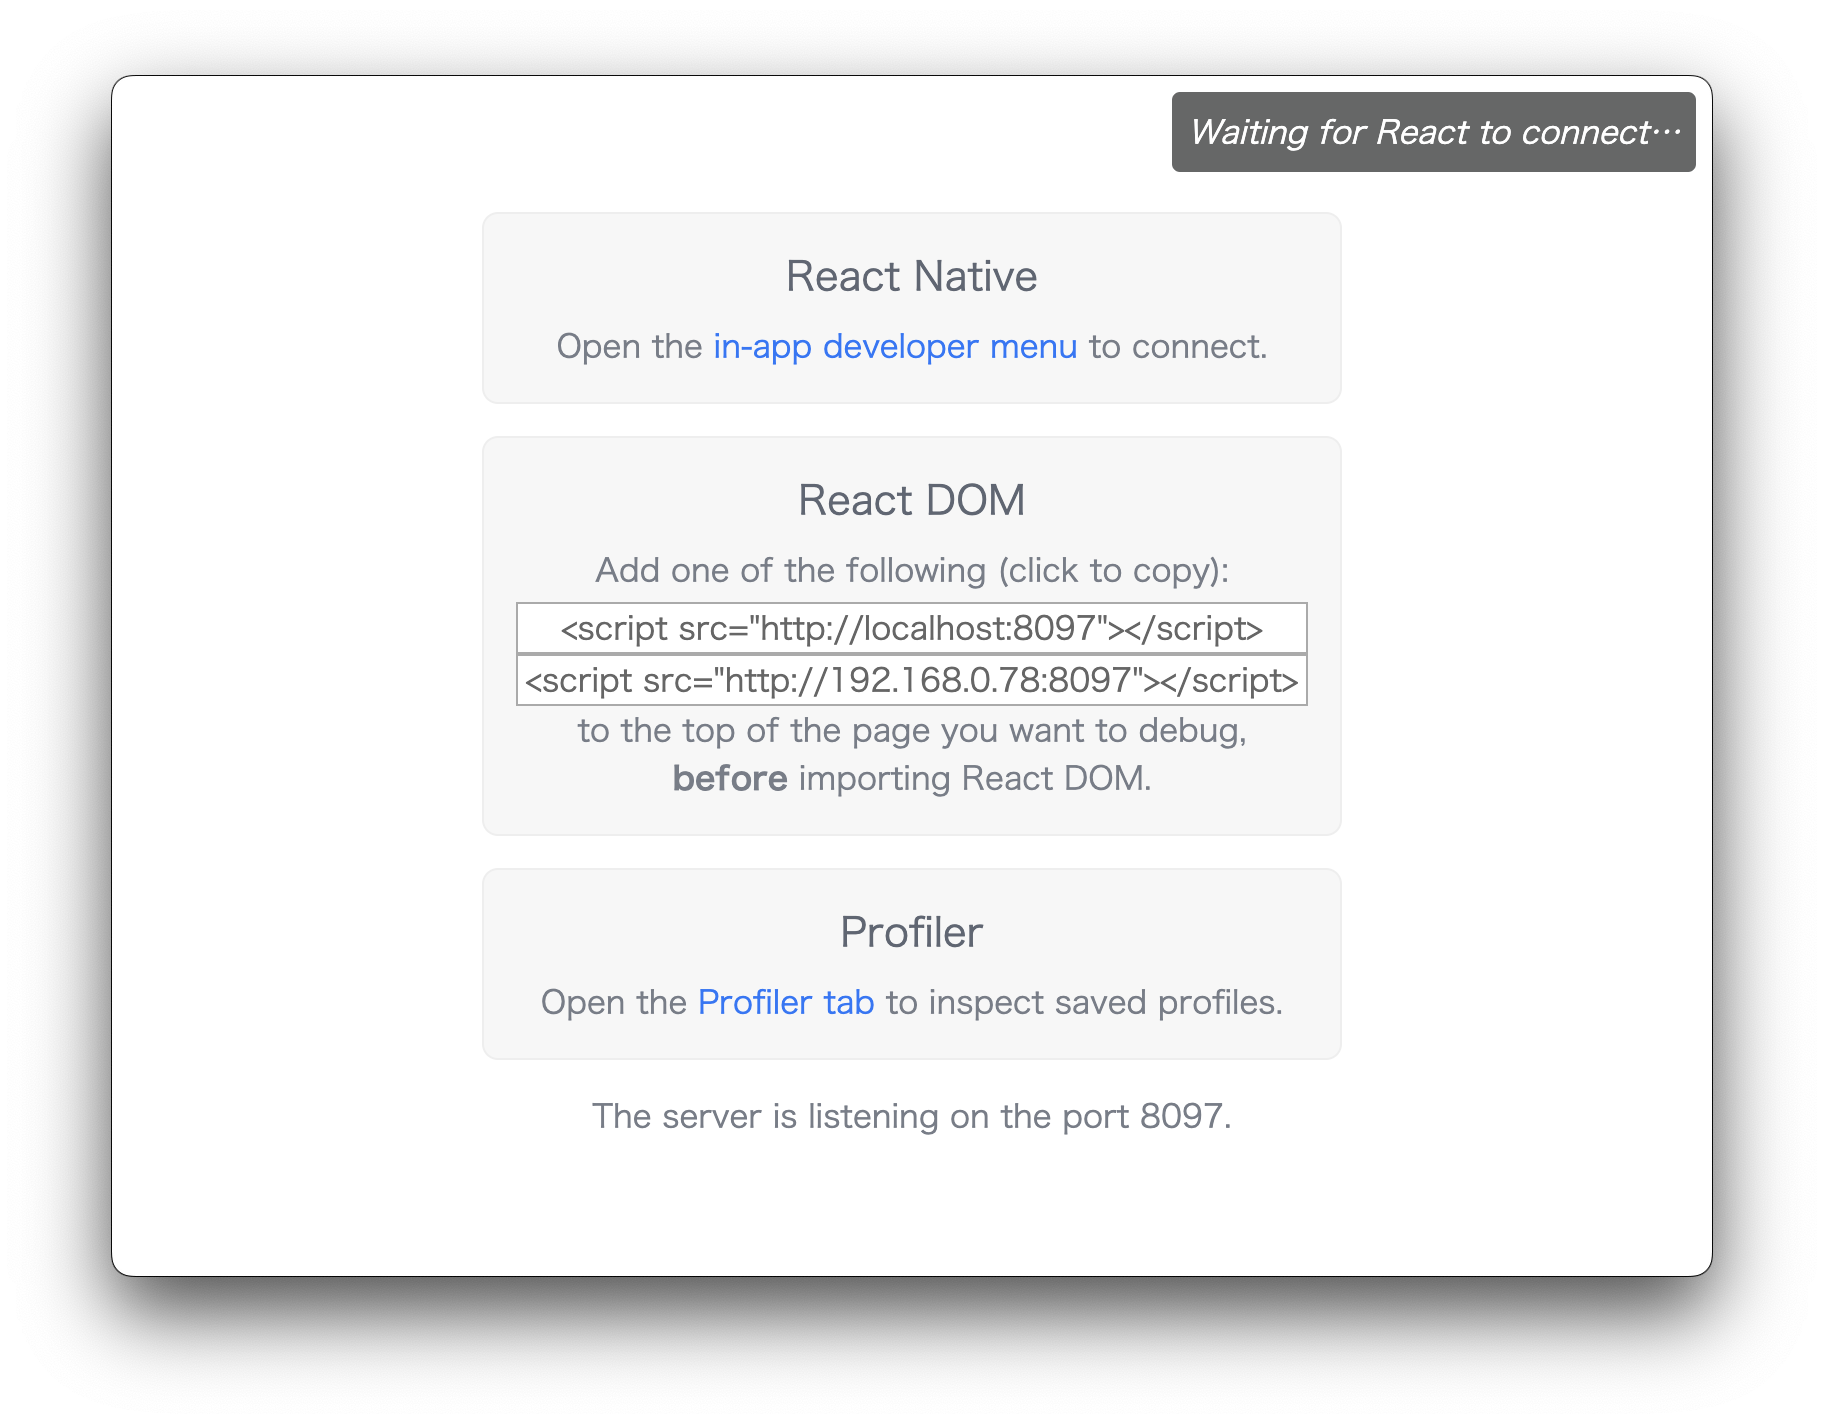
開発用のindex.htmlにはreact-devtools用のscriptタグを埋め込みます。このscriptタグは、後述する npm run devtool コマンドを実行することで表示される以下のウィンドウに書いてあります。
electron-viteの設定
electron-viteの設定は、electron.vite.config.tsに書きます。以下はreact-devtoolsの設定に関するものを抜粋しています。
import path from 'path';

import { defineConfig, defineViteConfig } from 'electron-vite';

export default defineConfig({
  renderer: defineViteConfig(({ command, mode }) => {
    if (mode === 'development') {
      return {
        root: 'src/renderer/dev',
        build: {
          rollupOptions: {
            input: path.join(__dirname, 'src/renderer/dev/index.html'),
          },
        },
      };
    } else {
      // production
      return {
        root: 'src/renderer',
        build: {
          rollupOptions: {
            input: path.join(__dirname, 'src/renderer/index.html'),
          },
        },
      };
    }
  }),
});
ポイントは mode でビルド毎にコンフィグを分け、 root と build.rollupOptions.input のパスをそれぞれ設定しています。
package.jsonにscriptsを追加
package.jsonに以下のnpmスクリプトを追加します。
{
  "scripts": {
    "devtool": "react-devtools",
      "start": "electron-vite preview", // start electron app to preview production build
    "ev:dev": "electron-vite dev",
    "dev": "run-p devtool ev:dev", // start dev server and electron app
    "prebuild": "electron-vite build" // build for production
  }
}
run-p コマンドはnpm-run-allパッケージをインストールすることで使え、指定したnpmスクリプト(ここでは devtool と ev:dev )を並列実行します。
開発環境の起動
developmentビルドで環境を立ち上げたいときは以下のコマンドを実行します。
npm run dev
これで、react-devtoolsを起動した状態でElectronアプリの開発をすることができます。