visual studio codeを使用して、phpのデバッグを行う事にしたが、数日間試行の上、やっと解決したので備忘録として記載します。
phpを使用する目的として、webサーバー用に組み込む事を前提に記載します。
Xampは、用いず、Apache24をインストールし、binにて、httpdで立ち上げる方法を取ります。
Visual Studio Code, php74はインストール済との前提で記載します。
<?php
$a = "abcd";
$b = "efgh";

$c = $a.$b;

echo $c;

?>
上記の様な簡単なプログラムに、ブレークポイントを付け、Step Inが出来る事を目的とします。
このコードは、Apachee24のhtdocsに、hello.phpとして保存して置きます。
この様なステップイン出来る状態にするためは、このサイトにある様に、下記の作業が必要です。

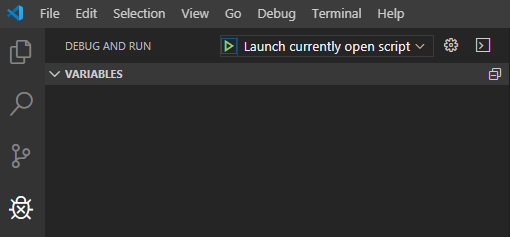
scriptを修正するためには、歯車を押します。「launch.json」が表示あれます。
{
    // Use IntelliSense to learn about possible attributes.
    // Hover to view descriptions of existing attributes.
    // For more information, visit: https://go.microsoft.com/fwlink/?linkid=830387
    "version": "0.2.0",
    "configurations": [
        {
            "type": "extensionHost",
            "request": "launch",
            "name": "Launch Extension",
            "runtimeExecutable": "${execPath}",
            "args": [
                "--extensionDevelopmentPath=${workspaceFolder}"
            ],
            "outFiles": [
                "${workspaceFolder}/out/**/*.js"
            ],
            "preLaunchTask": "npm"
        },
        {
            "name": "Python: Current File",
            "type": "python",
            "request": "launch",
            "program": "${file}",
            "console": "integratedTerminal"
        },
        {
            "name": "Listen for XDebug",
            "type": "php",
            "request": "launch",
            "port": 9000,
            "stopOnEntry": true,
            "pathMappings": {
                "C:\\Apache24\\htdocs": "${workspaceRoot}"
            }
        },
        {
            "name": "Launch currently open script",
            "type": "php",
            "request": "launch",
            "program": "${file}",
            "cwd": "${fileDirname}",
            "port": 9000,
        }
    ]
}
私は、pythonもデバッグするので、上記、コードには、pythonのjsonコードも含まれています。
このサイトでは、xampでを指定していますが、下記の通り修正しています。
注意事項として、 "C:\Apache24\htdocs": とする必要があります。¥と¥を2回続けて記載する取り決めになっています。
            "stopOnEntry": true,
            "pathMappings": {
                "C:\\Apache24\\htdocs": "${workspaceRoot}"
さらに、php.iniの追記も必要です。
[xdebug]
zend_extension = C:\php74\ext\php_xdebug-2.9.0-7.4-vc15-x86_64.dll
xdebug.remote_enable = 1
xdebug.remote_autostart = 1
xdebug.remote_connect_back = 1
xdebug.remote_port = 9000
ここで、虫の絵を押し「Launch currently open script」を選択し、ブレイクポイントを設定し、緑色の三角矢印を押すとデバッグが始まります。
以上です。
修正のご要望があれば、ご連絡下さい。
