この記事は Rustその2 Advent Calendar 2019 12/3 の記事です。
以前ブログでも書いたのですが、今回はRustを使ってServerlessFramework用のプロジェクトを作るための最小限のことだけ書いていきます。
環境構築
Rust
| バージョン | |
|---|---|
| rustc | 1.41.0-nightly |
| rustup | 1.20.2 |
| cargo | 1.41.0-nightly |
ServerlessFramework
| バージョン | |
|---|---|
| yarn | 1.19.2 |
| serverless | 1.58.0 |
| serverless-rust | 0.3.7 |
Rustインストール
curl --proto '=https' --tlsv1.2 -sSf https://sh.rustup.rs | sh
.profileにPATHが更新されるので確認して、読み込みます。
$ cat ~/.profile

export PATH="$HOME/.cargo/bin:$PATH"

$ source ~/.profile
cargoコマンドが使えれば完了です。
$ cargo version
cargo 1.41.0-nightly (8280633db 2019-11-11)
ServerlessFrameworkのインストール
今回はyarnを使って準備していきます。
まずはyarn initでpackage.jsonを作ります。
ひとまずすべてデフォルトで作ります。
$ yarn init
yarn init v1.19.2
question name (rust_serverless):
question version (1.0.0):
question description:
question entry point (index.js):
question repository url:
question author:
question license (MIT):
question private:
success Saved package.json
出来上がるとこんな感じになります。
{
  "name": "rust_serverless",
  "version": "1.0.0",
  "main": "index.js",
  "license": "MIT"
}
ここから、ServerlessFrameworkとserverless-rustを追加
$ yarn add serverless@1.58.0
$ yarn add serverless-rust@0.3.7
追加後のpackage.jsonはこうなります。
{
  "name": "rust_serverless",
  "version": "1.0.0",
  "main": "index.js",
  "license": "MIT",
  "dependencies": {
    "serverless": "^1.58.0",
    "serverless-rust": "^0.3.7"
  }
}
プロジェクト作成
rustのtemplateは現在ないみたいなので、sls createコマンドは使いません。
まずは、serverless.ymlを手書きします。
service: rust-sample
provider:
  name: aws
  runtime: rust
  memorySize: 128
  region: ap-northeast-1
plugins:
  - serverless-rust
package:
  individually: true
functions:
  example-function:
    handler: rust-sample
    events:
      - http:
          path: /
          method: GET
次にrustの初期化をします。
serverless.yml、package.json と同じ位置で以下のコマンドを叩きます。
$ cargo init
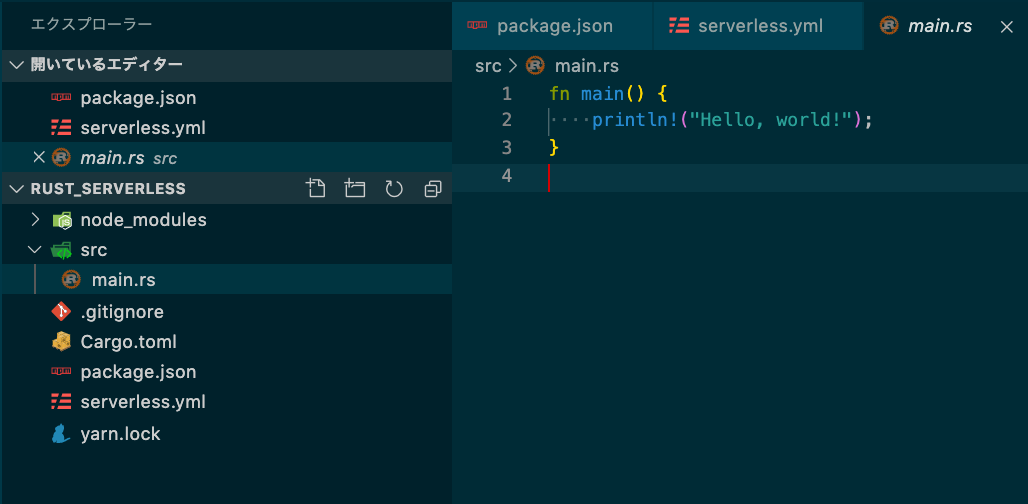
ここまでやると、以下のディレクトリ構成になってると思います。
コーディング
まず、main.rs用のサンプルのコードになります。
もとのコード消して、こちらに差し替えます。
use lambda_http::{lambda, IntoResponse, Request};
use lambda_runtime::{error::HandlerError, Context};
use serde_json::json;

fn main() {
    lambda!(handler)
}

fn handler(
    _: Request,
    _: Context,
) -> Result<impl IntoResponse, HandlerError> {
    Ok(json!({
        "message": "AWS Lambda on Rust"
    }))
}

# [cfg(test)]
mod tests {
    use super::*;

    #[test]
    fn handler_handles() {
        let request: Request<> = Request::default();
        let expected = json!({
            "message": "AWS Lambda on Rust"
        })
        .into_response();
        let response = handler(request, Context::default())
            .expect("expected Ok(_) value")
            .into_response();
        assert_eq!(response.body(), expected.body())
    }
}
次に、上記のソースに必要なPackageをCargo.tomlに追加します。
[package]
name = "rust-sample"
version = "0.1.0"
authors = ["hisayuki <*****@***>"]
edition = "2018"

# See more keys and their definitions at https://doc.rust-lang.org/cargo/reference/manifest.html

[dependencies]
lambda_runtime = "0.2.1"
lambda_http = "0.1.1"
log = "0.4"
serde_json = "^1"
serde_derive = "^1"
このときに、[package]のnameをserverless.ymlのhandler名と一緒にします。
functions:
  example-function:
    handler: rust-sample
    events:
      - http:
          path: /
          method: GET
この段階で、main.rsの単体テストは出来るので実際にやってみます。
コマンドはcargo testになります。
$ cargo test
    Finished test [unoptimized + debuginfo] target(s) in 0.20s
     Running target/debug/deps/rust_sample-eb5e576424cf1ee7

running 1 test
test tests::handler_handles ... ok

test result: ok. 1 passed; 0 failed; 0 ignored; 0 measured; 0 filtered out
Cargo.tomlにpackageを設定してからcargoコマンドを実行していない場合は、ここでpackageのインストールが始まります。
テスト
Lambdaのローカル単体テスト
Lambdaとしてテストスル場合、ローカルであってもリクエストを渡す必要があります。
Requestを渡さないとエラーが返ってきます。
{"errorType":"JsonError","errorMessage":"JsonError: invalid type: string \"\", expected struct LambdaRequest at line 1 column 2"}
そのため、本来API Gatewayから送られてくるRequestの簡易版を用意します。
{
  "path": "/",
  "httpMethod": "GET",
  "headers": {
    "Host": "amazonaws.com"
  },
  "requestContext": {
    "accountId": "",
    "resourceId": "",
    "stage": "dev",
    "requestId": "",
    "identity": {
      "sourceIp": ""
    },
    "resourcePath": "",
    "httpMethod": "",
    "apiId": ""
  },
  "queryStringParameters": {}
}
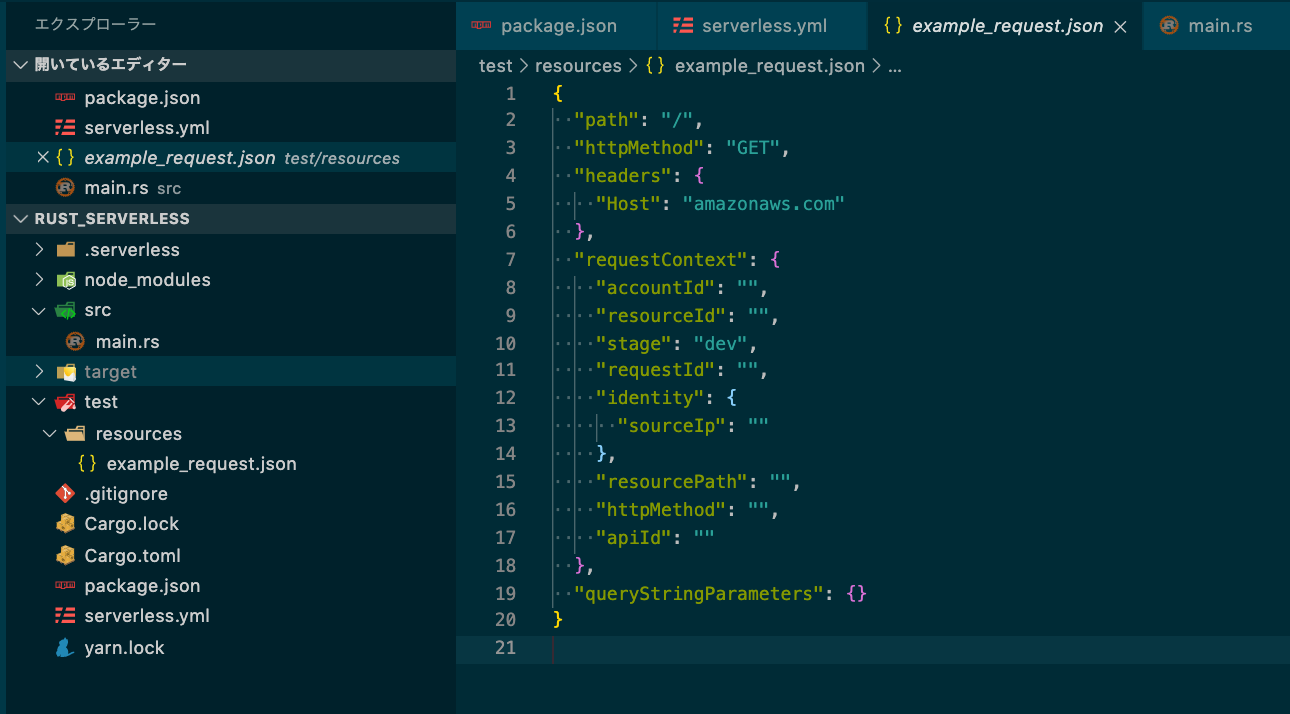
ディレクトリ構成はこんな感じ。
プロジェクトのrootで以下のコマンドを打つと実行結果が帰ってきます。
$ yarn sls invoke local -f example-function --path test/resources/example_request.json
yarn run v1.19.2
$ /Users/hisayuki/docker_dev/rust_serverless/node_modules/.bin/sls invoke local -f rust-sample --path test/resources/example_request.json
Serverless: Building native Rust rust-sample func...
    Finished release [optimized] target(s) in 3.04s
  adding: bootstrap (deflated 61%)
Serverless: Packaging service...
Serverless: Building Docker image...
START RequestId: 7cdd45ff-65e6-1b2f-f341-832c8239935c Version: $LATEST

END RequestId: 7cdd45ff-65e6-1b2f-f341-832c8239935c
REPORT RequestId: 7cdd45ff-65e6-1b2f-f341-832c8239935c  Init Duration: 161.04 ms        Duration: 5.20 ms       Billed Duration: 100 ms Memory Size: 1536 MB    Max Memory Used: 10 MB


{"statusCode":200,"headers":{"content-type":"application/json"},"multiValueHeaders":{"content-type":["application/json"]},"body":"{\"message\":\"AWS Lambda on Rust\"}","isBase64Encoded":false}

✨  Done in 54.26s.
API Gateway経由のローカル結合テスト
他言語で使われているserverless-offlineのPackageを追加しようとおもったのですが・・・
Rustはserverless-offline対応していないので、ローカルでは出来ないです。
API GatewayからのテストはAWS上にデプロイして行います。
デプロイ
AWS上にsls deployでデプロイします。
$ yarn sls deploy --aws-profile [プロファイル名]
yarn run v1.19.2
$ /Users/hisayuki/docker_dev/rust_serverless/node_modules/.bin/sls deploy --aws-profile [プロファイル名]
Serverless: Building native Rust rust-sample func...
    Finished release [optimized] target(s) in 2.05s
objcopy: stlfi43N: debuglink section already exists
  adding: bootstrap (deflated 60%)
Serverless: Packaging service...
Serverless: Uploading CloudFormation file to S3...
Serverless: Uploading artifacts...
Serverless: Uploading service rust-sample.zip file to S3 (1.06 MB)...
Serverless: Validating template...
Serverless: Updating Stack...
Serverless: Checking Stack update progress...
...........................
Serverless: Stack update finished...
Service Information
service: rust-sample
stage: dev
region: ap-northeast-1
stack: rust-sample-dev
resources: 10
api keys:
  None
endpoints:
  GET - https://a5uhcphfsj.execute-api.ap-northeast-1.amazonaws.com/dev/
functions:
  example-function: rust-sample-dev-example-function
layers:
  None
Serverless: Run the "serverless" command to setup monitoring, troubleshooting and testing.
✨  Done in 59.47s.
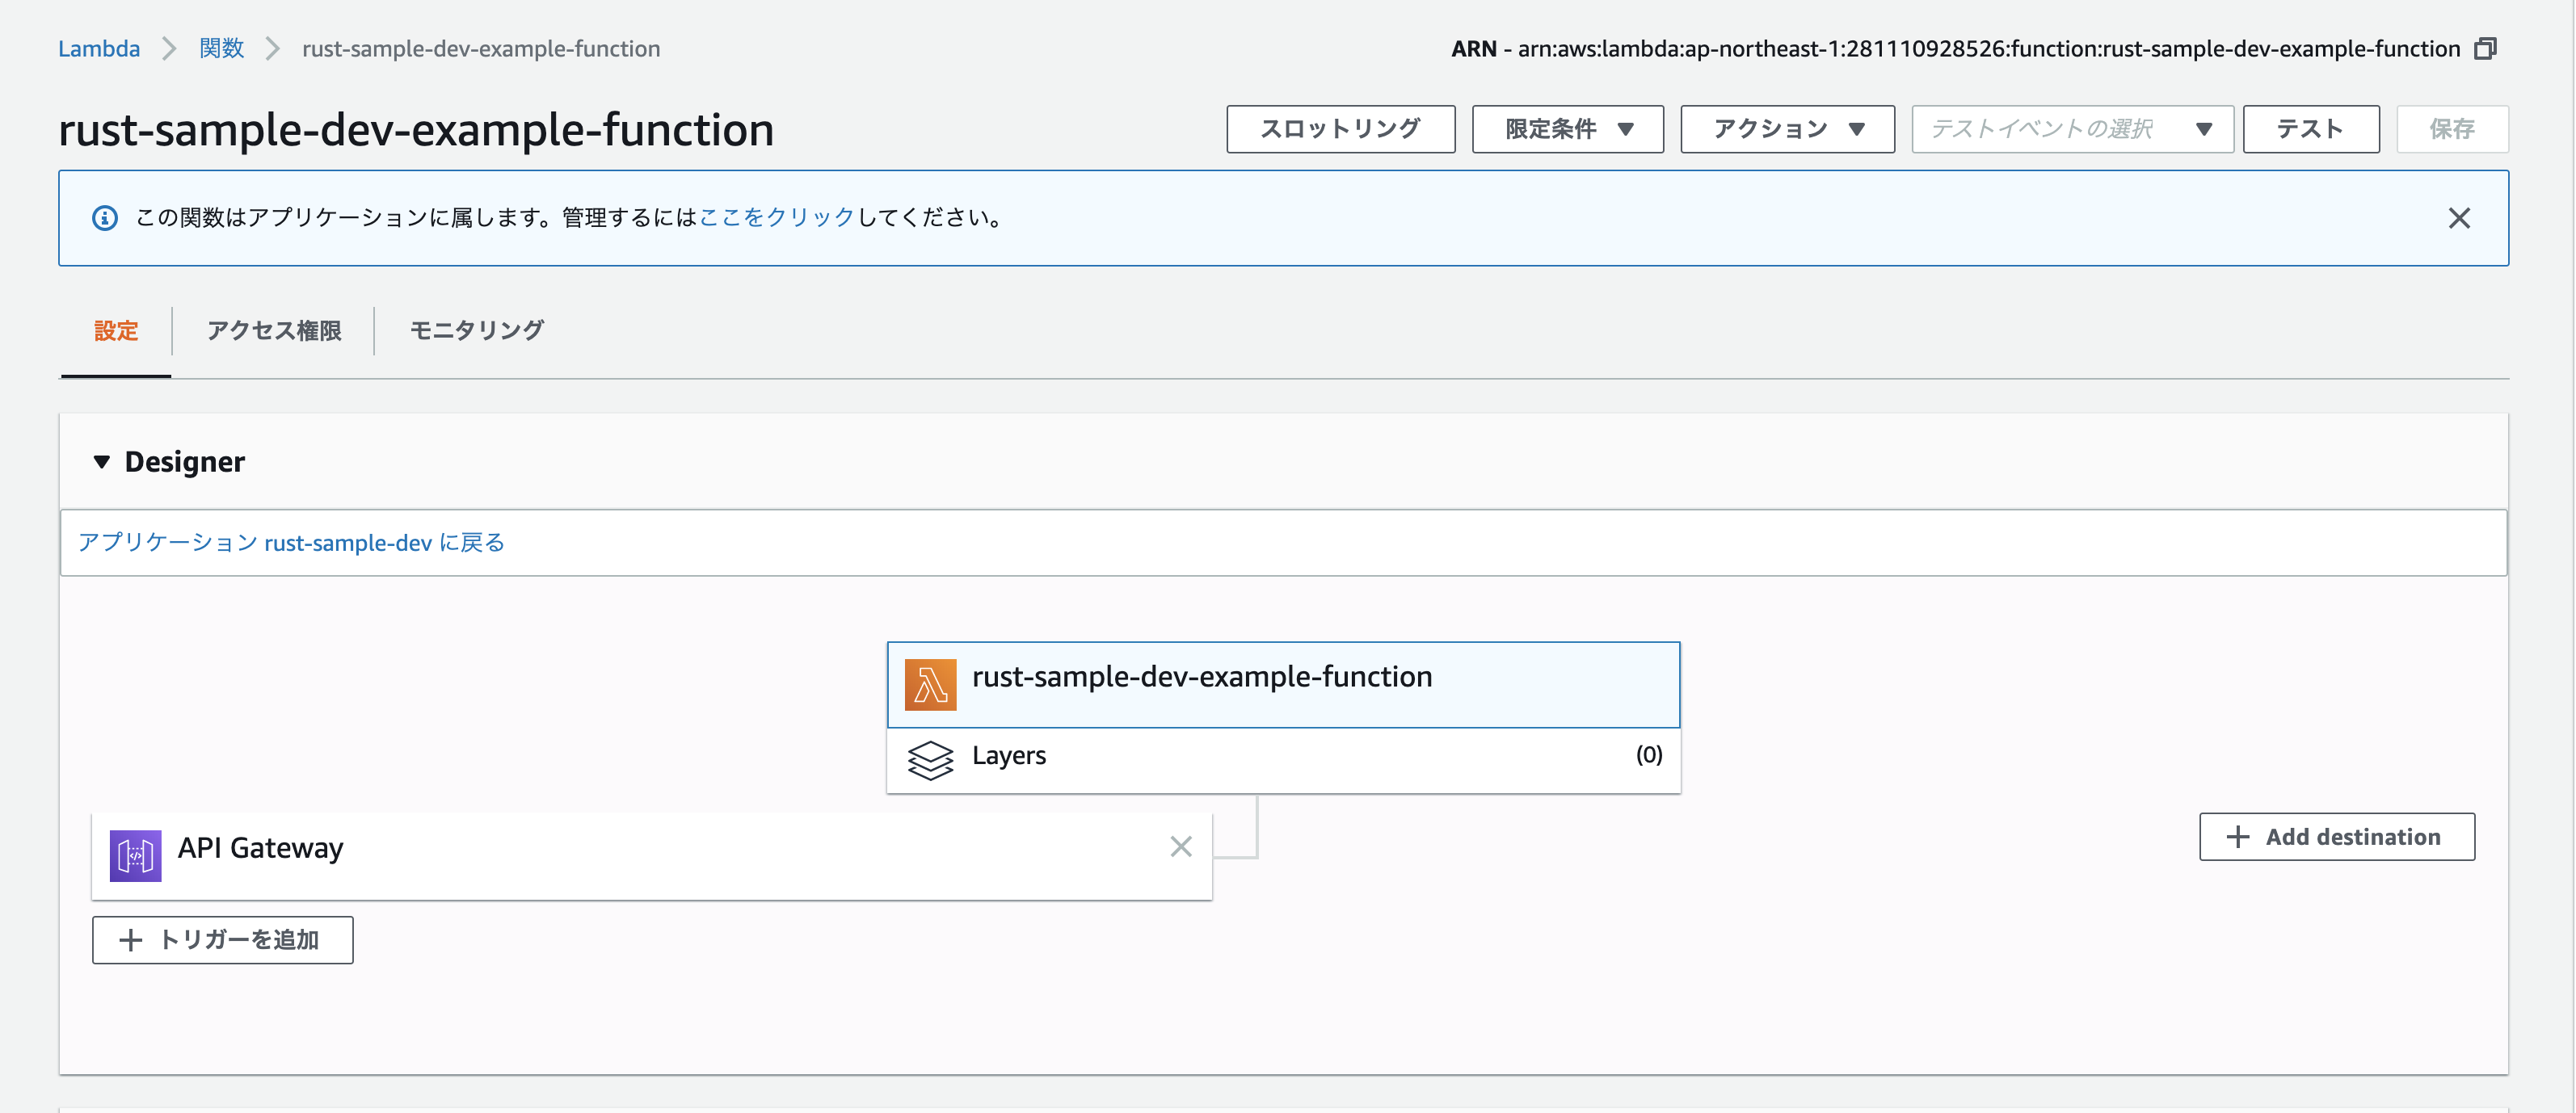
deploy完了すると、マネジメントコンソールでも確認できます。
AWS上でのLambda単体テスト
deploy後にlocalをつけずにinvokeで実行します。
$ yarn sls invoke -f example-function --aws-profile [プロファイル名]
yarn run v1.19.2
$ /Users/hisayuki/docker_dev/rust_serverless/node_modules/.bin/sls invoke -f example-function --path test/resources/example_request.json --aws-profile [プロファイル名]
{
    "statusCode": 200,
    "headers": {
        "content-type": "application/json"
    },
    "multiValueHeaders": {
        "content-type": [
            "application/json"
        ]
    },
    "body": "{\"message\":\"AWS Lambda on Rust\"}",
    "isBase64Encoded": false
}
✨  Done in 2.79s.
このように、Responseが返ってきます。
AWS上でのAPI Gateway経由結合テスト
こちらは、先程のLambdaのdeploy時にAPI Gatewayの作成とEndpointが作成されています。
endpoints:
  GET - https://a5uhcphfsj.execute-api.ap-northeast-1.amazonaws.com/dev/
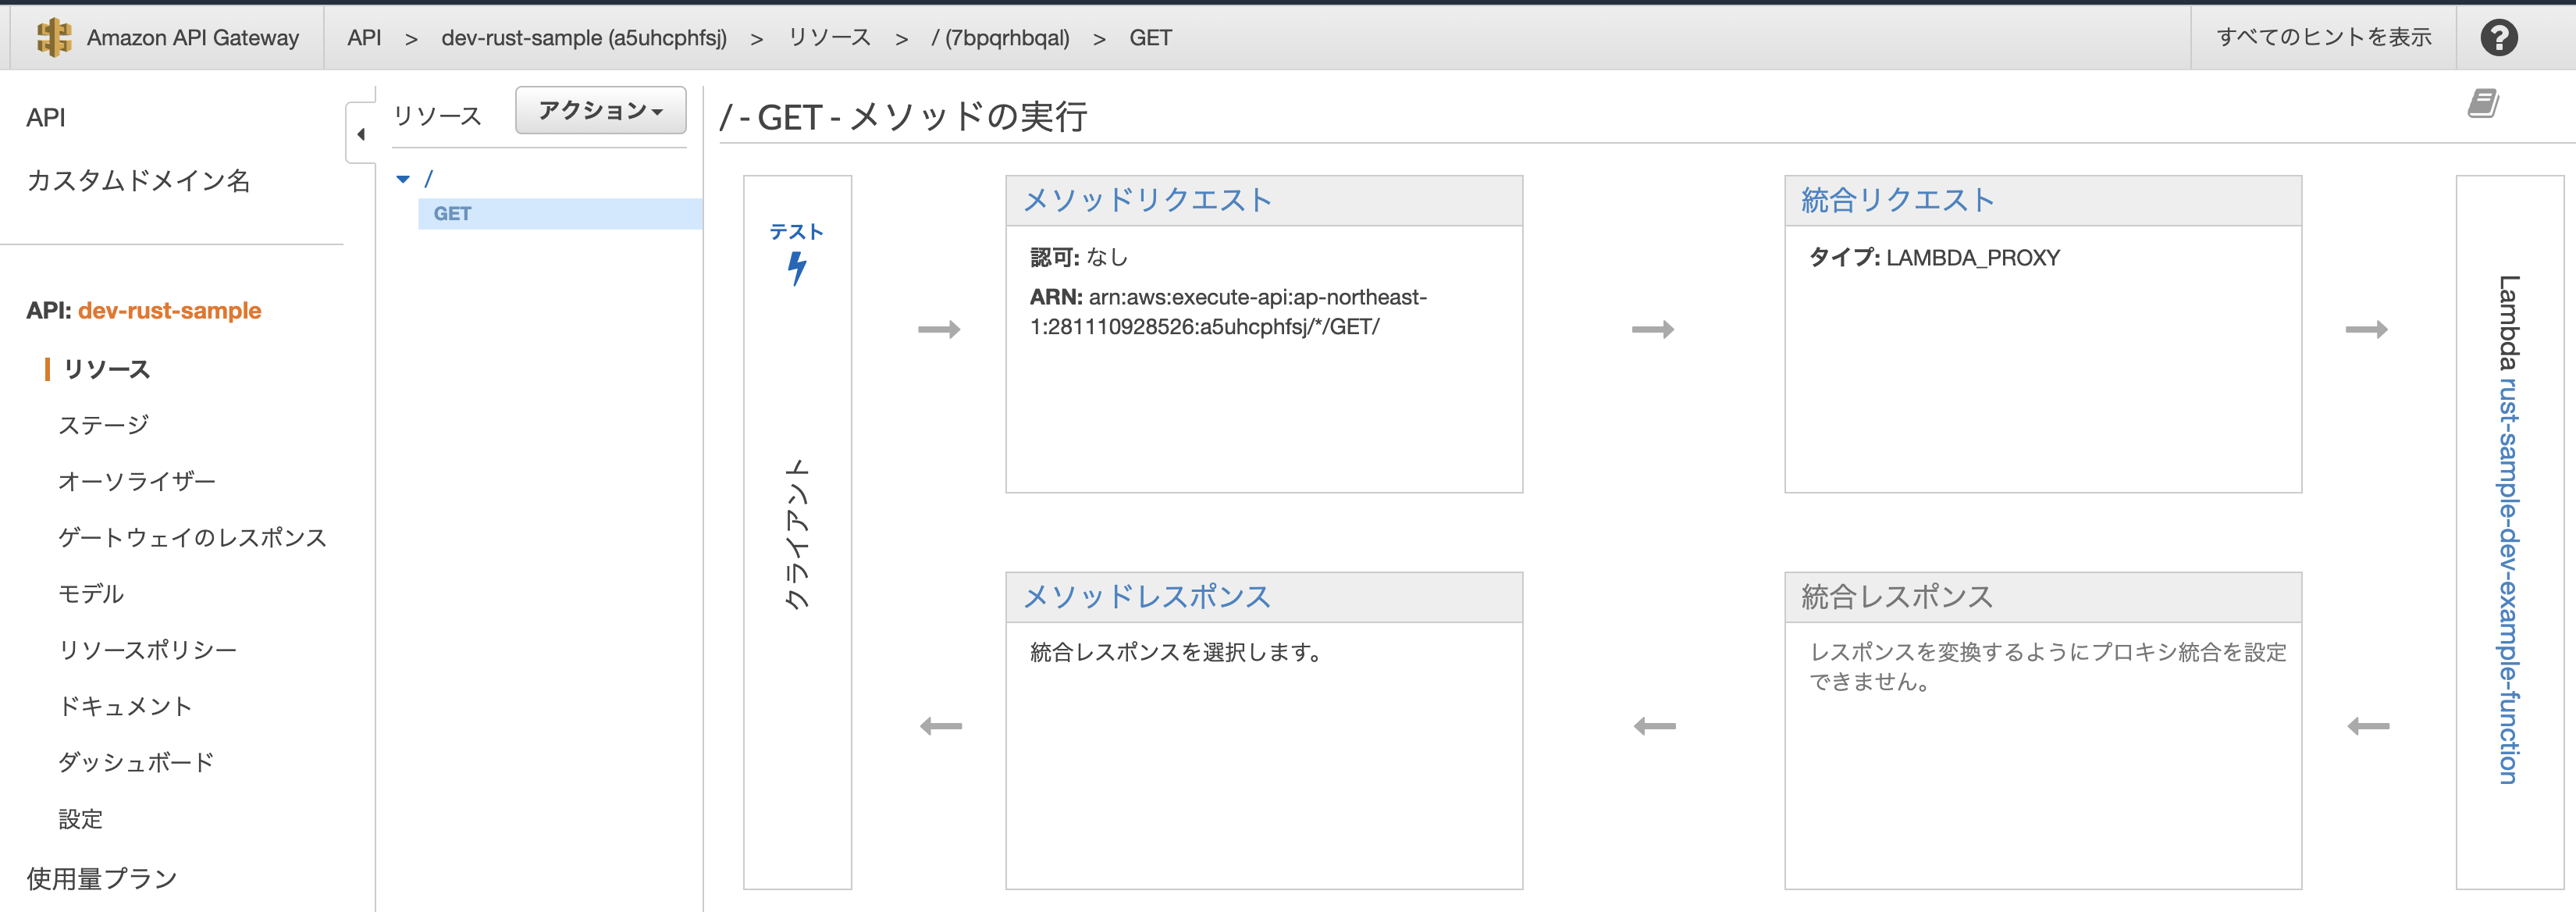
マネジメントコンソールでも確認できます。
テストの方法はcurlで実行をします。
$ curl -X GET  https://a5uhcphfsj.execute-api.ap-northeast-1.amazonaws.com/dev/
{"message":"AWS Lambda on Rust"}
これでAPI Gatewayからの実行テストも完了
まとめ
serverless-offlineが使えないのは残念ですが、RustでのLambda作成もだいぶ整ってきてます。
今回は書きませんでしたが、DynamoDBへの問い合わせ、複数Fanctionの作成方法もあります。
デフォルトで型とテストを備えているRustで、ぜひAPIの作成をしてみてください。


