認証サービスであるAWS Cognitoを使ってみたい、でもなかなか使い方がわからない、どう触っていいかわからない・・・
そんな人向けに、Angularベースでとりあえずプロト起こして触ってみようという内容です!
せっかくなので出来る限りの最新バージョンを使って、PackageManagerもyarnにしてみました!
準備
- AWSアカウント
- Node.jsはnodebrewで管理
yarnのインストール
homebrewでインストール
このとき、--ignore-dependenciesを付けてないとyarnがnodeをインストールしてしまうので、nodebrewの管理してるnodeが使えなくなります。
$ brew install yarn --ignore-dependencies
$ yarn -v
1.15.2
Node.jsのインストール
nodebrewでインストールします。
今回はv12.3.1を使っていきます。
$ nodebrew install-binary v12.3.1
Fetching: https://nodejs.org/dist/v12.3.1/node-v12.3.1-darwin-x64.tar.gz
######################################################################## 100.0%
Installed successfully

$ nodebrew use v12.3.1
use v12.3.1
Angular CLIのインストール
yarnを使ってAngular CLIをインストールします。
lates指定してますが、今回は8.0.0になりました。
$ yarn global add @angular/cli@latest
yarn global v1.15.2
[1/4] 🔍  Resolving packages...
[2/4] 🚚  Fetching packages...
[3/4] 🔗  Linking dependencies...
[4/4] 🔨  Building fresh packages...
success Installed "@angular/cli@8.0.0" with binaries:
      - ng
✨  Done in 6.27s.
Package Managerをyarnに変更する。
Angular CLIのPackage Managerもyarnに切り替えます。
$ ng config -g cli.packageManager yarn
Angularプロジェクトの作成
サンプルプロジェクトを作るので、プロジェクト用ディレクトリに移動して以下のコマンドを実行
Which stylesheet format would you like to use?ではCSSのタイプを選べるので、今回はSassを選択
$ ng new angular-amplify-auth --routing
? Which stylesheet format would you like to use? Sass   [ http://sass-lang.com/documentation/file.INDENTED_SYNTAX.html       ]
CREATE angular-amplify-auth/README.md (1035 bytes)
CREATE angular-amplify-auth/.editorconfig (246 bytes)
CREATE angular-amplify-auth/.gitignore (629 bytes)
CREATE angular-amplify-auth/angular.json (3599 bytes)
CREATE angular-amplify-auth/package.json (1293 bytes)
CREATE angular-amplify-auth/tsconfig.json (438 bytes)
CREATE angular-amplify-auth/tslint.json (1985 bytes)
CREATE angular-amplify-auth/browserslist (429 bytes)
CREATE angular-amplify-auth/karma.conf.js (1032 bytes)
CREATE angular-amplify-auth/tsconfig.app.json (210 bytes)
CREATE angular-amplify-auth/tsconfig.spec.json (270 bytes)
CREATE angular-amplify-auth/src/favicon.ico (5430 bytes)
CREATE angular-amplify-auth/src/index.html (305 bytes)
CREATE angular-amplify-auth/src/main.ts (372 bytes)
CREATE angular-amplify-auth/src/polyfills.ts (2838 bytes)
CREATE angular-amplify-auth/src/styles.sass (80 bytes)
CREATE angular-amplify-auth/src/test.ts (642 bytes)
CREATE angular-amplify-auth/src/assets/.gitkeep (0 bytes)
CREATE angular-amplify-auth/src/environments/environment.prod.ts (51 bytes)
CREATE angular-amplify-auth/src/environments/environment.ts (662 bytes)
CREATE angular-amplify-auth/src/app/app-routing.module.ts (245 bytes)
CREATE angular-amplify-auth/src/app/app.module.ts (393 bytes)
CREATE angular-amplify-auth/src/app/app.component.sass (0 bytes)
CREATE angular-amplify-auth/src/app/app.component.html (1152 bytes)
CREATE angular-amplify-auth/src/app/app.component.spec.ts (1137 bytes)
CREATE angular-amplify-auth/src/app/app.component.ts (225 bytes)
CREATE angular-amplify-auth/e2e/protractor.conf.js (810 bytes)
CREATE angular-amplify-auth/e2e/tsconfig.json (214 bytes)
    Successfully initialized git.
プロジェクト内でAngularのバージョンを確認
$ yarn ng v
yarn run v1.15.2
$ ng v

     _                      _                 ____ _     ___
    / \   _ __   __ _ _   _| | __ _ _ __     / ___| |   |_ _|
   / △ \ | '_ \ / _` | | | | |/ _` | '__|   | |   | |    | |
  / ___ \| | | | (_| | |_| | | (_| | |      | |___| |___ | |
 /_/   \_\_| |_|\__, |\__,_|_|\__,_|_|       \____|_____|___|
                |___/


Angular CLI: 8.0.0
Node: 12.3.1
OS: darwin x64
Angular: 8.0.0
... animations, cli, common, compiler, compiler-cli, core, forms
... language-service, platform-browser, platform-browser-dynamic
... router

Package                           Version
-----------------------------------------------------------
@angular-devkit/architect         0.800.0
@angular-devkit/build-angular     0.800.0
@angular-devkit/build-optimizer   0.800.0
@angular-devkit/build-webpack     0.800.0
@angular-devkit/core              8.0.0
@angular-devkit/schematics        8.0.0
@ngtools/webpack                  8.0.0
@schematics/angular               8.0.0
@schematics/update                0.800.0
rxjs                              6.4.0
typescript                        3.4.5
webpack                           4.30.0

✨  Done in 0.75s.
Amplify CLIのインストール
こちらはグローバルに入れてもいいけど、プロジェクトがない状態でAmplify CLIを叩く機会少ないと思うのでプロジェクト内に入れちゃいます。
なので、プロジェクト内のyarnでコマンドを叩きます。
$ yarn add @aws-amplify/cli
[1/4] 🔍  Resolving packages...
warning @aws-amplify/cli > amplify-category-function > grunt-aws-lambda > glob > minimatch@2.0.10: Please update to minimatch 3.0.2 or higher to avoid a RegExp DoS issue

 ~~~~~~~~~~[長いので割愛]

[2/4] 🚚  Fetching packages...
[3/4] 🔗  Linking dependencies...
[4/4] 🔨  Building fresh packages...

success Saved lockfile.
success Saved 447 new dependencies.
info Direct dependencies
└─ @aws-amplify/cli@1.6.11
info All dependencies

 ~~~~~~~~~~[長いので割愛]

✨  Done in 45.19s.
数行のwarningと大量のdependenciesが出るので、表示は割愛
yarn scriptに追加
package.jsonにamplifyの呼び出しコマンドを追加
{
  "name": "angular-amplify-auth",
  "version": "0.0.0",
  "scripts": {
    "ng": "ng",
    "start": "ng serve",
    "build": "ng build",
    "test": "ng test",
    "lint": "ng lint",
    "e2e": "ng e2e",
    "amplify": "amplify"
  },
Amplifyのインストール
AmplifyのPackageとAngular連携用のPackageをインストールします。
$ yarn add aws-amplify aws-amplify-angular
yarn add v1.15.2
[1/4] 🔍  Resolving packages...
[2/4] 🚚  Fetching packages...
warning Pattern ["proxy-agent@latest"] is trying to unpack in the same destination "/Users/hisayuki/Library/Caches/Yarn/v4/npm-proxy-agent-3.1.0-3cf86ee911c94874de4359f37efd9de25157c113/node_modules/proxy-agent" as pattern ["proxy-agent@^3.0.3"]. This could result in non-deterministic behavior, skipping.
[3/4] 🔗  Linking dependencies...
[4/4] 🔨  Building fresh packages...
success Saved lockfile.
success Saved 13 new dependencies.
info Direct dependencies
├─ aws-amplify-angular@3.0.3
└─ aws-amplify@1.1.28
info All dependencies
├─ @aws-amplify/analytics@1.2.16
├─ @aws-amplify/api@1.0.35
├─ @aws-amplify/interactions@1.0.30
├─ @aws-amplify/pubsub@1.0.28
├─ @aws-amplify/storage@1.0.30
├─ @aws-amplify/xr@0.1.17
├─ @types/lodash@4.14.132
├─ amazon-cognito-identity-js@3.0.12
├─ aws-amplify-angular@3.0.3
├─ aws-amplify@1.1.28
├─ axios@0.17.1
├─ js-cookie@2.2.0
└─ rxjs-compat@6.5.2
✨  Done in 16.64s.
最終的なpackage.jsonがこちら
{
  "name": "angular-amplify-auth",
  "version": "0.0.0",
  "scripts": {
    "ng": "ng",
    "start": "ng serve",
    "build": "ng build",
    "test": "ng test",
    "lint": "ng lint",
    "e2e": "ng e2e",
    "amplify": "amplify"
  },
  "private": true,
  "dependencies": {
    "@angular/animations": "~8.0.0",
    "@angular/common": "~8.0.0",
    "@angular/compiler": "~8.0.0",
    "@angular/core": "~8.0.0",
    "@angular/forms": "~8.0.0",
    "@angular/platform-browser": "~8.0.0",
    "@angular/platform-browser-dynamic": "~8.0.0",
    "@angular/router": "~8.0.0",
    "@aws-amplify/cli": "^1.6.11",
    "aws-amplify": "^1.1.28",
    "aws-amplify-angular": "^3.0.3",
    "rxjs": "~6.4.0",
    "tslib": "^1.9.0",
    "zone.js": "~0.9.1"
  },
  "devDependencies": {
    "@angular-devkit/build-angular": "~0.800.0",
    "@angular/cli": "~8.0.0",
    "@angular/compiler-cli": "~8.0.0",
    "@angular/language-service": "~8.0.0",
    "@types/jasmine": "~3.3.8",
    "@types/jasminewd2": "~2.0.3",
    "@types/node": "~8.9.4",
    "codelyzer": "^5.0.0",
    "jasmine-core": "~3.4.0",
    "jasmine-spec-reporter": "~4.2.1",
    "karma": "~4.1.0",
    "karma-chrome-launcher": "~2.2.0",
    "karma-coverage-istanbul-reporter": "~2.0.1",
    "karma-jasmine": "~2.0.1",
    "karma-jasmine-html-reporter": "^1.4.0",
    "protractor": "~5.4.0",
    "ts-node": "~7.0.0",
    "tslint": "~5.15.0",
    "typescript": "~3.4.3"
  }
}
Amplify CLIのAWSへアクセス設定
Amplify CLI専用のIAMユーザーを作ります。
$ yarn amplify configure
yarn run v1.15.2
$ amplify configure
Follow these steps to set up access to your AWS account:

Sign in to your AWS administrator account:
https://console.aws.amazon.com/
Press Enter to continue
これでAWSのコンソールログイン画面に行くので、今回Amplifyで使いたいアカウントにログインします。
ちなみに、ログイン後にスイッチロールで別のアカウントに切り替えたら、切り替え後のアカウントが適用されます。
Amplifyで使いたいアカウントのコンソール画面が出たら、CLIの画面でエンターを押します。
Specify the AWS Region
? region:  ap-northeast-1
Specify the username of the new IAM user:
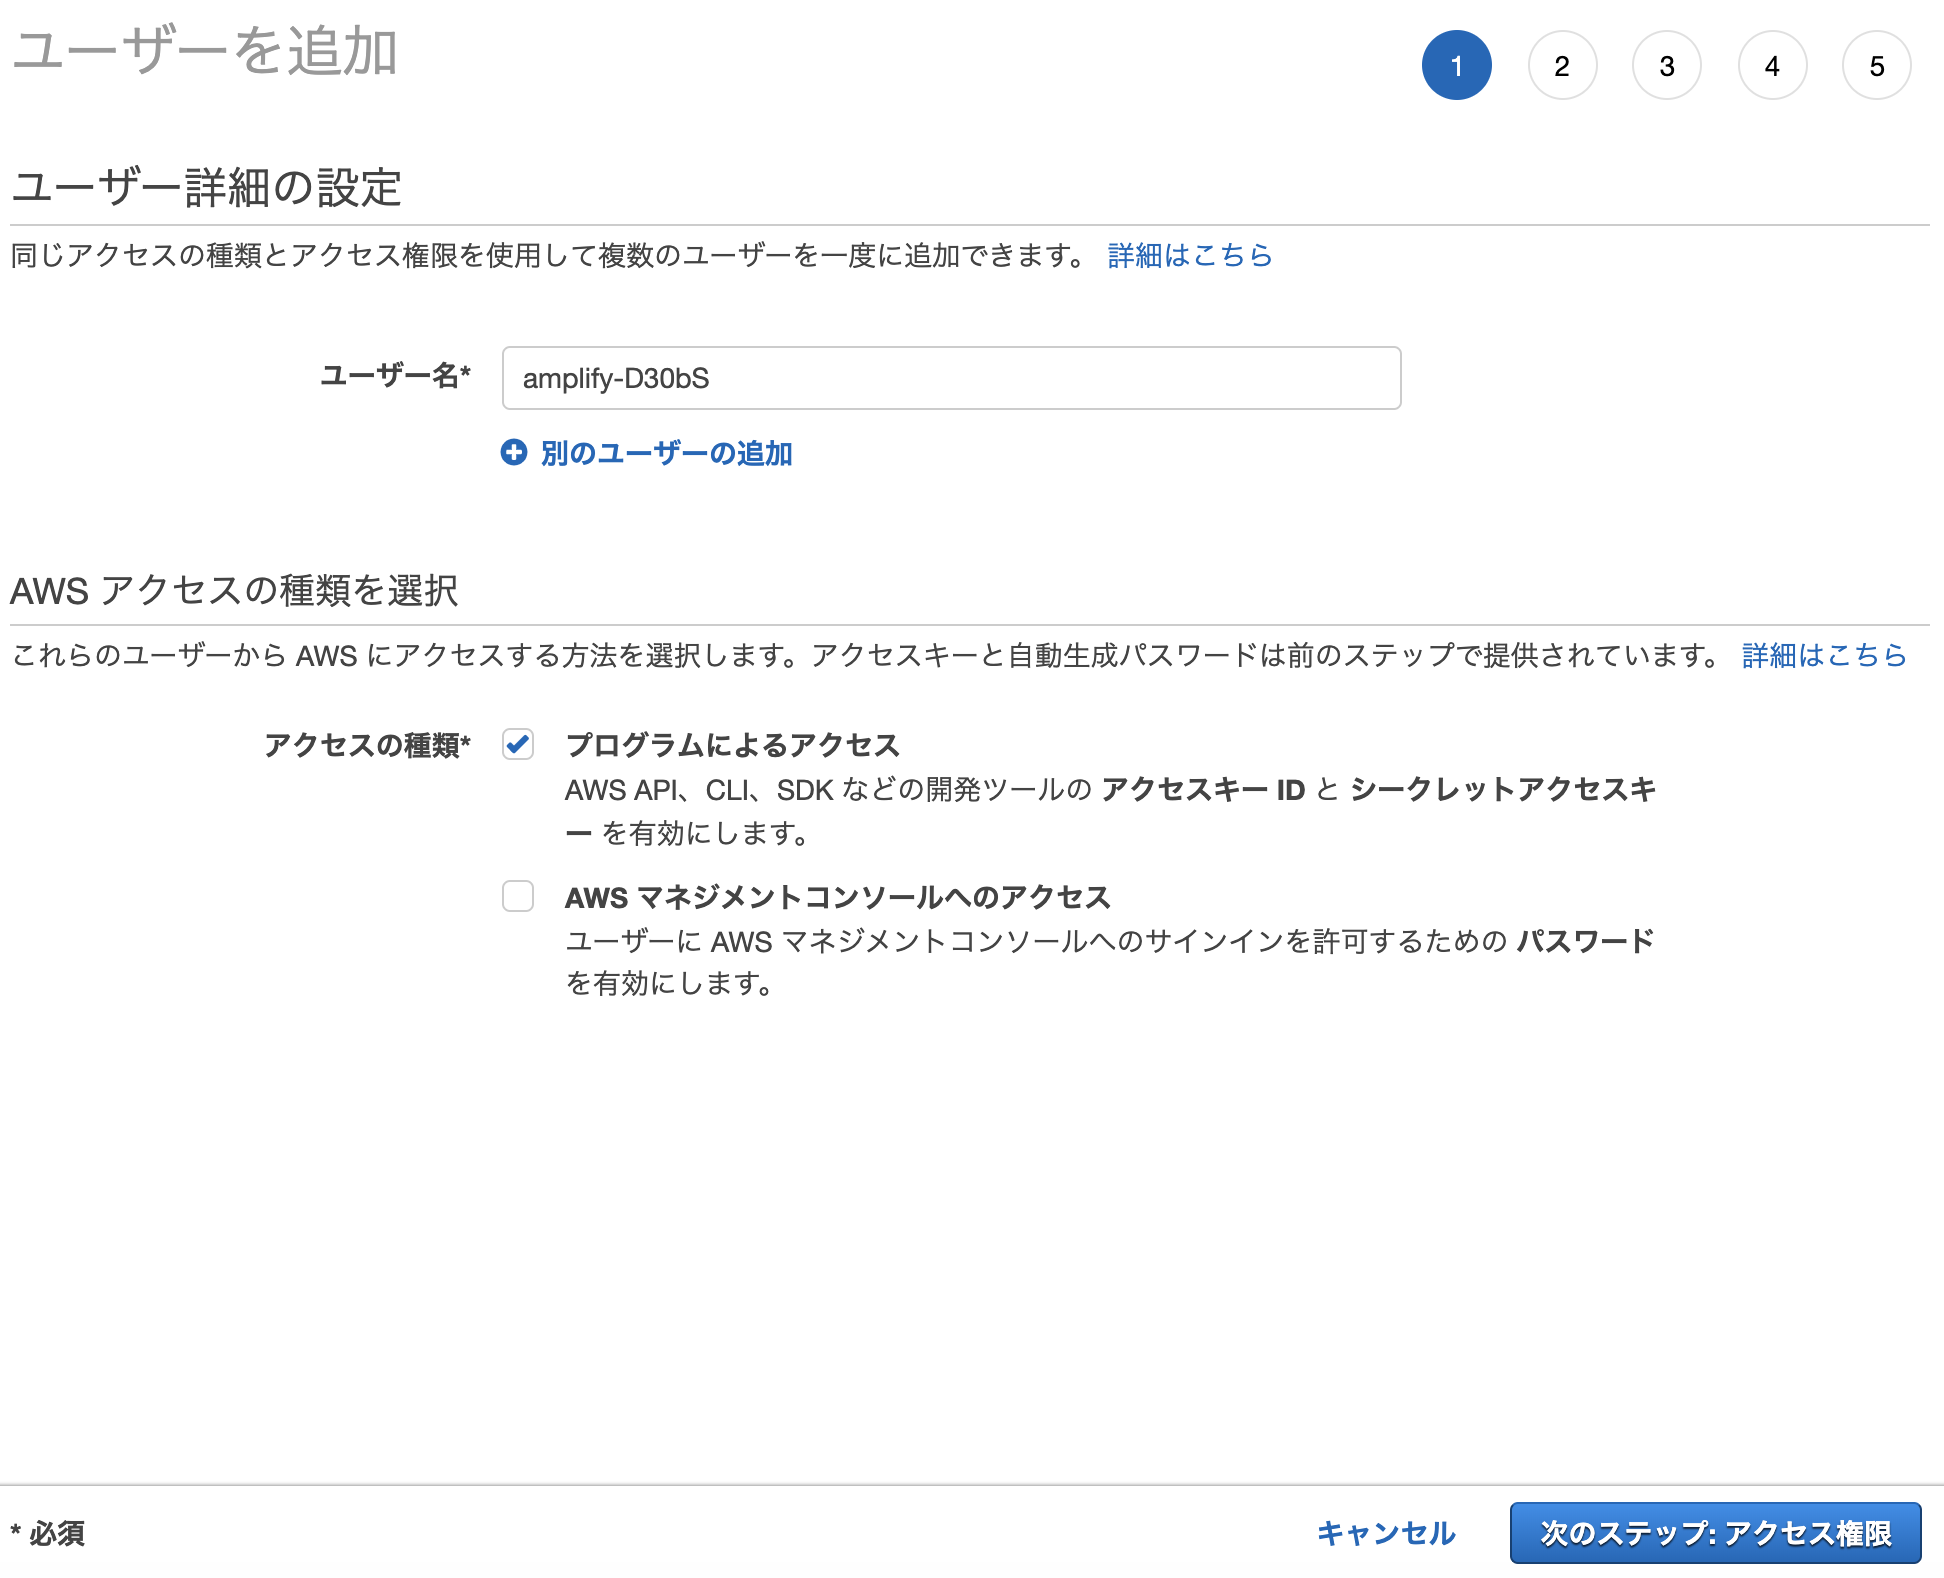
? user name:  amplify-D30bS
Complete the user creation using the AWS console
https://console.aws.amazon.com/iam/home?region=undefined#/users$new?step=final&accessKey&userNames=amplify-D30bS&permissionType=policies&policies=arn:aws:iam::aws:policy%2FAdministratorAccess
Press Enter to continue
今度はリージョンを聞かれるので、今回はap-northeast-1、次に作るIAMユーザーの名前を聞かれるので、デフォルトでOKであればそのままエンターを押します。
ここからはIAMユーザーの作成なので割愛。
デフォルトではAdministratorAccessのポリシーが付いたIAMユーザが出来上がります。
出来上がったらまたCLI画面でエンター
Enter the access key of the newly created user:
? accessKeyId: **********
? secretAccessKey: ********************
This would update/create the AWS Profile in your local machine
? Profile Name:  amplify_sample

Successfully set up the new user.
✨  Done in 559.81s.
先程作ったIAMユーザのaccessKeyIdとsecretAccessKeyを聞かれるので入力して、最後にProfileを設定する。
defaultでも良いですが、ローカルマシンで既にAWS CLIでdefaultプロファイルを作っていると上書きしてしまうので、別の名前が良いと思います。
Amplify初期化
Amplifyを使うプロジェクトで初期化をします。
$ yarn amplify init
yarn run v1.15.2
$ amplify init
Note: It is recommended to run this command from the root of your app directory
? Enter a name for the project angular-amplify-auth
? Enter a name for the environment sample
? Choose your default editor: Visual Studio Code
? Choose the type of app that you're building javascript
Please tell us about your project
? What javascript framework are you using angular
? Source Directory Path:  src
? Distribution Directory Path: dist
? Build Command:  yarn build
? Start Command: yarn start
Using default provider  awscloudformation

For more information on AWS Profiles, see:
https://docs.aws.amazon.com/cli/latest/userguide/cli-multiple-profiles.html

? Do you want to use an AWS profile? Yes
? Please choose the profile you want to use amplify_sample
| 質問 | 内容 |
|---|---|
| Enter a name for the project | プロジェクト名(Angularプロジェクト名) |
| Enter a name for the environment | 何環境か |
| Choose your default editor | エディタどれですか? |
| Choose the type of app that you're building | Android or ios or JSどれですか? |
| What javascript framework are you using | JSFrameworkどれですか? |
| Source Directory Path | sourceディレクトリのパス |
| Distribution Directory Path | build結果先のパス |
| Build Command | ビルドコマンド |
| tart Command | スタートコマンド |
| Do you want to use an AWS profile? | プロファイル使いますか? |
全部答えると裏でCloudFormationが動きます。
⠦ Initializing project in the cloud...

CREATE_IN_PROGRESS DeploymentBucket                           AWS::S3::Bucket            Wed May 29 2019 17:23:17 GMT+0900 (GMT+09:00)
CREATE_IN_PROGRESS AuthRole                                   AWS::IAM::Role             Wed May 29 2019 17:23:17 GMT+0900 (GMT+09:00)
CREATE_IN_PROGRESS angular-amplify-auth-sample-20190529172311 AWS::CloudFormation::Stack Wed May 29 2019 17:23:12 GMT+0900 (GMT+09:00) User Initiated
⠋ Initializing project in the cloud...

CREATE_IN_PROGRESS UnauthRole AWS::IAM::Role Wed May 29 2019 17:23:17 GMT+0900 (GMT+09:00)
⠧ Initializing project in the cloud...

CREATE_IN_PROGRESS DeploymentBucket AWS::S3::Bucket Wed May 29 2019 17:23:19 GMT+0900 (GMT+09:00) Resource creation Initiated
CREATE_IN_PROGRESS UnauthRole       AWS::IAM::Role  Wed May 29 2019 17:23:19 GMT+0900 (GMT+09:00) Resource creation Initiated
CREATE_IN_PROGRESS AuthRole         AWS::IAM::Role  Wed May 29 2019 17:23:18 GMT+0900 (GMT+09:00) Resource creation Initiated
⠧ Initializing project in the cloud...

CREATE_COMPLETE UnauthRole AWS::IAM::Role Wed May 29 2019 17:23:30 GMT+0900 (GMT+09:00)
CREATE_COMPLETE AuthRole   AWS::IAM::Role Wed May 29 2019 17:23:29 GMT+0900 (GMT+09:00)
⠇ Initializing project in the cloud...

CREATE_COMPLETE DeploymentBucket AWS::S3::Bucket Wed May 29 2019 17:23:40 GMT+0900 (GMT+09:00)
⠏ Initializing project in the cloud...

CREATE_COMPLETE angular-amplify-auth-sample-20190529172311 AWS::CloudFormation::Stack Wed May 29 2019 17:23:44 GMT+0900 (GMT+09:00)
✔ Successfully created initial AWS cloud resources for deployments.
✔ Initialized provider successfully.
Initialized your environment successfully.

Your project has been successfully initialized and connected to the cloud!

Some next steps:
"amplify status" will show you what you've added already and if it's locally configured or deployed
"amplify <category> add" will allow you to add features like user login or a backend API
"amplify push" will build all your local backend resources and provision it in the cloud
"amplify publish" will build all your local backend and frontend resources (if you have hosting category added) and provision it in the cloud

Pro tip:
Try "amplify add api" to create a backend API and then "amplify publish" to deploy everything

✨  Done in 119.19s.
この段階ではIAMRoleが2つと、S3バケットが1つ出来ています。
Authの追加
次にAmplifyのコマンドでAuthを追加します。
Authの追加でCognito作成をCloudFormationに追加するtemplate.ymlが出来ます。
$ yarn amplify add auth
yarn run v1.15.2
$ amplify add auth
Using service: Cognito, provided by: awscloudformation

 The current configured provider is Amazon Cognito.

 Do you want to use the default authentication and security configuration? Default configuration
 Warning: you will not be able to edit these selections.
 How do you want users to be able to sign in when using your Cognito User Pool? Username
 Warning: you will not be able to edit these selections.
 What attributes are required for signing up? (Press <space> to select, <a> to toggle all, <i> to invert selection)Email
Successfully added resource angularamplifyauth8d729781 locally

Some next steps:
"amplify push" will build all your local backend resources and provision it in the cloud
"amplify publish" will build all your local backend and frontend resources (if you have hosting category added) and provision it in the cloud

✨  Done in 26.57s.
| 質問 | 内容 |
|---|---|
| Do you want to use the default authentication and security configuration? | セキュリティ認証と設定どうしますか?(とりあえずデフォルト選択) |
| How do you want users to be able to sign in when using your Cognito User Pool? | Cognitoのユーザープールでログイン時に何を使う?(とりあえずユーザー名) |
| What attributes are required for signing up? (Press to select, to toggle all, to invert selection | サインアップ時に登録してもらう情報(今回はEmailのみ選択) |
まずはとりあえず作ってみるなので、簡単に設定しました。
一応あとからコンソールやCLIからは変更できます。
これでtemplate.ymlが出来上がります。
CloudFormationの更新
template.ymlの内容をCloudFormationに更新します。
i$ yarn amplify push
yarn run v1.15.2
$ amplify push


Current Environment: sample

| Category | Resource name              | Operation | Provider plugin   |
| -------- | -------------------------- | --------- | ----------------- |
| Auth     | angularamplifyauth8d729781 | Create    | awscloudformation |
? Are you sure you want to continue? Yes
⠏ Updating resources in the cloud. This may take a few minutes...

UPDATE_IN_PROGRESS angular-amplify-auth-sample-20190529172311 AWS::CloudFormation::Stack Wed May 29 2019 17:47:49 GMT+0900 (GMT+09:00) User Initiated
⠏ Updating resources in the cloud. This may take a few minutes...

CREATE_IN_PROGRESS authangularamplifyauth8d729781 AWS::CloudFormation::Stack Wed May 29 2019 17:48:00 GMT+0900 (GMT+09:00) Resource creation Initiated
CREATE_IN_PROGRESS authangularamplifyauth8d729781 AWS::CloudFormation::Stack Wed May 29 2019 17:47:58 GMT+0900 (GMT+09:00)
⠹ Updating resources in the cloud. This may take a few minutes...

CREATE_IN_PROGRESS angular-amplify-auth-sample-20190529172311-authangularamplifyauth8d729781-17R83R3RQ8087 AWS::CloudFormation::Stack Wed May 29 2019 17:47:59 GMT+0900 (GMT+09:00) User Initiated
⠸ Updating resources in the cloud. This may take a few minutes...

CREATE_IN_PROGRESS SNSRole AWS::IAM::Role Wed May 29 2019 17:48:09 GMT+0900 (GMT+09:00) Resource creation Initiated
CREATE_IN_PROGRESS SNSRole AWS::IAM::Role Wed May 29 2019 17:48:08 GMT+0900 (GMT+09:00)
⠸ Updating resources in the cloud. This may take a few minutes...

CREATE_COMPLETE SNSRole AWS::IAM::Role Wed May 29 2019 17:48:21 GMT+0900 (GMT+09:00)
⠸ Updating resources in the cloud. This may take a few minutes...

CREATE_IN_PROGRESS UserPool AWS::Cognito::UserPool Wed May 29 2019 17:48:28 GMT+0900 (GMT+09:00)
⠼ Updating resources in the cloud. This may take a few minutes...

CREATE_COMPLETE    UserPool AWS::Cognito::UserPool Wed May 29 2019 17:48:32 GMT+0900 (GMT+09:00)
CREATE_IN_PROGRESS UserPool AWS::Cognito::UserPool Wed May 29 2019 17:48:32 GMT+0900 (GMT+09:00) Resource creation Initiated
⠸ Updating resources in the cloud. This may take a few minutes...

CREATE_IN_PROGRESS UserPoolClientWeb AWS::Cognito::UserPoolClient Wed May 29 2019 17:48:40 GMT+0900 (GMT+09:00) Resource creation Initiated
CREATE_IN_PROGRESS UserPoolClient    AWS::Cognito::UserPoolClient Wed May 29 2019 17:48:38 GMT+0900 (GMT+09:00)
CREATE_IN_PROGRESS UserPoolClientWeb AWS::Cognito::UserPoolClient Wed May 29 2019 17:48:38 GMT+0900 (GMT+09:00)
⠇ Updating resources in the cloud. This may take a few minutes...

CREATE_COMPLETE UserPoolClientWeb AWS::Cognito::UserPoolClient Wed May 29 2019 17:48:41 GMT+0900 (GMT+09:00)
⠴ Updating resources in the cloud. This may take a few minutes...

CREATE_COMPLETE    UserPoolClient AWS::Cognito::UserPoolClient Wed May 29 2019 17:48:41 GMT+0900 (GMT+09:00)
CREATE_IN_PROGRESS UserPoolClient AWS::Cognito::UserPoolClient Wed May 29 2019 17:48:41 GMT+0900 (GMT+09:00) Resource creation Initiated
⠦ Updating resources in the cloud. This may take a few minutes...

CREATE_IN_PROGRESS UserPoolClientRole AWS::IAM::Role Wed May 29 2019 17:48:49 GMT+0900 (GMT+09:00) Resource creation Initiated
CREATE_IN_PROGRESS UserPoolClientRole AWS::IAM::Role Wed May 29 2019 17:48:47 GMT+0900 (GMT+09:00)
⠦ Updating resources in the cloud. This may take a few minutes...

CREATE_COMPLETE UserPoolClientRole AWS::IAM::Role Wed May 29 2019 17:48:59 GMT+0900 (GMT+09:00)
⠧ Updating resources in the cloud. This may take a few minutes...

CREATE_IN_PROGRESS UserPoolClientLambda AWS::Lambda::Function Wed May 29 2019 17:49:05 GMT+0900 (GMT+09:00)
⠧ Updating resources in the cloud. This may take a few minutes...

CREATE_COMPLETE    UserPoolClientLambda AWS::Lambda::Function Wed May 29 2019 17:49:06 GMT+0900 (GMT+09:00)
CREATE_IN_PROGRESS UserPoolClientLambda AWS::Lambda::Function Wed May 29 2019 17:49:06 GMT+0900 (GMT+09:00) Resource creation Initiated
⠇ Updating resources in the cloud. This may take a few minutes...

CREATE_IN_PROGRESS UserPoolClientLambdaPolicy AWS::IAM::Policy Wed May 29 2019 17:49:13 GMT+0900 (GMT+09:00) Resource creation Initiated
CREATE_IN_PROGRESS UserPoolClientLambdaPolicy AWS::IAM::Policy Wed May 29 2019 17:49:12 GMT+0900 (GMT+09:00)
⠏ Updating resources in the cloud. This may take a few minutes...

CREATE_COMPLETE UserPoolClientLambdaPolicy AWS::IAM::Policy Wed May 29 2019 17:49:23 GMT+0900 (GMT+09:00)
⠇ Updating resources in the cloud. This may take a few minutes...

CREATE_IN_PROGRESS UserPoolClientLogPolicy AWS::IAM::Policy Wed May 29 2019 17:49:29 GMT+0900 (GMT+09:00) Resource creation Initiated
CREATE_IN_PROGRESS UserPoolClientLogPolicy AWS::IAM::Policy Wed May 29 2019 17:49:28 GMT+0900 (GMT+09:00)
⠏ Updating resources in the cloud. This may take a few minutes...

CREATE_COMPLETE UserPoolClientLogPolicy AWS::IAM::Policy Wed May 29 2019 17:49:39 GMT+0900 (GMT+09:00)
⠋ Updating resources in the cloud. This may take a few minutes...

CREATE_IN_PROGRESS UserPoolClientInputs Custom::LambdaCallout Wed May 29 2019 17:49:44 GMT+0900 (GMT+09:00)
⠦ Updating resources in the cloud. This may take a few minutes...

CREATE_COMPLETE    UserPoolClientInputs Custom::LambdaCallout Wed May 29 2019 17:49:50 GMT+0900 (GMT+09:00)
CREATE_IN_PROGRESS UserPoolClientInputs Custom::LambdaCallout Wed May 29 2019 17:49:49 GMT+0900 (GMT+09:00) Resource creation Initiated
⠴ Updating resources in the cloud. This may take a few minutes...

CREATE_IN_PROGRESS IdentityPool AWS::Cognito::IdentityPool Wed May 29 2019 17:49:55 GMT+0900 (GMT+09:00)
⠹ Updating resources in the cloud. This may take a few minutes...

CREATE_COMPLETE    IdentityPool AWS::Cognito::IdentityPool Wed May 29 2019 17:49:59 GMT+0900 (GMT+09:00)
CREATE_IN_PROGRESS IdentityPool AWS::Cognito::IdentityPool Wed May 29 2019 17:49:58 GMT+0900 (GMT+09:00) Resource creation Initiated
⠹ Updating resources in the cloud. This may take a few minutes...

CREATE_COMPLETE    IdentityPoolRoleMap AWS::Cognito::IdentityPoolRoleAttachment Wed May 29 2019 17:50:09 GMT+0900 (GMT+09:00)
CREATE_IN_PROGRESS IdentityPoolRoleMap AWS::Cognito::IdentityPoolRoleAttachment Wed May 29 2019 17:50:09 GMT+0900 (GMT+09:00) Resource creation Initiated
CREATE_IN_PROGRESS IdentityPoolRoleMap AWS::Cognito::IdentityPoolRoleAttachment Wed May 29 2019 17:50:06 GMT+0900 (GMT+09:00)
⠼ Updating resources in the cloud. This may take a few minutes...

CREATE_COMPLETE angular-amplify-auth-sample-20190529172311-authangularamplifyauth8d729781-17R83R3RQ8087 AWS::CloudFormation::Stack Wed May 29 2019 17:50:13 GMT+0900 (GMT+09:00)
⠏ Updating resources in the cloud. This may take a few minutes...

CREATE_COMPLETE authangularamplifyauth8d729781 AWS::CloudFormation::Stack Wed May 29 2019 17:50:18 GMT+0900 (GMT+09:00)
⠋ Updating resources in the cloud. This may take a few minutes...

UPDATE_COMPLETE                     angular-amplify-auth-sample-20190529172311 AWS::CloudFormation::Stack Wed May 29 2019 17:50:23 GMT+0900 (GMT+09:00)
UPDATE_COMPLETE_CLEANUP_IN_PROGRESS angular-amplify-auth-sample-20190529172311 AWS::CloudFormation::Stack Wed May 29 2019 17:50:22 GMT+0900 (GMT+09:00)
✔ All resources are updated in the cloud


✨  Done in 191.15s.
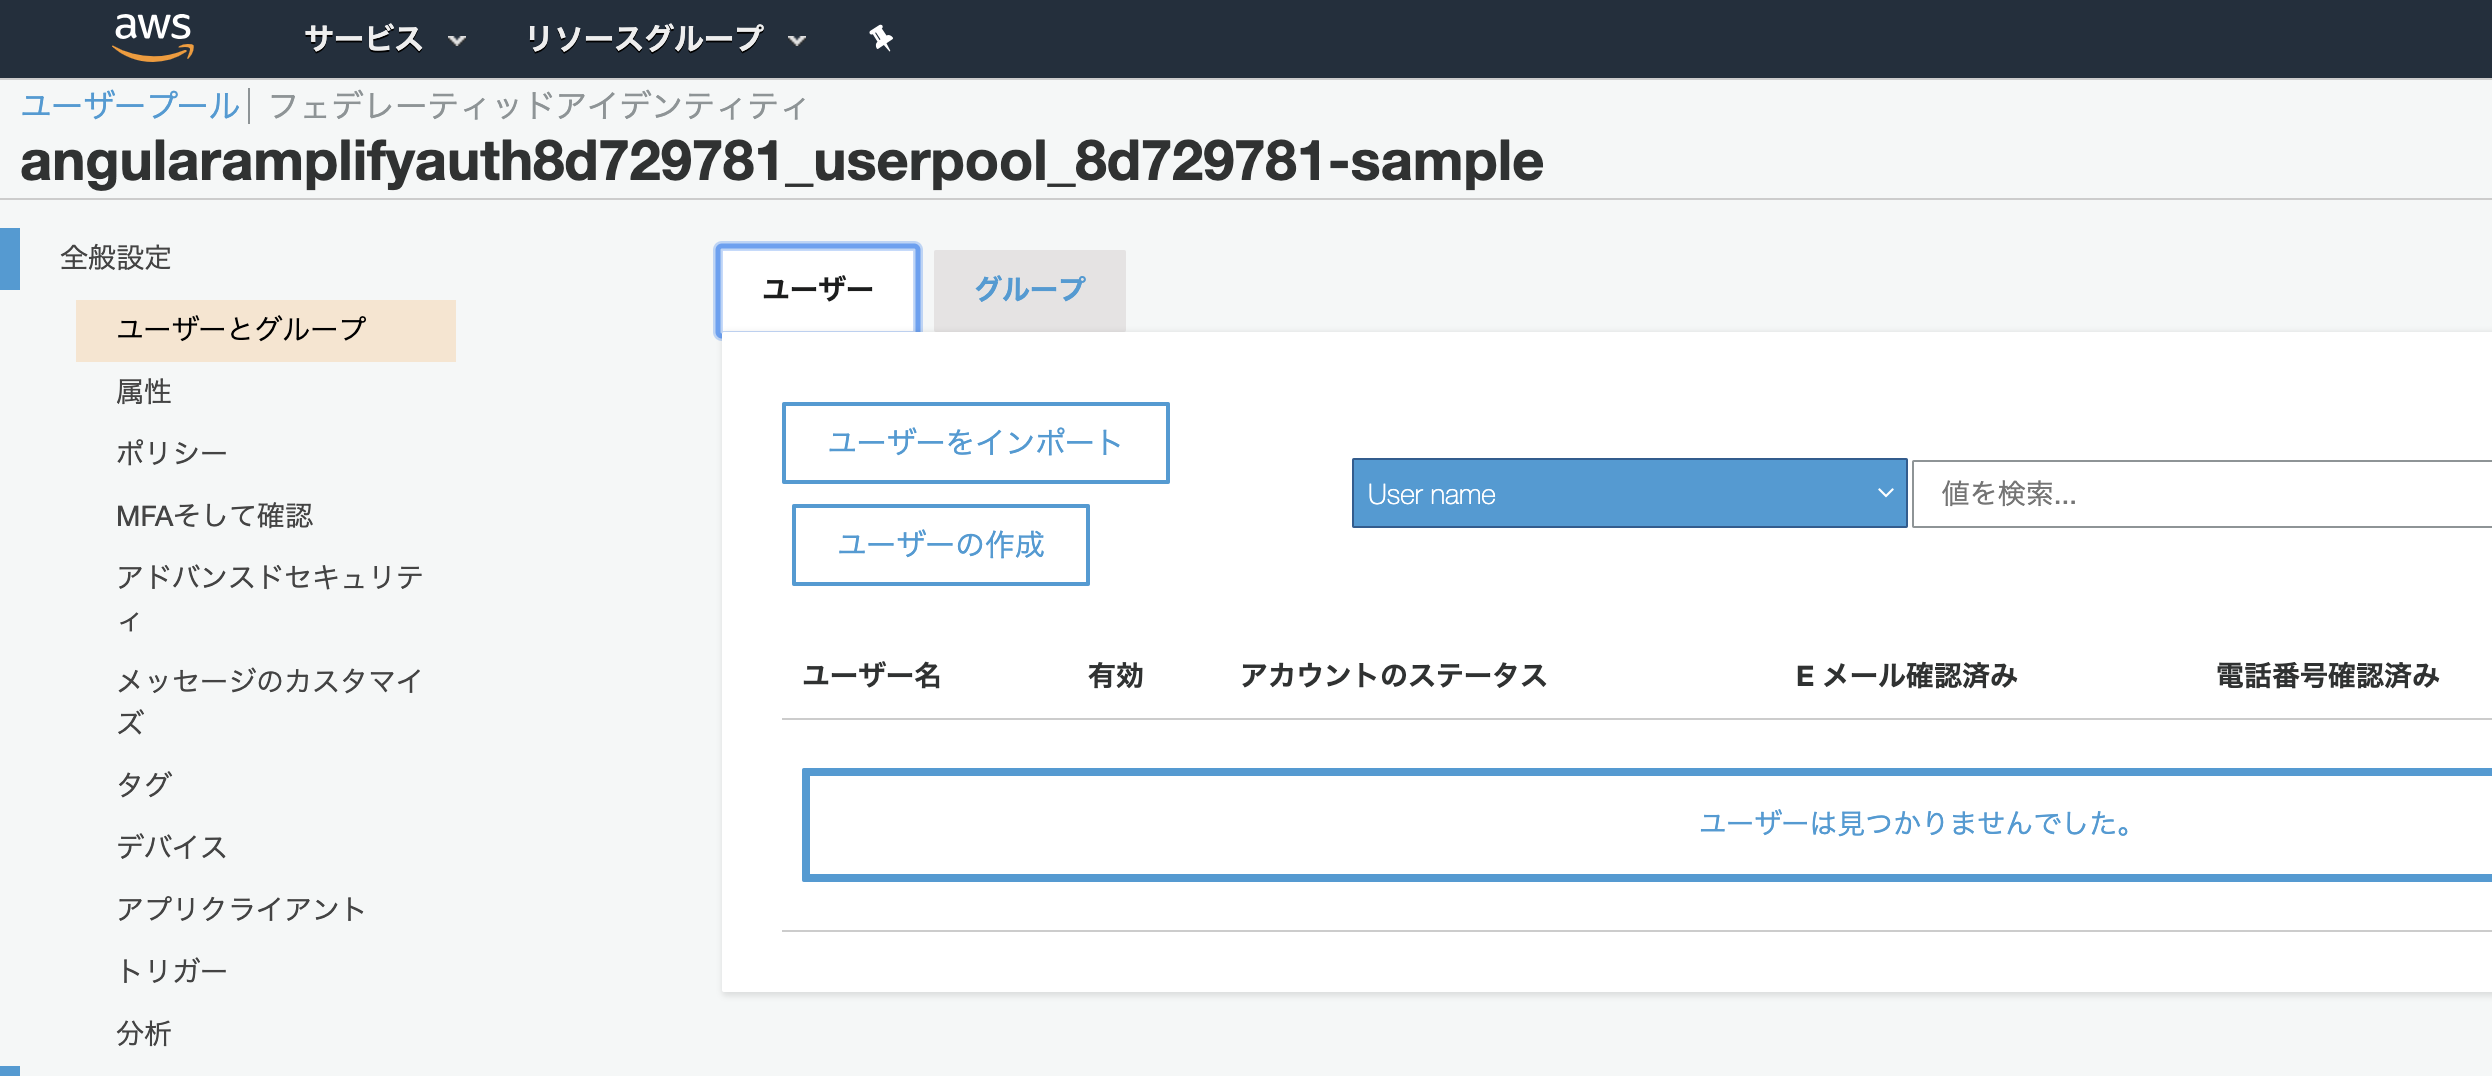
完了すると、Cognitoユーザープールが出来上がります。
これでAmplify側の設定は一旦終わりです。
Angularプロジェクトの設定
出来上がったCognitoをAngular側で使うための設定をします。
Amplifyの設定ファイルをインポート
import { enableProdMode } from '@angular/core';
import { platformBrowserDynamic } from '@angular/platform-browser-dynamic';

import { AppModule } from './app/app.module';
import { environment } from './environments/environment';

// ここから
import Amplify from 'aws-amplify';
import amplify from './aws-exports';
Amplify.configure(amplify);
// ここまで

if (environment.production) {
  enableProdMode();
}

platformBrowserDynamic().bootstrapModule(AppModule)
  .catch(err => console.error(err));
AmplifyModuleとAmplifyServiceの読み込み
import { BrowserModule } from '@angular/platform-browser';
import { NgModule } from '@angular/core';

import { AppRoutingModule } from './app-routing.module';
import { AppComponent } from './app.component';

import { AmplifyAngularModule, AmplifyService } from 'aws-amplify-angular'; // 追加


@NgModule({
  declarations: [
    AppComponent
  ],
  imports: [
    BrowserModule,
    AppRoutingModule,
    AmplifyAngularModule // 追加
  ],
  providers: [
    AmplifyService // 追加
  ],
  bootstrap: [AppComponent]
})
export class AppModule { }
コンパイル時にnodepackageを読み込む
typesにnodeを指定
{
  "extends": "./tsconfig.json",
  "compilerOptions": {
    "outDir": "./out-tsc/app",
    "types": ["node"]
  },
  "include": [
    "src/**/*.ts"
  ],
  "exclude": [
    "src/test.ts",
    "src/**/*.spec.ts"
  ]
}
Angular6以降の対応
src/polyfills.tsの最終行に(window as any).global = window;を追加
こちらはAmplifyに関わらず、AngularとNode.jsのアップデートで発生してる問題。
詳細はこちら
/***

 ~~~~~~~~~~[長いので割愛]

/***************************************************************************************************
 * APPLICATION IMPORTS
 */
(window as any).global = window;
実際の表示画面の書き換え
app.component.htmlに表示させるように、HTMLタグの書換とCSSの読み込みをします。
<!--すべて消して以下のタグのみに-->
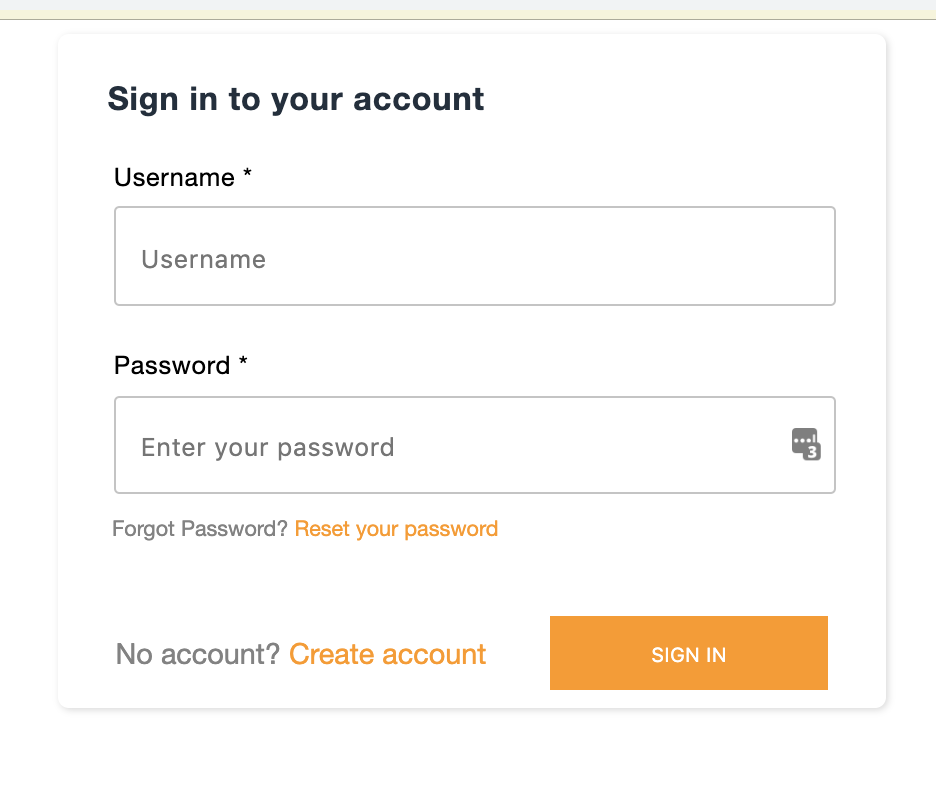
<amplify-authenticator></amplify-authenticator>
/* You can add global styles to this file, and also import other style files */
@import '~aws-amplify-angular/Theme.css';
動作確認
実際に動いている所を確認します。
以下のコマンドを実行してから、http://localhost:4200/を開きます。
yarn start
この画面が出たら完了です!


