2014年11月に心拍のビジュアライザーを作りました。
3,000人の方に体験して頂きました。その節はありがとうございます。
http://pulsephase.pfq.jp/
ということで、その時に使った心拍センサーとoFでの値の取得方法について書いていきます。
基本的にはArduinoでセンサーを繋いで、それをoFで拾うというシンプルな方法になります。
[01] 使用した心拍センサー
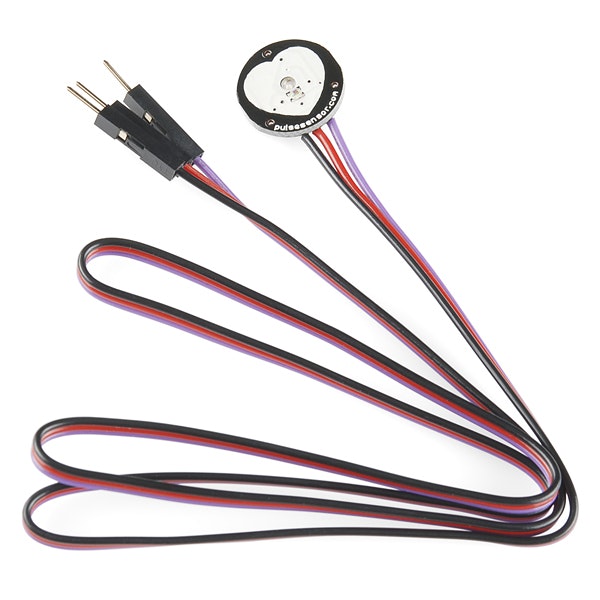
Pulse Sensor
heart-rate beats per minute for arduino
http://pulsesensor.com/
Arduinoに繋いで使えるシンプルな心拍センサーです。(この記事を書いてる時に知ったのですが、Kickstarterから出できたようですね)
日本からの場合はこちらで購入できます。
スイッチサイエンス
https://www.switch-science.com/catalog/1135/
中身は上の写真の通りセンサー本体と、指に巻き付けるテープやベルクロなどが入っています。
また、そのままだと基板が露出しているので、グルーガンで表面を覆う必要があります。
下記のビデオを参考に工作をして下さい。
http://pulsesensor.com/blogs/news/7406100-getting-started-video
僕の場合はグルーガンの芯に透明度の高いものを使いました。(下記リンク参照)
半透明のもので覆ってしまうと、LEDの光が遮られてしまうので精度が落ちます。
http://www.amazon.co.jp/dp/B006JZCRE2/
また、作業はキッチンペーパーの上で行うときれいにコーティング出来て良いです。
[02] 心拍センサーをArduinoに繋ぐ
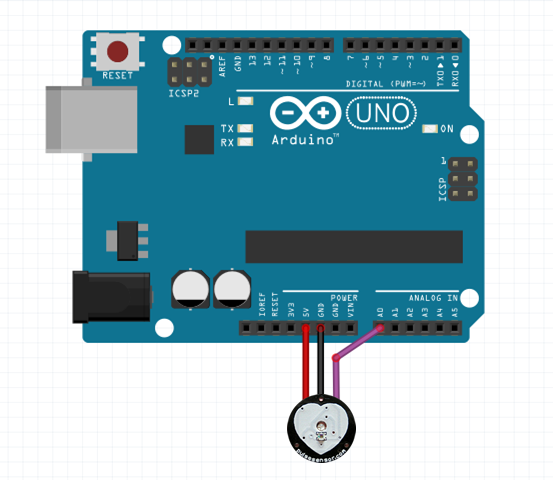
下図の用にArduinoにPulse Sensorを接続をします。
ArduinoはUNO(Rev3)を使用しました。
- 赤ライン: 5V
- 黒ライン: GND
- 紫ライン: A0
そして、下記ページから Latest Arduino code version 1.2 をDLします。
http://pulsesensor.com/pages/code-and-guide
この中にある、 PulseSensorAmped_Arduino_1dot2.ino をArduinoに書き込みます。
書き込みが成功したら、Pulse Sensorに指を押し付けます。(第一関節の間当たりが結構取れやすいです)
すると、Arduinoの'L'LEDが心拍数に合わせて点滅します。('L'LEDはArduinoにくっついてるDigital Pin側のちっこいLED)
ここまででArduino側のセッティングは完了です。
[03] oFで値を取得
まず、Arduino側の処理とoFでの処理の切り分けの説明。
先ほどの PulseSensorAmped_Arduino_1dot2.ino と同じフォルダに Interrupt.ino というファイルがあると思うのですが、この2つのファイルの中で心拍数(BPM)とIBI(インターバル)を計算しています。
以下の箇所でシリアルにデータを飛ばしているので、oFではこのデータを取得するだけでOKです。
void loop(){
  sendDataToProcessing('S', Signal);     // send Processing the raw Pulse Sensor data
  if (QS == true){                       // Quantified Self flag is true when arduino finds a heartbeat
        fadeRate = 255;                  // Set 'fadeRate' Variable to 255 to fade LED with pulse
        sendDataToProcessing('B',BPM);   // send heart rate with a 'B' prefix
        sendDataToProcessing('Q',IBI);   // send time between beats with a 'Q' prefix
        QS = false;                      // reset the Quantified Self flag for next time
     }

  ledFadeToBeat();

  delay(20);                             //  take a break
}

...

void sendDataToProcessing(char symbol, int data ){
    Serial.print(symbol);                // symbol prefix tells Processing what type of data is coming
    Serial.println(data);                // the data to send culminating in a carriage return
}
oFのコードはAddon化したので抜粋しますが、
-
- シリアルに接続
-
- Arduinoから飛んできたバイトデータをパースし取得
-
- 2を繰り返す
という手順でoFから心拍(BPM)やIBI(インターバル)が取得出来ます。
Addonはこちらからどうぞ。(変なところあったらこちらまでご連絡を https://twitter.com/h_hayashi )
https://github.com/hisahayashi/ofxArdPulseSensor
上記のAddonを読み込んだあと、下記の記述を追加すれば値が取得出来ると思います。
ただしMacでしか確認していないので、シリアルのポート取得らへんがWindowsだとコケる可能性があります。
# include "ofxArdPulseSensor.h"

...

public:
    ofxArdPulseSensor pSensor;
    PulseData pData;
//--------------------------------------------------------------
void ofApp::setup(){
ofSetFrameRate(60);
ofBackground(0,0,0);
pSensor.setup();
}
//--------------------------------------------------------------
void ofApp::update(){
pSensor.update();
pData = pSensor.getSensor();
}
//--------------------------------------------------------------
void ofApp::draw(){
bool bSetupArduino = pData.bSetupArduino;
int pulseVal = pData.pulseVal;
int bpm = pData.BPM;
int ibi = pData.IBI;
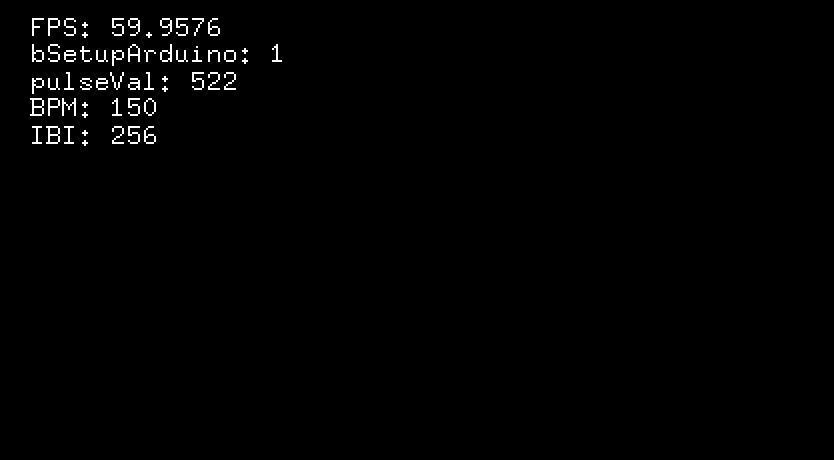
string msg = "";
msg += "FPS: " + ofToString(ofGetFrameRate()) + "\n";
msg += "bSetupArduino: " + ofToString(bSetupArduino) + "\n";
msg += "pulseVal: " + ofToString(pulseVal) + "\n";
msg += "BPM: " + ofToString(bpm) + "\n";
msg += "IBI: " + ofToString(ibi) + "\n";
ofSetColor( 255, 255 );
ofDrawBitmapString(msg, 20, 20);
}