背景
実務でReactも使っているようで、入社前のキャッチアップとしてToDoリストを作成します。
まずは基本的な部分の理解を深めたかったのでJavaScript+Reactで作っていこうと思います。
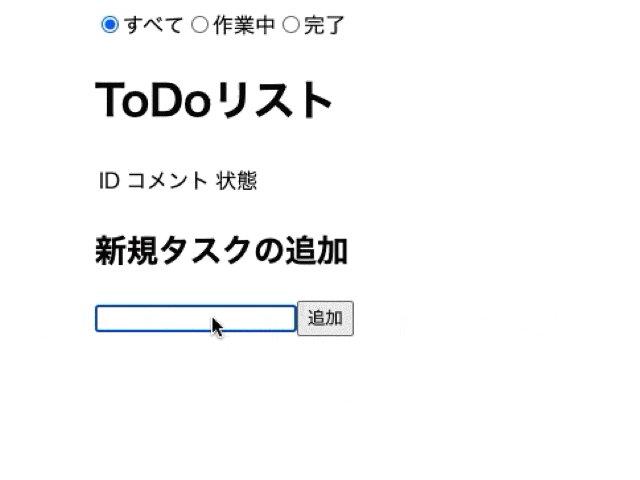
完成イメージ
今回はあくまでReactの学習に重きをおいているのでHTML/CSSは省きました。
機能としては4つ、それぞれ以下のように動きを区分しました。
1. タスク追加機能
- フォームに文字列を入力
- 追加ボタンをクリックするとタスク追加、追加後はフォームの値を""にする
- 追加すると、ID、コメント(=タスク名)、状態ボタン、削除ボタンを表示
- IDは0から始まる連番
- 入力後の状態は作業中
2. タスク削除機能
- 削除ボタンを押すと同じ行のタスクを削除
- 削除後はID更新
3. タスクの状態変更
- "作業中"のときにクリックすると"完了"に更新
- "完了"のときにクリックすると"作業中"に更新
4. タスクフィルター機能
- ラジオボタン
- 上のラジオボタンの選択状況を判定
- フィルターに応じて表示分け
例: 作業中のラジオボタンが選択されているときは状態が"作業中"のタスクのみ表示
0. 前提
ディレクトリ構造
ディレクトリ構造は以下の通り、最低限のものになりました。
- node_modules
- src
   |- App.jsx
   |- index.js
-package-lock.json
-package-json
今回いじるのはApp.jsxのみです!
その他のディレクトリについては学習中です、、、
JSXについて
jsxというJacaScriptの拡張を使ってReactの要素を生成できるので、React Docsの通りjsxを使って書いていきたいと思います。
JSXの特徴は以下の通り
- JavaScriptにHTMLを書ける
- マークアップとロジックを両方含む
コンポーネントという単位で管理するため - エラーや警告をより多く表示可能
- Reactにとって必須というわけではない(現状、使っている人が多いらしい)
プロジェクトの立ち上げ
プロジェクトの立ち上げ方は以下を参考にしてください。
React Docs -Create React App
npx create-react-app アプリ名
cd アプリ名
npm start
index.js
import React from "react";
import ReactDOM from "react-dom";

import { App } from "./App";

ReactDOM.render(<App />, document.getElementById("root"));
最後の行の<App />はApp.jsxのことです。
ReactDOM.render(element, document.getElementById("root));とすることでelement(コンポーネント)をレンダーすることができます。
1. タスク追加機能
import React, { useState } from "react";

export const App = () => {
 const [todoText, setTodoText] = useState(""); *1
 const [todoList, setNewTodoList] = React.useState([]);

 // インプットフォームの状態を管理
  const onChangeTodoText = (event) => {
    setTodoText(event.target.value);
  };

  // 追加ボタンを押すとタスクがToDoリストに追加される
  const onClickAdd = () => {
    if (todoText === "") return;
    const newTodo = {
      comment: todoText,
      status: "作業中"
    }
    // DOMが更新される
    todoList.push(newTodo);
    // 入力フォーム内を""にする
    setTodoText("");
  };


 return (
    <> *2
      <div className="task-area">
        <h1>ToDoリスト</h1>
        <table>
          <thead>
            <tr>
              <td >ID</td>
              <td>コメント</td>
              <td>状態</td>
            </tr>
          </thead>
          <tbody id="todo-body">
            {todoList.map((todo, index) => (
              <tr>
                <td>{index}</td>
                <td>{todo.comment}</td>
                <td><button>{todo.status}</button></td>
                <td><button>削除</button></td>
              </tr>
            ))}
          </tbody>
        </table>
      </div>

      <h2>新規タスクの追加</h2>
      <div className="add-todo">
        <input value={todoText} onChange={onChangeTodoText} />
        <button onClick={onClickAdd}>追加</button>
      </div>
    </>
  );
}
*1 stateとは現在の状態をあらわすもの。todoTextは現在の状態で、setTodoTextは更新する関数のこと。useState(初期値)`で初期値を設定している。
*2 returnのあとの<></>は、<React.Fragment></React.Fragment>の省略形です。
JSXでは一番上のノードを一つのタグで囲う必要がありますが、余計に
2. タスク削除機能
export const App = () => {
  // todoリスト
  const [todoText, setTodoText] = useState("");
  const [todoList, setNewTodoList] = React.useState([]);

// (略)

  // 削除
  const onClickDelete = (index) => {
    const deletedTodoList = [...todoList];
    deletedTodoList.splice(index, 1);
    setNewTodoList(deletedTodoList);
  };

  return (
    <>
    // (略)
        <h1>ToDoリスト</h1>
        <table>
          <thead>
            <tr>
              <td >ID</td>
              <td>コメント</td>
              <td>状態</td>
            </tr>
          </thead>
            <tbody id="todo-body">
              {todoList.map((todo, index) => (
               <tr>
                <td>{index}</td>
                <td>{todo.comment}</td>
                <td><button>{todo.status}</button></td>
                <td><button onClick={() => onClickDelete(index)}>削除</button></td>  // 関数を追加
               </tr>
              ))}
            </tbody>
        </table>
      </div>
    // (略)
    </>
  );
}
splice(n, c)
- 配列の要素を削除する
- 引数nは何番目の要素か
- 引数cはnから数えて何個か
onClick={() => 関数(引数)}
onClick={関数(引数)}だとレンダリング後すぐに関数が走ってしまうため、この形で回避
...配列名(スプレット構文)
まずは現在のToDoリストを...todoListというスプレット構文で変数に入れます。
削除機能とタスク状態の変更機能はこの配列を更新していく形で実装しています。
3. タスクの状態変更機能
タスクのステータスが"作業中"のときは"完了"に切り替え、
"完了"のときは"作業中"に切り替えるようにしたい。
export const App = () => {
  // (略)
  // statusの切り替え
  const onClickSwitch = (index) => {
    const switchTodoList = [...todoList];
    if (switchTodoList[index].status === "作業中") {
      switchTodoList[index].status = "完了";
    } else if (switchTodoList[index].status === "完了") {
      switchTodoList[index].status = "作業中";
    }
    setNewTodoList(switchTodoList);
  };

  return (
    <>
    // (略)
        <h1>ToDoリスト</h1>
        <table>
          <thead>
            <tr>
              <td >ID</td>
              <td>コメント</td>
              <td>状態</td>
            </tr>
          </thead>
            <tbody id="todo-body">
              {todoList.map((todo, index) => (
                <tr>
                  <td>{index}</td>
                  <td>{todo.comment}</td>
                  <td><button onClick={() => onClickSwitch(index)}>{todo.status}</button></td>
                  <td><button onClick={() => onClickDelete(index)}>削除</button></td>
                </tr>
              ))}
            </tbody>
          </table>
    // (略)
    </>
  );
}
削除機能と同じように現在の配列をスプレッド構文を使って新たな変数に格納します。
この配列の中にある'status'という要素の状態によって、"作業中"↔"完了"を切り替えるように実装
タスクフィルター機能
export const App = () => {
  // todoリスト
  const [todoText, setTodoText] = useState("");
  const [todoList, setNewTodoList] = React.useState([]);
  const [filteredTodoList, setFilteredTodoList] = React.useState([]);
  const [radio, setRadio] = React.useState('all');

  // ラジオボタン更新
  const handleChange = (event) => {
    setRadio(event.target.value);
    if (event.target.value === "incomplete") {
      const incompleteTodoList = [...todoList].filter((todo) => todo.status === "作業中");
      setFilteredTodoList(incompleteTodoList);
    } else if (event.target.value === "complete") {
      const completeTodoList = [...todoList].filter((todo) => todo.status === "完了");
      setFilteredTodoList(completeTodoList);
    } return
  }

  // (略)

  return (
    <>
      <div className="complete-area">
        <label>
          <input type="radio" value="all" onChange={handleChange} checked={radio === 'all'} />
          すべて
        </label>

        <label>
          <input type="radio" value="incomplete" onChange={handleChange} checked={radio === 'incomplete'} />
          作業中
        </label>

        <label>
          <input type="radio" value="complete" onChange={handleChange} checked={radio === 'complete'} />
          完了
        </label>


        <h1>ToDoリスト</h1>
        <table>
          <thead>
            <tr>
              <td >ID</td>
              <td>コメント</td>
              <td>状態</td>
            </tr>
          </thead>
            {
              radio === "all"?
              <tbody id="todo-body">
              {todoList.map((todo, index) => (
                <tr>
                  <td>{index}</td>
                  <td>{todo.comment}</td>
                  <td><button onClick={() => onClickSwitch(index)}>{todo.status}</button></td>
                  <td><button onClick={() => onClickDelete(index)}>削除</button></td>
                </tr>
              ))}
              </tbody>
              :
              <tbody id="todo-body">
              {filteredTodoList.map((todo, index) => (
                <tr>
                  <td>{index}</td>
                  <td>{todo.comment}</td>
                  <td><button onClick={() => onClickSwitch(index)}>{todo.status}</button></td>
                  <td><button onClick={() => onClickDelete(index)}>削除</button></td>
                </tr>
              ))}
              </tbody>
            }
        </table>
      </div>
    // (略)
    </>

  );
}
これが一番苦労しました。
大きく分けて以下の3つの機能を実装することにしました。
- ラジオボタン
handleChange関数でconst [radio, setRadio] = React.useState('all');で初期値を選択し、これでラジオボタンのstateを管理
setRadio(event.target.value);でstateを更新し、クリックされた箇所がチェックされるようにreturn側にもcheckedのプロパティを設定
onChangeというのは、JavaScriptにおけるchangeイベントのこと
-
上のラジオボタンの選択状況を判定
同じくhandleChange関数にラジオボタンの選択状況を判定できるよう、if (event.target.value === "incomplete")等を書きました。 -
フィルターに応じて表示分け
フィルターされた配列をconst [filteredTodoList, setFilteredTodoList] = React.useState([]);で管理
handleChange関数内でラジオボタンに応じてtodoListの要素が持つstatusでフィルターしました。
最後にradio === "all"? A : B;で表示分け。
完成コード
import React, { useState } from "react";
import "./style.css";


export const App = () => {
  // todoリスト
  const [todoText, setTodoText] = useState("");
  const [todoList, setNewTodoList] = React.useState([]);
  const [filteredTodoList, setFilteredTodoList] = React.useState([]);
  const [radio, setRadio] = React.useState('all');

  // ラジオボタン更新
  const handleChange = (event) => {
    setRadio(event.target.value);
    if (event.target.value === "incomplete") {
      const incompleteTodoList = [...todoList].filter((todo) => todo.status === "作業中");
      setFilteredTodoList(incompleteTodoList);
    } else if (event.target.value === "complete") {
      const completeTodoList = [...todoList].filter((todo) => todo.status === "完了");
      setFilteredTodoList(completeTodoList);
    } return
  }

  // インプットフォームの状態を管理
  const onChangeTodoText = (event) => {
    setTodoText(event.target.value);
  };

  // 追加ボタンを押すとタスクがToDoリストに追加される
  const onClickAdd = () => {
    if (todoText === "") return;
    const newTodo = {
      comment: todoText,
      status: "作業中"
    }
    // DOMが更新される
    todoList.push(newTodo);
    // 入力フォーム内を""にする
    setTodoText("");
  };

  // 削除
  const onClickDelete = (index) => {
    const deletedTodoList = [...todoList];
    deletedTodoList.splice(index, 1);
    setNewTodoList(deletedTodoList);
  };

  // statusの切り替え
  const onClickSwitch = (index) => {
    const switchTodoList = [...todoList];
    if (switchTodoList[index].status === "作業中") {
      switchTodoList[index].status = "完了";
    } else if (switchTodoList[index].status === "完了") {
      switchTodoList[index].status = "作業中";
    }
    setNewTodoList(switchTodoList);
  };

  return (
    <>
      <div className="complete-area">
        <label>
          <input type="radio" value="all" onChange={handleChange} checked={radio === 'all'} />
          すべて
        </label>

        <label>
          <input type="radio" value="incomplete" onChange={handleChange} checked={radio === 'incomplete'} />
          作業中
        </label>

        <label>
          <input type="radio" value="complete" onChange={handleChange} checked={radio === 'complete'} />
          完了
        </label>


        <h1>ToDoリスト</h1>
        <table>
          <thead>
            <tr>
              <td >ID</td>
              <td>コメント</td>
              <td>状態</td>
            </tr>
          </thead>

            {
              radio === "all"?
              <tbody id="todo-body">
              {todoList.map((todo, index) => (
                <tr>
                  <td>{index}</td>
                  <td>{todo.comment}</td>
                  <td><button onClick={() => onClickSwitch(index)}>{todo.status}</button></td>
                  <td><button onClick={() => onClickDelete(index)}>削除</button></td>
                </tr>
              ))}
              </tbody>
              :
              <tbody id="todo-body">
              {filteredTodoList.map((todo, index) => (
                <tr>
                  <td>{index}</td>
                  <td>{todo.comment}</td>
                  <td><button onClick={() => onClickSwitch(index)}>{todo.status}</button></td>
                  <td><button onClick={() => onClickDelete(index)}>削除</button></td>
                </tr>
              ))}
              </tbody>
            }

        </table>
      </div>

      <h2>新規タスクの追加</h2>
      <div className="add-todo">
        <input value={todoText} onChange={onChangeTodoText} />
        <button onClick={onClickAdd}>追加</button>
      </div>

    </>

  );
}
さいごに
JavaScriptだとgetElementByIdなどでターゲット要素を指定する必要がありますが、Reactだとevent.target.valueだけでターゲット要素を取得でき、生のJavaScriptで書くよりも圧倒的に簡単に書くことができました。
一方で、onChangeやonClickなど、JavaScriptの基本を抑えていないと理解できないこともあるので基本の大事さを再認識しました。
まだまだコンポーネント化などもできておらず改善点がたくさんありますが、実務でも使いこなせるよう継続して触ってみたいと思います。