はじめに
この記事は、ZOZOテクノロジーズ #4AdventCalendar2019の記事です。
昨日は@Kyou13さんの「開発合宿でVue.js+Firebase+Onsen UIで食事の栄養管理アプリを作った話」でした。
さて、iOSでは、アニメーション中に画面を移動するとアニメーションが停止してしまうのは既知の事実かと思います。
基本的には ViewController のライフサイクルに合わせて調整してあげれば良いですが、コンポーネント化されたカスタムViewに関しては、コンポーネント側で管理されている方が利用しやすいケースの方が多いと思います。
この記事では、コンポーネント化されたカスタムView側でアニメーションを管理するTipsを紹介します。
アニメーションが止まるタイミング
まず、アニメーションが止まるタイミングですが、次の2つが考えられます。
- アプリ内で画面を移動する
- アプリをバックグラウンドに移動させる
では、下記のカスタムViewを例に、それぞれの対応方法を見ていきます。
動作環境
- Xcode 10.3
- Swift 5
- iOS 12.4
import UIKit

class IndicatorView: UIView {
    private let strokeLayer = CAShapeLayer()
    private var isAnimating = false

    override init(frame: CGRect) {
        super.init(frame: frame)
        initialize()
    }

    required init?(coder: NSCoder) {
        super.init(coder: coder)
        initialize()
    }

    override func draw(_ rect: CGRect) {
        let lineWidth: CGFloat = 2.0
        let radius = (rect.width - lineWidth) / 2
        let startAngle = CGFloat.pi * (3 / 2)
        let endAngle = startAngle + CGFloat.pi * 2.0
        let path = UIBezierPath(
            arcCenter: CGPoint(x: rect.width / 2.0, y: rect.height / 2.0),
            radius: radius,
            startAngle: startAngle,
            endAngle: endAngle,
            clockwise: true
        )
        strokeLayer.frame = rect
        strokeLayer.path = path.cgPath
        strokeLayer.lineWidth = lineWidth
    }

    private func initialize() {
        strokeLayer.fillColor = UIColor.clear.cgColor
        strokeLayer.strokeColor = UIColor.blue.cgColor
        strokeLayer.strokeEnd = 0.8
        layer.insertSublayer(strokeLayer, at: 0)
    }

    private func addAnimation() {
        let animation = CABasicAnimation(keyPath: "transform.rotation")
        animation.fromValue = 0.0
        animation.toValue = 2.0 * Double.pi
        animation.duration = 1.0
        animation.repeatCount = .infinity
        animation.timingFunction = CAMediaTimingFunction(name: .linear)

        strokeLayer.add(animation, forKey: "rotate")
    }

    func startAnimating() {
        guard !isAnimating else { return }
        isAnimating = true
        addAnimation()
    }

    func stopAnimating() {
        guard isAnimating else { return }
        isAnimating = false
        strokeLayer.removeAllAnimations()
    }
}
アプリ内で画面を移動した場合
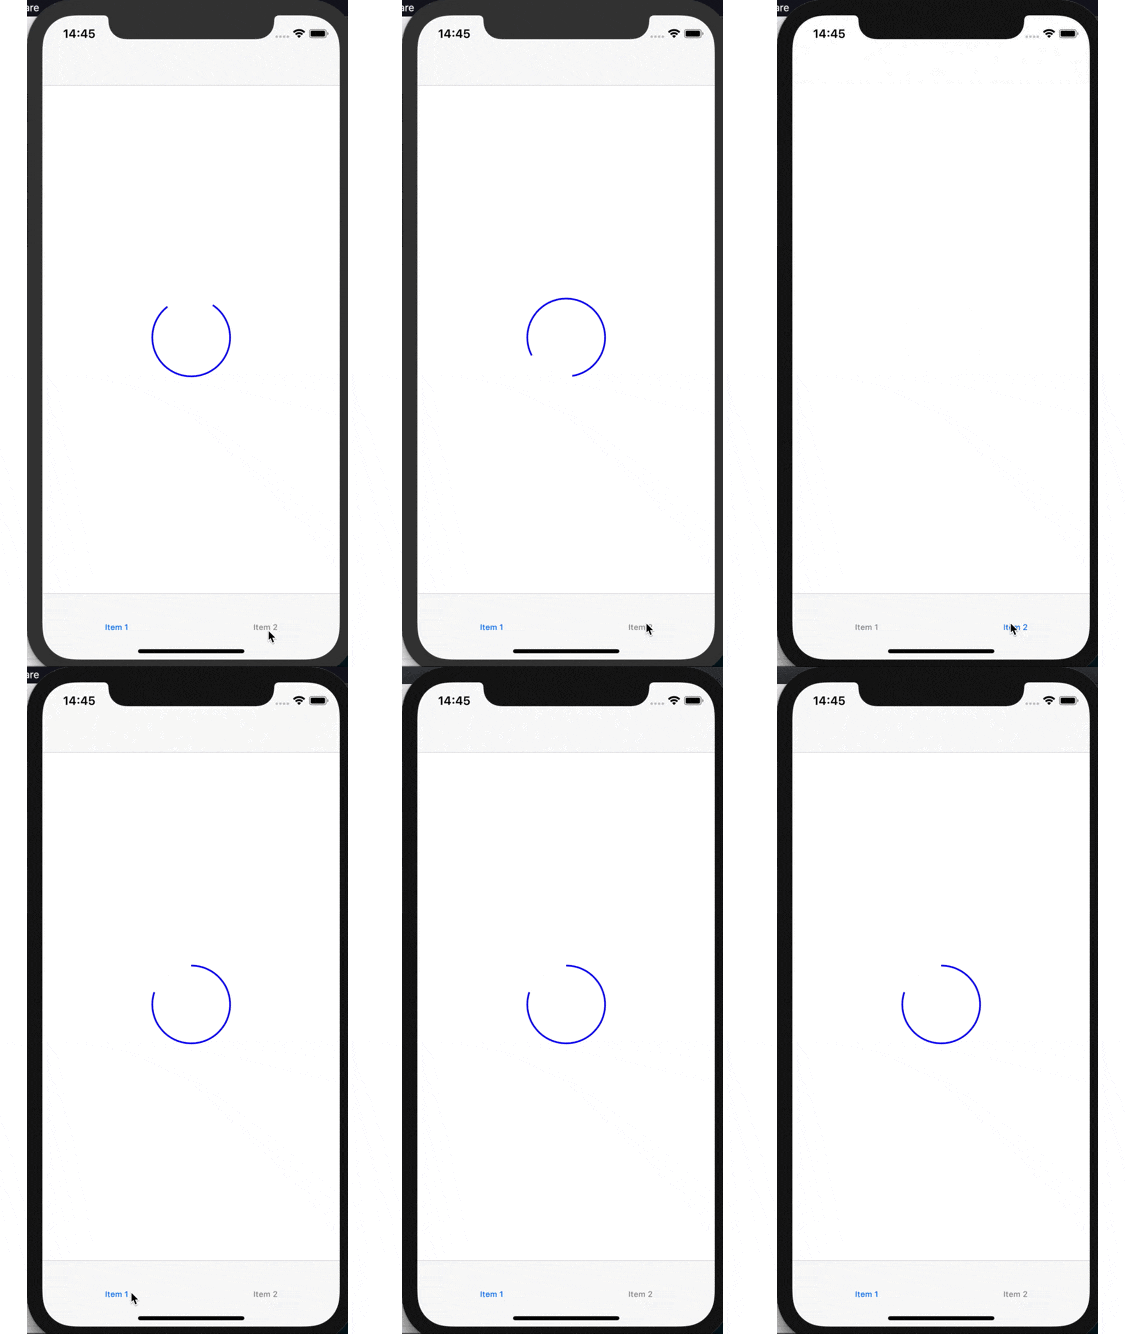
ナビゲーションのプッシュやタブ移動などがこちらの対象になります。
Before
画面に戻ってくるとアニメーションが止まっていることがわかります。
対応方法
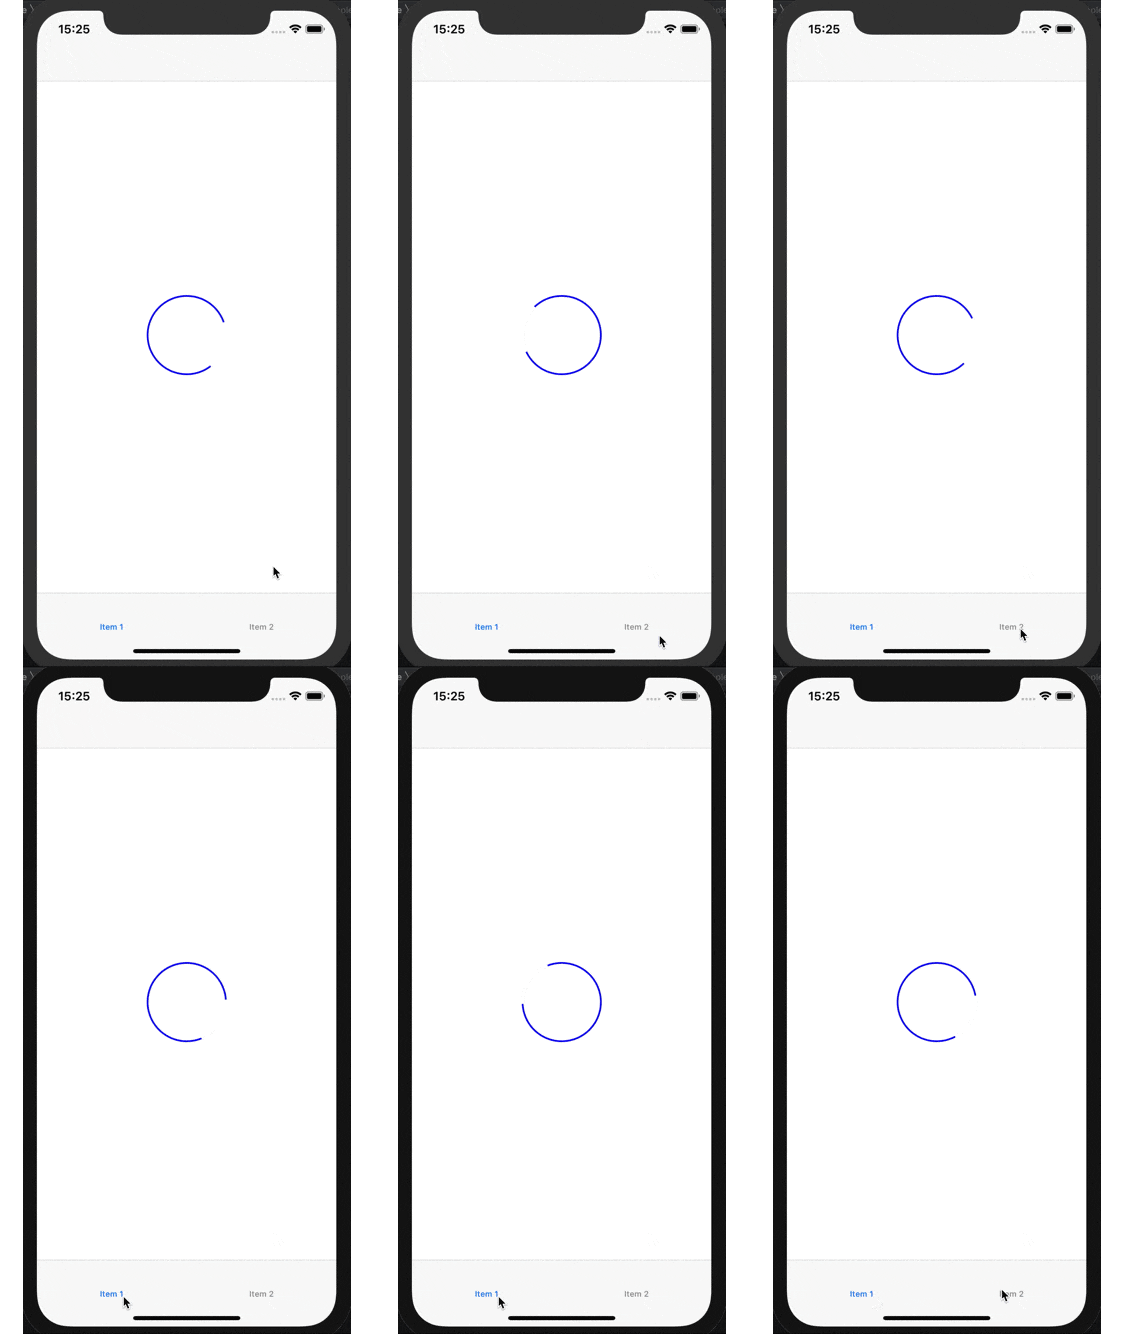
UIView の、 didMoveToWindow() メソッドを利用すると、 window が変わったタイミングでイベントを取得することができます。
画面に表示されるタイミングでは、 window プロパティに値が入っているので、そのタイミングでアニメーションを追加します。
    override func didMoveToWindow() {
        super.didMoveToWindow()

        if let _ = window, isAnimating {
            addAnimation()
        }
    }
After
アプリをバックグラウンドに移動させた場合
Before
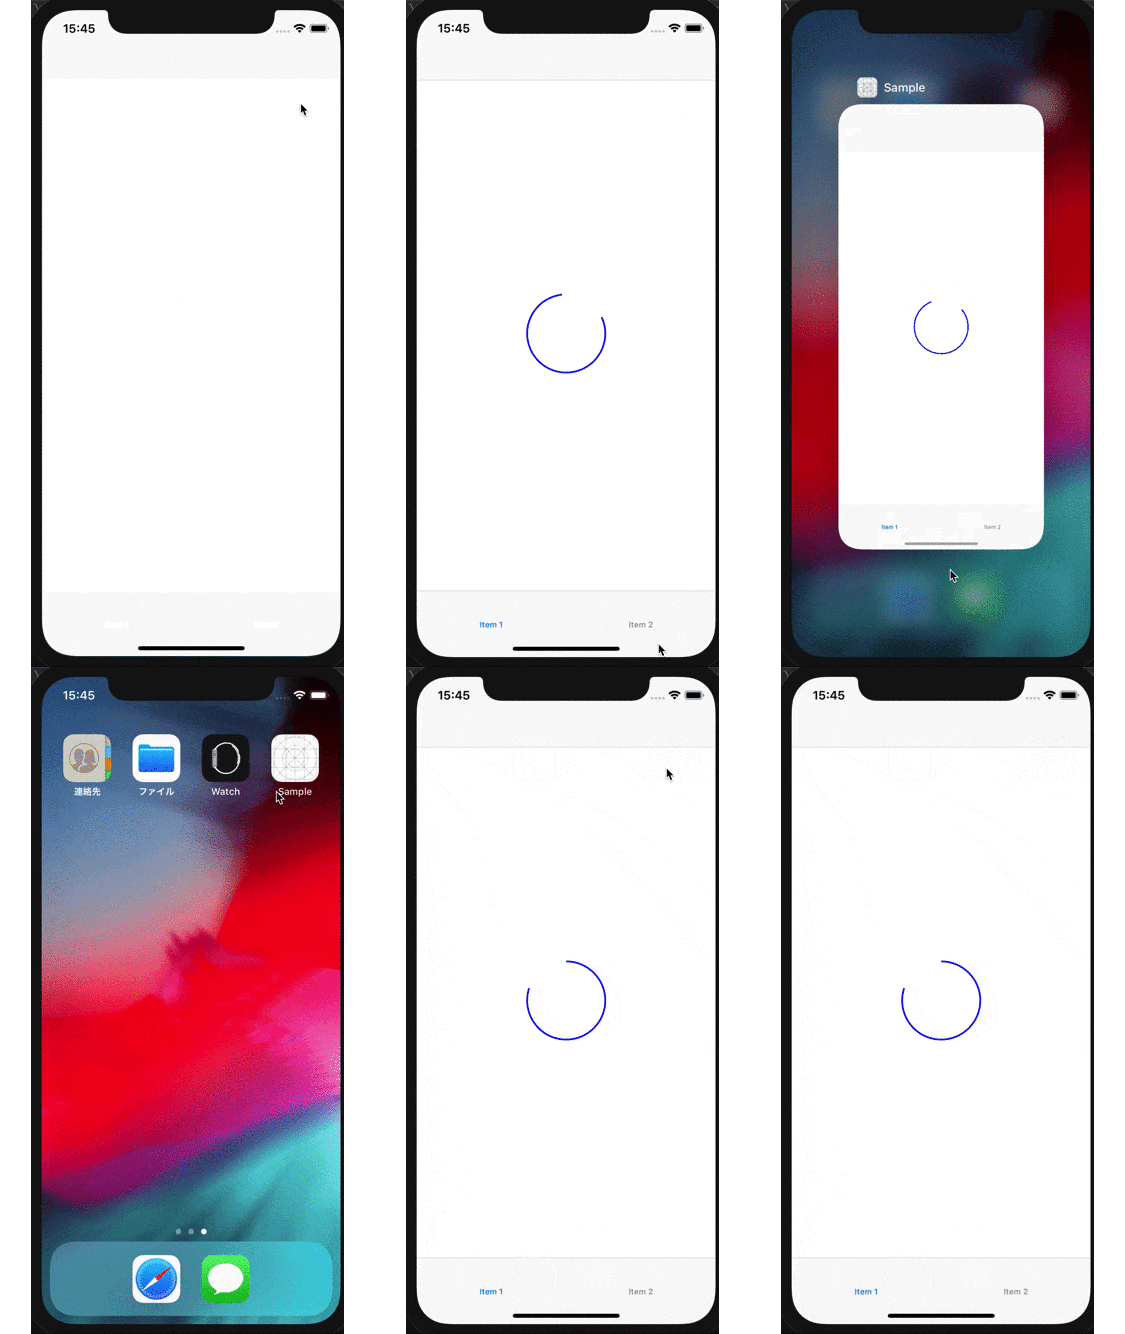
バックグラウンドに移動後、アプリに戻ってくるとアニメーションが止まっています。
対応方法
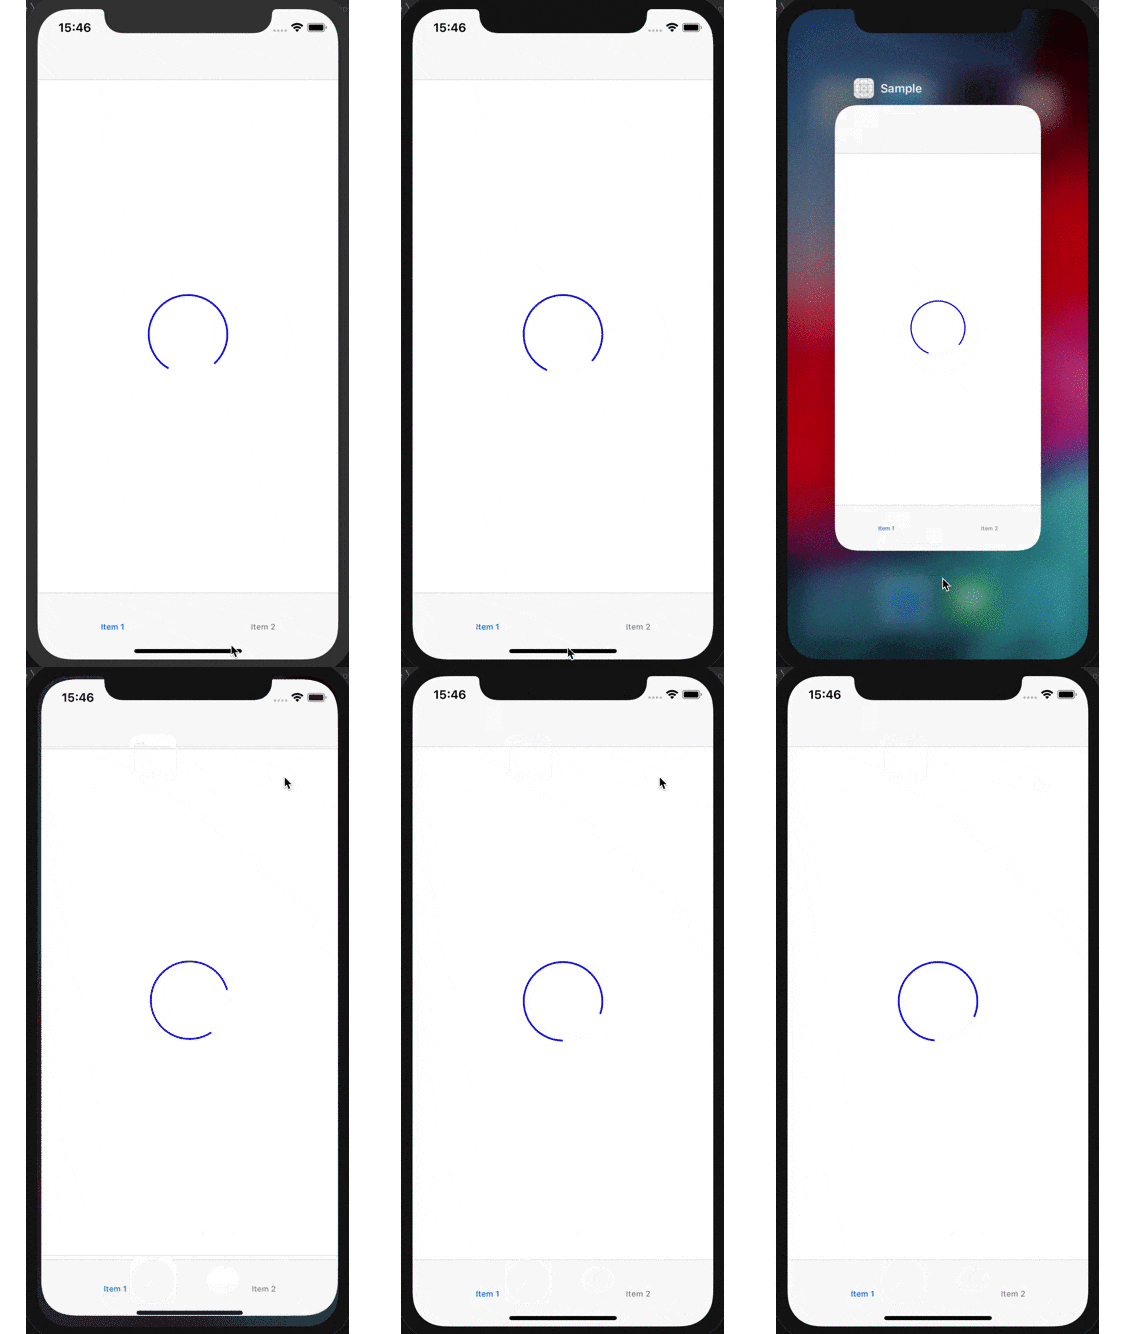
NotificationCenter を利用するとアプリがフォアグラウンドなったタイミングでイベントを取得できるので、そのタイミングでアニメーションを追加してあげます。
    private func initialize() {
        strokeLayer.fillColor = UIColor.clear.cgColor
        strokeLayer.strokeColor = UIColor.blue.cgColor
        strokeLayer.strokeEnd = 0.8
        layer.insertSublayer(strokeLayer, at: 0)

        NotificationCenter.default.addObserver(
            self,
            selector: #selector(handleEnterForeground),
            name: UIApplication.willEnterForegroundNotification,
            object: nil
        )
    }

    @objc func handleEnterForeground(_: Notification) {
        if let _ = window, isAnimating {
            addAnimation()
        }
    }
After
これでアプリを利用している間はアニメーションを止めることなく、動かし続けることができます。
最終的なコードです。
class IndicatorView: UIView {
    private let strokeLayer = CAShapeLayer()
    private var isAnimating = false

    override init(frame: CGRect) {
        super.init(frame: frame)
        initialize()
    }

    required init?(coder: NSCoder) {
        super.init(coder: coder)
        initialize()
    }

    override func draw(_ rect: CGRect) {
        let lineWidth: CGFloat = 2.0
        let radius = (rect.width - lineWidth) / 2
        let startAngle = CGFloat.pi * (3 / 2)
        let endAngle = startAngle + CGFloat.pi * 2.0
        let path = UIBezierPath(
            arcCenter: CGPoint(x: rect.width / 2.0, y: rect.height / 2.0),
            radius: radius,
            startAngle: startAngle,
            endAngle: endAngle,
            clockwise: true
        )
        strokeLayer.frame = rect
        strokeLayer.path = path.cgPath
        strokeLayer.lineWidth = lineWidth
    }

    override func didMoveToWindow() {
        super.didMoveToWindow()

        if let _ = window, isAnimating {
            addAnimation()
        }
    }

    private func initialize() {
        strokeLayer.fillColor = UIColor.clear.cgColor
        strokeLayer.strokeColor = UIColor.blue.cgColor
        strokeLayer.strokeEnd = 0.8
        layer.insertSublayer(strokeLayer, at: 0)

        NotificationCenter.default.addObserver(
            self,
            selector: #selector(handleEnterForeground),
            name: UIApplication.willEnterForegroundNotification,
            object: nil
        )
    }

    @objc func handleEnterForeground(_: Notification) {
        if let _ = window, isAnimating {
            addAnimation()
        }
    }

    private func addAnimation() {
        let animation = CABasicAnimation(keyPath: "transform.rotation")
        animation.fromValue = 0.0
        animation.toValue = 2.0 * Double.pi
        animation.duration = 1.0
        animation.repeatCount = .infinity
        animation.timingFunction = CAMediaTimingFunction(name: .linear)

        strokeLayer.add(animation, forKey: "rotate")
    }

    func startAnimating() {
        guard !isAnimating else { return }
        isAnimating = true
        addAnimation()
    }

    func stopAnimating() {
        guard isAnimating else { return }
        isAnimating = false
        strokeLayer.removeAllAnimations()
    }
}
さいごに
「動作はつづける、アニメーションは止めない!」
明日は@iiizukkeyiii さんです。
お楽しみに!


