この記事は ZOZO Advent Calendar 2022 カレンダーVol.6の18日目の記事です。
はじめに
今年のWWDCでもSwiftUIのアップデートがあり、SwiftUIは年々使いやすくなっている印象です。
SwiftUIが発表されてから3年ぐらい経ちますが、ちょっとしたサンプル実装ぐらいでしか触れてきませんでした。
他社の採用事例も増えてきており、流石に無視出来なくなってきているのでとてもマイペースではありますが、Apple MusicのUIをSwiftUIで実装してみています。
実装はまだ一部ですが、個人的なメモを残しているのでそれを公開したいと思います。
環境
Xcode 14.1
iOS 16+
メモ
modifierの順序は大事
Viewはstructだから。
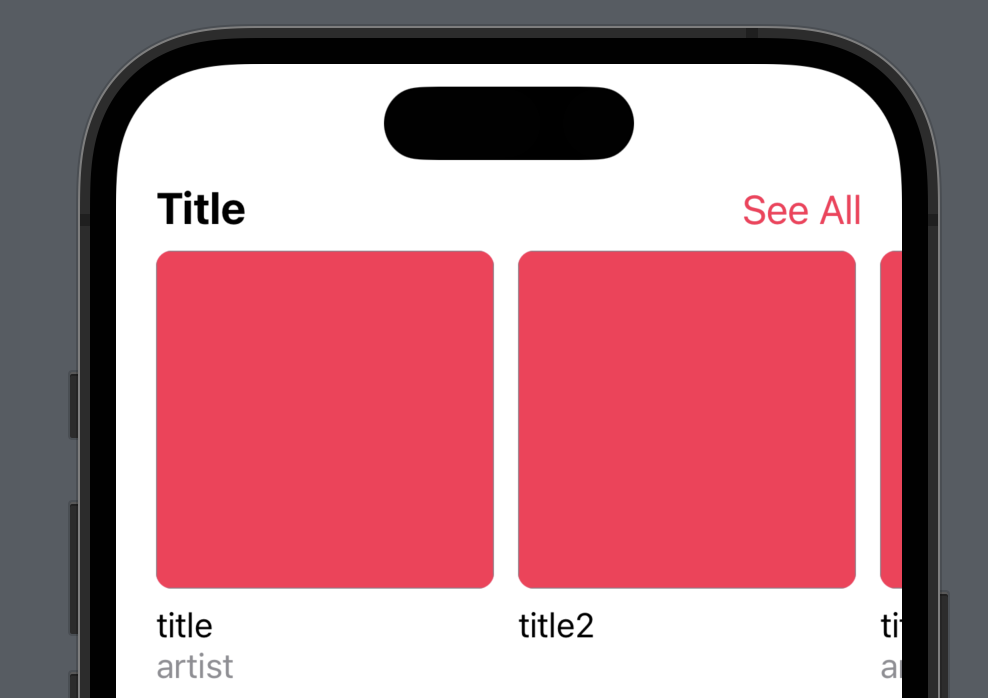
例えばボーダー込みで角丸にしたい時。border → cornerRadiusの順序。
Rectangle()
    .aspectRatio(1, contentMode: .fill)
    .foregroundColor(.pink)
    .border(.gray, width: 0.5)
    .cornerRadius(8)

逆だとborderが角丸にならない。
Rectangle()
    .aspectRatio(1, contentMode: .fill)
    .foregroundColor(.pink)
    .cornerRadius(8)
    .border(.gray, width: 0.5)

GeometryReader
コンテンツの位置とサイズを取得できるので、端末サイズの比率でViewのサイズを指定したいときに使える。
GeometryReader { proxy in
    LazyVStack(spacing: 0) {
        ...
    }
    .frame(width: proxy.size.width * 0.7)
}
ScrollViewのcontentInsets指定
配下のViewにpaddingを指定する。
ScrollView(.horizontal, showsIndicators: false) {
    LazyHStack(spacing: 12) {
		    ...
		}
		.padding(.horizontal, 20)
}
@ViewBuilder 属性を使ってViewを返す
条件によって返すViewを変えたい時などに使える。
@ViewBuilder
private func section(with section: State.Section, screenWidth: CGFloat) -> some View {
    switch section {
    case let .topPicks(state):
        MediumPortraitRectangleHGridSection(
            state: state,
            frameWidth: screenWidth,
            paddingHorizontal: paddingHorizontal
        )
トップレベル(View階層の)のVStackのspacingは0にするのが良さそう
階層が深くなると思わぬところにspacingが効いてしまうことがあった。
var body: some View {
    VStack(spacing: 0) {
        HStack(alignment: .center, spacing: 20) {
            VStack(alignment: .leading, spacing: 4) {
                HStack(spacing: 2) {
                    Image(systemName: "applelogo")
                        Text(state.headline)
                            .bold()
                        }
                        Text(state.subheadline)
                            .foregroundColor(.gray)
                    }
想定通り組めるなら余計なSpacerやpaddingが減るので使ったほうがいい。
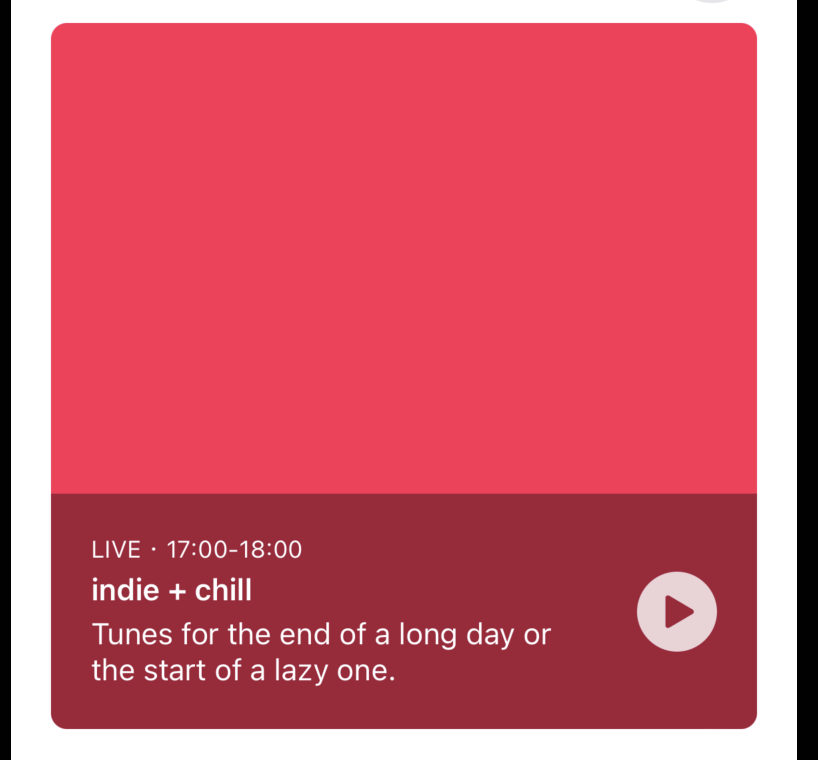
Viewを重ねるときはZStackを使う
ZStack(alignment: .leading) {
    Rectangle()
        .background(Color.black)
        .opacity(0.2)

    HStack(alignment: .center, spacing: 14) {
        VStack(alignment: .leading, spacing: 4) {
            Group {
                HStack(spacing: 0) {
                    Text("LIVE")
                    Text("・")
                    Text(state.timetable)
                }
                .font(.caption)

                Text(state.title)
                    .lineLimit(1)
                    .bold()

                Text(state.caption)
                    .lineLimit(nil)
                    .layoutPriority(1)
            }
            .font(.system(size: 15))
            .foregroundColor(.white)
        }
        Spacer()

        Image(systemName: "play.circle.fill")
            .resizable()
            .scaledToFit()
            .foregroundColor(.white)
            .frame(width: 40)
            .opacity(0.8)
    }
    .padding(.horizontal, 20)
}

異なるViewに同じmodifierを適応させたい場合はGroupが使える
Group {
	Text("1")
	Text("2")
}
.foregroundColor(.white)
.multilineTextAlignment(.center)
レイアウトを優先させたいViewにはlayoutPriorityを使う
例えばテキストが長くなった時、上のテキストを優先させたいなど。
Text("長い文字列")
	.layoutPriority(1)
Text("長い文字列")
テキストが短いときは上詰め、長いときは一杯にしたいとき Spacer(minLength: 0) を使う
VStack(alignment: .leading) {
	Text("長い文字列")
	// minLength指定がないとSpacerの分、文字が広がらない
	Spacer(minLength: 0)
}
テキストの複数行は .lineLimit(nil) を使う
Text(state.caption)
    .lineLimit(nil)
ライトグレーを使う
// UIColorを使う
Color(uiColor: .lightGray)
// systemGrayを使う
Color(.systemGray6)
ForEachでoffsetを使用する方法
ForEach(Array(array.enumerated()), id: \.element) { offset, element in
previewDevice
プレビューの端末指定ができる。(複数可)
struct BrowseView_Previews: PreviewProvider {
    static var previews: some View {
        BrowseView()
            .previewDevice(PreviewDevice(rawValue: "iPhone 14 Pro"))
            .previewDisplayName("iPhone 14 Pro")
    }
}

次のコマンドをターミナルで実行すると使用できる端末一覧が取得できる
xcrun simctl list devicetypes
LazyVStack内でListは使えない?
深ぼってないので深ぼる。
ScrollViewでページングができない
UIScrollViewに存在した isPagingEnabled と同等のものがない
Xcode 14からSFSymbolが検索できるようになって便利
所感
まだベストプラクティスがわからずこれでいいのかな?と悩むことも多い。大体VStack, HStackで組めてしまうので他のレイアウトを適材適所で使えるようになりたい。
おわりに
個人的メモなので整理されてなく、雑メモですみません。(メモにキャプチャはないので頑張って貼りました)
まだ初歩的なところですが今後もSwiftUIと触れ合う時間を作って仲良くなっていこうと思います。


