概要
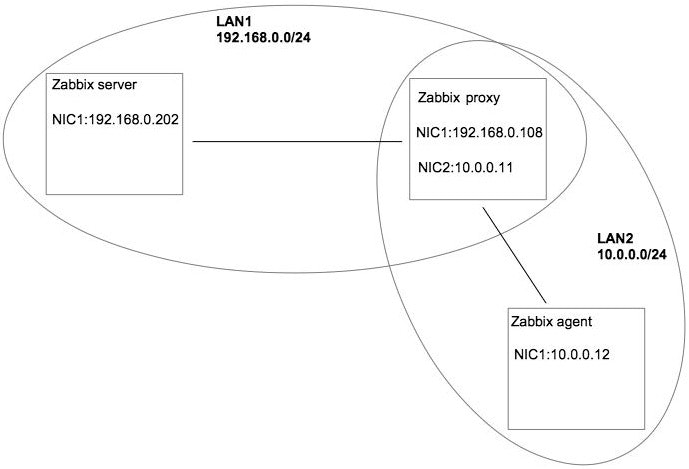
上図のようにLAN1の Zabbix server から Zabbix proxy を通して Zabbix agentの監視を行う
※本件は、設定の核心についてのみ考えるため、通信のセキュリティに関して関与しない、もしインターネットを通してServer<ー>Proxyの通信を行う場合には、ネットワーク機器などで適切な通信制限をする必要がある
インストールしてあるパッケージ
Zabbix server
- zabbix-server-mysql/zabbix-web/zabbix-web-japanese/zabbix-web-mysql/MariaDB/httpd/PHP
Zabbix proxy
- zabbix-proxy-mysql/MariaDB
Zabbix agent
- zabbix-agent
インストール
Zabbix server
- 通常のzabbix serverインストールと同様
Zabbix proxy
- webインターフェース(zabbix-web群)を除いたzabbix serverインストールとほぼ同じ
1. MariaDBをインストール
2. MariaDBにzabbix用のDB・ユーザーを追加
3. zabbix-proxyをインストール
4. MariaDBに initial schema と data を追加
(/usr/share/doc/zabbix-proxy-mysql-x.x.x/schema.sql.gzを実行する)
5. zabbix_proxy.confの変更
6. zabbix proxyの起動
Zabbix agent
- 通常のzabbix agentインストールと同様
セットアップの勘所
proxyのセットアップとproxy用の変更点
Zabbix server
※セキュリティ関係の通信設定は別の器機等で行うので、ここではzabbixで必要な設定しか行わない
また、通常のserverのセットアップからの変更点
### Option: ProxyConfigFrequency
#       How often Zabbix Server sends configuration data to a Zabbix Proxy in seconds.
#       This parameter is used only for proxies in the passive mode.
#
# Mandatory: no
# Range: 1-3600*24*7
# Default:
# ProxyConfigFrequency=3600

ProxyConfigFrequency=60
-
server側とproxy側の設定の同期頻度の設定の変更
デフォルトでは3600秒(1時間)となっており、設定や変更しても動作確認ができないので、ここでは60秒としている、本番運用する場合には、適切に変更する。
Zabbix Proxy
### Option: ProxyMode
#       Proxy operating mode.
#       0 - proxy in the active mode
#       1 - proxy in the passive mode
#
# Mandatory: no
# Default:
# ProxyMode=0
ProxyMode=1

### Option: Server
#       IP address (or hostname) of Zabbix server.
#       Active proxy will get configuration data from the server.
#       For a proxy in the passive mode this parameter will be ignored.
#
# Mandatory: yes (if ProxyMode is set to 0)
# Default:
# Server=

Server=192.168.0.202

### Option: DBHost
#       Database host name.
#       If set to localhost, socket is used for MySQL.
#       If set to empty string, socket is used for PostgreSQL.
#
# Mandatory: no
# Default:
DBHost=localhost

### Option: DBName
#       Database name.
#       For SQLite3 path to database file must be provided. DBUser and DBPassword are ignored.
#       Warning: do not attempt to use the same database Zabbix server is using.
#
# Mandatory: yes
# Default:
# DBName=

DBName=zabbix

### Option: DBUser
#       Database user. Ignored for SQLite.
#
# Default:
# DBUser=

DBUser=zabbix

### Option: DBPassword
#       Database password. Ignored for SQLite.
#       Comment this line if no password is used.
#
# Mandatory: no
# Default:
# DBPassword=

DBPassword=zabbix

### Option: DBSocket
#       Path to MySQL socket.
#
# Mandatory: no
# Default:
DBSocket=/tmp/mysql.sock

### Option: ConfigFrequency
#       How often proxy retrieves configuration data from Zabbix Server in seconds.
#       For a proxy in the passive mode this parameter will be ignored.
#
# Mandatory: no
# Range: 1-3600*24*7
# Default:
# ConfigFrequency=3600
ConfigFrequency=60
-
ProxyMode
zabbix proxy プロセスの動作モード、DNS等での名前解決を使わず、IP通信で行うので、ここでは passive mode の 1 とする -
Server
zabbix serverに向ける、ここでは zabbix server のIPアドレス 192.168.0.202 -
DBHost
zabbix proxy専用のDB(zabbix serverとは別DB)に向ける、ここでは localhost -
DBName
zabbix proxy専用のDB(zabbix serverとは別DB)に向ける、ここでは zabbix -
DBPassword
zabbix proxy専用のDB(zabbix serverとは別DB)に向ける、ここでは zabbix -
DBSocket
zabbix proxy専用のDB(zabbix serverとは別DB)に向ける、ここでは /tmp/mysql.sock -
ConfigFrequency
zabbix proxy と zabbix server の設定同期頻度の設定(zabbix serverと 合わせる)、ここでは 60秒
Zabbix Agent
##### Passive checks related

### Option: Server
#       List of comma delimited IP addresses (or hostnames) of Zabbix servers.
#       Incoming connections will be accepted only from the hosts listed here.
#       If IPv6 support is enabled then '127.0.0.1', '::127.0.0.1', '::ffff:127.0.0.1' are treated equally.
#
# Mandatory: no
# Default:
# Server=

Server=10.0.0.11
-
Server
zabbix proxyに向ける、ここでは zabbix proxy のIPアドレス 10.0.0.11
WEBインタフェース側での設定
通常通り、192.168.0.202/zabbix/に ブラウザでアクセスする
- proxyの設定
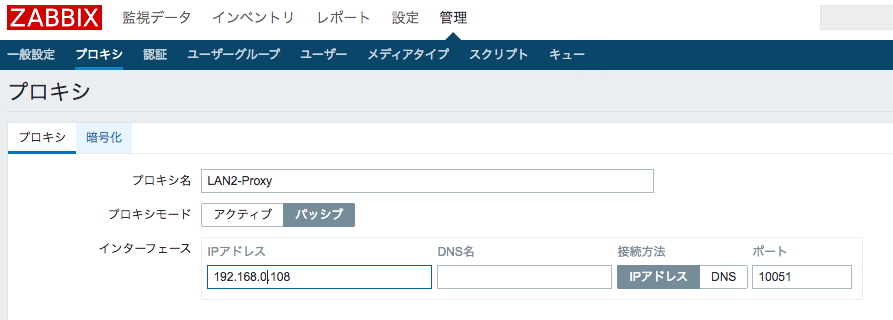
パッシブでserver側から通信ができるproxyのIPを設定
- ホストの設定
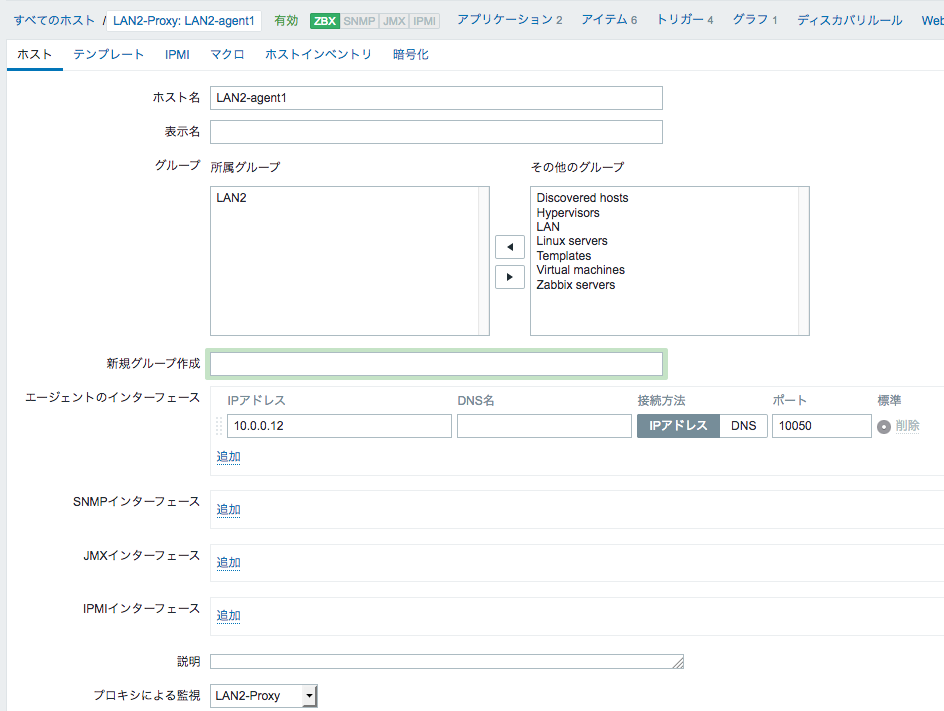
proxyから通信できるIPを設定、プロキシによる監視で使用するプロキシを設定する
- テンプレートの設定
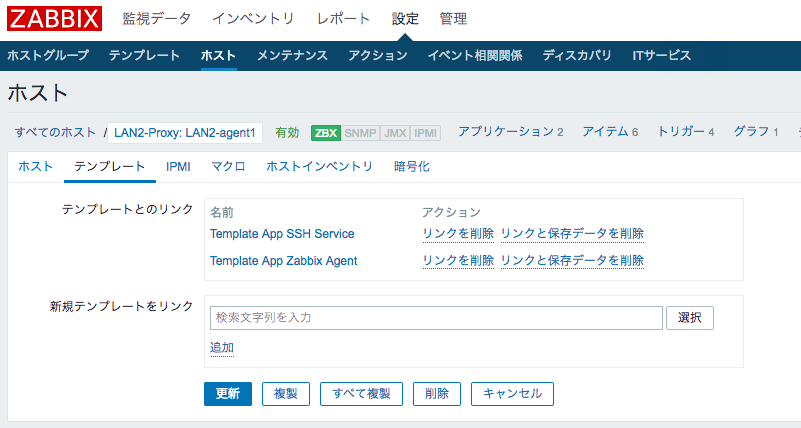
プロキシを通した監視でも、通常のサーバーからの監視と同じテンプレートでよい
- アイテムの設定

プロキシを通した監視でも、通常のサーバーからの監視と同じアイテムでよい、ここではDisk周りサンプルとして作成している
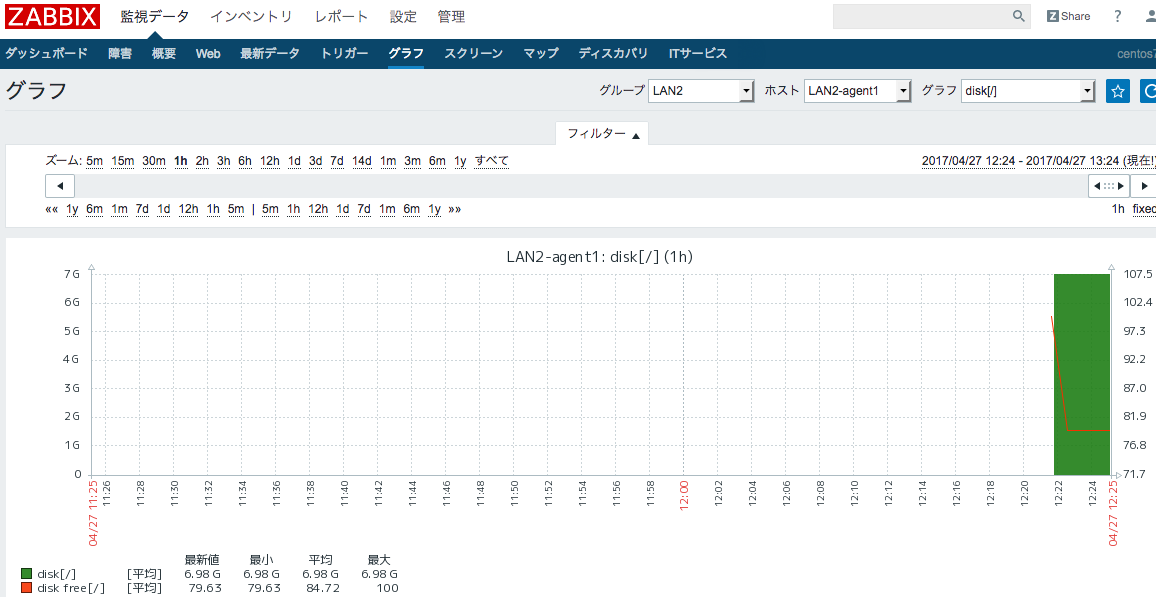
- グラフの設定
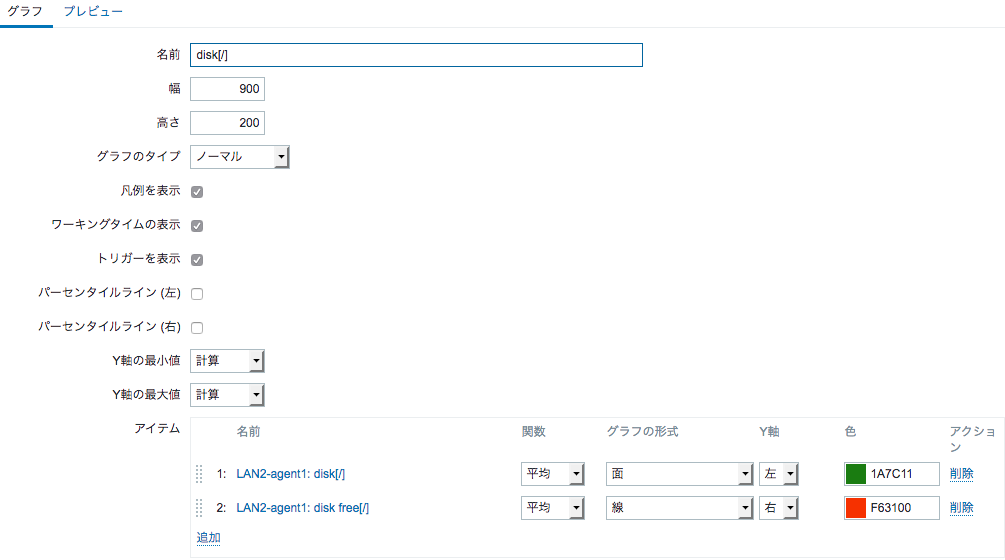
通常のグラフの作成
- グラフのスクリーンショット