はじめに
Leafletとは
Leaflet とは、インタラクティブな地図をWebページに埋め込むためオープンソースJSライブラリです。非常に軽量で、基本的な機能であれば実現できるのが特徴です。
ただし 「ヘビーユースは禁止」されているなど、タイル利用規約が規定されているので、ご利用の際はそれに従うようにしてください。
環境
Ruby 3.1.4
Rails 7.1.0
importmap + stimulus
実装
Gemfileの追加
gem 'leaflet-rails'
gem 'importmap-rails'
importmapの設定
下記コマンドでimportmapに関連するファイルを生成します。
./bin/rails importmap:install
変更されたファイル
//= link_tree ../images
//= link_directory ../stylesheets .css
+ //= link_tree ../../javascript .js
+ //= link_tree ../../../vendor/javascript .js
+ // Configure your import map in config/importmap.rb. Read more: https://github.com/rails/importmap-rails
<!DOCTYPE html>
<html>
  <head>
    <title>Mapping</title>
    <meta name="viewport" content="width=device-width,initial-scale=1">
    <%= csrf_meta_tags %>
    <%= csp_meta_tag %>

    <%= stylesheet_link_tag "application", "data-turbo-track": "reload" %>
+    <%= javascript_importmap_tags %>
  </head>

  <body>
    <%= yield %>
  </body>
</html>
+ #!/usr/bin/env ruby
+
+ require_relative "../config/application"
+ require "importmap/commands"
+ # Pin npm packages by running ./bin/importmap
+
+ pin "application", preload: true
stimulusの設定
こちらはimportmapを使用する際の環境構築の手順がREADMEにまとめられているため、それ通りに設定していきます。
具体的には、下記コマンドでstimulusに関連するファイルを生成します。
./bin/rails stimulus:install
変更されたファイル
// Configure your import map in config/importmap.rb. Read more: https://github.com/rails/importmap-rails
+ import "controllers"
+ import { Application } from "@hotwired/stimulus"
+
+ const application = Application.start()
+
+ // Configure Stimulus development experience
+ application.debug = false
+ window.Stimulus   = application
+
+ export { application }
+ // Import and register all your controllers from the importmap under controllers/*
+
+ import { application } from "controllers/application"
+
+ // Eager load all controllers defined in the import map under + controllers/**/*_controller
+ import { eagerLoadControllersFrom } from "@hotwired/stimulus-loading"
+ eagerLoadControllersFrom("controllers", application)
+
+ // Lazy load controllers as they appear in the DOM (remember not to preload controllers in import map!)
+ // import { lazyLoadControllersFrom } from "@hotwired/stimulus-loading"
+ // lazyLoadControllersFrom("controllers", application)
+ import { Controller } from "@hotwired/stimulus"
+
+ export default class extends Controller {
+   connect() {
+     this.element.textContent = "Hello World!"
+   }
+ }
# Pin npm packages by running ./bin/importmap

pin "application", preload: true
+ pin "@hotwired/stimulus", to: "stimulus.min.js", preload: true
+ pin "@hotwired/stimulus-loading", to: "stimulus-loading.js", preload: true
+ pin_all_from "app/javascript/controllers", under: "controllers"
上記でimportmap + stimulusの設定は完了になります。
Leafletの設定
それでは本題のLeafletの設定に入っていきます。
まずは下記コマンドで、LeafletとLeaflet-cssをピン留めします。
./bin/importmap pin leaflet
./bin/importmap pin leaflet-css
変更されたファイル
# Pin npm packages by running ./bin/importmap

pin "application", preload: true
pin "@hotwired/stimulus", to: "stimulus.min.js", preload: true
pin "@hotwired/stimulus-loading", to: "stimulus-loading.js", preload: true
pin_all_from "app/javascript/controllers", under: "controllers"
+ pin "leaflet", to: "https://ga.jspm.io/npm:leaflet@1.9.4/dist/leaflet-src.js"
+ pin "leaflet-css", to: "https://ga.jspm.io/npm:leaflet-css@0.1.0/dist/leaflet.css.min.js"
これでLeafletを使用することができるようになります。
stimulus controller作成
次にstimulusのcontrollerを作成していきます。
中ではライフサイクルコールバックメソッドの、connect() disconnect()を定義します。
import { Controller } from "@hotwired/stimulus";
import "leaflet-css";
export default class extends Controller {
static targets = ["placeholder"]
connect() {
import("leaflet").then(L => {
this.map = L.map(this.placeholderTarget).setView([35.694004, 139.753632], 10);
L.tileLayer('https://{s}.tile.openstreetmap.org/{z}/{x}/{y}.png', {
maxZoom: 20,
attribution: '© <a href="https://www.openstreetmap.org/copyright">OpenStreetMap</a> contributors'
}).addTo(this.map);
});
}
disconnect() {
this.map.remove()
}
}
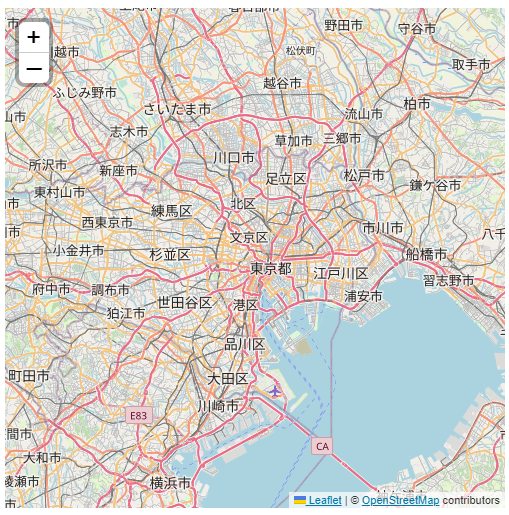
最後に下記コードをviewに組み込むことで、地図を表示することができます。
<div class="leaflet-container" data-controller="map" data-target="map.placeholder" style="height: 500px; width: 500px;"></div>
参考
