はじめに
社内でTailwindCSSとStorybookの紹介があり、
使える案件があれば導入してみたいなあと思っていました。
実案件に導入する前にまずはどんな風に使うか触ってみたかったので、
こちらも実案件では使ったことがないSvelteKitのプロジェクトに導入してみました。
本記事の対象者
- とりあえず全部使ったことないから触ってみたい
- TailwindCSSとStorybook気になってるけどどうやってはじめるのかわかんない
- SvelteKitで作成したプロジェクトにTailwindCSSとStorybookを導入したい
各ツールの詳しい使い方や解説は本記事ではしません(そこまで理解できてない)。
参考記事
実行環境
- macOS Ventura
13.2.1 - Node.js
20.6.0
パッケージマネージャーはお好みでどうぞ。今回はnpmです。
プロジェクトの作成
公式の手順通りにSvelteKitのプロジェクトを作成します。
プロジェクトの初期設定を対話形式で聞かれますが、お試しなのでなんでもいいです。
npm create svelte@latest my-app
cd my-app
npm install
npm run dev
今回はテンプレートをSkeleten projectにしたので、npm run devで以下の画面が立ち上がればOKです。
TailwindCSSの導入
作成したプロジェクトにTailwindCSSをインストールします。
TailwindCSSの公式手順もありますが、
Svelte Addというものを使うと諸々の設定を自動でしてくれるそうなので、こちらでインストールします。
設定内容を追いたい場合は公式手順通りにインストールしてください。
npx svelte-add@latest tailwindcss
# 依存関係をアップデートする
npm install
インストールできたので使ってみます。
src/routes/+page.svelteにボタンを追加します。
<button class="primary mx-8 my-8"> ボタン </button>

<style lang="postcss">
  .primary {
    @apply bg-blue-500 hover:bg-blue-700 text-white font-bold py-2 px-4 rounded;
  }
</style>
ちゃんとスタイルが適用されていますね。
TailwindCSSはHTMLの中にクラスでスタイルを書いていくものですが、@applyを使うことでクラスとしてまとめることができます。
ただし使いすぎるとTailwindCSSの良さを損なうので、用途を絞って使うのが良さそうです。
上記コードのprimaryは自前クラス、mx-8 my-8はTailwindCSSで用意されたクラスです。
今回はボタンをコンポーネント化して、propsでprimary warning(後で作る)等のクラス名を受け取るようにしたいので、@applyを利用します。
Storybookの導入
Storybookの公式手順通りに、プロジェクトのルートディレクトリで以下のコマンドを実行します。
npx storybook@latest init
以下の画像のメッセージまで出ればインストールは完了です。
Ctrl + Cで終了し、npm run storybookを実行して以下の画面が立ち上がればOKです。
Storybookのテンプレートが作られています。
各ツールのインストールはこれで終了です。
コンポーネントの登録
先程のボタンをコンポーネントとして分割して、Storybookに登録します。
Nuxt.jsだとcomponentsフォルダにvueファイルを置いていきますが、
SvelteKitの場合はコンポーネントの置き場が決められているわけではない?のでsrc/lib配下にcomponentsフォルダを作成し、Button.svelteを作成します。
color style sizeをpropsで受け取るようにします。
<script>
  /** @type {'primary' | 'secondary' | 'warning' | 'danger'} */
  export let color = "primary"

  /** @type {'default' | 'pill' | 'outline'} */
  export let style = "default"

  /** @type {'small' | 'medium' | 'large'} */
  export let size = "medium"
</script>

<button class={[color, style, `button--${size}`, "shadow-none"].join(" ")}>
  ボタン
</button>

<style lang="postcss">
  .primary {
    @apply bg-blue-500 text-blue-500 hover:bg-blue-600 border border-blue-500 hover:border-transparent;
  }

  .secondary {
    @apply bg-sky-400 text-sky-400 hover:bg-sky-500 border border-sky-400 hover:border-transparent;
  }

  .warning {
    @apply bg-orange-500 text-orange-500 hover:bg-orange-600 border border-orange-500 hover:border-transparent;
  }

  .danger {
    @apply bg-red-500 text-red-500 hover:bg-red-600 border border-red-500 hover:border-transparent;
  }

  .default {
    @apply text-white font-bold rounded;
  }

  .pill {
    @apply text-white font-bold rounded-full;
  }

  .outline {
    @apply bg-transparent font-semibold hover:text-white rounded;
  }

  .button--small {
    @apply text-sm py-1 px-2;
  }
  .button--medium {
    @apply text-base py-2 px-4;
  }
  .button--large {
    @apply text-lg py-3 px-6;
  }
</style>
呼び出し側
<script>
  import Button from "$lib/components/Button.svelte"
</script>

<div class="mx-8 my-8">
  <Button color="primary" style="outline" size="large" />
</div>
こんな感じで表示されます。
次にこのボタンをStorybookに登録します。
インストール時にsrc配下にstoriesフォルダが作成されています。
この中の*.stories.jsに設定を書いていきます。
src/lib/components/Button.svelteを新しく登録したいので、元々あるButton.stories.js以外は全て削除します。
そしてButton.stories.jsを次のように書き換えます。
import Button from "$lib/components/Button.svelte"

// More on how to set up stories at: https://storybook.js.org/docs/svelte/writing-stories/introduction
export default {
  title: "Example/Button",
  component: Button,
  tags: ["autodocs"],
  argTypes: {
    color: {
      control: {type: "select"},
      options: ["primary", "secondary", "warning", "danger"],
    },
    size: {
      control: {type: "select"},
      options: ["small", "medium", "large"],
    },
    style: {
      control: {type: "select"},
      options: ["default", "pill", "outline"],
    },
  },
}

// More on writing stories with args: https://storybook.js.org/docs/svelte/writing-stories/args
export const Primary = {
  args: {
    color: "primary",
    style: "default",
  },
}

export const Secondary = {
  args: {
    color: "secondary",
    style: "pill",
  },
}

export const Warning = {
  args: {
    color: "warning",
    style: "pill",
  },
}

export const Danger = {
  args: {
    color: "danger",
    style: "outline",
  },
}
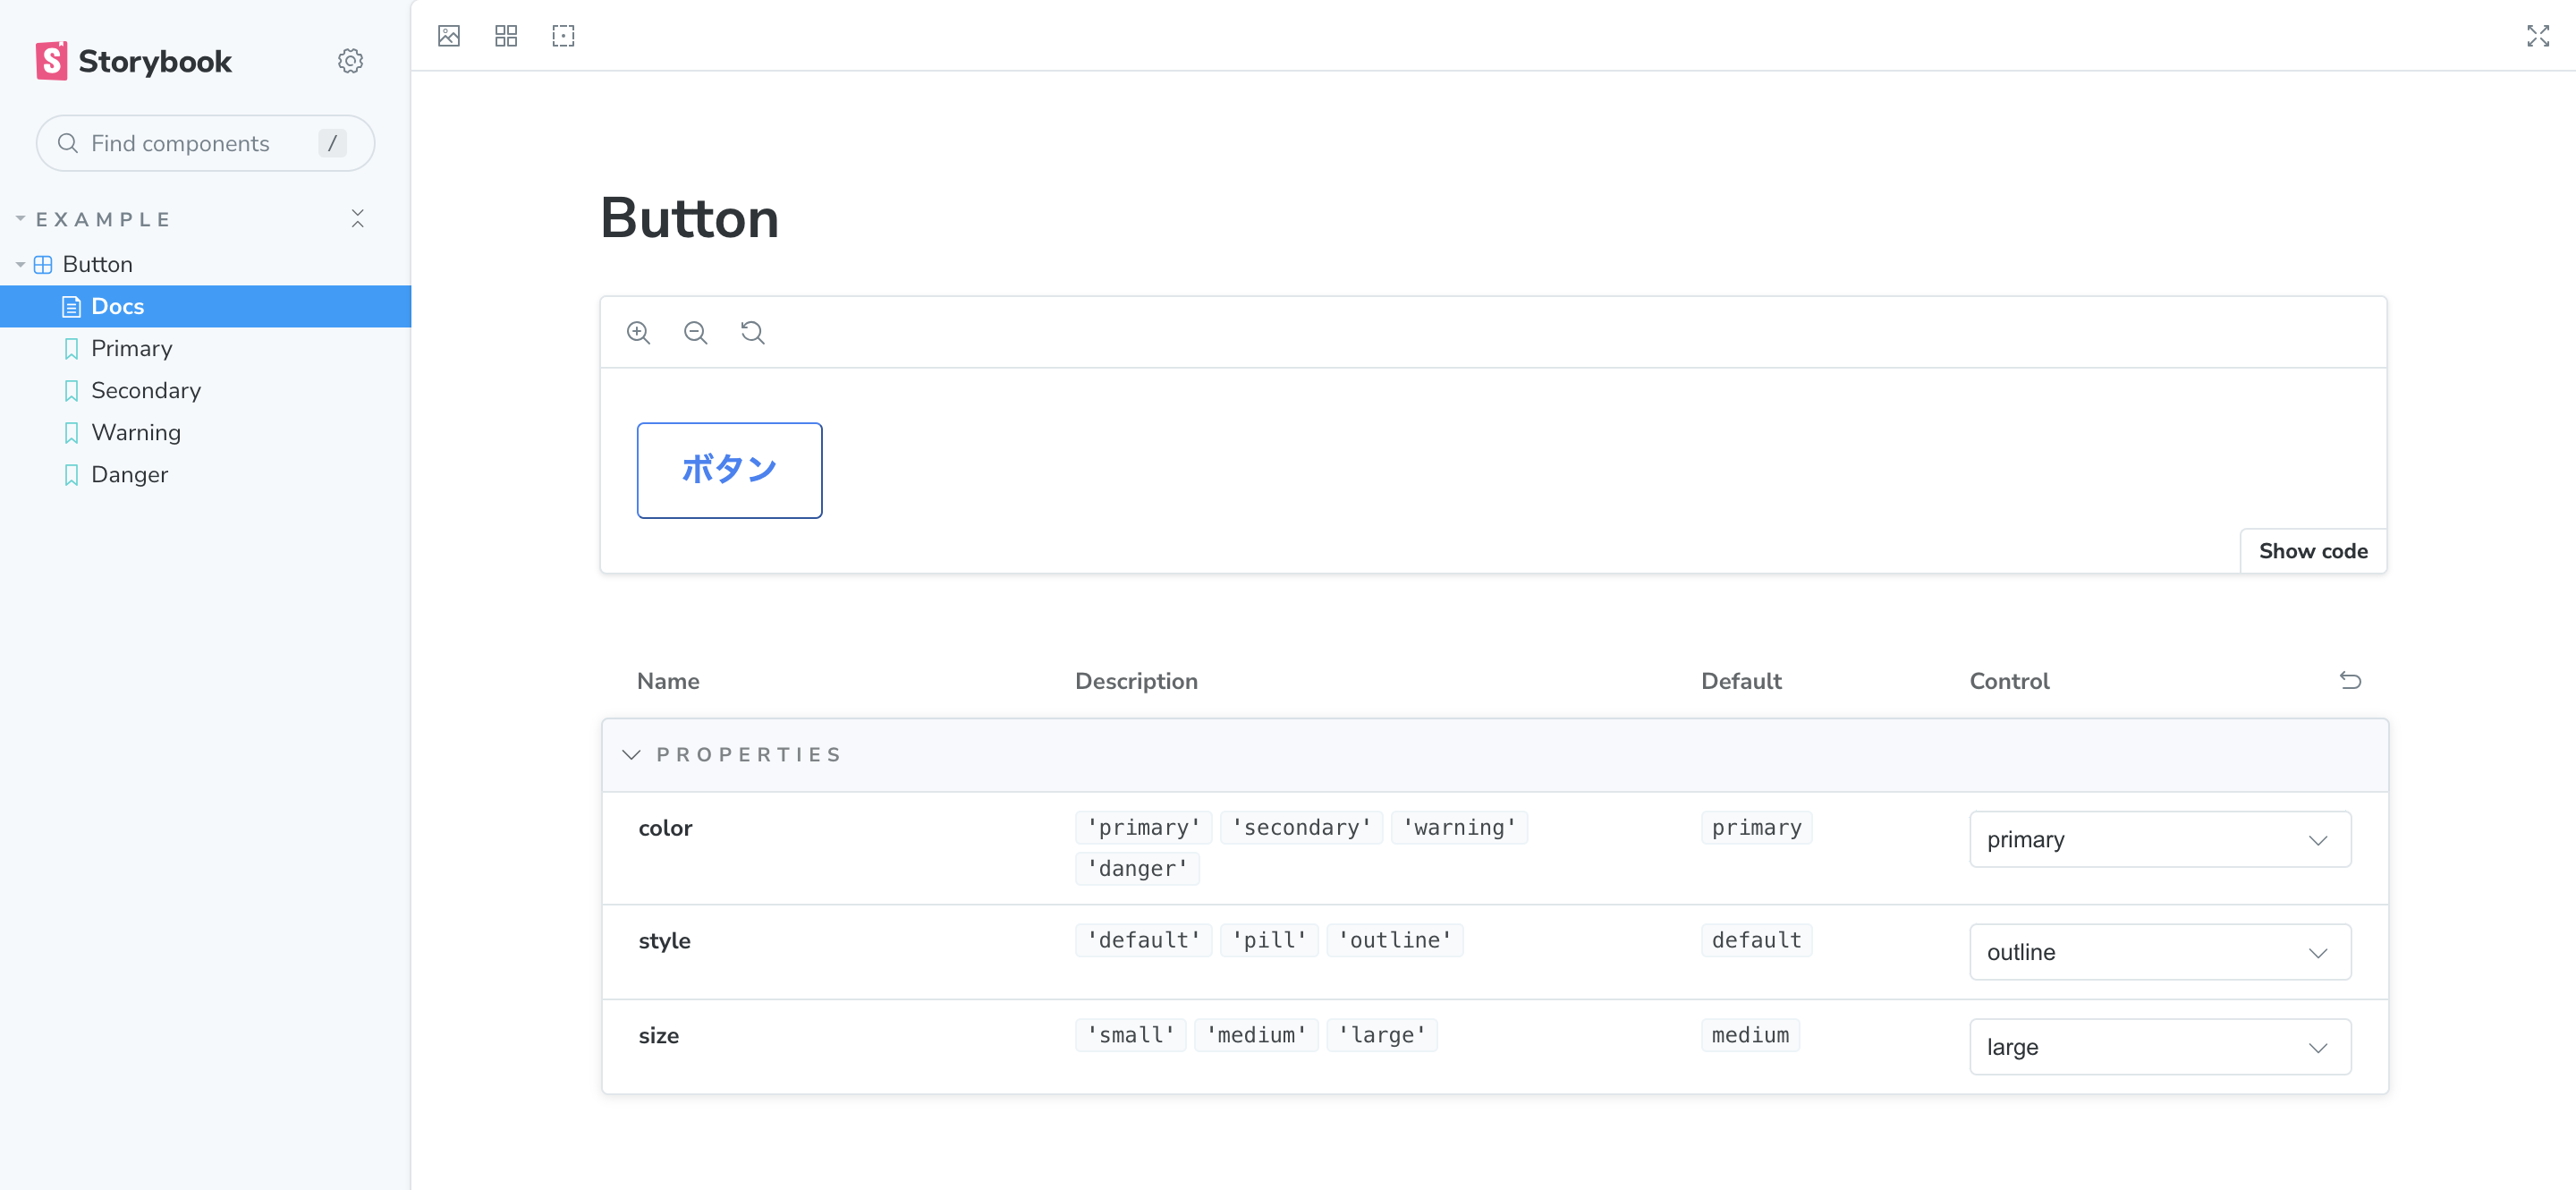
こんな感じでボタンが登録されて、UIライブラリのサイトのようにボタンの見た目を変更して確認できます。
以上がSvelteKitにTailwindCSSとStorybookを導入する手順でした。
おわりに
実務で扱うにはまだまだ勉強不足ですが、とりあえず各ツールの使い方はわかりました。
お試しで触ってみたい方の参考になれば幸いです。
おまけ
TailwindCSSのクラス名は最初わからないので、公式ドキュメントを探しながら書いていたのですが、Github Copilotを利用していると大変便利だったので紹介します。
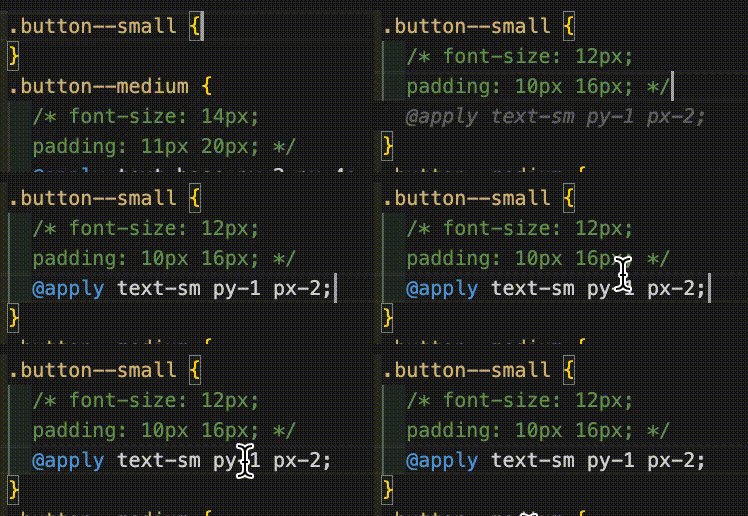
既存のCSSがあってそれをTailwindCSSのクラス名に変換したい場合は、
以下のようにコメントにCSSを記載しておけばGithub Copilotがクラス名を生成してくれます。
公開サイトからコピーしてきたCSSを使いたい時などに便利そうです。


