(Processing Advent Calendar 2016 25日目)
概要
ProcessingでGPUを利用した高速演算を行う。
背景
Processingを利用してスケッチを作ったものの、あまりにも速度が遅くて実用に耐えられなかったときありませんか。
Processingの標準機能を利用するのであれば、GLSLを利用してShaderを書くことで描画演算を高速に行うことができると思います。
しかし、Shader言語は難しくすでに作ってしまったスケッチを移植するのは難易度が高すぎるわけで。
そこでGPUの並列演算を利用しつつも、Processingらしさをなるべく崩さずにできないかとおもい、
JavaからGPGPU(OpenCL)を呼び出すライブラリであるaparapiを利用することにしました。
参考リンク
・Aparapi
・aparapi GitHub レポジトリ
実行方法
ライブラリのインストール
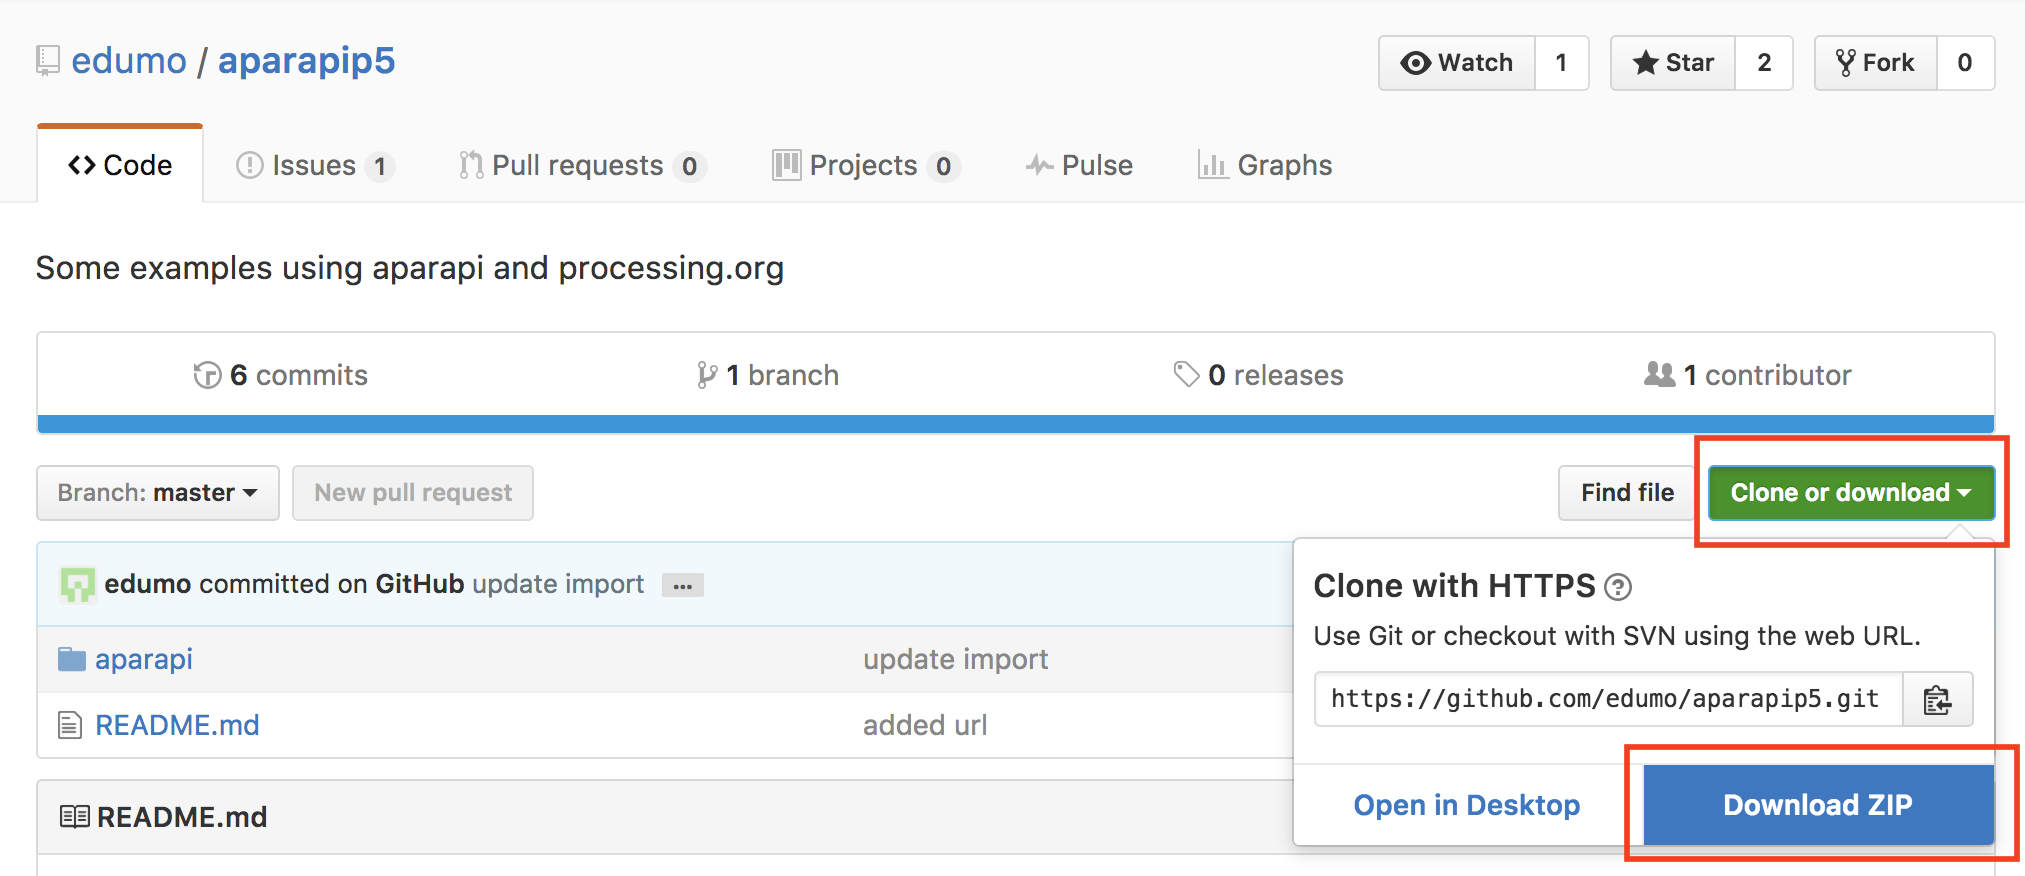
aparapiのライブラリをダウンロードします
aparapip5

ダウンロードしたaparapip5-master.zipを解凍すると次のような階層になると思います。

processingにライブラリをインストールします。
processingのユーザディレクトリを開き、次の階層になるように配置します。

processingを起動し直すとロードされます。
サンプルにaparapiが表示されるようになります。

ライブラリにもaparapiが登録されるようになります。

プログラム
内容

初期状態では利用可能であればOpenCL(GPUを利用した実装)で動きます、
クリックするたびにProcessing標準の動きとOpenCLを利用した動きが切り替わります。
ソースコード
import com.amd.aparapi.*;

KernelP5 kernel;

long generations = 0;
long start = System.currentTimeMillis();

public void setup() {
  size(1280, 768);
  frameRate(240);
  background(0);

  fill(255);
  loadPixels();

  kernel = new KernelP5(width, height, pixels);
  //lifeKernel.setExecutionMode(Kernel.EXECUTION_MODE.CPU);
  updatePixels();
}
public void draw() {
  //background(0);
  kernel.nextGeneration();
  updatePixels();

  fill(0);
  rect(0, 0, 100, 20);
  fill(255);
  text(frameRate, 10, 10);
  println(this.kernel.getExecutionMode());
}

public void mouseMoved() {
  kernel.mx = mouseX;
  kernel.my = mouseY;
}

boolean GPUUsageflag = true;
public void mousePressed() {
  if (GPUUsageflag==true) {
    kernel.setExecutionMode(Kernel.EXECUTION_MODE.JTP);
  } else {
    kernel.setExecutionMode(Kernel.EXECUTION_MODE.GPU);
  }
  GPUUsageflag = !GPUUsageflag;
  println(GPUUsageflag);
}
public class KernelP5 extends Kernel {

  private int[] imageData;
  private final Range range;
  private final int width;
  private final int height;
  private float time;
  private float timed;

  public int mx = 0;
  public int my = 0;

  public KernelP5(int _width, int _height, int[] pixels) {
    width = _width;
    height = _height;
    imageData = pixels;
    range = Range.create(width * height);
    println(getExecutionMode());

    setExplicit(true);
    clear();
  }

  public void setImage(int[] pixels) {
    imageData = pixels;
  }

  @Override
    public void run() {
    int gid = getGlobalId();

    int tx = gid % width;
    int ty = gid / width;
    int red = 0;
    int green = 0;
    int blue = 0;
    for (int i = 0; i < 12; i++) {
      float xx = cos(toRadians(i * 30) + (time)) * my + width / 2;
      float yy = sin(toRadians(i * 30) + (time)) * my + height / 2;
      float dx = tx - xx;
      float dy = ty - yy;

      float dx2 = dx * dx;
      float dy2 = dy * dy;

      float dist = sqrt(dx2 + dy2);

      if (dist > 512) {
        continue;
      } else {
        dist = (512 - dist) / 2;
      }
      float r = 0;
      r = abs(sin((mx / 500.0) * toRadians(dist * 5) + -time * 3) * dist);
      if (i % 3 == 0) {
        red += r;
      } else if (i % 3 == 1) {
        green += r;
      } else {
        blue += r;
      }
    }

    red = min(red, 255);
    green = min(green, 255);
    blue = min(blue, 255);
    imageData[gid] = 0xEE000000 + (red << 16) + (green << 8) + (blue);
  }

  public void nextGeneration() {
    time -= abs(sin(toRadians(timed))) * 0.01;
    timed += 1;
    execute(range);
  }

  public int[] getImageData() {
    return imageData;
  }
}
解説
aparapiを利用した実装はKernelの無名クラスを作る方法と
        final float inA[] = new float[]{1.0f, 2.0f, 3.0f, 4.0f};
        final float inB[] = new float[]{0.1f, 0.2f, 0.3f, 0.4f};
        final float result[] = new float[inA.length];

        Kernel kernel = new Kernel() {
            @Override
            public void run() {
                int i = getGlobalId();
                result[i] = inA[i] + inB[i];
            }
        };

        Range range = Range.create(result.length);
        kernel.execute(range);
Kernelクラスを継承して作る方法があります。
public class FFTKernel extends Kernel {
    final float inA[] = new float[]{1.0f, 2.0f, 3.0f, 4.0f};
    final float inB[] = new float[]{0.1f, 0.2f, 0.3f, 0.4f};
    final float result[] = new float[inA.length];

    @Override
    public void run() {
        int i = getGlobalId();
        result[i] = inA[i] + inB[i];
    }
}
run()の中の実装が実行時にGPU(OpenCL)を利用するコードに変換されます。