以下の3種類のリンクを紹介。
[1] ブラウザでインターネット上のURLを開く
[2] アプリ内の特定のページを開く(好きなコードを動かせるので、実際はなんでもできる)
[3] 外部アプリを開く
例えばこういう時に使えます!
[1][2] 規約やポリシーへの同意を求める文面で、青い部分をタップした時にウェブやアプリ内の該当ページを見せたい。

[3-A] カメラ等の利用許可を得るために、設定アプリを開かせたい。
[3-B] 住所・施設等の紹介ページに、マップアプリを開くリンクをつけたい。
1. インターネット上のURLへのリンク
基本です。
AttributedStringで文章を作り、rangeを指定して.linkAttributeを付与。
その後、textViewのattributedTextに設定。
class LinkUIViewController: UIViewController {
    @IBOutlet weak var textView: UITextView! {
        didSet {
            let baseString = "Googleへのリンク"
            let paragraph = NSMutableParagraphStyle()
            let attributedString = NSMutableAttributedString(string: baseString, attributes: [NSAttributedString.Key.paragraphStyle: paragraph])
            attributedString.addAttribute(.link, value: "https://www.google.com/", range: NSString(string: baseString).range(of: "Google"))
            textView.attributedText = attributedString
        }
    }
}
2. アプリ内リンク
アプリ内の遷移先をStoryboardで作る
まず、遷移先の画面を用意する。既にある場合は飛ばしてOKです。
今回の遷移先のViewControllerをもつStoryboardを作成。

利用規約のViewControllerを作る。
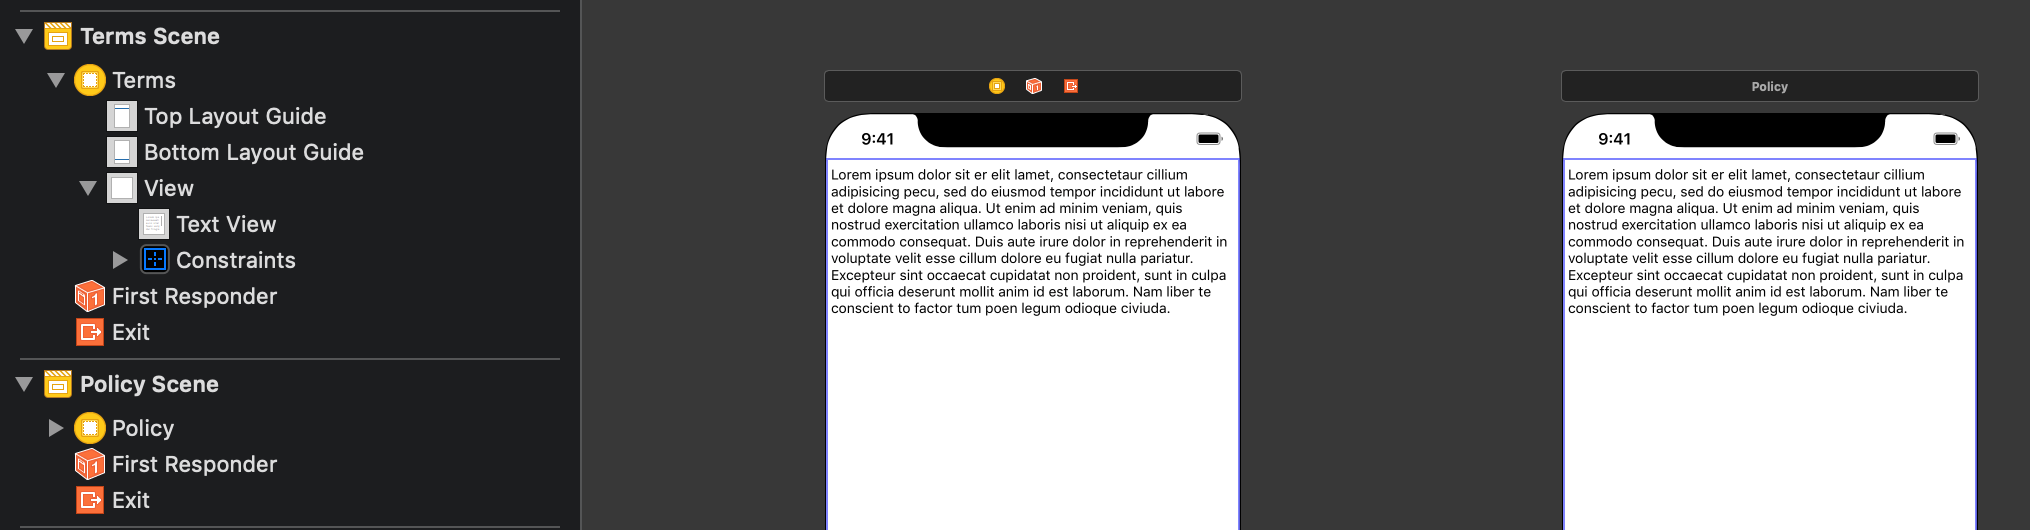
それぞれのViewControllerにIDを振る。
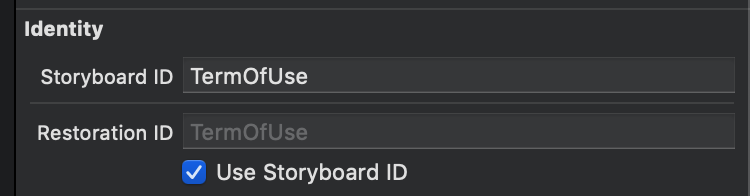
なお、Storyboard IDとRestoration IDは同じにすることが推奨されており、Restoration ID設定のUse Storyboard IDにチェックを入れるとStoryboard IDと同一名扱いになる。
コード
1と同様にURLを埋め込むが、これを任意の文字列にしておく。
今回は"TermOfUseLink"に。
class LinkUIViewController: UIViewController {
    @IBOutlet weak var textView: UITextView! {
        didSet {
            let baseString = "利用規約へのリンク"
            let paragraph = NSMutableParagraphStyle()
            let attributedString = NSMutableAttributedString(string: baseString, attributes: [NSAttributedString.Key.paragraphStyle: paragraph])
            attributedString.addAttribute(.link, value: "TermOfUseLink", range: NSString(string: baseString).range(of: "利用規約"))
            textView.attributedText = attributedString
        }
    }
}
そしてUITextViewDelegateのtextView(_:shouldInteractWith:in:interaction:)を使うと、URLを開く前に判定できる。
URLに先程の"TermOfUseLink"が設定されていた場合、Storyboard経由でViewControllerを呼ぶようにする。
import UIKit

extension LinkUIViewController: UITextViewDelegate {
    public func textView(_ textView: UITextView, shouldInteractWith URL: URL, in characterRange: NSRange, interaction: UITextItemInteraction) -> Bool {
        let urlString = URL.absoluteString
        if urlString == "TermOfUseLink" {
            // Storyboardを呼び出し
            let storyboard = UIStoryboard(name: "MyPage", bundle: nil)
            // Storyboard内のViewControllerをIDから呼び出し
            let viewController = storyboard.instantiateViewController(withIdentifier: "TermOfUse")
            // 画面遷移
            navigationController?.pushViewController(viewController, animated: true)
            return false // 通常のURL遷移を行わない
        }
        return true // 通常のURL遷移を行う
    }
}
そしてここでreturn falseすると通常のURL遷移はキャンセルされる。
単にURLを開く許可・不許可を判定する用途にも使える。
Return Value
true if interaction with the URL should be allowed; false if interaction should not be allowed.
3.外部アプリへのリンク
設定を開く
定数としてUIApplication.openSettingsURLStringが利用でき、これを使うと標準で自分のアプリに関しての設定画面が開く。
class LinkUIViewController: UIViewController {
    @IBOutlet weak var textView: UITextView! {
        didSet {
            let baseString = "設定へのリンク"
            let paragraph = NSMutableParagraphStyle()
            let attributedString = NSMutableAttributedString(string: baseString, attributes: [NSAttributedString.Key.paragraphStyle: paragraph])
                                                         // ↓これ
            attributedString.addAttribute(.link, value: UIApplication.openSettingsURLString, range: NSString(string: baseString).range(of: "設定"))
            textView.attributedText = attributedString
        }
    }
}
特定のアプリを開く
有名サービスの多くはiOS9以降のUniversal Links機能に対応しているので、Twitter等を呼ぶ際に特に意識することはないと思われる。
例えばGoogleMapなら、以下のようなURLで特定座標をMapアプリもしくはブラウザで開いてくれる。
"https://www.google.com/maps/@42.585444,13.007813,6z"
https://developers.google.com/maps/documentation/urls/ios-urlscheme
まとめ
「3種類」と言っても、流れはどれも同じでした。
step1. テキストにNSMutableAttributedStringでリンクを埋め込む
step2. shouldInteractWithでリンクを判定
step3. 必要に応じて好きな動作
これに限らずUITextViewDelegateはすごく強いので、うまく使ってやりたいところです。