はじめに
どうも、新卒でラクスに入社した@hirobexです。
今はMailDealerというサービスの開発をしています。
名前の通り、メールを扱う商材なのですが、私にはメール周りの知識が乏しいです。
なので、今回Advent Calenderという機会に少し自分でメール関連の機能を触ってみました。
SMTPサーバーの設定
vagrantfileの設定例
Vagrant.configure("2") do |config|
  config.vm.box = "ubuntu/focal64"
  config.vm.network "private_network", ip: "192.168.33.10"
end
Postfixのインストール
sudo apt-get install -y postfix
メールサーバーの設定形式を聞かれるため、「設定無し」を選択
インストール完了後、設定ファイルをコピーしてくるように言われるのでコピーしておく。
cp /usr/share/postfix/main.cf.debian /etc/postfix/main.cf
Postfixの設定
sudo vim /etc/postfix/main.cf
今回は、下記のように設定
myhostname = mail.example.com
mydomain = example.com
myorigin = $mydomain

# ローカルホスト以外からも受け付ける
inet_interfaces = all

# 通信をipv4のみに制限
inet_protocols = ipv4

# ローカルアドレスの他に、ip aコマンドで出力されるenp0sのinetアドレスを設定
mynetworks = 127.0.0.0/8, 10.0.2.0/24

# 受信したメールの保存形式・保存場所を指定
home_mailbox = Maildir/

# 受信するドメインの設定
mydestination = $myhostname, $mydomain

smtpd_banner = $myhostname ESMTP $mail_name (Ubuntu)
biff = no

# appending .domain is the MUA's job.
append_dot_mydomain = no
メールエイリアスの更新
newaliases
メールユーザの追加
今回はメール受信用のユーザを新たに追加した。
sudo adduser user
sudo chmod 777 /var/spool/mail

su - user
cd
mkdir Maildir
postfixの起動
systemctl start postfix
送信テスト
hostsを設定
ipアドレスは、postfixの設定時と同じようにip aコマンドで出力される enp0s のinetアドレスを設定
10.0.2.15 mail.example.com
telnetで接続して送信テスト
ログイン
telnet mail.example.com 25
成功時 220 mail.example.com ESMTP Postfix (Ubuntu)
FROMアドレスの入力
mail from: user@mail.example.com
250 2.1.0 Ok
Toアドレスの入力
rcpt to: user@mail.example.com
成功時 250 2.1.5 Ok
本文の入力開始
data
本文入力
Hello World!
.
成功時 250 2.0.0 Ok: queued as ○○○
ログアウト
quit
成功時
221 2.0.0 Bye
Connection closed by foreign host.
テスト実行後、下記コマンドでメールデータが新規作成されているか確認
su - user
cd /MailDir/new
ls
下記のようなデータが作成されていれば送受信が成功している
1639895199.V801I3f68dM923995.mail
送信がうまく行かない場合
/var/log/maillogでエラーログが見れる
送信APIの作成
今回はfastAPIで作成する。
コードはこう
import smtplib
from email.mime.text import MIMEText
from smtplib import *

from fastapi import FastAPI

app = FastAPI()


@app.post("/send")
def send_email(smtp_server: str, from_address: str, to_address: str, subject: str, message: str):
    with smtplib.SMTP(smtp_server, 25) as smtp:
        msg = MIMEText(message)
        msg["Subject"] = subject
        try:
            smtp.sendmail(msg=msg.as_string(), from_addr=from_address, to_addrs=to_address)
        except (SMTPRecipientsRefused, SMTPHeloError, SMTPSenderRefused, SMTPDataError, SMTPNotSupportedError) as e:
            return {"ERROR_LOG": e}
    return {"to_address": to_address, "subject": subject, "message": message}
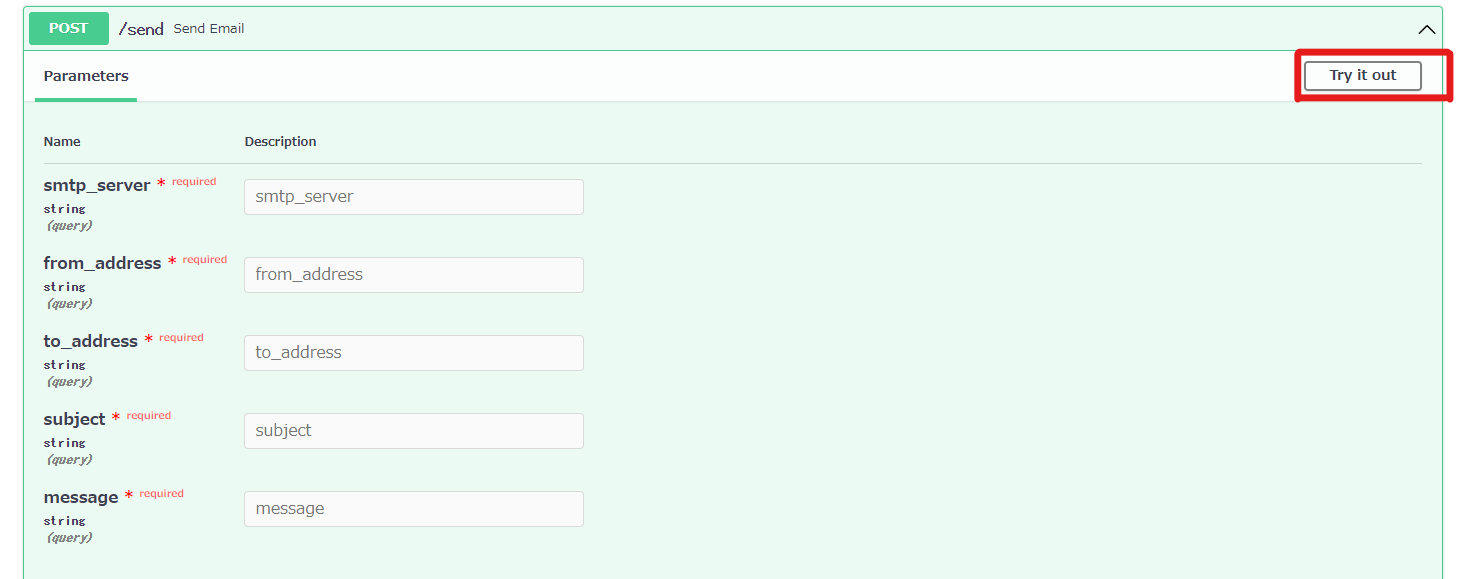
FastAPIは、自動でAPIのドキュメントを作成してくれる便利機能があるので、利用する
特に設定していなければ、以下のURLにドキュメントが生成される
Try it Outをクリックすると、Parameterが入力できるようになる。

smtp_serverには、Vagrantで設定したprivate ipアドレスを入力する。
from_addresと、to_addressには、テスト送信と同じものを用いる
subjectとmessageは適当に入力する。
excecuteを押して、200が返ってきたら、またMaildirを確認する。
ファイルが増えていたら成功!
あとがき
ほぼほぼPostfixの設定で埋まってしまいました。
逆に言うと、これだけのコードでAPIが作れてしまうFastAPIがすごいのかもしれませんね。
次はSMTPログインを試したり、DovecotでPOP/IMAP受信ができるようにしたりもしたいですね。