やろうと思ったきっかけ
メルマガがうざい。だから購読を解除したい。
でも、どのメルマガに登録しているかわからんから面倒。。
ってことでTwitterで下記つぶやきましたが、この記事を書いている段階でいいねは1つだけ。
一気にメルマガ解除したいけど、メール多すぎて対応しきれない。。。
— ひろし@React Native勉強中エンジニア (@hiro_progra0524) March 9, 2022
と言う声(from 私)に応えて、特定の期間でメールの送信元別に集計して、メルマガ解除しやすくするツールを作ろうかと思ってますが、需要ありますか?
えぇぇぇ、、みんなあまり困ってない感じ??
でも私は困っているし。。ってことで、開発することにしました。
まずはGmailのApi使えないと話にならないよねってことで、そのあたりの話をします。
手順
1.GCPでGmailApiを有効化する
GCPでアプリの追加
下記のような画面が出るので、適当なプロジェクト名を付けます。

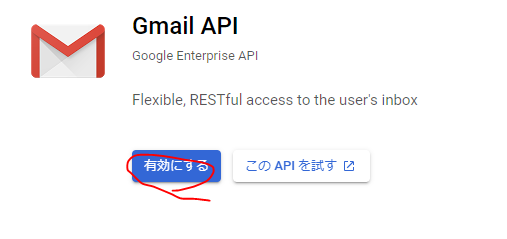
GmailAPiの有効化
Gmailと入れるとgmail apiが出てくるのでクリック

認証情報を作成
GmailAPiの管理画面で認証情報から認証情報を作成をクリック

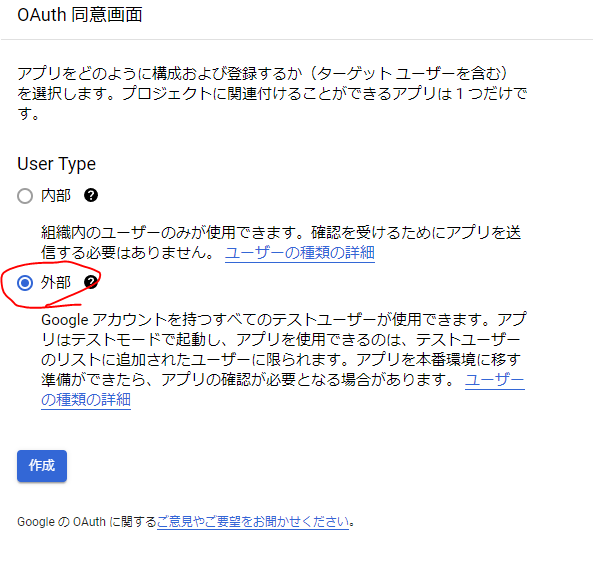
同意画面の作成
スコープの設定をする
スコープとはGmailApiの用途を制限するためのやつ。
よくGoogle認証でこのアプリはGmailの閲覧・送信・削除をします。的なやつあるじゃないですか?あれの設定です

上記の設定が最後なので、概要の画面まで行ったらとりあえず同意画面は完了
OAuth2の作成
改めて認証情報→認証情報の作成でOAuth2を使用する設定をする

アプリケーションの種類とかリダイレクトURIとかを入力
この時のリダイレクトURIって何のことを言っているかというとユーザーは基本的に下記の流れでTokenを取得する。
- 開発サイトから、GoogleAuth画面に遷移
- GoogleAuth画面でログイン&同意する。
- 開発サイトにリダイレクトされて、その時にURL経由でAccessTokenと交換できる使い捨てのcodeがもらえる
この時の3番目のリダイレクトのURIのこと。
で、このリダイレクトURIはワイルドカード使えないので、http://localhost:3000 とした場合、リダイレクト先はlocalhost:3000しか対応できない。
http://localhost:3000/auth とかのurlは対応できないわけ。
まあこの辺はあとで自由に変更できるからこのタイミングでは割と適当でよい。

ここまでやって保存ってすると次の画面でクライアントIDとクライアントシークレットがもらえる。

この時のコードをどこかに保存しておく
2.実際にデータを取得してみる。
この章からは1章でやったOAuthを実際に使ってmailのデータを取得していくよーー
Next.jsのcreate(yarn)
まずはNext.jsでcreateappをする
この辺の説明は公式を見てください。
多分いろいろ書くより公式見たほうが早いと思います。
https://nextjs.org/docs/api-reference/create-next-app
useGmailを作成
このhooksで行うのは基本的なgoogleの認証やらAccessTokenの取得やら、取得したときにエラーがあればそういったものを返したいなーと思って作成。
import {useCallback, useState} from "react";
import axios from "axios";

interface TokenRes {
    access_token: string,
    token_type: string,
    expires_in: string,
    scope: string
}

export const useGmail = () => {

    // apicall時に実際に使用するtokenとかを持ったResponse
    const [res, setRes] = useState<TokenRes | undefined>(undefined);
    const [hasError, setHasError] = useState<boolean>(false);

    // OAuthのcodeがすでに使われていたりした場合trueにする。
    const [invalidCode, setInvalidCode] = useState<boolean>(false);

    const clientId = "取得してきたクライアントidを入れる";
    const clientSecret = "取得してきたクライアントSeacretを入れる";

    // ユーザーがOAuthで同意した後に戻ってくるリダイレクトURI。先にGoogleのOAuthで設定をする必要がある。
    const redirectUrl = "http://localhost:3000/login";

    // 上記で設定したApiのScopeを入れる
    const apiScope = "https://www.googleapis.com/auth/gmail.readonly";

    // OAuthの同意画面への認証URLのベース
    const urlBase = "https://accounts.google.com/o/oauth2/v2/auth?response_type=code&client_id=";

    // https://developers.google.com/youtube/v3/guides/auth/server-side-web-apps?hl=ja
    // https://developers.google.com/gmail/api/reference/rest

    // OAuthで取得したcodeとAccessTokenを引き換えるurlのベース。ここにはPostメソッドでRequestを投げる
    const getTokenUrl = "https://accounts.google.com/o/oauth2/token";

    // OAuthの同意画面のurlBaseとclientIdとかを使ってOAuthのendpointを作成する。
    const gmailAuthEndpoint = `${urlBase}${clientId}&redirect_uri=${redirectUrl}&scope=${apiScope}`;

    // OAuthで取得したCodeをAccessTokenと引き換えるメソッド。本来ならdepsにclientIdやらclientSercretを入れたほうがいいけどいったんスルー
    const toAuthCode = useCallback((code: string) => {
        // ここのジェネリックを指定することでAxiosResponseのdataの型が決まる。
        axios.post<TokenRes>(getTokenUrl, {
            code: code,
            client_id: clientId,
            client_secret: clientSecret,
            redirect_uri: redirectUrl,
            grant_type: "authorization_code",
        })
          .then(res => setRes(res.data))
          .catch(e => {
              // 確か200以外が返った場合はこっち。
        // invalid_grantが返ってきた場合、codeが使用済みのケースが多い。
              console.log(e.response.data.error)
              console.log({"error": e});
              if (e.response.data.error === "invalid_grant") {
                  setInvalidCode(true)
              } else {
                  setHasError(true);
              }
          });
    }, [])

    return {gmailAuthEndpoint, toAuthCode, res, hasError, invalidCode}
}
Loginページの構成
import React, {useCallback, useEffect, useState} from 'react';
import {useGmail} from "../../hooks/useGmail";
import {useRouter} from "next/router";
import axios from "axios";

interface UserProfileRes {
  emailAddress: string,
  messagesTotal: number,
  threadsTotal: number,
  historyId: string
}

interface MailListRes {
  "messages": MessageList[],
  "nextPageToken": string,
  "resultSizeEstimate": number
}

interface MessageList {
  id: string,
  threadId: string,
}

interface Message {
  "id": string,
  "threadId": string,
  "labelIds": [
    string
  ],
  "snippet": string,
  "historyId": string,
  "internalDate": string,
  "sizeEstimate": number,
  "raw": string,
  "payload": {
    "partId": string,
    "mimeType": string,
    "filename": string,
    "headers": [
      {
        "name": string,
        "value": string
      }
    ],
    "body": {
      "attachmentId": string,
      "size": number,
      "data": string
    },
  },
}

const Index = () => {
  // ユーザーのプロフィール
  const [profile, setProfile] = useState<UserProfileRes | undefined>(undefined)

  // mailListで取得した結果。idとthreadidしかない。
  const [mailList, setMailList] = useState<MailListRes | undefined>(undefined)

  // mailListで取得した結果から、詳細を取得して格納
  const [mails, setMails] = useState<Message[]>([])

  const {gmailAuthEndpoint, toAuthCode, res, hasError, invalidCode} = useGmail();

  // リダイレクトされたときにurlにcodeがのっかってくるのでuseRouterでクエリを取得する。
  // http://localhost:3000/login?code=111jasha みたいな感じで返ってくる。
  const router = useRouter();
  const {code} = router.query;

  // クエリでcodeが取れた場合、AccessTokenと交換する。
  useEffect(() => {
    if(code != null){
      toAuthCode(code as string);
    }
  }, [code])


  // プロフィールを取得するapiのendpoint。yourmailaddressにはOAuthで入力したメールアドレスを入力。
  const endpoint = `https://gmail.googleapis.com/gmail/v1/users/${yourmailaddress}/profile`;

  // メールのリストを取得するapiのendpoint。yourmailaddressにはOAuthで入力したメールアドレスを入力。
  // 以下apiのResponceはidとthreadidしかないため、データが取れた後詳細をgetする
  const mailEndpoint = `https://gmail.googleapis.com/gmail/v1/users/${yourmailaddress}/messages`;

  // profileを取得する関数
  const getProfile = useCallback(() => {
    if(res?.access_token != null) {
      axios.get<UserProfileRes>(endpoint, {
        headers: {
          Authorization: `Bearer ${res.access_token}`,
        }
      }).then(res => setProfile(res.data))
    }

  }, [res])

  // メールのリストを取得する関数
  const getEmail = useCallback(() => {
    if(res?.access_token != null) {
      axios.get<MailListRes>(mailEndpoint, {
        headers: {
          Authorization: `Bearer ${res.access_token}`,
        },
        params: {
          maxResults: 500,
          includeSpamTrash: false,
          q: "After: 2022/03/09 "
        }
      }).then(res => setMailList(res.data))
    }
  }, [res])

  // mailListが変わったタイミング→メールのリストを取得したタイミングで発火
  useEffect(() => {
    if(mailList != null && res != null){

      // Promise<AxiosResponse<Message>>の配列が返ってくるため後ほどPrimise.allをする必要あり。
      const data = mailList.messages.map(async (mail: MessageList) => {

        // yourmailaddressはOAuthで使用したアドレス。
        const endpoint = `https://gmail.googleapis.com/gmail/v1/users/${yourmailaddress}/messages/${mail.id}`;
        return await axios.get<Message>(endpoint, {
          headers: {
            Authorization: `Bearer ${res.access_token}`,
          }
        })
      })

      // 上記で返ってきたPromise<AxiosResponse<Message>>を調理
      Promise.all(data).then(result => {
        const arr = result.map(r => r.data)
        setMails(arr);
      });
    }
  }, [mailList])

  // subjectはheaders(配列)の中のnameが"Subject"となっているものなので、それ用の関数
  // headers: [
  //   {
  //     name: "Subject"
  //     value: "メールのタイトルが入ります。"
  //   },
  //   {
  //     name: "Subject"
  //     value: "メールのタイトルが入ります。2"
  //   }
  // ]
  const getSubject = (mail: Message): string => {
    const sub = mail.payload.headers.filter(h => h.name === "Subject");
    if(sub != null && sub.length > 0){
      return sub[0].value;
    }
    return "not found subject"
  }

  return (
    <div>
      <p>login page.</p>
     {// このボタンを押したら認証}
        <button onClick={() => {window.location.href = gmailAuthEndpoint }}>認証</button>
      <p>{code}</p>
      {
        hasError && <p>エラーがあります。再認証してください。</p>
      }
      {
        invalidCode && <p>認証に失敗しました。再度認証してください。</p>
      }
      {// 認証後にAccessTokenが取得出来たらここに表示するようにする}
      {res &&
          <>
              <ul>
                  <li>accessToken: {res.access_token}</li>
                  <li>refreshToken: {res.scope}</li>
                  <li>expiresIn: {res.expires_in}</li>
                  <li>tokenType: {res.token_type}</li>
              </ul>
              <button onClick={getProfile}>プロフィール取得</button>
          </>
      }
      {
        // Profileが取得出来たらここに表示するようにする。
        profile &&
          <>
              <ul>
                  <li>emailAddress: {profile.emailAddress}</li>
                  <li>historyId: {profile.historyId}</li>
                  <li>messagesTotal: {profile.messagesTotal}</li>
                  <li>threadsTotal: {profile.threadsTotal}</li>
              </ul>
              <button onClick={getEmail}>get mail</button>
          </>
      }
      {
        // mailの詳細get後に一気に表示されるようにする。
        mails.length > 0 &&
        <>
          {mails.map((m, index) => {
            return <>
              <ul>
                <li>{getSubject(m)}</li>
                <li>snippet: {m.snippet}</li>
              </ul>
            </>
          })}
        </>
      }
    </div>
  );
};

export default Index;
_app.tsxを修正してlogin画面でcodeのクエリが取れるようにする。
next.jsのuseRouterの仕様で初回レンダリング時にはクエリが取れずundefinedになるらしいので、それを回避するためのコード
import App from 'next/app'
App.getInitialProps = async () => ({ pageProps: {} })
export default App
完成物
tokenとかは実施に使用できないため特に隠しはせず。。
本当は認証画面でcodeの有効期限が切れていたら、googleOAuth認証が出るはず

参考文献
AccessToken取得までの公式リファレンス
https://developers.google.com/youtube/v3/guides/auth/server-side-web-apps?hl=ja
GmailApiの公式リファレンス
https://developers.google.com/gmail/api/reference/rest


