- micro:bitでMIDI接続できないかと思って調べていたら以下の動画を見つけたので試してみました
- 動画を公開してくださり、ありがとうございます

- つまづいたり調べた箇所のメモとなります
準備
- micro:bit
- iPad 1
- アプリ
- GarageBand
- micro:bit
- アプリ
やり方
1. micro:bitとiPadをペアリングする
- iOSでmicro:bitを使用する - Bluetooth経由の接続 よりペアリング用のHEXファイルをmicro:bitに書き込む
- iPadのmicro:bitアプリを立ち上げる
-
Connectionを選択し画面の指示に従ってペアリングする
- ペアリング済みの場合は
Choose micro:bitからお使いのmicro:bitが登録されていることを確認する
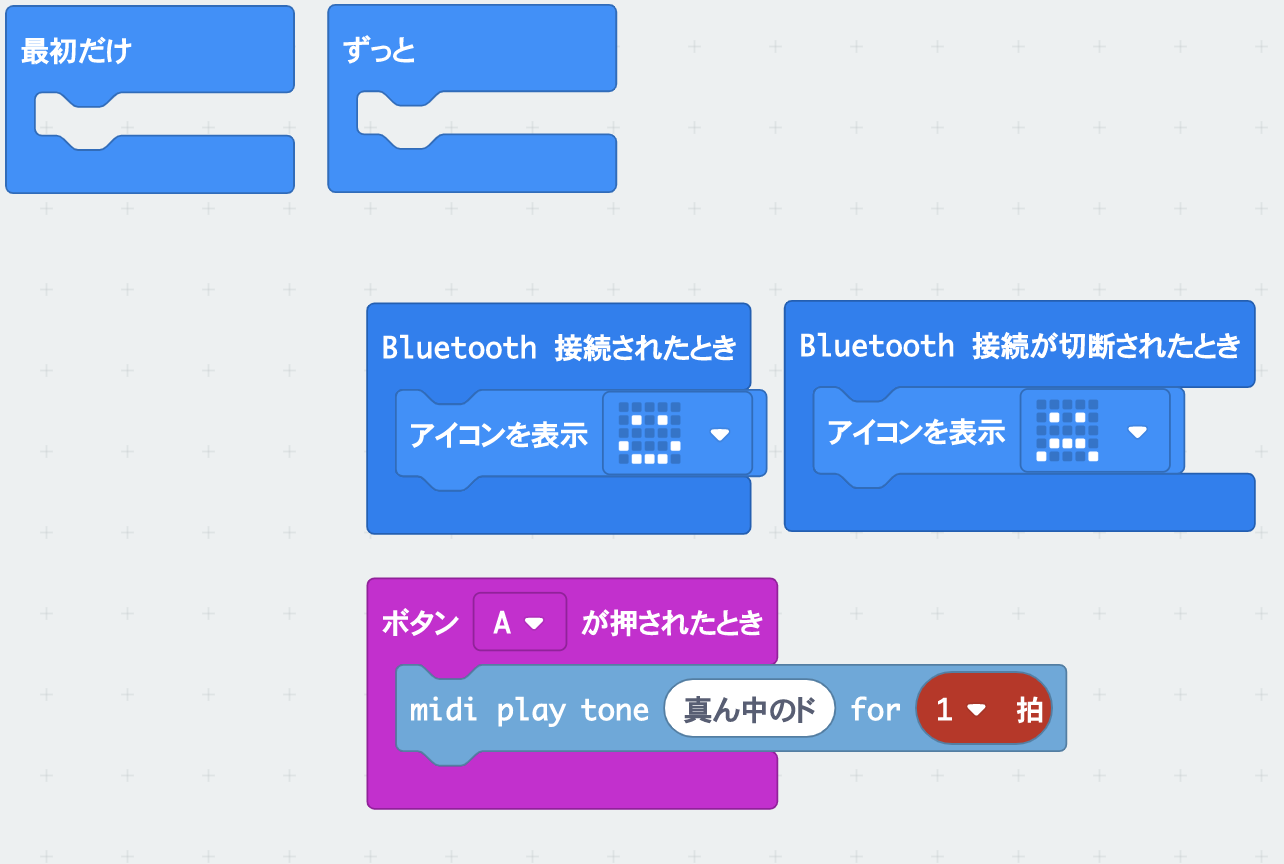
2. MakeCodeでプログラムを作ってmicro:bitに書き込む
- 必要なブロックは
高度なブロック→拡張機能から”midi”と検索してbluetooth-midiを選択する
3. iPadの設定を確認する
- iPadの
設定→BluetoothからBBC micro:bit [xxxxx]2をタップして接続済みにする - この時点でmicro:bitのLEDに
にこちゃんマークが出てきます
4. GarageBandとmicro:bitを接続する
- GarageBandを開いて
TRACKS→KEYBOARDを選択 - 画面右上の
設定(スパナアイコン)→詳細→Bluetooth MIDIデバイスを選択 -
BBC micro:bitをタップして接続済みにする
5. 音を出す
- micro:bitのAボタンを押すとGarageBandから音が出ます

参考
-
iOSなら同じようにできると思います(iPad以外は未検証) ↩
-
この部分の
xxxxxは「micro:bitとiPadを接続する」でmicro:bitのLEDに表示された模様で分かるようです。Can I rename my micro:bit? ↩