今回はUnityからUbuntu機にSSH接続する方法について,簡単に紹介していきたいと思います。大まかにいって,以下の内容について説明します。
- SSH接続
- プロセスの実行
- ログの取得
- プロセスの停止
開発環境
| Unity | 2022.3.42f1 |
|---|---|
| OS | Windows11 |
プロジェクトの作成とSSH.NETのインストール
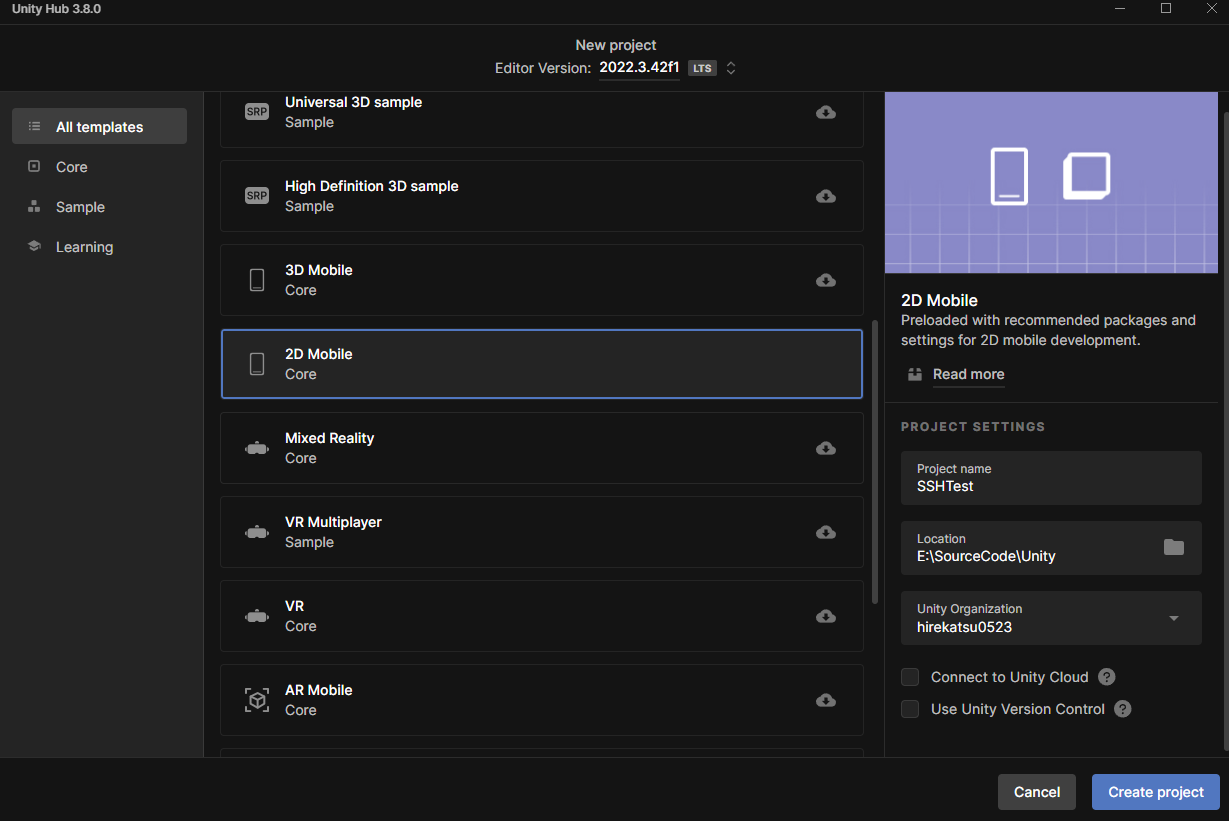
まず,Unityで新規プロジェクトを作成します。今回は2D Mobileのテンプレートを選びましたが,どれを選んでも大丈夫だと思います。
次にC#でSSHを扱うために,SSH.NETライブラリを導入します。
下のリンクからSSH.NET-2020.0.2-bin.zipをダウンロードしてください。

ダウンロードしたファイルを解凍したら,分かりやすくするためにフォルダ名をSSH.NETとリネームします。また,中にあるフォルダの内,net40以外のフォルダは必要ないので削除してください。
最後にSSH.NETフォルダを先ほど作成したUnityプロジェクトのAssetsフォルダ内にドラッグアンドドロップしたら,ライブラリのインストールは完了です。
SSH接続してみる
とりあえずボタンを押すとSSH接続されるようなプログラムを作成してみます。
Assets下にScriptsフォルダを作成し,そこにSSHConnector.csファイルを作成してください。
コードを以下のように変更します。
using UnityEngine;
using System;
using Renci.SshNet;
using UnityEngine.UI;
using TMPro;
public class SSHConnector : MonoBehaviour
{
    [SerializeField] private string host_name;
    [SerializeField] private string user_name;
    [SerializeField] private string password;
    private TextMeshProUGUI text;
    private Button button;
    private int port = 22;
    public static SshClient ssh;
    void Start()
    {
        if (String.IsNullOrEmpty(host_name) || String.IsNullOrEmpty(user_name) || String.IsNullOrEmpty(password))
        {
            Debug.LogError("Please set host_name, user_name, password in the inspector.");
            return;
        }
        button = GetComponent<Button>();
        text = GetComponentInChildren<TextMeshProUGUI>();
        text.text = "SSH";
        button.onClick.AddListener(OnClick);
    }

    void OnDestroy()
    {
        if (ssh != null)
        {
            ssh.Disconnect();
            ssh.Dispose();
        }
    }

    public void OnClick()
    {
        text.text = "Connecting...";
        try
        {
            ConnectionInfo info = new ConnectionInfo(host_name, port, user_name, new PasswordAuthenticationMethod(user_name, password));
            ssh = new SshClient(info);
            ssh.Connect();
            if (ssh.IsConnected)
            {
                Debug.Log("SSH connection established.");
                text.text = "Established";
            }
            else
            {
                Debug.LogError("SSH connection failed.");
                text.text = "Failed";
                return;
            }
        }
        catch (Exception e)
        {
            Debug.LogError("Error: " + e.Message);
            text.text = "Failed";
            return;
        }
    }
}
SSH接続に関する処理はOnClick関数内に書かれており,それ以外はUnityによくある定型文です。
さっそくボタンを作成して,スクリプトを割り当ててみます。
ヒエラルキーウィンドウで右クリックをして,UI>ボタン-TextMeshProを追加します。
ボタンに先ほど作成したSSHConnector.csをアタッチして,インスペクターウィンドウからシリアライズフィールドの値を設定しましょう。

Host_nameにはSSH接続先のホスト名かIPアドレス,User_nameにはユーザー名,パスワードにはパスワードを入力します。
例えば
ssh example@test.local
という風にssh接続している場合,test.localがホスト名であり,exampleがユーザー名となります。
Playボタンを押してシーンを実行し,先ほど作成したボタンを押すとSSH接続が試みられます。SSH接続に成功すると以下のようにボタンの表示が変化するはずです。

プロセスを実行する
次に接続先の端末でコマンドを実行するボタンを作成してみます。
Scriptsフォルダ内にCommandExecutor.csファイルを作成してください。
コードを以下のように変更します。
using System.Collections;
using System.Collections.Generic;
using UnityEngine;
using Renci.SshNet;
using TMPro;
using UnityEngine.UI;
public class CommandExecutor : MonoBehaviour
{
[SerializeField] private string command;
private TextMeshProUGUI text;
private Button button;
void Start()
{
if (string.IsNullOrEmpty(command))
{
Debug.LogError("Please set command in the inspector.");
return;
}
text = GetComponentInChildren<TextMeshProUGUI>();
text.text = "Execute";
button = GetComponent<Button>();
button.onClick.AddListener(ExecuteCommand);
}
public void ExecuteCommand()
{
try
{
SshCommand cmd = SSHConnector.ssh.CreateCommand(command);
Debug.LogFormat("[CMD] {0}", command);
cmd.Execute();
var stdOut = cmd.Result;
var stdErr = cmd.Error;
Debug.LogFormat("終了コード: {0}", cmd.ExitStatus);
if(stdOut != string.Empty)
{
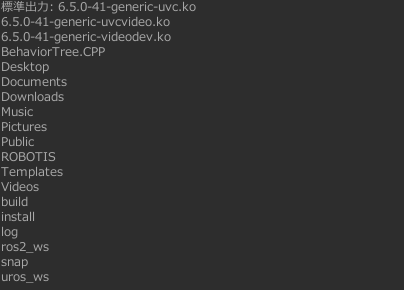
Debug.LogFormat("標準出力: {0}", stdOut);
text.text = "Success";
}
if (cmd.ExitStatus != 0 && stdErr != string.Empty)
{
Debug.LogErrorFormat("標準エラー: {0}", stdErr);
text.text = "Failed";
}
}catch (System.Exception e)
{
Debug.LogError("Error: " + e.Message);
text.text = "Failed";
return;
}
}
}
先ほどと同様にボタンを作成し,そこにCommandExecutor.csをアタッチします。この時,先ほど作成したボタンとオブジェクト名が被らないようにしてください。
以下のようにシリアライズフィールドを設定します。

コマンドには実行したいコマンドを入力してください。
先ほど作成したSSH接続ボタンを押してから,コマンド実行ボタンを押すと,以下の画像のようにコンソールにコマンドの出力が表示されるはずです。
持続的なプロセスのログの取得
上で試したlsコマンドなどは,すぐにプロセスが終了するため先ほどの方法でも良かったのですが,継続的に動作するプロセスの場合は別の方法でログを取得する必要があります。
まずはSSHConnectorを改良して,shell streamに対応させます。
using UnityEngine;
using System;
using Renci.SshNet;
using UnityEngine.UI;
using System.Text;
using TMPro;
public class SSHConnector : MonoBehaviour
{
    [SerializeField] private string host_name;
    [SerializeField] private string user_name;
    [SerializeField] private string password;
    [SerializeField] private TextMeshProUGUI log;
    private TextMeshProUGUI text;
    private Button button;
    private int port = 22;
    public int max_lines = 5;
    public static SshClient ssh;
    public static ShellStream shellStream;
    StringBuilder output;
    void Start()
    {
        if (String.IsNullOrEmpty(host_name) || String.IsNullOrEmpty(user_name) || String.IsNullOrEmpty(password))
        {
            Debug.LogError("Please set host_name, user_name, password in the inspector.");
            return;
        }
        button = GetComponent<Button>();
        text = GetComponentInChildren<TextMeshProUGUI>();
        text.text = "SSH";
        button.onClick.AddListener(OnClick);
        output = new StringBuilder();
    }

    void OnDestroy()
    {
        if (ssh != null)
        {
            ssh.Disconnect();
            ssh.Dispose();
        }
    }

    public void OnClick()
    {
        text.text = "Connecting...";
        try
        {
            ConnectionInfo info = new ConnectionInfo(host_name, port, user_name, new PasswordAuthenticationMethod(user_name, password));
            ssh = new SshClient(info);
            ssh.Connect();
            if (ssh.IsConnected)
            {
                Debug.Log("SSH connection established.");
                text.text = "Established";
                if (shellStream == null)
                {
                    shellStream = ssh.CreateShellStream("xterm", 80, 24, 800, 600, 1024);
                }
            }
            else
            {
                Debug.LogError("SSH connection failed.");
                text.text = "Failed";
                return;
            }
        }
        catch (Exception e)
        {
            Debug.LogError("Error: " + e.Message);
            text.text = "Failed";
            return;
        }
    }

    void Update()
    {
        if (shellStream != null)
        {
            if (shellStream.DataAvailable)
            {
                string line = shellStream.Read();
                string[] unwantedChars = { "\u0007", "\u001B", "\u6708", "\u5408", "\u8A08" };
                foreach (string ch in unwantedChars)
                {
                    line = line.Replace(ch, "");
                }
                output.AppendLine(line);
                string[] lines = output.ToString().Split('\n');
                output.Clear();
                foreach (string l in lines)
                {
                    if (!string.IsNullOrWhiteSpace(l))
                    {
                        output.AppendLine(l);
                    }
                }
                lines = output.ToString().Split('\n');
                if (lines.Length > max_lines)
                {
                    output.Clear();
                    for (int i = lines.Length - max_lines; i < lines.Length; i++)
                    {
                        output.AppendLine(lines[i]);
                    }
                }
                log.text = output.ToString();
            }
        }
    }
}
新しく追加したログ表示用のテキストボックスを作成します。
ヒエラルキーウィンドウで右クリックし,UI>テキスト-TextMeshProを選択してください。
インスペクターウィンドウのSSH Connectorに'Log'という項目が追加されているので,そこにテキストボックスを割り当てます。

次に,CommandExecutorの方もshell streamに対応させていきます。以下のように変更してください。
using System.Collections;
using System.Collections.Generic;
using UnityEngine;
using Renci.SshNet;
using TMPro;
using UnityEngine.UI;
using System;

public class CommandExecutor : MonoBehaviour
{
    [SerializeField] private string command;
    private TextMeshProUGUI text;
    private Button button;
    void Start()
    {
        if (string.IsNullOrEmpty(command))
        {
            Debug.LogError("Please set command in the inspector.");
            return;
        }
        text = GetComponentInChildren<TextMeshProUGUI>();
        text.text = "Execute";
        button = GetComponent<Button>();
        button.onClick.AddListener(ExecuteCommand);
    }

    public void ExecuteCommand()
    {
        try{
            if (SSHConnector.shellStream != null){
                SSHConnector.shellStream.WriteLine(command);
                Debug.LogFormat("[CMD] {0}", command);
                text.text = "Executed";
            }
            else
            {
                Debug.LogError("Shell stream is not available.");
                text.text = "Failed";
            }
        }
        catch (Exception e)
        {
            Debug.LogError("Error: " + e.Message);
            text.text = "Failed";
        }
    }
}
これでとりあえず実行できるようになりましたが,Ubuntuが日本語版の場合,テキストボックスのフォントも日本語に対応したものにしなければ文字化けが発生してしまいます。
その場合は,上のサイトなどを参考にして,TextMeshProに日本語フォントを導入することをお勧めします。
プロセスの停止
通常であればCtrl + Cによって実行中のプロセスを停止させることができるのですが,今回の場合は安直にCtrl + Cに相当するシーケンスである\x03を送ってもうまくいきません。
ここで,例えば以下のようなコードを中断したい状況を想定します。
- roop.py
import time
count = 0
while 1:
  print("hello world", count)
  count += 1
  time.sleep(1)
Ubuntuではpkillコマンドを使うことでプロセス名を指定して,プロセスを中断させることができます。
pkill -f "python3 roop.py"
そこで,CommandExecutorのコードを以下のように変更します。
using System.Collections;
using System.Collections.Generic;
using UnityEngine;
using Renci.SshNet;
using TMPro;
using UnityEngine.UI;
using System;

public class CommandExecutor : MonoBehaviour
{
    [SerializeField] private string command;
    private string kill_command;
    private TextMeshProUGUI text;
    private Button button;
    bool execute_flag = false;
    void Start()
    {
        if (string.IsNullOrEmpty(command))
        {
            Debug.LogError("Please set command in the inspector.");
            return;
        }
        kill_command = "pkill -f \"" + command + "\"";
        text = GetComponentInChildren<TextMeshProUGUI>();
        text.text = "Execute";
        button = GetComponent<Button>();
        button.onClick.AddListener(OnClick);
    }

    public void OnClick()
    {
        try{
            if (execute_flag){
                SshCommand cmd = SSHConnector.ssh.RunCommand(kill_command);
                cmd.Execute();
                text.text = "Execute";
                execute_flag = false;
            }
            else{
                if(ExecuteCommand(command)){
                    text.text = "Stop";
                    execute_flag = true;
                }else{
                    text.text = "Failed";
                }
            }
        }
        catch (Exception e)
        {
            Debug.LogError("Error: " + e.Message);
            text.text = "Failed";
        }
    }

    bool ExecuteCommand(string command)
    {
        if (SSHConnector.shellStream != null)
        {
            SSHConnector.shellStream.WriteLine(command);
            Debug.LogFormat("[CMD] {0}", command);
            return true;
        }
        else
        {
            Debug.LogError("Shell stream is not available.");
            return false;
        }
    }
}
こうすることで,プロセスを任意のタイミングで停止させることができるようになります。
テスト
メモ
AndroidでmDNSを使うのは面倒なので,素直にipでホストを指定したほうがいいと思います。
また,ROS2のコマンドをkillするにはpkill -f ros2などが使えます。