主要読み上げ機能を評価するためのテストプログラムをご披露しよう。
まずは、ソースプログラムから各クラウドや配布ページをポチリながらサンプルをコピペしながら評価試験プログラムを書いたものです。
test.py
# !/usr/local/bin/python3.6
import os,subprocess,requests
aplay = ['aplay','-q','-D', 'plughw:0,0','sample.wav']
mpg123 = ['mpg123','-a', 'plughw:0,0', '-q','sample.mp3' ]
'''
AquesTalk
'''
def aquestalk(t,fn):
    cmd=['/home/pi/aquestalkpi/AquesTalkPi','-f','-','-o', fn+'.wav']
    c = subprocess.Popen(cmd,stdin=subprocess.PIPE)
    c.stdin.write(t.encode())
    c.stdin.close()
    c.wait()
    aplay[4]=fn+'.wav'
    wr = subprocess.Popen(aplay).wait()
'''
OPen JTalk
'''
def open_jtalk(t,fn):
    cmd=['open_jtalk','-x','/var/lib/mecab/dic/open-jtalk/naist-jdic'
    ,'-m','/usr/share/hts-voice/mei/mei_normal.htsvoice','-r','1.0','-ow', fn+'.wav']
    c = subprocess.Popen(cmd,stdin=subprocess.PIPE)
    c.stdin.write(t.encode())
    c.stdin.close()
    c.wait()
    aplay[4]=fn+'.wav'
    wr = subprocess.Popen(aplay).wait()
'''
google text to speech
'''
def google(t,fn):
    'export GOOGLE_APPLICATION_CREDENTIALS=auth.json'
    os.environ['GOOGLE_APPLICATION_CREDENTIALS']='auth.json'
    from google.cloud import texttospeech as tts
    client = tts.TextToSpeechClient()
    audio_config = tts.types.AudioConfig(audio_encoding=tts.enums.AudioEncoding.LINEAR16)
    voice = tts.types.VoiceSelectionParams(language_code='ja-JP',name='ja-JP-Wavenet-A')
    resp = client.synthesize_speech(tts.types.SynthesisInput(text=t), voice, audio_config)
    with open(fn+'.wav', 'wb') as out:
        out.write(resp.audio_content)
    aplay[4]=fn+'.wav'
    wr = subprocess.Popen(aplay).wait()
'''
Microsoft Azure text to speech
'''

def azure(t,fn):
    from xml.etree import ElementTree
    #export SPEECH_SERVICE_KEY=xxxxxxxxxxxxxxxxxxxxxxxxxxxxxxxxxxxxxxxxxxx
    response = requests.post("https://westus.api.cognitive.microsoft.com/sts/v1.0/issueToken",
        headers={'Ocp-Apim-Subscription-Key': os.environ['SPEECH_SERVICE_KEY']})
    headers = {
        'Authorization': 'Bearer ' + str(response.text),
        'Content-Type': 'application/ssml+xml',
        'X-Microsoft-OutputFormat': 'riff-24khz-16bit-mono-pcm',
        'User-Agent': 'YOUR_RESOURCE_NAME'
    }
    xml_body = ElementTree.Element('speak', version='1.0')
    xml_body.set('{http://www.w3.org/XML/1998/namespace}lang', 'ja-JP')
    voice = ElementTree.SubElement(xml_body, 'voice')
    voice.set('{http://www.w3.org/XML/1998/namespace}lang', 'ja-JP')
    voice.set('name','ja-JP-Ayumi-Apollo')
    voice.text = t
    body = ElementTree.tostring(xml_body)
    response = requests.post('https://westus.tts.speech.microsoft.com/cognitiveservices/v1', headers=headers, data=body)
    with open(fn+'.wav', 'wb') as audio:
        audio.write(response.content)
    aplay[4]=fn+'.wav'
    wr = subprocess.Popen(aplay).wait()
'''
AWS amazon
'''
def aws(t,fn):
    from boto3 import Session
    from botocore.exceptions import BotoCoreError, ClientError
    from contextlib import closing
    session = Session(region_name="us-west-2")
    polly = session.client("polly")
    response = polly.synthesize_speech(Text=t, OutputFormat="mp3", VoiceId="Takumi")
    if "AudioStream" in response:
        with closing(response["AudioStream"]) as stream:
            try:
                with open(fn+".mp3", "wb") as file:
                    file.write(stream.read())
            except IOError as error:
                print(error)
                sys.exit(-1)
            mpg123[4]=fn+".mp3"
            subprocess.Popen(mpg123).wait()
'''
IBM WATSON
'''
def watson(t,fn):
    from ibm_watson import TextToSpeechV1
    tts = TextToSpeechV1(iam_apikey='xxxxxxxxxxxxxxxxxxxxxxxxxxxxxxx',
        url='https://gateway-tok.watsonplatform.net/text-to-speech/api/')
    with open(fn+'.wav', 'wb') as audio_file:
        audio_file.write(tts.synthesize(t,voice='ja-JP_EmiVoice',accept='audio/wav').get_result().content)
        aplay[4]=fn+'.wav'
        wr = subprocess.Popen(aplay).wait()
msg='お電話ありがとうございます。ただいま、電話に出ることができません。ピーッという音が鳴りましたら[発信音の後に]、メッセージをお願いします。こちらからすぐにお電話いたします。'
for say in [aquestalk,open_jtalk,google,azure,aws,watson]:
    nm=str(say).split(' ')[1]
    tx=nm+"が話します。"+msg
    print(tx,nm)
    say(tx,nm)
| Name | URL |
|---|---|
| AquesTalk Pi | https://www.a-quest.com/products/aquestalkpi.html |
| open jtalk | http://open-jtalk.sp.nitech.ac.jp/ |
| Google Cloud | https://cloud.google.com/text-to-speech/?hl=JA |
| Azure MS | https://azure.microsoft.com/ja-jp/services/cognitive-services/text-to-speech/ |
| AWS amazon | https://aws.amazon.com/jp/polly/ |
| IBM WATSON | https://www.ibm.com/watson/jp-ja/developercloud/text-to-speech.html |
各プロダクト頑張っている。それぞれの好みがあるから実際に評価してみてください。
意外と嵌りやすいのがRaspberry pi の動作環境づくりだ!
まず嵌ったのがRaspberry piのスピーカ出力だ!
Qiitaをaplayで検索して
結論を導きだしたのが
aplay = ['aplay','-q','-D', 'plughw:0,0','sample.wav']
wr = subprocess.Popen(aplay).wait()
or
mpg123 = ['mpg123','-a', 'plughw:0,0', '-q','sample.mp3' ]
wr = subprocess.Popen(mpg123).wait()
これで音をスピーカから出せる。
AquesTalkとOpenJtalkは、マニュアルの指示に従うと問題なく動作した。
その他のライブラリ
| Name | Command |
|---|---|
| Google Cloud | pip install google-cloud-texttospeech |
| AWS amazon | pip install boto3 |
| IBM WATSON | pip install watson-developer-cloud |
サンプルの音を下記で聞くことができます。
クラウド音声評価中 pic.twitter.com/5G4hvwEzBJ
— utaca.rich (@RichUtaka) May 18, 2019
インストール
$ wget http://www.a-quest.com/download/package/aquestalkpi-20130827.tar.gz
$ tar xzvf aquestalkpi-20130827.tar.gz
$ cd aquestalkpi
$ sudo apt-get install open-jtalk
$ sudo apt-get install open-jtalk-mecab-naist-jdic hts-voice-nitech-jp-atr503-m001
認証情報
AWSの認証情報は、、aws configure コマンドにより以下にセットされる。
$aws configure
AWSアクセスキーとAWSシークレットキーを入力と下記のファイルが出来上がる
cat ~/.aws/credentials
[default]
aws_access_key_id = xxxxxxxxxxxxxxxxxxx
aws_secret_access_key = xxxxxxxxxxxxxxxxxxxxxxxxxxxxxxxxxxxxxxxxxxxx
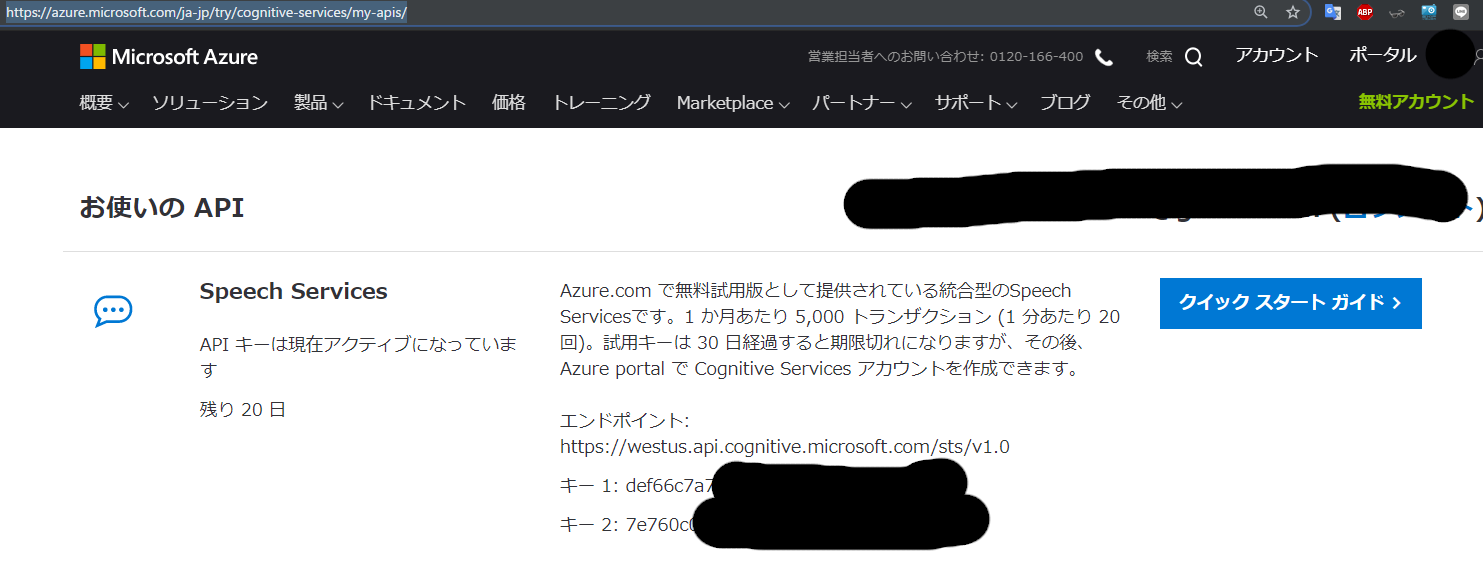
Azureの認証情報
IBM WATSON 認証情報
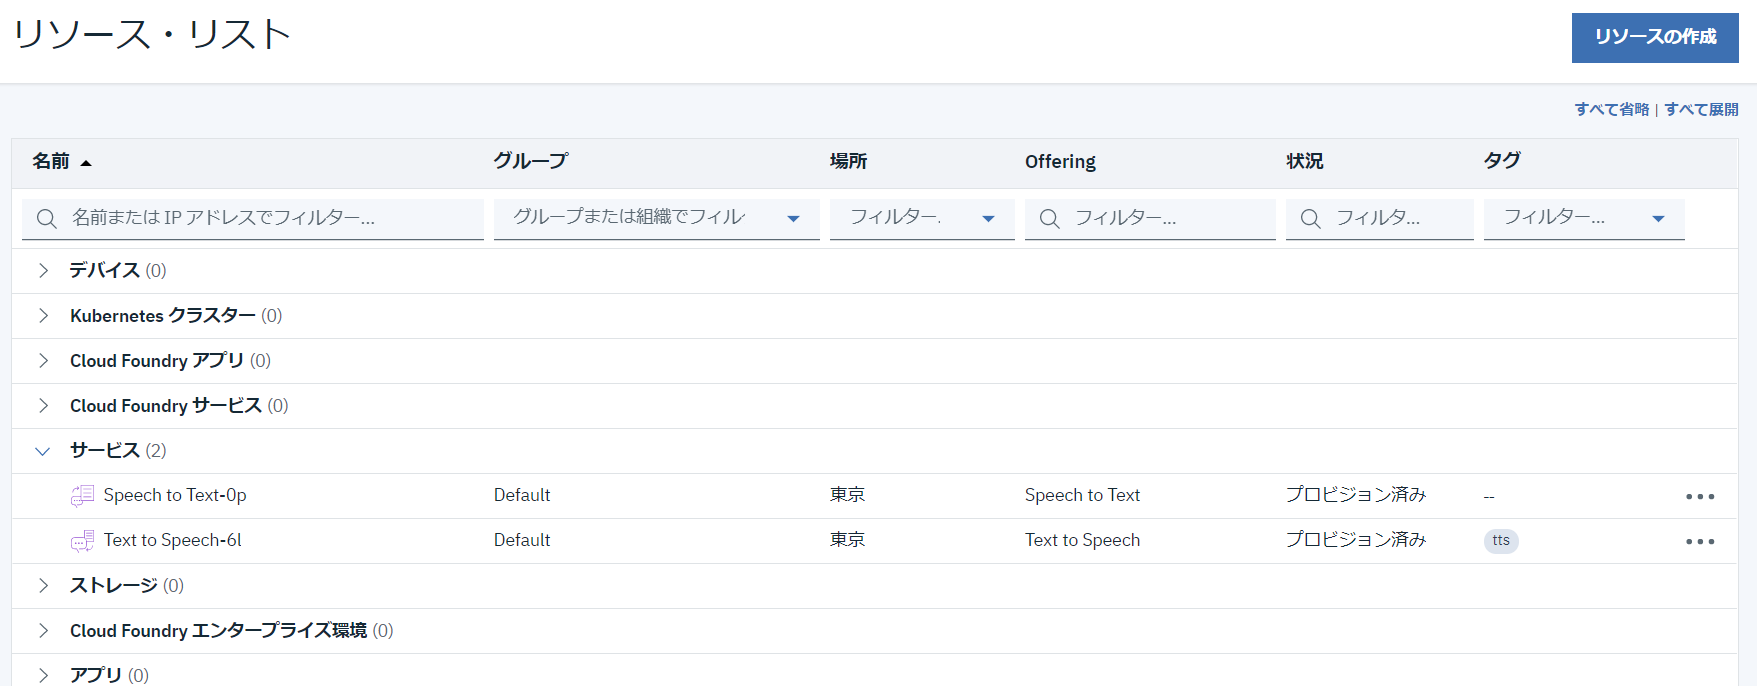
サービスをクリックすると
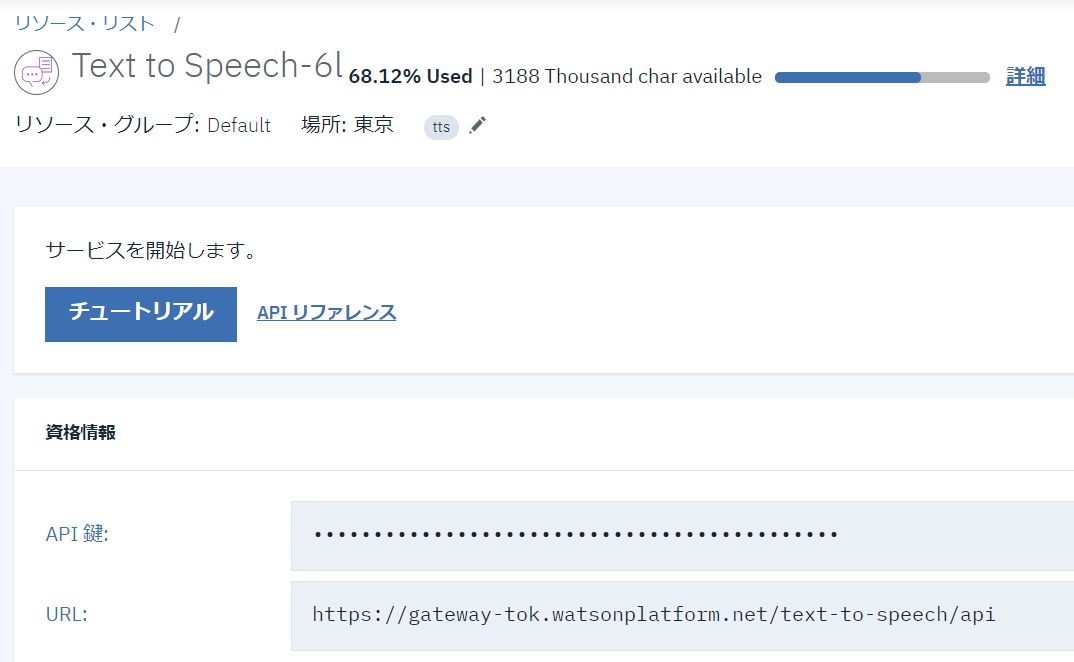
API 鍵:が表示されるのでiam_apikey=下記のコピペする、
tts = TextToSpeechV1(iam_apikey='xxxxxxxxxxxxxxxxxxxxxxxxxxxxxxxxxx',
        url='https://gateway-tok.watsonplatform.net/text-to-speech/api/')
Googleの認証情報
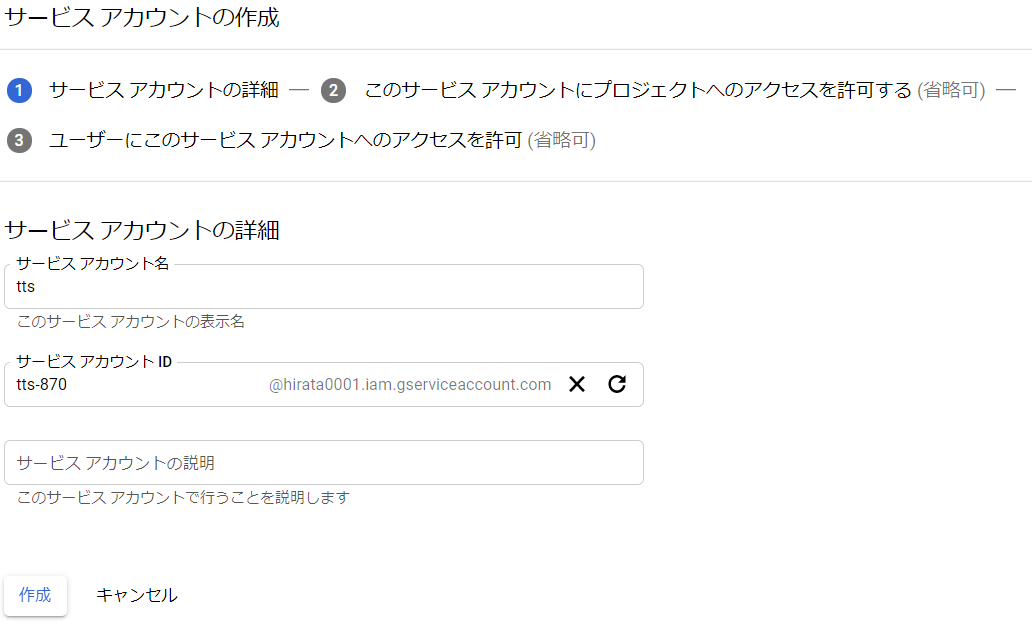
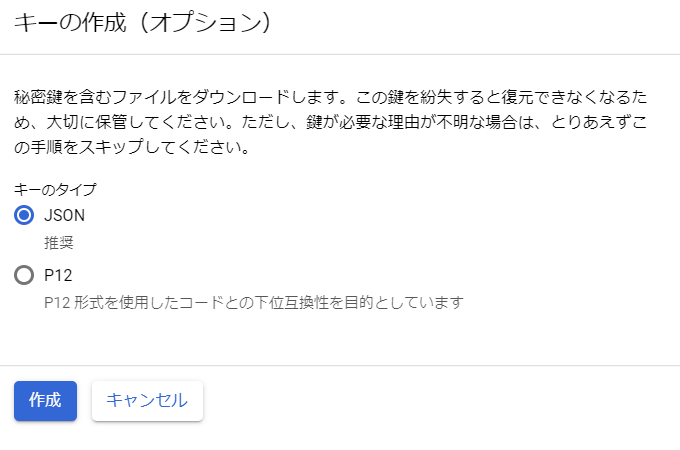
jsonファイルがダウンロードできるので環境変数にセットする。
$ export GOOGLE_APPLICATION_CREDENTIALS=auth.json