Windows 10 のCortana(コルタナ)からRaspberry PIを制御する。
Cortana コルタナは、Windows 10に搭載されている音声認識です。

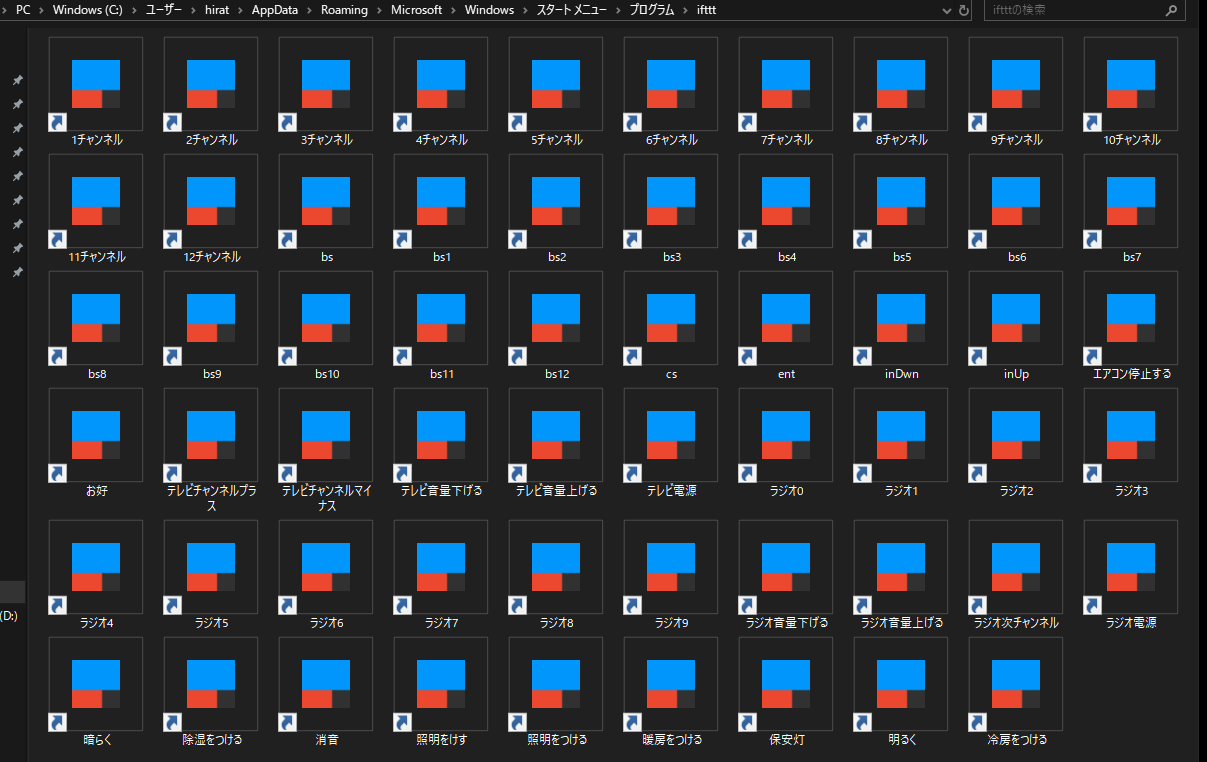
Windows 10 Cortanaでコマンドを認識させるためには、スタートメニューにショートカットを作成します。iftttというホルダを作成しショートカットを配置します。
例えば  「照明をつける」を開くと話すとショートカットを実行します。
注意 配置した直後は、認識しないのでクリックして実行してください。
C:\Users\{ユーザー名}\AppData\Roaming\Microsoft\Windows\Start Menu\Programs\ifttt
以下に実行コマンドのショートカットを作成します。

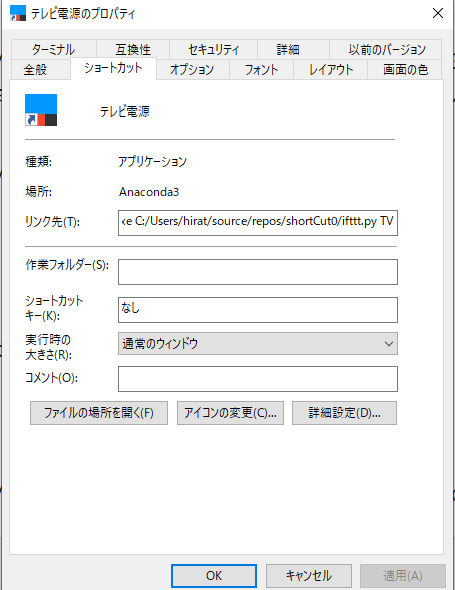
リンク先は、以下のプログラムになっている。
C:\Users\hirat\Anaconda3\python.exe C:/Users/hirat/source/repos/shortCut0/ifttt.py TV
ifttt.pyは。単純なweb requestコマンドを作成した。
iftttへのリクエストをpythonでコーディングすると
import os,sys,requests
if __name__ == '__main__':    r=requests.post('https://maker.ifttt.com/trigger/HomeControl/with/key/{キー文字列}',
                   {'value1':sys.argv[1]})
    print(r.text)
Windows Script Host ライブラリのインストール
pip install pypiwin32
プログラムでwindowsのショートカットを作成するためには、Windows Script Hostを使用します。
import win32api as WScript
import win32com.client
if __name__ == '__main__':
    cortana={"1チャンネル":"1","2チャンネル":"2","3チャンネル":"3","4チャンネル":"4","5チャンネル":"5","6チャンネル":"6","7チャンネル":"7","8チャンネル":"8","9チャンネル":"9","10チャンネル":"10","11チャンネル":"11","12チャンネル":"12","テレビ電源":"TV","テレビチャンネルプラス":"cup","テレビチャンネルマイナス":"cdwn","テレビ音量上げる":"vup","テレビ音量下げる":"vdwn","消音":"vcut","bs":"bs","cs":"cs","bs1":"bs1","bs2":"bs2","bs3":"bs3","bs4":"bs4","bs5":"bs5","bs6":"bs6","bs7":"bs7","bs8":"bs8","bs9":"bs9","bs10":"bs10","bs11":"bs11","bs12":"bs12","inUp":"inUp","inDwn":"inDwn","ent":"ent","照明をつける":"on","照明をけす":"off","お好":"fav","保安灯":"small","明るく":"lup","暗らく":"ldwn","冷房をつける":"ac","エアコン停止する":"acoff","暖房をつける":"heeting","除湿をつける":"Joshitsu","ラジオ電源":"ron","ラジオ1":"r1","ラジオ2":"r2","ラジオ3":"r3","ラジオ4":"r4","ラジオ5":"r5","ラジオ6":"r6","ラジオ7":"r7","ラジオ8":"r8","ラジオ9":"r9","ラジオ0":"r0","ラジオ音量上げる":"R+","ラジオ音量下げる":"R-","ラジオ次チャンネル":"r>"}
    for key,item in cortana.items():
        WshShell = win32com.client.Dispatch("WScript.Shell")
        shortCut=WshShell.CreateShortcut("C:/Users/hirat/AppData/Roaming/Microsoft/Windows/Start Menu/Programs/ifttt_p/%s.lnk"%key)
        shortCut.TargetPath="python.exe"
        shortCut.Arguments = "C:/Users/hirat/source/repos/shortCut0/ifttt.py %s"%item
        shortCut.IconLocation ="C:/Users/hirat/source/repos/shortCut0/favicon.ico"
        shortCut.Save()
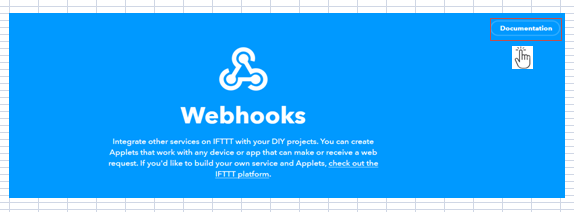
Webhooksを定義します。


iftttのリクエストは、下記のURLから入手します。
https://ifttt.com/maker_webhooksから
MQサービスを利用する。
MQ(メッセージキューイング)とは、異なるソフトウェア間でデータを送受信する手法の一つで、直接データを渡すのではなく一旦第三者のソフトウェアに預けることで、送信側も受信側も好きなタイミングで送受信処理をおこなうことができるようにする方式。
今回は、PCとRaspberry PIのインターフェイス接続するのにもちいる。
本来は、メインフレームとATMなどの異なるシステムを連携させるのに用いる。

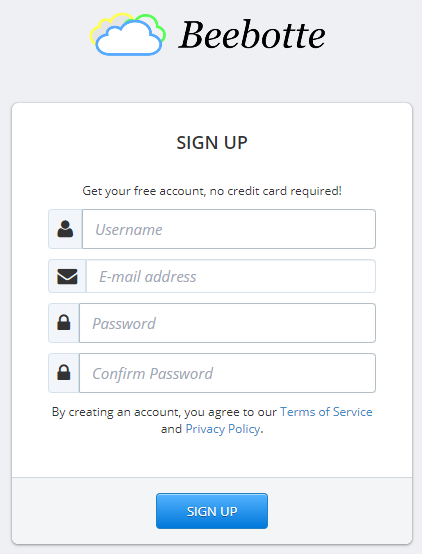
BeeBottleは、無料で利用できるMQサービスです。
ログインした直後には、testとチャンネルが作られる。

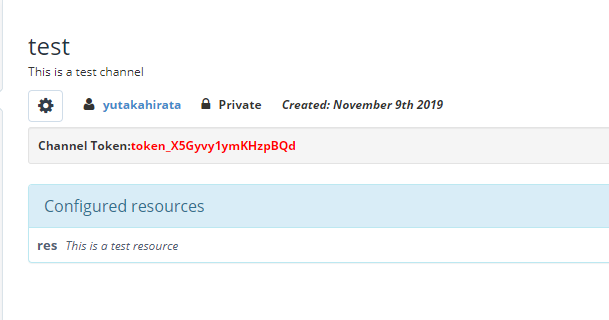
チャンネルトークンをメモする。

consoleを開いて送受信ができることを確認しよう。

{ "channel": "test", "resource": "res", "eid": "test.res", "data": "Hello World", "ts": 1573277790737 }
SubscribeしてPublishからHello worldできればOK!
次は、LAN内に接続しているRaspberry PIのpythonのプログラムがSubscribeできるかテストする。
アクセスするための証明書をhttps://beebotte.com/certs/mqtt.beebotte.com.pemからダウンロードする。
Raspberry piがSubscribeするためのテストプログラム
import paho.mqtt.client as mqtt
import json
HOST = 'mqtt.beebotte.com'
PORT = 8883
CA_CERTS = 'mqtt.beebotte.com.pem'
TOKEN = '{トークン文字列}'
TOPIC = 'test/res' #チャンネル/リソース
# 接続されたとき
def on_connect(client, userdata, flags, respons_code):
    print('on_connect status {0}'.format(respons_code))
# メッセージを受け取ったとき
def on_message(client, userdata, msg):
    msg=json.loads(msg.payload.decode("utf-8"))
    mqmsg=msg['data']
    print(mqmsg)


client = mqtt.Client()
client.on_connect = on_connect
client.on_message = on_message
client.username_pw_set('token:%s' % TOKEN)
client.tls_set(CA_CERTS)
client.connect(HOST, PORT)
client.subscribe(TOPIC)
print('start')
# イベントループ
while True:
    try:
        client.loop_start()
    except:
        break
print('exit')
Publishのツール https://beebotte.com/api/play

これをPython プログラムでコーディングすると
import os,sys,requests,json
if __name__ == '__main__':
    payload = {'data': sys.argv[1]}
    r=requests.post('https://api.beebotte.com/v1/data/write/test/res?token=token_X5Gyvy1ymKHzpBQd',payload)
    print(r.text)
実行結果
C:\Users\hirat\source\repos\mqtt>python publish.py "hello world 東京"
true

C:\Users\hirat\source\repos\mqtt>test.py
start
on_connect status 0
hello world 東京
exit
テスト用Curl
curl -i -H "Content-Type: application/json" -X POST -d '{"data":"Hello World form curl"}' https://api.beebotte.com/v1/data/write/test/res?token=token_X5Gyvy1ymKHzpBQd
