たくさんボタンを配置する。
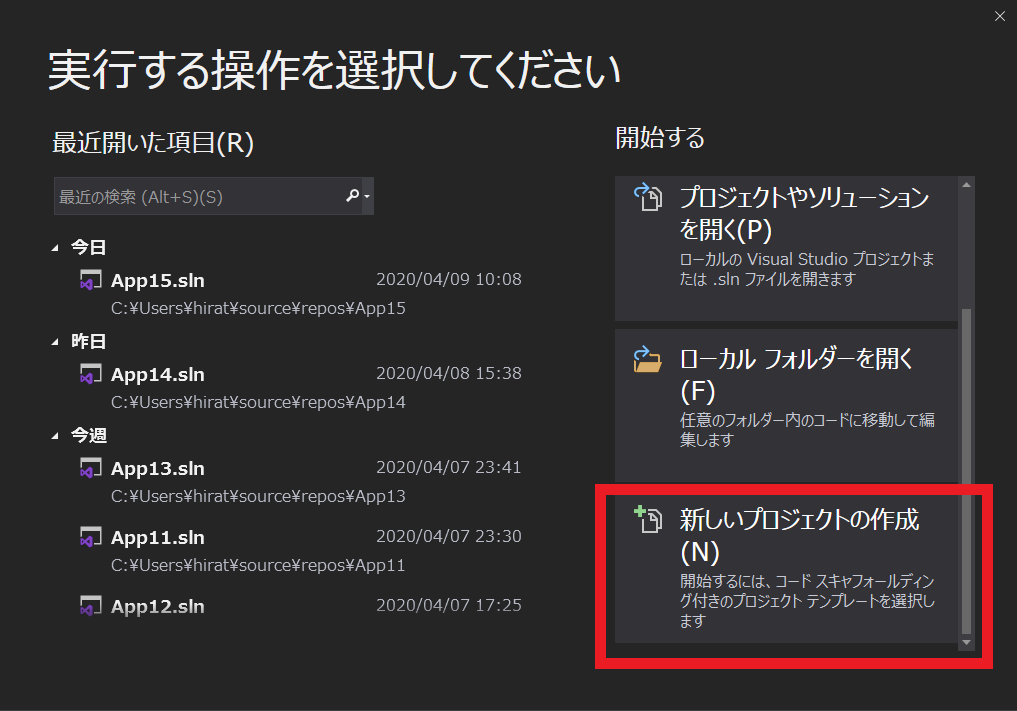
Visual Studio 2019でプロジェクトを作成する。

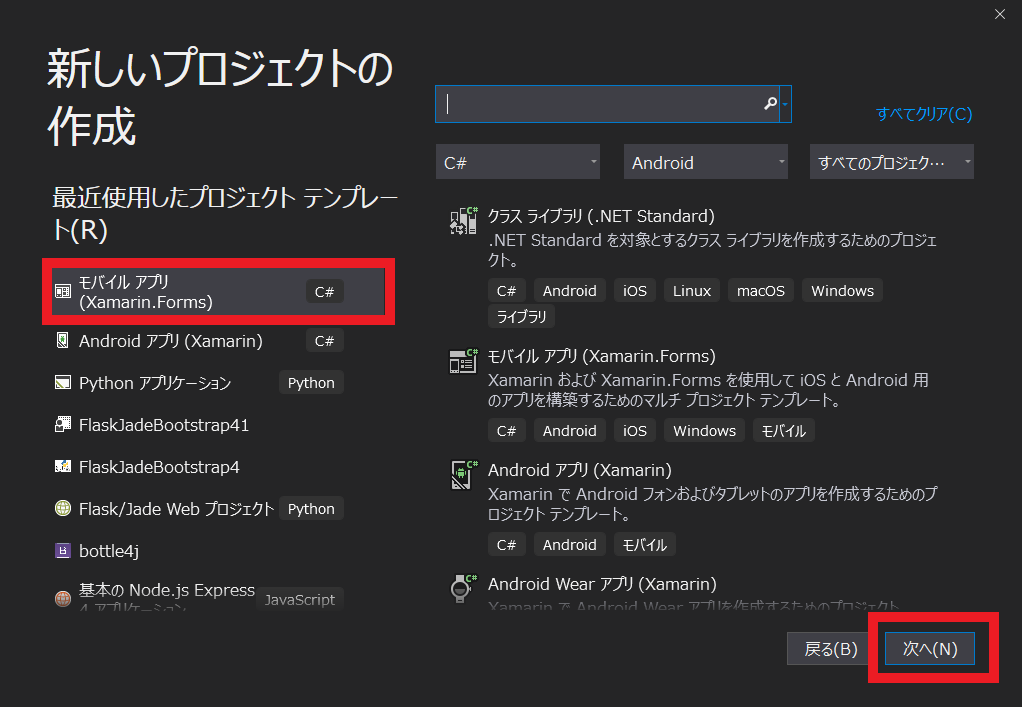
Xamarin Formsを選択する。
Windows APPを作成するような感覚で開発できる。

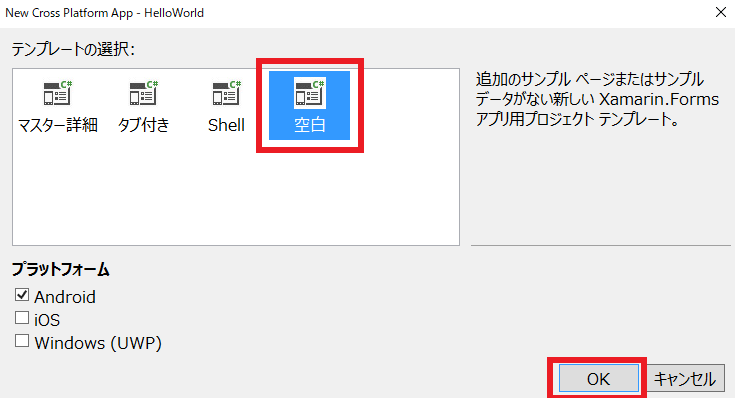
空白のプロジェクトを作成する。

MainPage.xamlは、そのまま使います。
MainPage.xaml
<?xml version="1.0" encoding="utf-8" ?>
<ContentPage xmlns="http://xamarin.com/schemas/2014/forms"
             xmlns:x="http://schemas.microsoft.com/winfx/2009/xaml"
             xmlns:d="http://xamarin.com/schemas/2014/forms/design"
             xmlns:mc="http://schemas.openxmlformats.org/markup-compatibility/2006"
             mc:Ignorable="d"
             x:Class="ManyButtons.MainPage">

    <StackLayout>
        <!-- Place new controls here -->
        <Label Text="Welcome to Xamarin.Forms!"
           HorizontalOptions="Center"
           VerticalOptions="CenterAndExpand" />
    </StackLayout>

</ContentPage>
プログラムによりボタンを生成し、Gridに配置した。
MainPage.xaml.cs
using Android.Widget;
using System;
using System.Collections.Generic;
using System.ComponentModel;
using System.Linq;
using System.Text;
using System.Threading.Tasks;
using Xamarin.Forms;

namespace ManyButtons
{
    // Learn more about making custom code visible in the Xamarin.Forms previewer
    // by visiting https://aka.ms/xamarinforms-previewer
    [DesignTimeVisible(false)]
    public partial class MainPage : ContentPage
    {
        public MainPage()
        {
            InitializeComponent();
            Setup();
        }
        // Button に Tag プロパティを追加
        class Mbutton : Xamarin.Forms.Button
        {
            public object Tag
            {
                get { return (object)GetValue(TagProperty); }
                set { SetValue(TagProperty, value); }
            }

            public static readonly BindableProperty TagProperty =
                BindableProperty.Create(nameof(Tag), typeof(object), typeof(Mbutton), null);
        }
        // 16個のボタンを作成してグリットに配置
        void Setup()
        {
            var g = new Grid() {HeightRequest=400 };
            var k = 0;
            for(var i = 0; i < 4; i++)
            {
                for (var j = 0; j < 4; j++)
                {
                    var b = new Mbutton() { Text = $"{k}",Tag=k};
                    b.Clicked += B_Clicked;
                    g.Children.Add(b, j, i);
                    k++;
                }
            }
            //余白部の作成
            var l=new Label();
            g.Children.Add(l, 0, 8);
            Content = g;
        }

        private void B_Clicked(object s, EventArgs e)
        {
            var sx = s as Mbutton;
            Toast.MakeText(Android.App.Application.Context,
                $"{sx.Tag}がタッチされた",ToastLength.Short).Show();
        }
    }
}
注意 xamarin forms buttonには、TagプロパティがないのでButtonを継承してobject Typeの何でもセットできるTagを用意した。
Toastは、アンドロイド用に用意されたメッセージボックスで表示後一定時間で消される。
実行すると下記のようになる。
MessageBox(DisplayAlert)版
MainPage.xaml.cs
using Android.Widget;
using System;
using System.Collections.Generic;
using System.ComponentModel;
using System.Linq;
using System.Text;
using System.Threading.Tasks;
using Xamarin.Forms;

namespace ManyButtons
{
    // Learn more about making custom code visible in the Xamarin.Forms previewer
    // by visiting https://aka.ms/xamarinforms-previewer
    [DesignTimeVisible(false)]
    public partial class MainPage : ContentPage
    {
        public MainPage()
        {
            InitializeComponent();
            Setup();
        }
        // Button に Tag プロパティを追加
        class Mbutton : Xamarin.Forms.Button
        {
            public object Tag
            {
                get { return (object)GetValue(TagProperty); }
                set { SetValue(TagProperty, value); }
            }

            public static readonly BindableProperty TagProperty =
                BindableProperty.Create(nameof(Tag), typeof(object), typeof(Mbutton), null);
        }
        // 16個のボタンを作成してグリットに配置
        void Setup()
        {
            var g = new Grid() {HeightRequest=400 };
            var k = 0;
            for(var i = 0; i < 4; i++)
            {
                for (var j = 0; j < 4; j++)
                {
                    var b = new Mbutton() { Text = $"{k}",Tag=k};
                    b.Clicked += B_Clicked;
                    g.Children.Add(b, j, i);
                    k++;
                }
            }
            //余白部の作成
            var l=new Label();
            g.Children.Add(l, 0, 8);
            Content = g;
        }

        private void B_Clicked(object s, EventArgs e)
        {
            var sx = s as Mbutton;
            DisplayAlert("Alert", $"ボタン{sx.Tag}がタッチされた", "OK");
        }
    }
}

