背景
最近、画像認識に興味を持ち始め色々調べていくうちに、学習済みモデルというものが結構手軽に利用できることを知る。大多数の人にとっては、初歩的すぎて役に立たないかもしれないが、自分の備忘録と文章を書く訓練として、また自分のように本当に初歩の初歩の段階にいる方向けにとりあえず書いていく。ちなみに、内容としてはほとんどyolo公式をなぞっただけである。
今回のゴール
yolov3を使い、画像から物体検出させる。
やってみた
まずはgit cloneコマンドで向こうのリポジトリを丸々もらう。するとカレントディレクトリにdarknetリポジトリができる。
git clone https://github.com/pjreddie/darknet
cd darknet
make
公式には「Easy!」って書いてある。
あとは重みファイルをもってきて、実行するだけ
wget https://pjreddie.com/media/files/yolov3.weights
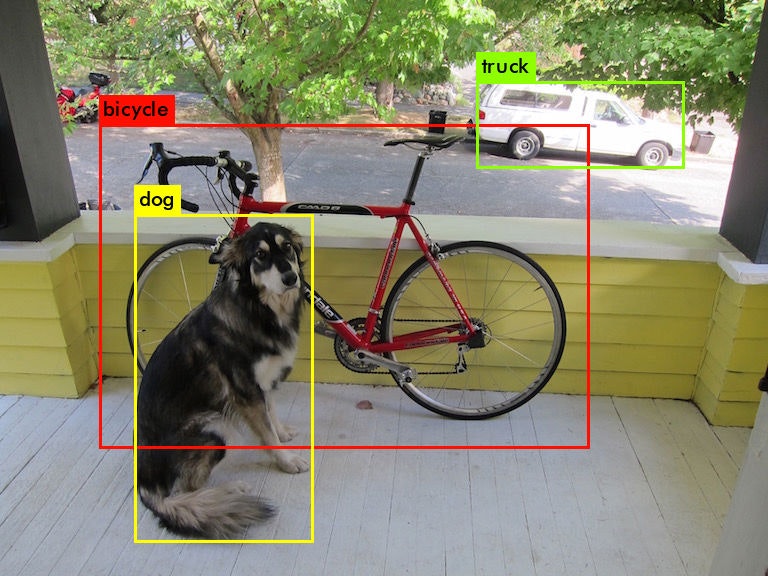
./darknet detect cfg/yolov3.cfg yolov3.weights data/dog.jpg
のはずだったが、自分の環境(mac)にwgetコマンドをいれていなかったのでインストールして、
brew install wget
リトライ!
Loading weights from yolov3.weights...Done!
data/dog.jpg: Predicted in 25.730297 seconds.
bicycle: 99%
truck: 92%
dog: 100%
できた!
上のコマンドの通り、darknetフォルダ配下のdataフォルダ内のdog.jpgに対して判定を実行している。そのため、他の画像で試したい時はdata/dog.jpgの部分を変更する。
ちなみに自分のカスタマイズなしのmacPC環境(CPU)では結果の表示まで15秒ほどかかった。
yolo公式にはv3以外にもいくつかバージョンがあり、上記と同様の手続きで使うことができそう。(未確認)
次はopenCVで画像に枠と判定結果を表示させるところまで書きたい。
【追記】
一応、openCVをインストールせずとも、darknetのフォルダ内にpredictions.jpgとして枠付きで結果を出力しているようだ。