やること
- 前々回と前回で SSD と YOLO v3 でそれぞれ物体検出を実施してみましたが、今回は M2Det で物体検出を実施してみます
- 今回は Google Colaboratory 上で実行していきます
概要
- 実行環境の準備(Google Colaboratory にて実行)
- Google Drive からモデルをダウンロード
- 画像ファイルのコピー
- モデルの実行
- 結果の表示
実行環境
- google colaboratory
- pytorch
- opencv
- tqdm
- addict
1.実行環境の準備(Google Colaboratory にて実行)
- Google Colaboratory を開き、「ランタイム」タブの「ランタイムのタイプの変更」から「GPU」へ変更しておきます

- その後、以下を実行していきます
- 各種パッケージをインストール
- リポジトリをクローン
- シェルを実行
実行環境の準備
!pip install torch torchvision
!pip install opencv-python tqdm addict
!git clone https://github.com/qijiezhao/M2Det.git
%cd M2Det/
!sh make.sh
2. Google Drive からモデルをダウンロード
- GitHubのREADMEに学習済モデルのリンク先が記載されています(https://drive.google.com/file/d/1NM1UDdZnwHwiNDxhcP-nndaWj24m-90L/view) ので、この Google Drive のリンクからコード上でダウンロードしていきます
- ダウンロードは、[こちら] (https://github.com/nsadawi/Download-Large-File-From-Google-Drive-Using-Python)のコードを参考にしました
-
download_file_from_google_driveを実行することで、コマンドによるダウンロードが可能です
import requests

def download_file_from_google_drive(id, destination):
    URL = "https://docs.google.com/uc?export=download"

    session = requests.Session()

    response = session.get(URL, params = { 'id' : id }, stream = True)
    token = get_confirm_token(response)

    if token:
        params = { 'id' : id, 'confirm' : token }
        response = session.get(URL, params = params, stream = True)

    save_response_content(response, destination)

def get_confirm_token(response):
    for key, value in response.cookies.items():
        if key.startswith('download_warning'):
            return value

    return None

def save_response_content(response, destination):
    CHUNK_SIZE = 32768

    with open(destination, "wb") as f:
        for chunk in response.iter_content(CHUNK_SIZE):
            if chunk: # filter out keep-alive new chunks
                f.write(chunk)

file_id = '1NM1UDdZnwHwiNDxhcP-nndaWj24m-90L'
destination = './m2det512_vgg.pth'
download_file_from_google_drive(file_id, destination)
3. 画像ファイルのコピー
- Google Drive のマウントを実施します
- その後、画像ファイルの入ったフォルダにある jpg ファイルを、M2Det を実行する「imgs」に全てコピーします(私の環境では、My Drive > ML > work 配下に画像ファイルを格納しています)
GoogleDriveのマウント
from google.colab import drive
drive.mount('/content/drive')
画像ファイルのコピー
!cp /content/drive/My\ Drive/ML/work/*.jpg ./imgs
4. モデルの実行
- モデルを実行します
モデルの実行
!python demo.py -c=configs/m2det512_vgg.py -m=m2det512_vgg.pth
5. 結果の表示
- 実行した結果を表示します
- 実行した画像ファイルは、「XXX_m2det.jpg」のように作成されます
import cv2
import matplotlib.pyplot as plt

plt.figure(figsize=(5, 5), dpi=200)
img = cv2.imread('imgs/herd_of_horses_m2det.jpg')
show_img = cv2.cvtColor(img, cv2.COLOR_BGR2RGB)
plt.imshow(show_img)

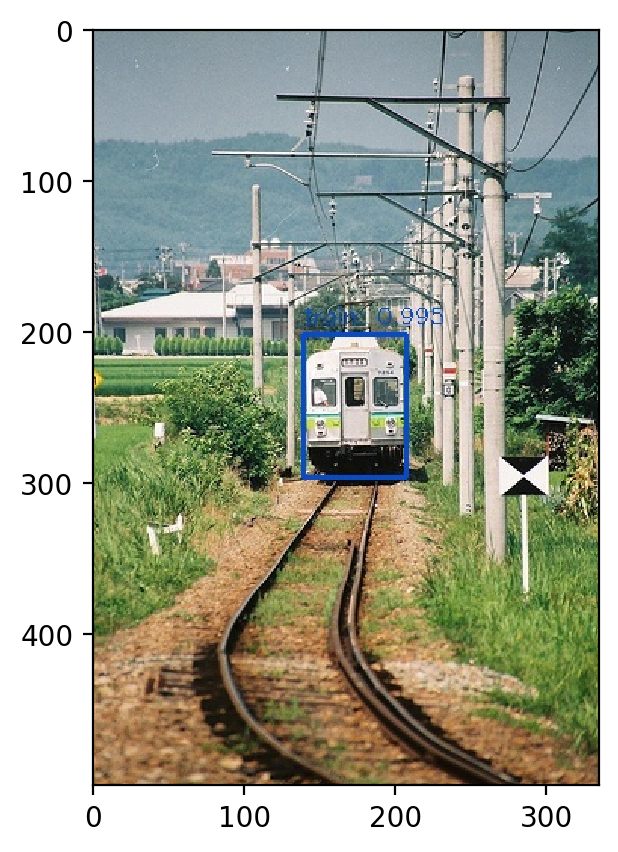
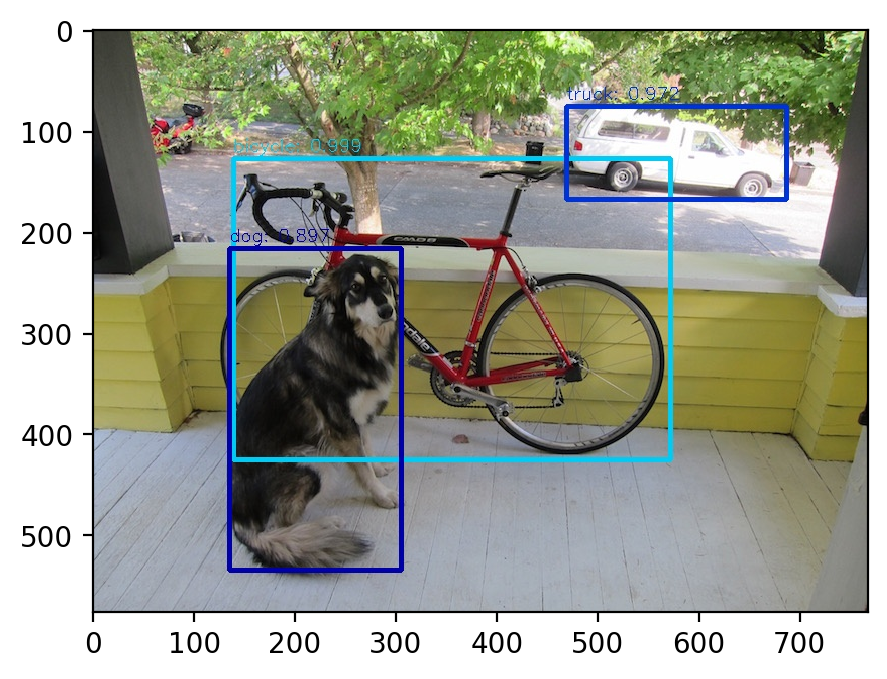
- そのほかの画像も実施しました

ソースコード