はじめに
WordPressをFargateで運用時、apacheのエラーログに以下の出力を発見しました。
[Thu May 1 xx:xx:xx.xxxxx 2022] [authz_core:error] [pid 694]
[client xxx.xxx.xxx.xxx:43092] AH01630: client denied by server configuration: /var/www/html/server-status
client IPから、海外のbotがhttps://ドメイン/server-statusにアクセスしていることが分かりました。
この対応について説明します。
事前構築
- 以下を記事通り、wordpressをfargateで構築済み
- 基本的に下記のDockerfileをビルド後、ECRにpushし、デプロイしただけです。
FROM wordpress:5.8.1-php7.4-apache

RUN set -ex; \
    apt-get update && apt-get install -y \
        wget \
        unzip \
    && apt-get clean \
    && rm -rf /var/lib/apt/lists/*

# /usr/src/wordpress/wp-content/plugin にプラグインを置いておくと、ビルド時、ドキュメントルートに設置する
WORKDIR /usr/src/wordpress/wp-content/plugins

# プラグイン[WP Offload Media Lite for Amazon S3]をインストール
RUN set -ex; \
    wget -q -O amazon-s3-and-cloudfront.zip https://downloads.wordpress.org/plugin/amazon-s3-and-cloudfront.1.4.3.zip \
    && unzip -q -o '*.zip' -d /usr/src/wordpress/wp-content/plugins \
    && chown -R www-data:www-data /usr/src/wordpress/wp-content/plugins \
    && rm -f '*.zip'

# 所有者の変更
RUN chown -R www-data:www-data /var/www/html

WORKDIR /var/www/html
wordpress:5.8.1-php7.4-apacheイメージをpullし、/var/www/html配下にwordpressのファイル・ディレクトリを配置しています。
また、ビルド時のファイルは、Dockerfileのみです。
.
└── Dockerfile
エラー対応
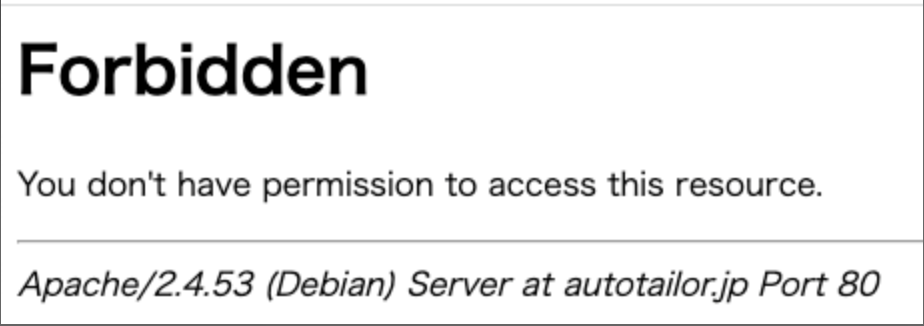
まず、ブラウザでhttps://ドメイン/server-statusにアクセスすると、以下のエラー表示がされました。
パスが適切でない場合、wordpressのテーマに沿った404エラーが表示されるのですが、/server-statusだとされませんでした。
例えば/testestestの場合、wordpressのテーマに沿った404エラーが表示されます。
confの記載方法を確認
client denied by server configuration:で検索すると、apacheのconfの書き方が NG の場合に起こるエラーログと出ました。
<Directory /var/www/html>
	Options Indexes FollowSymLinks
-	AllowOverride None
-    Order allow,deny
+    Allow from all
	Require all granted
</Directory>
NGの書き方になっているか確認するため、fargate exec でfargate内に入り、confファイルを探し確認しましたが、書き方に問題はありませんでした。
ちなみに、wordpress:5.8.1-php7.4-apacheのイメージだと、設定ファイルは、httpd.confではなく/etc/apache2/apache2.confでした。
<Directory /var/www/>
	Options Indexes FollowSymLinks
	AllowOverride None
	Require all granted
</Directory>
fargate execの方法は、こちらを参照してください。
status_moduleの起動
次に/server-statusで調べたところ、
/server-statusのパスにブラウザからアクセスすると、 apache のサーバの動作状況の確認を行うことができるstatus_module (mod_status)というモジュールがapacheにあると分かりました。
fargate execでstatus_moduleが起動しているか確認すると、起動しておりました。
$ apachectl -M
status_module
また、status_moduleの設定ファイルは、/etc/apache2/mods-available/status.confにあり、確認すると、Require localが設定されていることがわかりました。
<IfModule mod_status.c>
	# Allow server status reports generated by mod_status,
	# with the URL of http://servername/server-status
	# Uncomment and change the "192.0.2.0/24" to allow access from other hosts.

	 <Location /server-status>
	 	SetHandler server-status
	 	Require local
	 	#Require ip 192.0.2.0/24
	 </Location>

	# Keep track of extended status information for each request
	ExtendedStatus On

	# Determine if mod_status displays the first 63 characters of a request or
	# the last 63, assuming the request itself is greater than 63 chars.
	# Default: Off
	#SeeRequestTail On


	<IfModule mod_proxy.c>
		# Show Proxy LoadBalancer status in mod_status
		ProxyStatus On
	</IfModule>


</IfModule>
Location /server-statusにRequire localが指定されていたため、/server-statusアクセスしても、リクエストが拒否され、Forbiddenが返されたということですね。
対策
httpd.confを修正しstatus_moduleの起動を無効にすると、良いのですが、httpd.confが見当たらず、無効化できませんでした。
別の対策として、status.confのLocationをコメントアウトしました。Location箇所の削除でもよいです。
#<Location /server-status>
#	SetHandler server-status
#	Require local
#	#Require ip 192.0.2.0/24
#</Location>
コメントアウトでなく、Require all deniedをしてもapacheにエラーログとして、出力されるため、コメントアウトの対応をしました。
コメントアウトすることで、/server-status にアクセスすると、status.confではなく、apache2.confのLocationにルーティングされ、wordpressテーマに沿った404エラーが返ります。
Dockerfileとstatus.confの修正
fargate execでファイルを修正してもコンテナが再起動されると、リセットされますので、
Locationをコメントアウトしたstatus.confファイルをローカルに作成し、ビルドします。
<IfModule mod_status.c>
	# Allow server status reports generated by mod_status,
	# with the URL of http://servername/server-status
	# Uncomment and change the "192.0.2.0/24" to allow access from other hosts.

	# <Location /server-status>
	# 	SetHandler server-status
	# 	Require local
	# 	#Require ip 192.0.2.0/24
	# </Location>

	# Keep track of extended status information for each request
	ExtendedStatus On

	# Determine if mod_status displays the first 63 characters of a request or
	# the last 63, assuming the request itself is greater than 63 chars.
	# Default: Off
	#SeeRequestTail On


	<IfModule mod_proxy.c>
		# Show Proxy LoadBalancer status in mod_status
		ProxyStatus On
	</IfModule>


</IfModule>
Dockerfileも修正します。
FROM wordpress:5.8.1-php7.4-apache

RUN set -ex; \
    apt-get update && apt-get install -y \
        wget \
        unzip \
    && apt-get clean \
    && rm -rf /var/lib/apt/lists/*

# /usr/src/wordpress/wp-content/plugin にプラグインを置いておくと、ビルド時、ドキュメントルートに設置する
WORKDIR /usr/src/wordpress/wp-content/plugins

# プラグイン[WP Offload Media Lite for Amazon S3]をインストール
RUN set -ex; \
    wget -q -O amazon-s3-and-cloudfront.zip https://downloads.wordpress.org/plugin/amazon-s3-and-cloudfront.1.4.3.zip \
    && unzip -q -o '*.zip' -d /usr/src/wordpress/wp-content/plugins \
    && chown -R www-data:www-data /usr/src/wordpress/wp-content/plugins \
    && rm -f '*.zip'

+ COPY conf/status.conf /etc/apache2/mods-available

# 所有者の変更
RUN chown -R www-data:www-data /var/www/html

WORKDIR /var/www/html
ディレクトリ構造は以下のようになりました。
これで、ビルドし、ECRにpushして、デプロイすると反映されます。
詳しくは、先ほど紹介した事前構築の記事を参照してください。
.
├── conf
│   └── status.conf
└── Dockerfile
/server-status にアクセスすると、wordpressテーマに沿った404エラーが返り、エラーログが出力されず、無事解決しました。
参照
