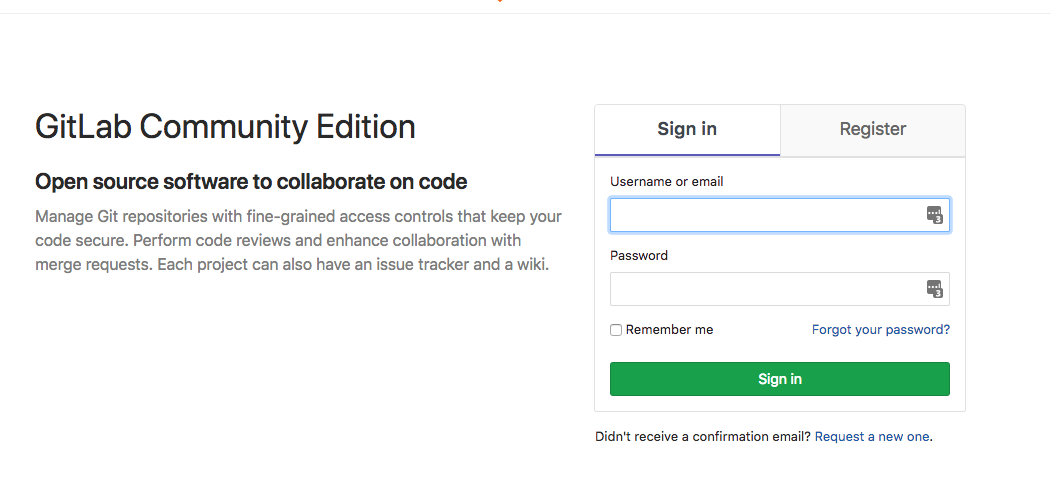
はじめに
ここ最近、リポジトリ管理しているプロジェクトが増えてきたこともありつつ、プライベートリポジトリを構築するモチベーションも増えつつあります。
無料でプライベートリポジトリを作成したいのであれば、Bitbucketの無料プランでも、無制限にプライベートリポジトリが作成可能ですが、どうせならリポジトリサーバーを自分でも運用したいと思い、借りたVPS(OSはFreeBSD)にGitLabサーバーを構築した時の記事を書こうと思います。
OS
借りているVPSにFreeBSDをインストールしています。
% uname -a
FreeBSD ns1.jabug.jp 11.1-RELEASE-p1 FreeBSD 11.1-RELEASE-p1 #2 r313908+91baad1bb58b(releng/11.1): Tue Oct 17 00:34:17 JST 2017     root@ns1.jabug.jp:/usr/obj/usr/src/sys/MYKERNEL  amd64
jail
jailとは、OSレベル仮想化機構実装の一つであり、ホストマシンとは独立した小さなシステムでFreeBSDを動かすことができる機能です。LinuxではDockerが有名になってしまいましたが、jailは古くからFreeBSDで実現されています。今回はホストマシンではなく、その中で小さなFreeBSDマシンを構築して、その上でGitLabサーバーを構築しようと思います。
qjailによるjailシステムの構築
jailはFreeBSDの標準機能ですので、最新のFreeBSDマシンであれば jail コマンドであらかたの設定が行えます。しかし、jailシステムが多くなるにつれてどうしても管理が煩雑化してしまう可能性があるため、今回は qjail という jailマネージャーをインストールし、その上でjailを作成・管理しようと思います。
% sudo pkg install qjail
& sudo qjail install
% sudo qjail create -n lo0 -4 127.0.0.1 git
Successfully created  git
VIMAGEによるjailネットワークの設定
jailでFreeBSDのシステムを小さく分けられるのですが、これは作成したjailシステムをホストマシンや他のjailから独立させているだけです。そのため、ネットワークスタックも分割している訳ではありません。
jail専用に独自にネットワークスタックを作成したいのであれば、VIMAGEによって他のシステムからは独立したネットワークを作成することができます。
% sudo ifconfig epair create
FreeBSDでは、epairというインタフェースを作成することができます。これはその名前の通りペアとなっているインタフェースであり、上記のコマンドで epair0a, epair0b の二つのインタフェースを作成することができます。
このペアのインタフェースは相互に通信することが可能です。この内、一つをホストマシン、もう一方をjailシステムに紐付けさせることにより、ホストマシンとjailシステムの相互通信が可能となります。しかし、単にホストマシンと紐づけるだけでは、やはり管理が煩雑化するかと思われます。
ここでは、仮想インタフェースと同じく仮想スイッチも一緒に作成することにします。
% sudo ifconfig bridge create
以上の設定をホストマシンの起動スクリプト、およびjailシステムの設定に紐付けさせる様にします。
qjail_enable="YES"
cloned_interfaces="bridge0 epair0"
ifconfig_epair0a="up"
ifconfig_bridge0="up"
ifconfig_bridge0="addm epair0a addm vtnet0"
ifconfig_bridge0_alias0="inet 192.168.0.1/24"
pf_enable="YES"
pf_flags=""
pf_rules="/etc/pf.conf"
pflog_logfile="/var/log/pflog"
pflog_enable="YES"
gateway_enable="YES"
qjailで各jailシステムの起動スクリプトを設定するには、 qjail.config/ 配下にあるjail名のものが設定ファイルとなります。
git {
host.hostname       =  "git";
path                =  "/usr/jails/git";
mount.fstab         =  "/usr/local/etc/qjail.fstab/git";
exec.consolelog     =  "/var/log/qjail.www.console.log";
mount.devfs;
devfs_ruleset       =  "4";
vnet                =  "new";
vnet.interface      =  "epair0b";
exec.start   = "ifconfig epair0b 192.168.0.2 netmask 255.255.255.0";
exec.start  += "route add default 192.168.0.1";
exec.start  += "/bin/echo "epair0b" > /etc/epair";
exec.start  += "/bin/sh /etc/rc";
exec.stop    = "/bin/sh /etc/rc.shutdown";
}

% sudo qjail restart git
このあたりは非常に面倒な設定かと思われますので、分かりにくい場合は後日コメント・執筆します。
以上で、jailシステムが構築されます。
なお、qjail経由でjailシステムにログインするには qjail console を使います。
% sudo qjail console git
GitLabのインストール準備作業
では、これよりGitLabをjailシステムにインストールしてみましょう。インストール手順ですが、GitLabのバージョン毎にインストール手順書が用意されているため、これに沿った形で必要な設定を行なっていこうと思います。
以降は、jailシステムにログインした後に操作するコマンド群です。
UTF-8の設定
まずはじめに、jailシステムのロケールをUTF-8に変更します。
$ vi /etc/login.conf
default:\
...
:charset=UTF-8:\
:lang=en_US.UTF-8:
GitLabのインストール
pkgより、GitLabnのバイナリパッケージを入手することができます。
今回はGitLabの最新版を手に入れたいため、カスタムリポジトリからGitLabをインストールするようにします。
% mkdir -p /usr/local/etc/pkg/repos
% vi /usr/local/etc/pkg/repos/FreeBSD.conf

# add the following to FreeBSD.conf:

FreeBSD: {
  url: "pkg+http://pkg.FreeBSD.org/${ABI}/latest"
}

% pkg update
% pkg upgrade
% pkg install www/gitlab-ce
% sysrc gitlab_enable=YES
PostgreSQLのインストール
次にデータベースの初期化を行います。デフォルトのjailシステムでは System V IPC(以下、sysvpic)リソースの操作ができないようになっているため、DBの初期化の際に共有メモリを操作するシステムコールが呼び出せません。
% pkg install postgresql95-server postgresql95-contrib
% sysrc postgresql_enable=YES
service postgresql initdb
creating configuration files ... ok
running bootstrap script ... 2018-08-19 11:07:15.669 JST [80355] FATAL:  could not create shared memory segment: Function not implemented
2018-08-19 11:07:15.669 JST [80355] DETAIL:  Failed system call was shmget(key=1, size=48, 03600).
child process exited with exit code 1
そのため、先ほどのqjail.configにsysvipcのリソースを操作できるように許可します。
allow.sysvipc       =  "1";

% sudo qjail restart git
以上でDBの初期化が行えます。
% service postgresql initdb
creating directory /var/db/postgres/data10 ... ok
creating subdirectories ... ok
selecting default max_connections ... 100
selecting default shared_buffers ... 128MB
selecting dynamic shared memory implementation ... posix
creating configuration files ... ok
running bootstrap script ... ok
performing post-bootstrap initialization ... ok
syncing data to disk ... ok

WARNING: enabling "trust" authentication for local connections
You can change this by editing pg_hba.conf or using the option -A, or
--auth-local and --auth-host, the next time you run initdb.

Success. You can now start the database server using:

    /usr/local/bin/pg_ctl -D /usr/local/pgsql/data -l logfile start

% service postgresql start
2018-08-19 11:10:33.594 JST [80852] LOG:  listening on IPv6 address "::1", port 5432
2018-08-19 11:10:33.594 JST [80852] LOG:  listening on IPv4 address "127.0.0.1", port 5432
2018-08-19 11:10:33.598 JST [80852] LOG:  listening on Unix socket "/tmp/.s.PGSQL.5432"
2018-08-19 11:10:33.612 JST [80852] LOG:  ending log output to stderr
2018-08-19 11:10:33.612 JST [80852] HINT:  Future log output will go to log destination "syslog".
DBの設定(PostgreSQL < 9.6 の場合)
% psql -d template1 -U pgsql -c "CREATE DATABASE gitlabhq_production OWNER git;"
% psql -d template1 -U pgsql -c "CREATE DATABASE gitlabhq_production OWNER git;"
% psql -U git -d gitlabhq_production
% psql -U pgsql -d gitlabhq_production -c "CREATE EXTENSION IF NOT EXISTS pg_trgm;"
Redisの設定
続いてRedisの設定を行います。
% echo 'unixsocket /var/run/redis/redis.sock' >> /usr/local/etc/redis.conf
% echo 'unixsocketperm 770' >> /usr/local/etc/redis.conf
% sysrc redis_enable=YES
% service redis restart
% pw groupmod redis -m git
GitLabの設定
Gitユーザのホームディレクトリの変更
パッケージでインストールしたGitLab経由で作成されたgitユーザーのホームディレクトリを変更します。
vipw -d /etc
git:*:211:211::0:0:gitosis user:/usr/local/git:/bin/sh
git:*:211:211::0:0:gitosis user:/usr/home/git:/bin/sh
次にgitlab.ymlを変更します。
% cd /usr/local/www/gitlab-ce
gitlab:
  host: git.example.com
% sysctl hw.ncpu
% su -l git -c "git config --global core.autocrlf input"
% su -l git -c "git config --global gc.auto 0"
% su -l git -c "git config --global repack.writeBitmaps true"
% su -l git -c "git config --global receive.advertisePushOptions true"
% su -l git -c "mkdir -p /usr/home/git/.ssh"
% chown git /usr/local/share/gitlab-shell
% su -l git -c "cd /usr/local/www/gitlab-ce && rake gitlab:setup RAILS_ENV=production"
% chown root /usr/local/share/gitlab-shell
GitLab rootユーザーのパスワード設定
% su -l git -c "cd /usr/local/www/gitlab-ce && rake gitlab:setup RAILS_ENV=production GITLAB_ROOT_PASSWORD=yourpassword"
Applicationステータスのチェック
% su -l git -c "cd /usr/local/www/gitlab-ce && rake gitlab:env:info RAILS_ENV=production"
% su -l git -c "cd /usr/local/www/gitlab-ce && rake gettext:compile RAILS_ENV=production"
% su -l git -c "cd /usr/local/www/gitlab-ce && rake yarn:install gitlab:assets:clean gitlab:assets:compile RAILS_ENV=production NODE_ENV=production"
Assets Compile
% su -l git -c "cd /usr/local/www/gitlab-ce && rake yarn:install gitlab:assets:clean gitlab:assets:compile RAILS_ENV=production NODE_ENV=production"
PostgreSQLのスーパーユーザーを消す
% psql -d template1 -U pgsql -c "ALTER USER git WITH NOSUPERUSER;"
GitLabの起動
% service gitlab start
% cd /home/git
% su - git
% cd gitlab/
% cp config/gitlab.yml.example config/gitlab.yml
Nginxのインストール
jailシステムから直接unicornにアクセスするのも面倒なので、nginx経由でGitlabにアクセスすることができるようにNginxの設定を行います。
Gitlabをインストールした時にNginxのサンプル設定も一緒に入っているので、httpの設定に設定ファイルを読み込めるようにします。
% pkg install nginx
http {
  include       /usr/local/www/gitlab-ce/lib/support/nginx/gitlab;
}
サンプルファイルはserver_nameがまだ明示的に設定されていないため、ここにアクセスする際の名前を指定します。
## Normal HTTP host
server {
  ## Either remove "default_server" from the listen line below,
  ## or delete the /etc/nginx/sites-enabled/default file. This will cause gitlab
  ## to be served if you visit any address that your server responds to, eg.
  ## the ip address of the server (http://x.x.x.x/)n 0.0.0.0:80 default_server;
  listen 0.0.0.0:80 default_server;
  listen [::]:80 default_server;
  server_name git.example.com; ## Replace this with something like gitlab.example.com
以上で、ホストマシンからNginx経由でGitLabサーバーにアクセスすることが可能となりました。
% sysrc nginx_enable="YES"
% service nginx restart
ホストシステムのリバースプロキシとNAT設定
最後にサーバ外からGitLabへアクセスがあった場合、ホストマシンへアクセスするのではなく、jailシステムにアクセスする必要があるため、Nginx のリバースプロキシ機能と PF というファイアウォールのNAT機能を設定し、外からアクセスできるようにします。
server {
	listen 80;
	listen [::]:80;
	server_name git.example.com;

	# Redirect all HTTP requests to HTTPS with a 301 Moved Permanently response.
    	#return 301 https://$host$request_uri;
	location / {
                    proxy_redirect     off;
                    proxy_set_header   X-FORWARDED_PROTO http;
                    proxy_set_header   Host              $http_host;
                    proxy_set_header   X-Real-IP         $remote_addr;
                    proxy_set_header   X-Forwarded-For   $proxy_add_x_forwarded_for;
                    proxy_pass http://192.168.0.2:80;
	}
}
wan_if="vtnet0"
jail_subnet = "192.168.0.0/24"
nat on $wan_if inet from $jail_subnet to ! $jail_subnet -> ($wan_if)

pass proto udp to any port domain keep state
pass inet proto icmp from any to any
% sudo service nginx restart
% sudo service pf restart
これでやっとVPS外からのネットワークからでもGitLabサーバーへアクセスすることが可能となりました。
最後に
長くなりましたが、FreeBSDでGitLabサーバーを構築する話でした。
今回は、かなり必要な設定の説明を省いてしまっています。
本来は jail、 VIMAGE、 PF、 リバースプロキシ、 GitLabと最低5つの説明を詳細にしなければならなかったのですが、それはまた今度にします。
また、GitLabのHTTPS化についても今回省いてしまったので、その話も後日執筆したいと思います。
それにしても、pkgでGitLabがインストールできるようになっているので、そのことだけ考えても、随分と構築手順が綺麗にまとめられたのではないかと思われます。
その分、選択肢が色々あり、かなりたくさんのツールを使っている感は否めないですが、、、
その他参考文献
1.GitLab運用のノウハウについて
2.jailについて
3.qjailについて
4.vnetについて
5.epairについて
6.bridgeについて
