サイトをSSL化したい
目標
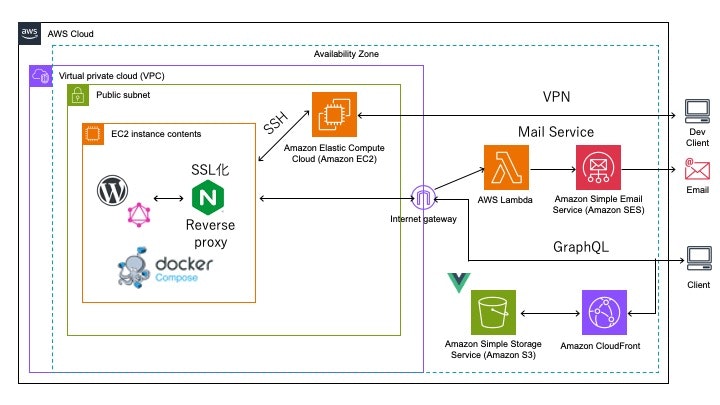
AWS EC2で動作するアプリケーションをSSL化したい
アプリケーション概要
-
ブログサイト
WordpressからデータをGraphQLで、データを取得しVue.jsでblogデータを表示する。 -
メリット
- バニラのWordpressより、カスタム性が高い。
- ブログデータの入力をWordpressのUIを使ってできるため、感覚的にブログの編集が行える
戦略
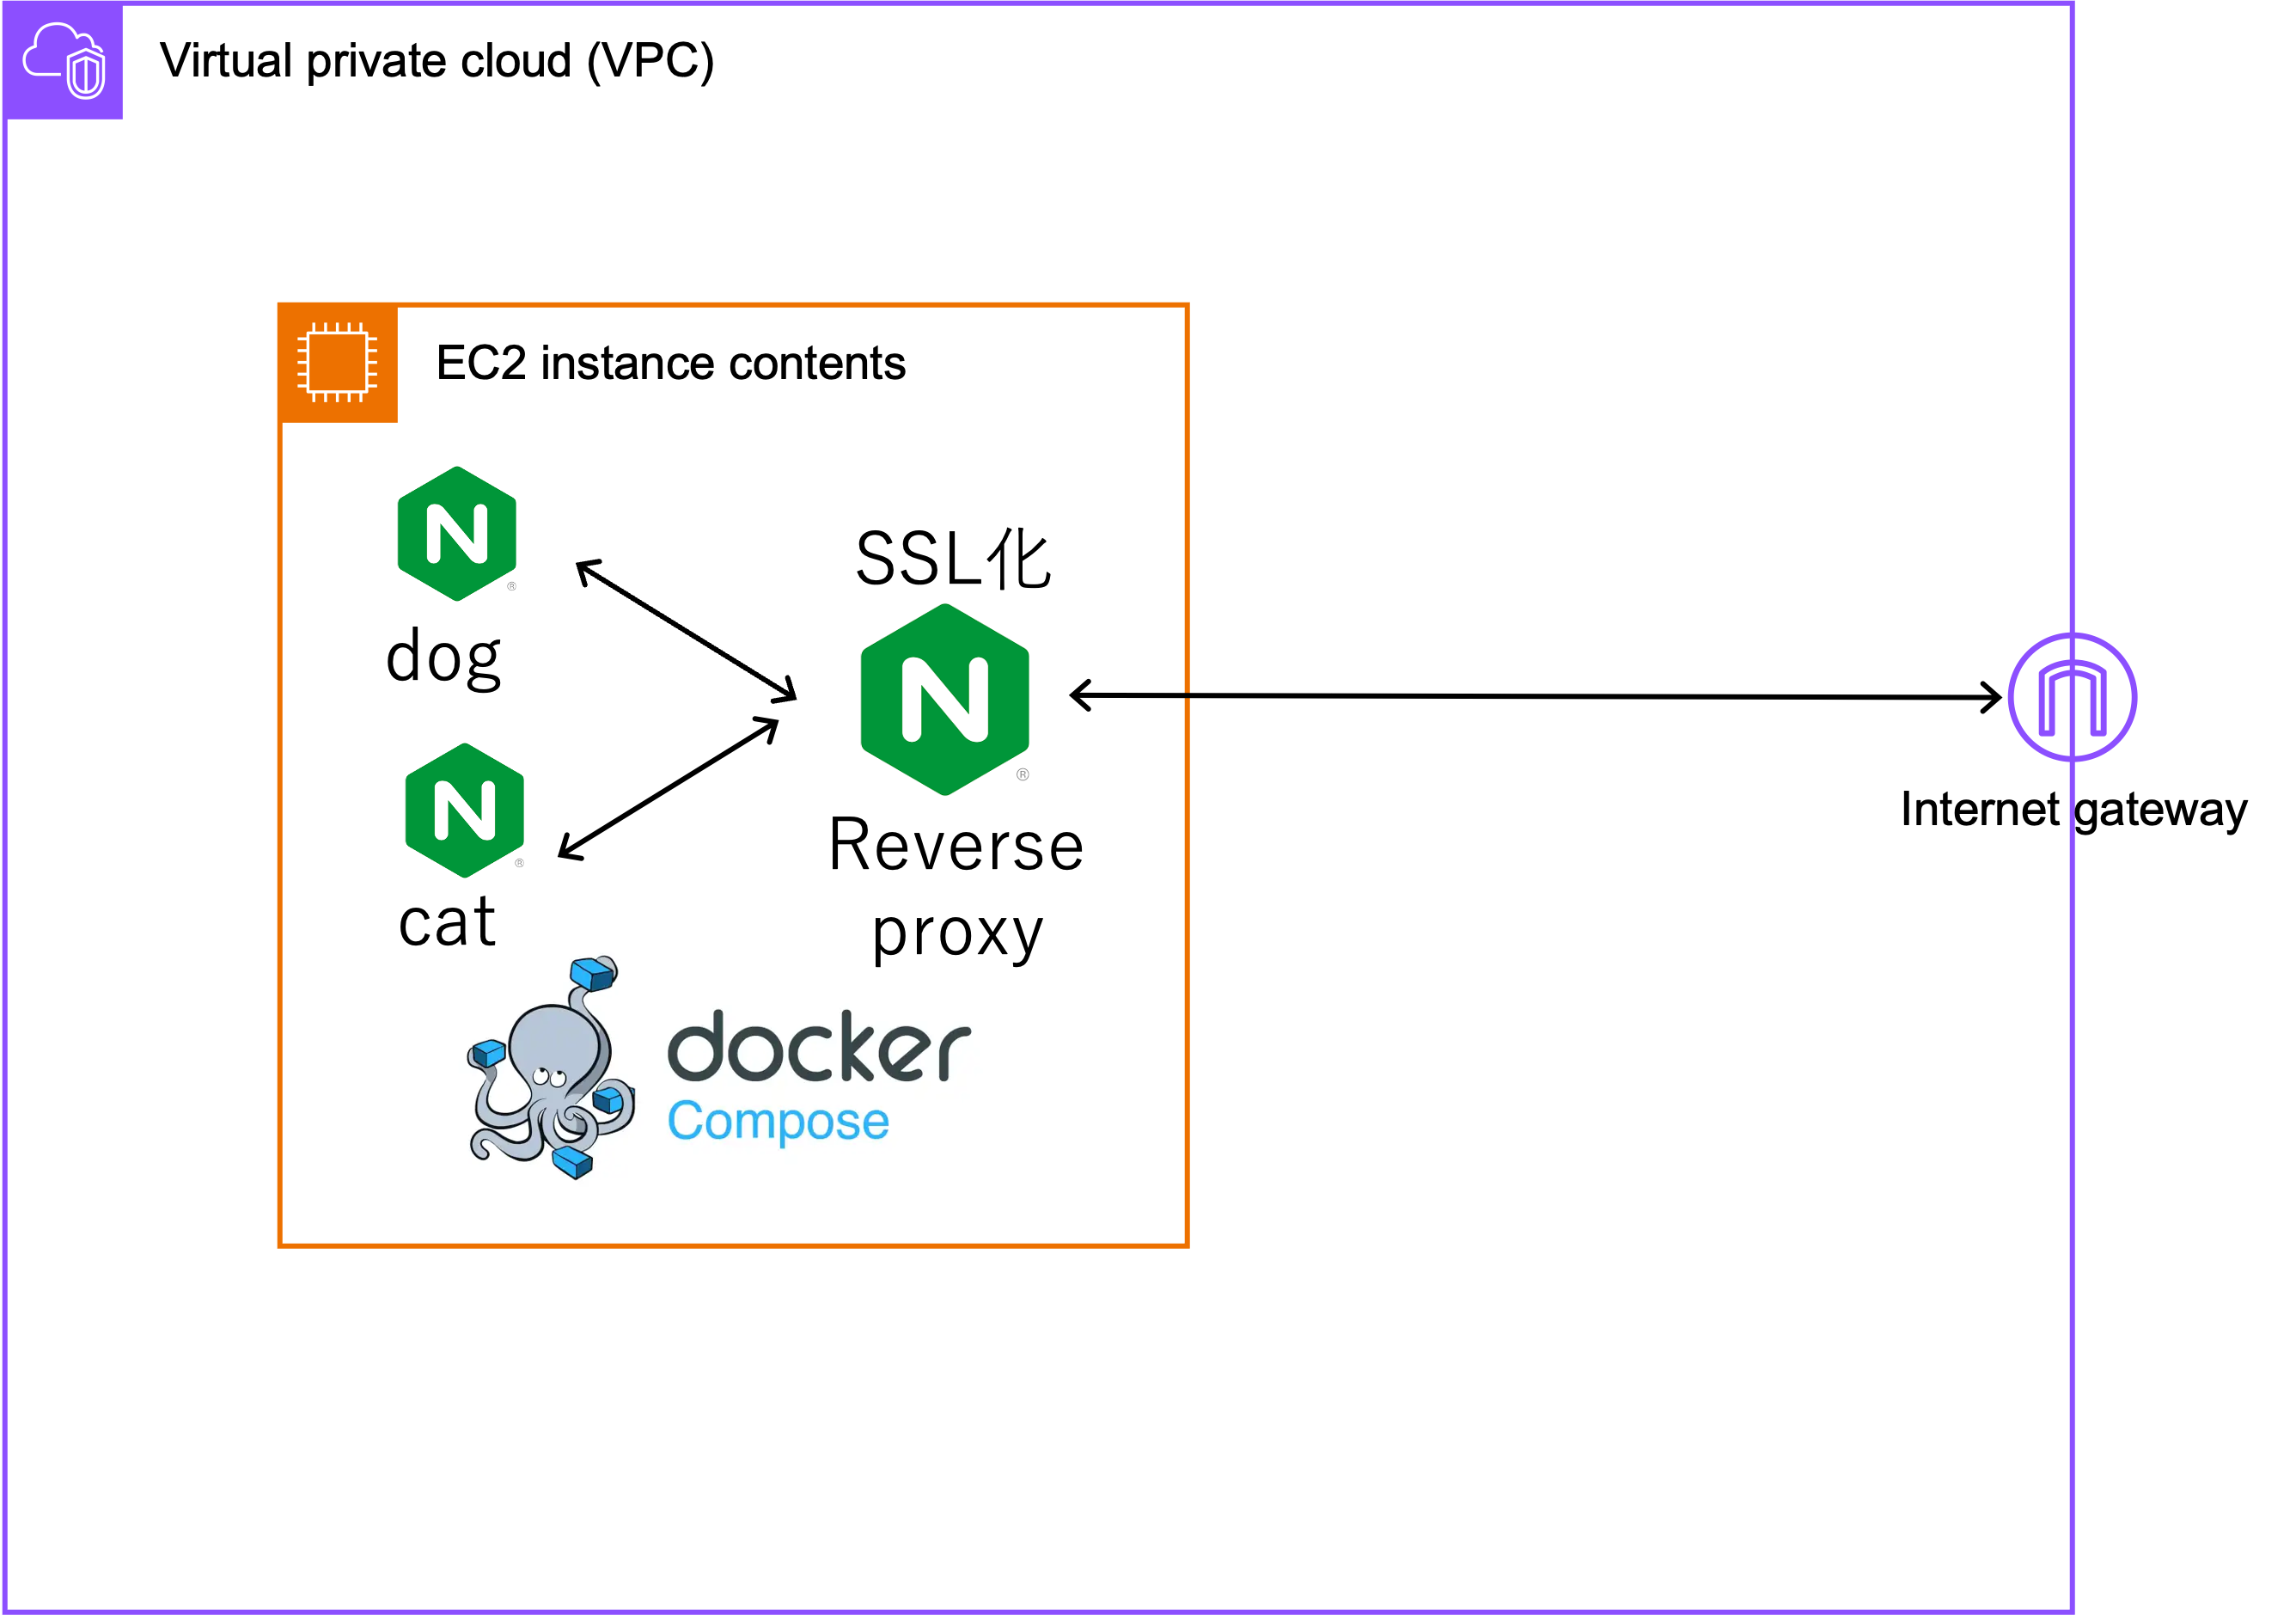
- リバースプロキシを使ってアプリケーションへSSLでアクセスできるようにする
SSL化手順
前提
- AWS
- EC2(t3.small)を利用する
- アプリケーション
- docker-composeを利用して、デプロイを用意に行えるようにする。
- SSL
- LetsEncryptでSSL化を行う
リバースプロキシサーバの作成
以下の記事を参考にしました。
1. 以下のフォルダ(ファイル)構成を行う
├── docker-compose.yml
├── cat-server
│   └── index.html
├── dog-server
│   └── index.html
└── reverse-proxy
│   └── nginx.conf
│   └── index.html
└── letsencrypt
    └── docker-compose.yml
2. index.htmlを作成する
<!DOCTYPE html>
<html>
  <head>
    <meta charset="utf-8"/>
    <meta name="viewport" content="width=device-width, initial-scale=1"/>
    <title>犬好きのためのページ</title>
  </head>
  <body>
    <h1>犬好きのためのページ</h1>
  </body>
</html>
<!DOCTYPE html>
<html>
  <head>
    <meta charset="utf-8"/>
    <meta name="viewport" content="width=device-width, initial-scale=1"/>
    <title>猫好きのためのページ</title>
  </head>
  <body>
    <h1>猫好きのためのページ</h1>
  </body>
</html>
3. nginxの設定ファイルを作成する
events {
    worker_connections  16;
}
http {
    server {
        listen 443 ssl;
        server_name localhost;
    	ssl_certificate     /etc/letsencrypt/live/{your_domain_name}/fullchain.pem;
    	ssl_certificate_key /etc/letsencrypt/live/{your_domain_name}/privkey.pem;
        location /dog {
            proxy_pass http://host.docker.internal:8000/;
            proxy_redirect off;
        }
        location /cat {
            proxy_pass http://host.docker.internal:7001/;
            proxy_redirect off;
        }
    }
    server{
	    listen 80;
	    return 301 https://host.docker.internal:8000/;
    }
}
{your_domain_name}には、自身のドメイン名を入力してください
4.docker-compose.ymlを作成する
version: "3"

services:
  dog-server:
    image: nginx
    container_name: "dog-container"
    volumes:
      - ./dog-server:/usr/share/nginx/html
    ports:
      - 8000:80
    extra_hosts:
      - "host.docker.internal:host-gateway"

  cat-server:
    image: nginx
    container_name: "cat-container"
    volumes:
      - ./cat-server:/usr/share/nginx/html
    ports:
      - 7001:80
    extra_hosts:
      - "host.docker.internal:host-gateway"

  reverse-proxy:
    image: nginx:alpine
    restart: always
    volumes:
      - ./reverse-proxy/nginx.conf:/etc/nginx/nginx.conf
      - letsencrypt-cert:/etc/letsencrypt:ro
    ports:
      - 80:80
      - 443:443
    extra_hosts:
      - "host.docker.internal:host-gateway"

volumes:
  letsencrypt-cert:
    external: true
5. docker volumesを作る
$ docker volume create letsencrypt-cert
6. 証明書取得用のdocker-compose.ymlを作成する
version: "3"

services:
  letsencrypt:
    image: certbot/certbot
    ports:
      - 80:80
      - 443:443
    volumes:
      - letsencrypt-cert:/etc/letsencrypt
    entrypoint:
      certbot certonly
        --standalone
        -m {your_email}
        --agree-tos
        -d {your_domain_name}
volumes:
  letsencrypt-cert:
    external: true
{your_emain}と{your_domain_name}には、自身のメールアドレスとドメイン名を入力してください。
7. 証明書を取得する
letsencryptフォルダに入り、コンテナを立ち上げます
$ cd letsencrypt
$ docker-compose up -d
8. サーバを立ち上げる
4で作成したdocker-compose.yml(コンテナ)を立ち上げます。
$ cd ../
$ cd docker-compose up -d
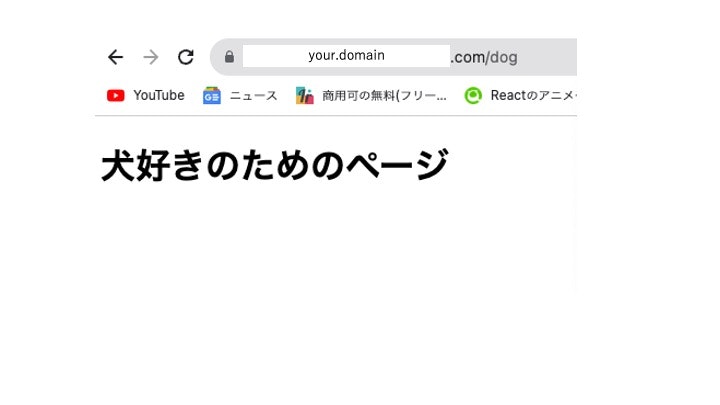
chromeでアクセスすと、鍵マークがつきSSLで通信できていることが示されました。


